Copper And Gold Mason Jars DIY
Copper And Gold Mason Jars DIY for Christmas. A simple project for holding candles or flowers and they are made to look old with patina , using a few tricks! You can use these year round if you love metallic home accents like I do and they are extremely budget friendly. Pretty too…don’t you think?
Before we get to the meat of this craft, I’m sharing some clickable links to our Christmas shop if you’re up for that.
They are also known as ball jars, canning jars and for many of our grandmothers (including mine) they were a staple of the kitchen. I recall visiting my grandma a couple of times as a young girl on the farm of a friend where she would spend her summers. Fresh farm fruits and vegetables were “put up” for the winter and the smells still stick in the recesses of my mind to this day. To see more about the history of the jars visit here. To view a similar post that I did a few years ago about silvering Mason jars, visit HERE.
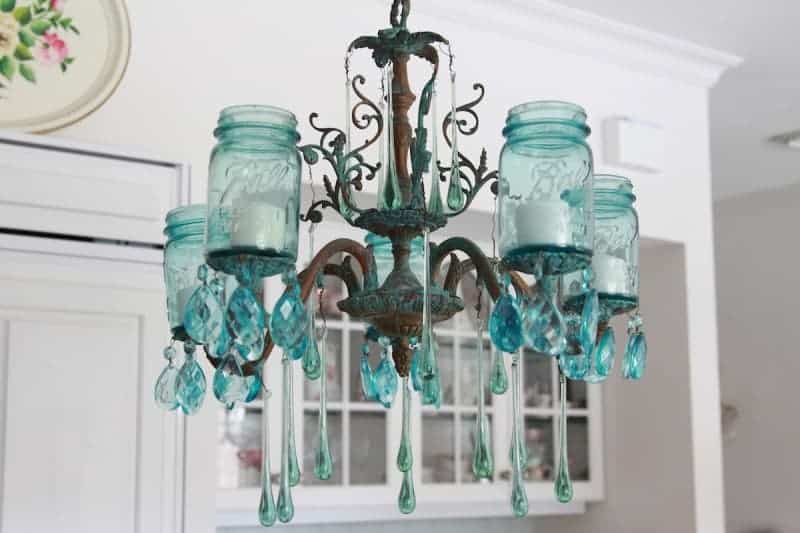
And above…if you’ve been here before you may be familiar with my “almost famous” Mason Jar Chandelier (find instructions to make one HERE). I made this one years back after my husband brought home a rusty, crusty vintage chandelier that couldn’t be rewired. Having a bunch of vintage blue Mason jars in my kitchen I had the idea to make a “candeliere”. We started getting so many requests that we started a side hustle and made and sold these by the score. We even had the privilege of creating one commissioned by the Ball jar descendents! These jars are timeless and will never go away and there are so many crafts you can make with a good old Mason jar. Let’s get started…
Copper And Gold Mason Jars DIY
Supplies
- Pint sized Mason jars…old or new will work equally as well.
- Metallic Spray Paints in gold and copper
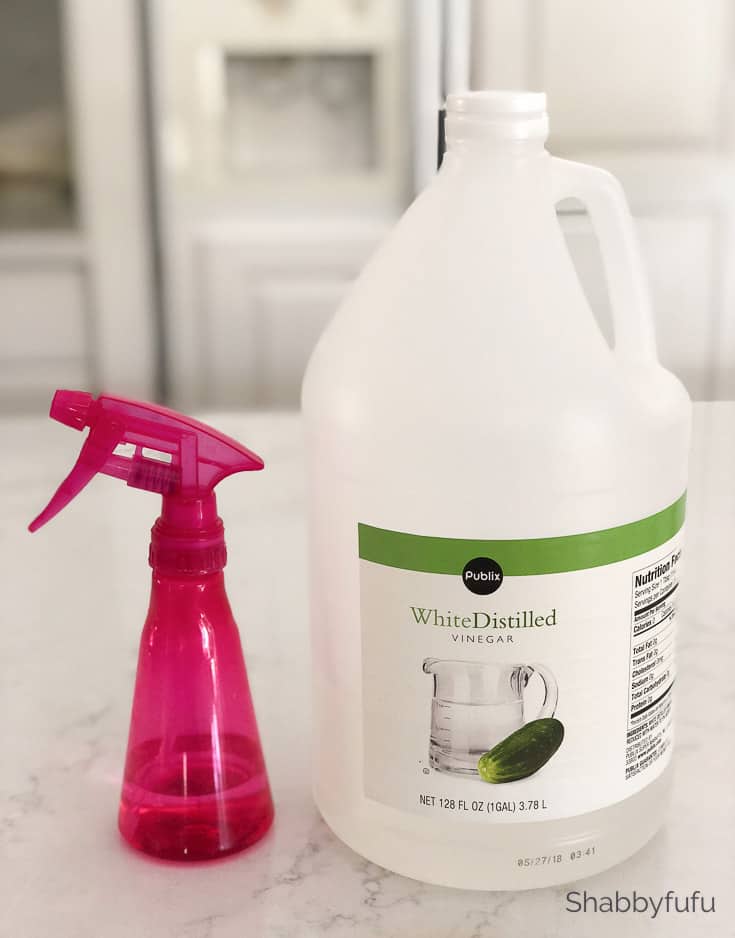
- Spray bottle
- White vinegar

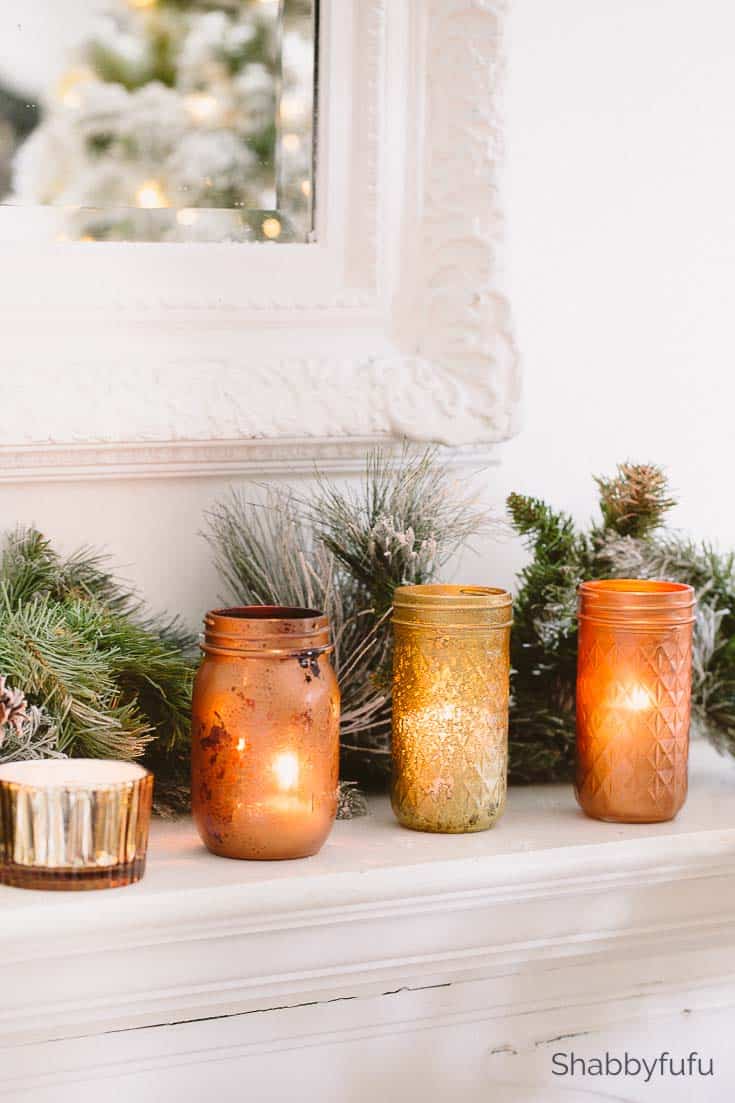
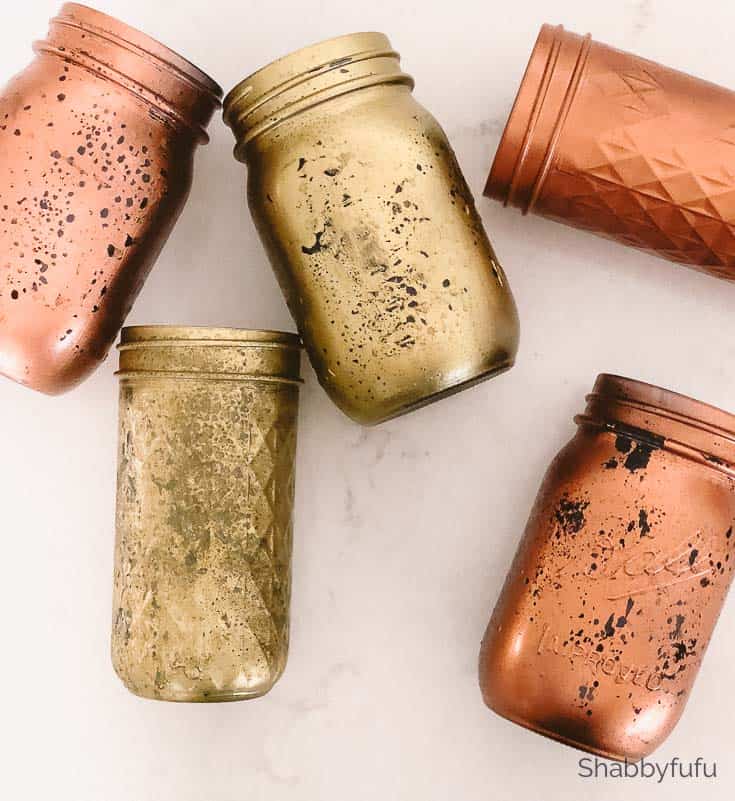
I’m recommending this little secret and here is how I got that VINTAGE PATINA look on my copper and gold Mason jars. Start with darker Ball jars if you can find them. Because you are going to use a resist factor when painting the deep color will show underneath and give such a great effect!![]()
Copper and gold Mason jars DIY
Instructions
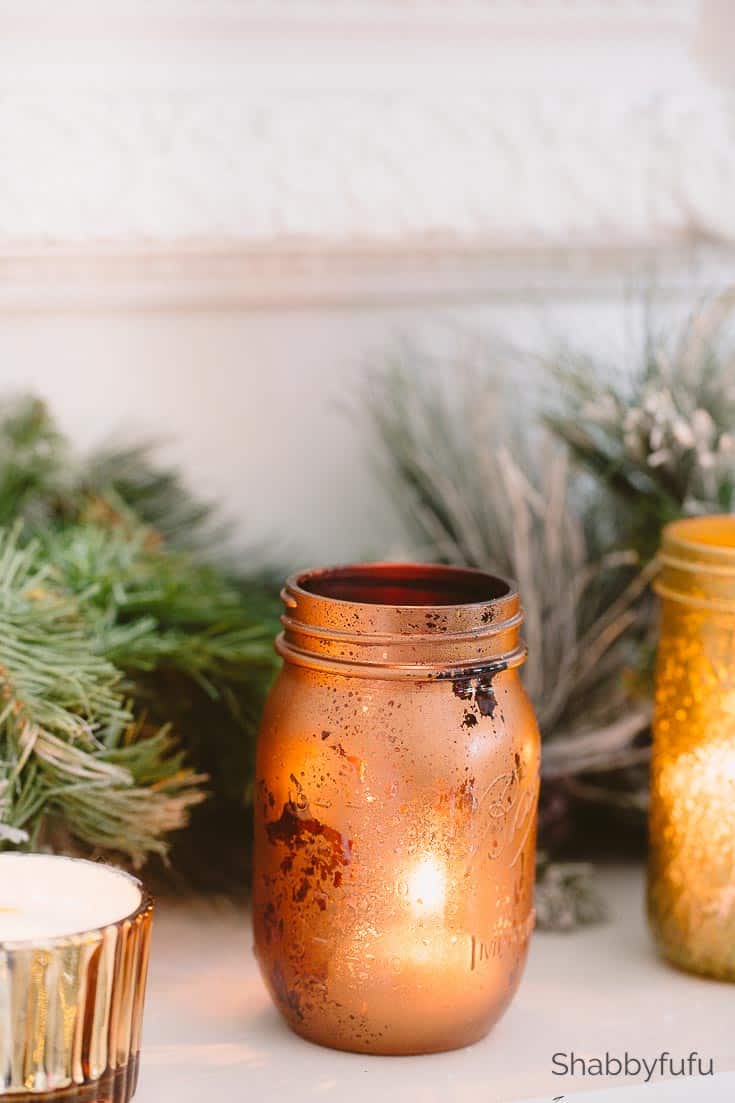
Oh gee…easiest thing ever! I recommend working outside and on a heavy piece of cardboard or a dropcloth. Wear gloves simply spray the OUTSIDE of your jar completely. You could also spray the lids and rings, but I didn’t in this case. Add a couple of inches of white household vinegar to a spray bottle. You can dilute slightly with water, but not super necessary. After you’ve sprayed the jar and BEFORE THE PAINT DRIES, lightly mist in some areas to get the paint to bead up in resist. You should get the effect seen below. Allow the paint to dry and spray with an acrylic sealer if you plan on using these outdoors.
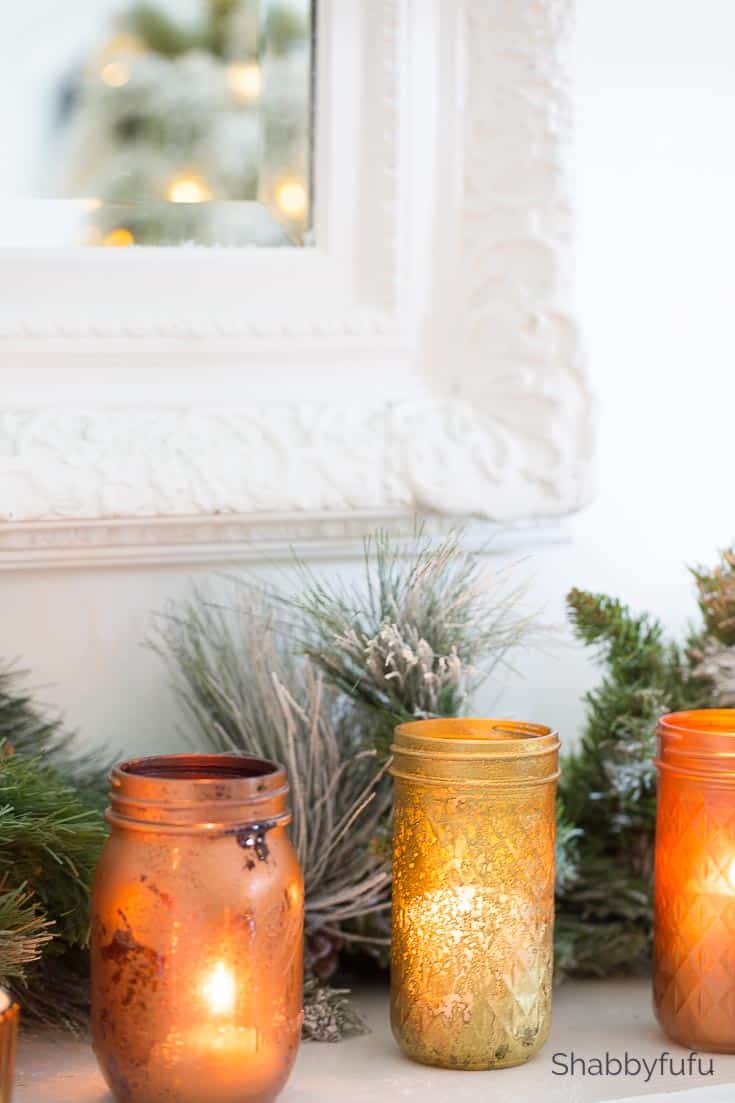
I LOVE how these look on the mantel during the holidays! Below you can see how the diamond pattern jars were clear glass, so they have a different patina. Another option to try is GOLD or COPPER LEAF…and I shared a tutorial on that a few years back in THIS POST.
You could also use this paint technique on glass candle sticks, glass plates, wine goblets. Any decorative glass, not touching food…just spray on the reverse side, spray with sealer and hand wash only.
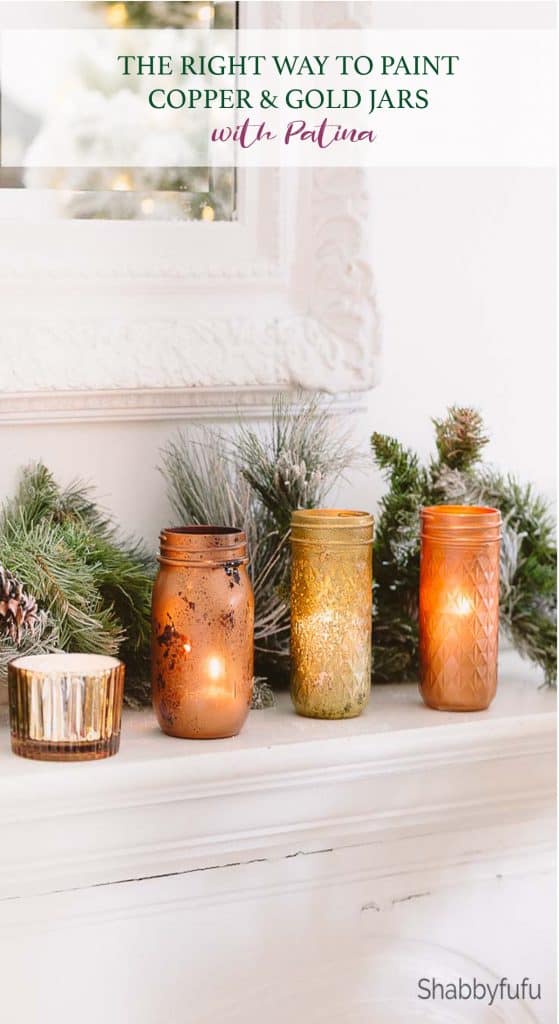
I hope that you try this out and let me know if you have any questions! PIN IT for future reference below:
I love this idea. Would even make a great gift and tie together with a pretty ribbon. Thanks for the tutorial. Cindy
Janet those are perfection. I love the peels and cracks, they look like the real deal. And the colors are so warm and cozy, so good.
So pretty, Janet! I love the copper and gold colors.
Hugs, Jamie
Janet, these are sooooo pretty! And I would have never guessed that you used purple jars. You an such an inspiration to me!
Oh wow!! SO pretty!!
Janet, these turned out amazing!! I love copper & gold all year round so I’ll definitely have to try this technique!
Janet,
You make every project look so easy and beautiful! Love how your mason jars came out. I tried this on a vase and wanted to try it on a glass ornament. Now I’m totally inspired by you!
These look gorgeous and I love that they are versatile to be used year round. Thank you for sharing and being a part of the blog hop Janet.
This are beautiful Janet! I love the warm glow, perfect for those cozy winter evenings. 🙂
Christy
These are so pretty and look so cozy, thank you for the tutorial!
Lovely, Janet… and so easy! Great tutorial for these patina mason jars… almost give a mercury glass look! Pinned to THREE boards! 😉
Such a smart idea to start with the dark jars. Your patina looks so authentic!
So sorry Janet! I had Lori on my mind when I was writing my comment to you, LOL! Sorry about that!?
Love this! I am definitely gonna be making some of these! Thanks so much for sharing.
Thanks for stopping by Tara…have fun creating!
Oh my gosh – I love this! I have everything needed to create these little gems. In the future, I would like to include them in tablescapes of other places around the home and would just like to link back to you for instructions.
Please let me know if you are ok with that.
2 more questions, would blue canning jars provide the same look, and have you tried this with a sliver metallic spray paint ?
These are absolutely beautiful!! Saving this so I can make some for fall.
They are perfect for fall…and actually all winter long!