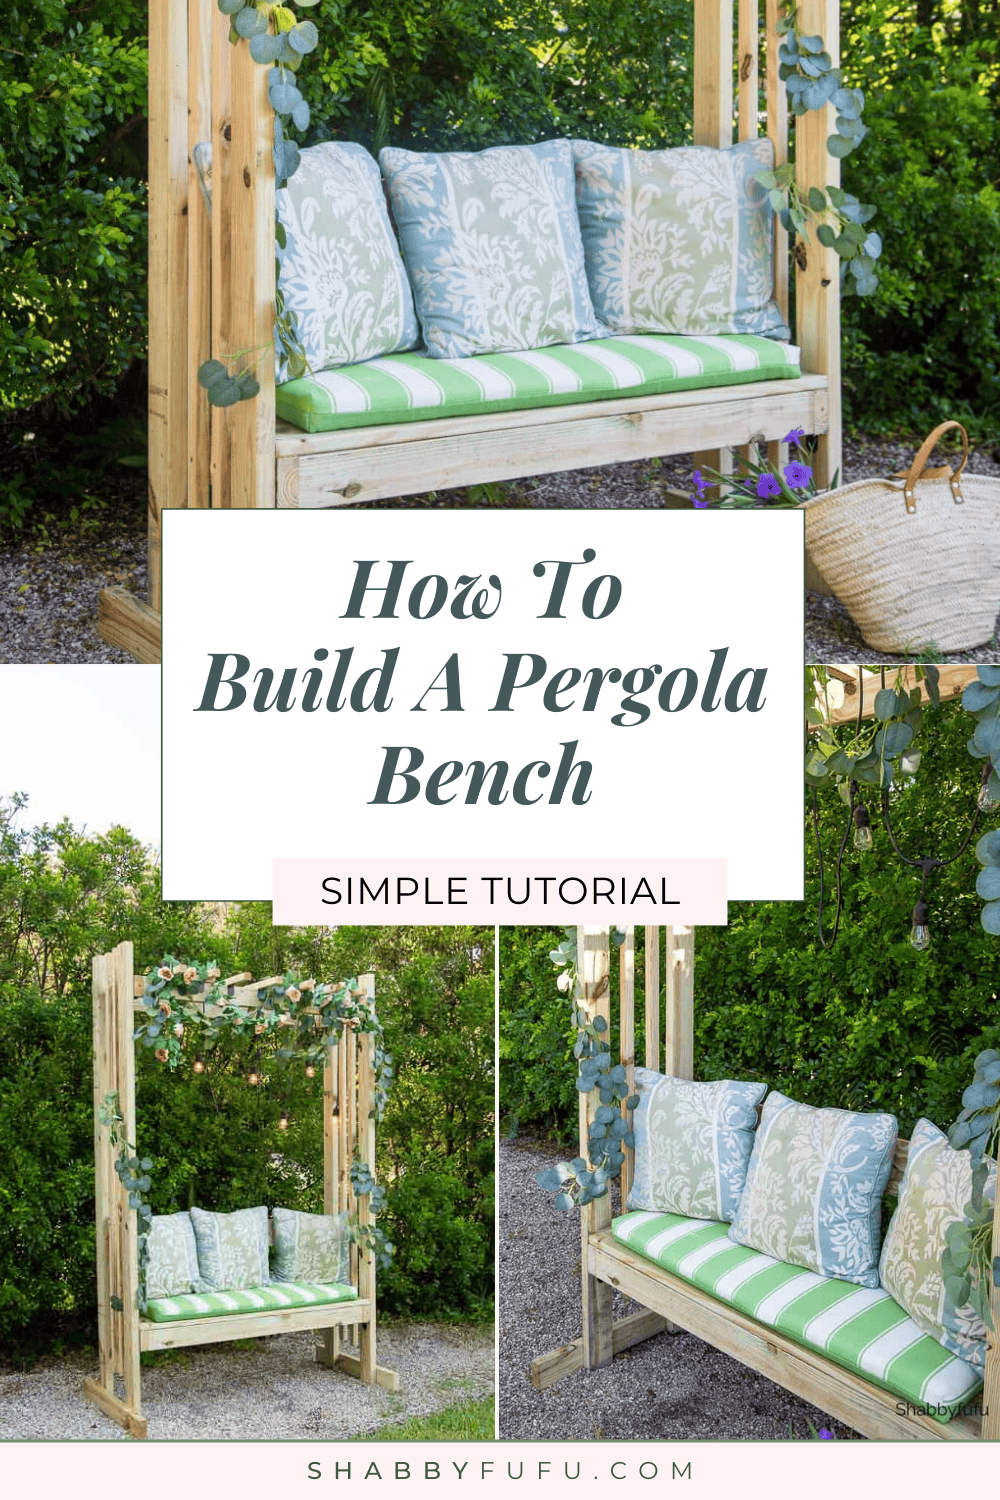
How To Build A Simple Pergola Bench: Tutorial
This post may contain affiliate links. For more information, please see our disclosure policy.
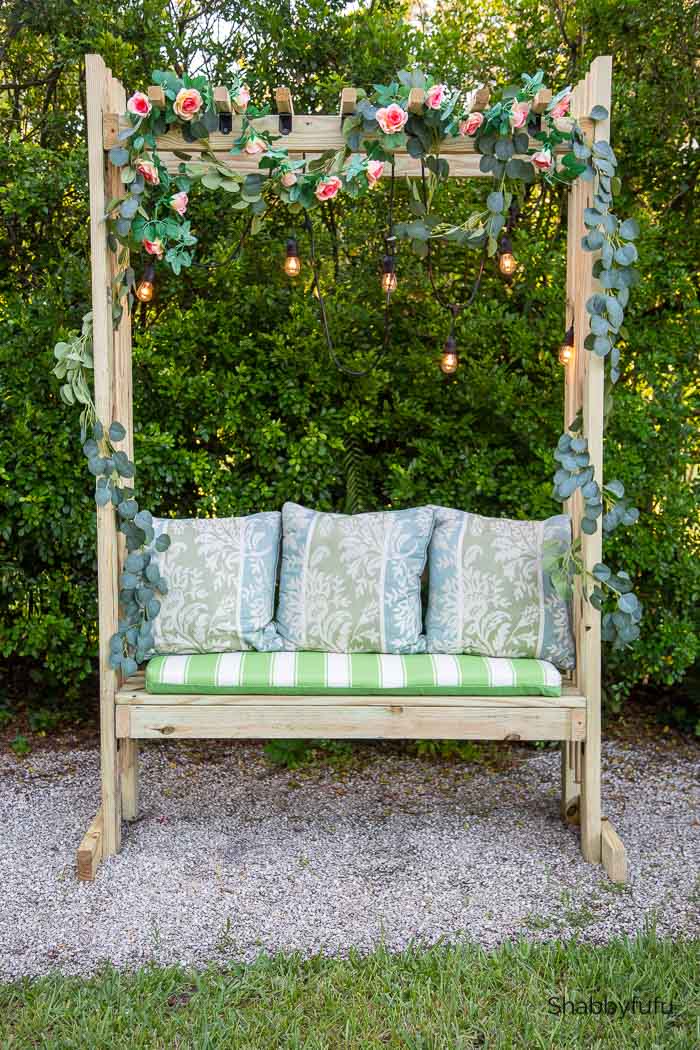
In this post you’ll learn how to build a simple pergola bench that is perfect for any garden space, large or small. We are even giving you the plans, so if you have knowledge of some basic power tools you can build one yourself!
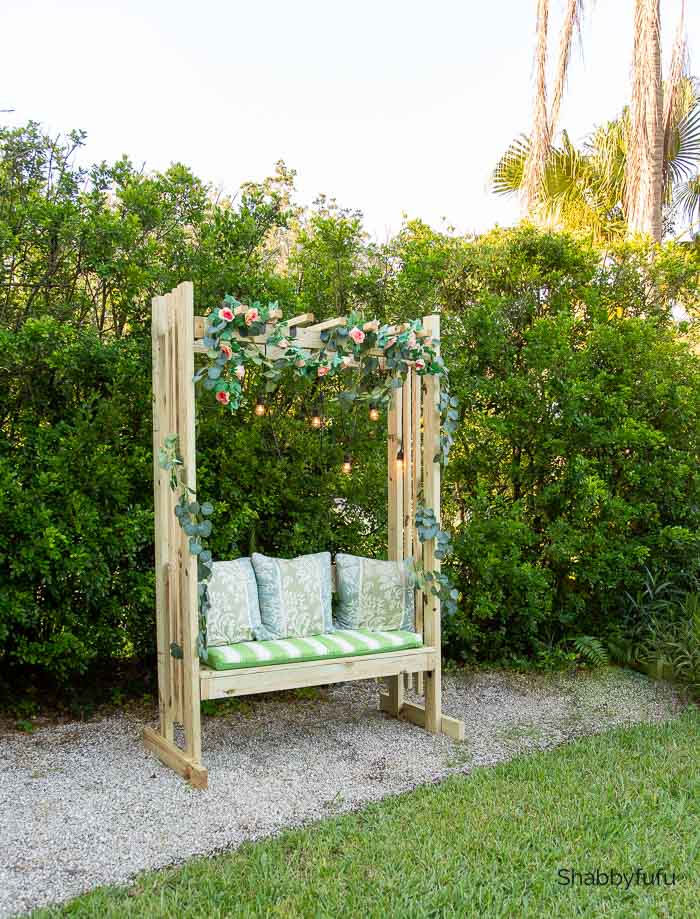
We believe that in any garden, large or small you can carve out spaces for sitting and enjoying the outdoors. A place to relax and perhaps drink a glass of tea (unsweet for me), meditate and watch the sun setting behind the trees. This simple pergola bench is going to be just that right little space for years to come!
This is a paid post in behalf of Spectrum Brands but the opinions expressed here are my own.
I had seen something similar on Pinterest a couple of years ago and it inspired me to design this pergola bench. Fortunately I was able to explain this to my husband well enough that he could draw a rough sketch. Next we had an easier and more professional plan created for you, as opposed to his unintelligible chicken scratch! You’ll find a link to the plan below, so keep scrolling.
We like to build things! I generally have the ideas and he does the execution. Then, if painting or staining is involved I prefer to do that with a more artistic knowledge of color. Like this Easy To Build And Paint Table With NO NAILS. I know…amazing concept, right?! Let’s get into the build of this beauty, which is all made possible by these National Hardware Light Rafter Ties.
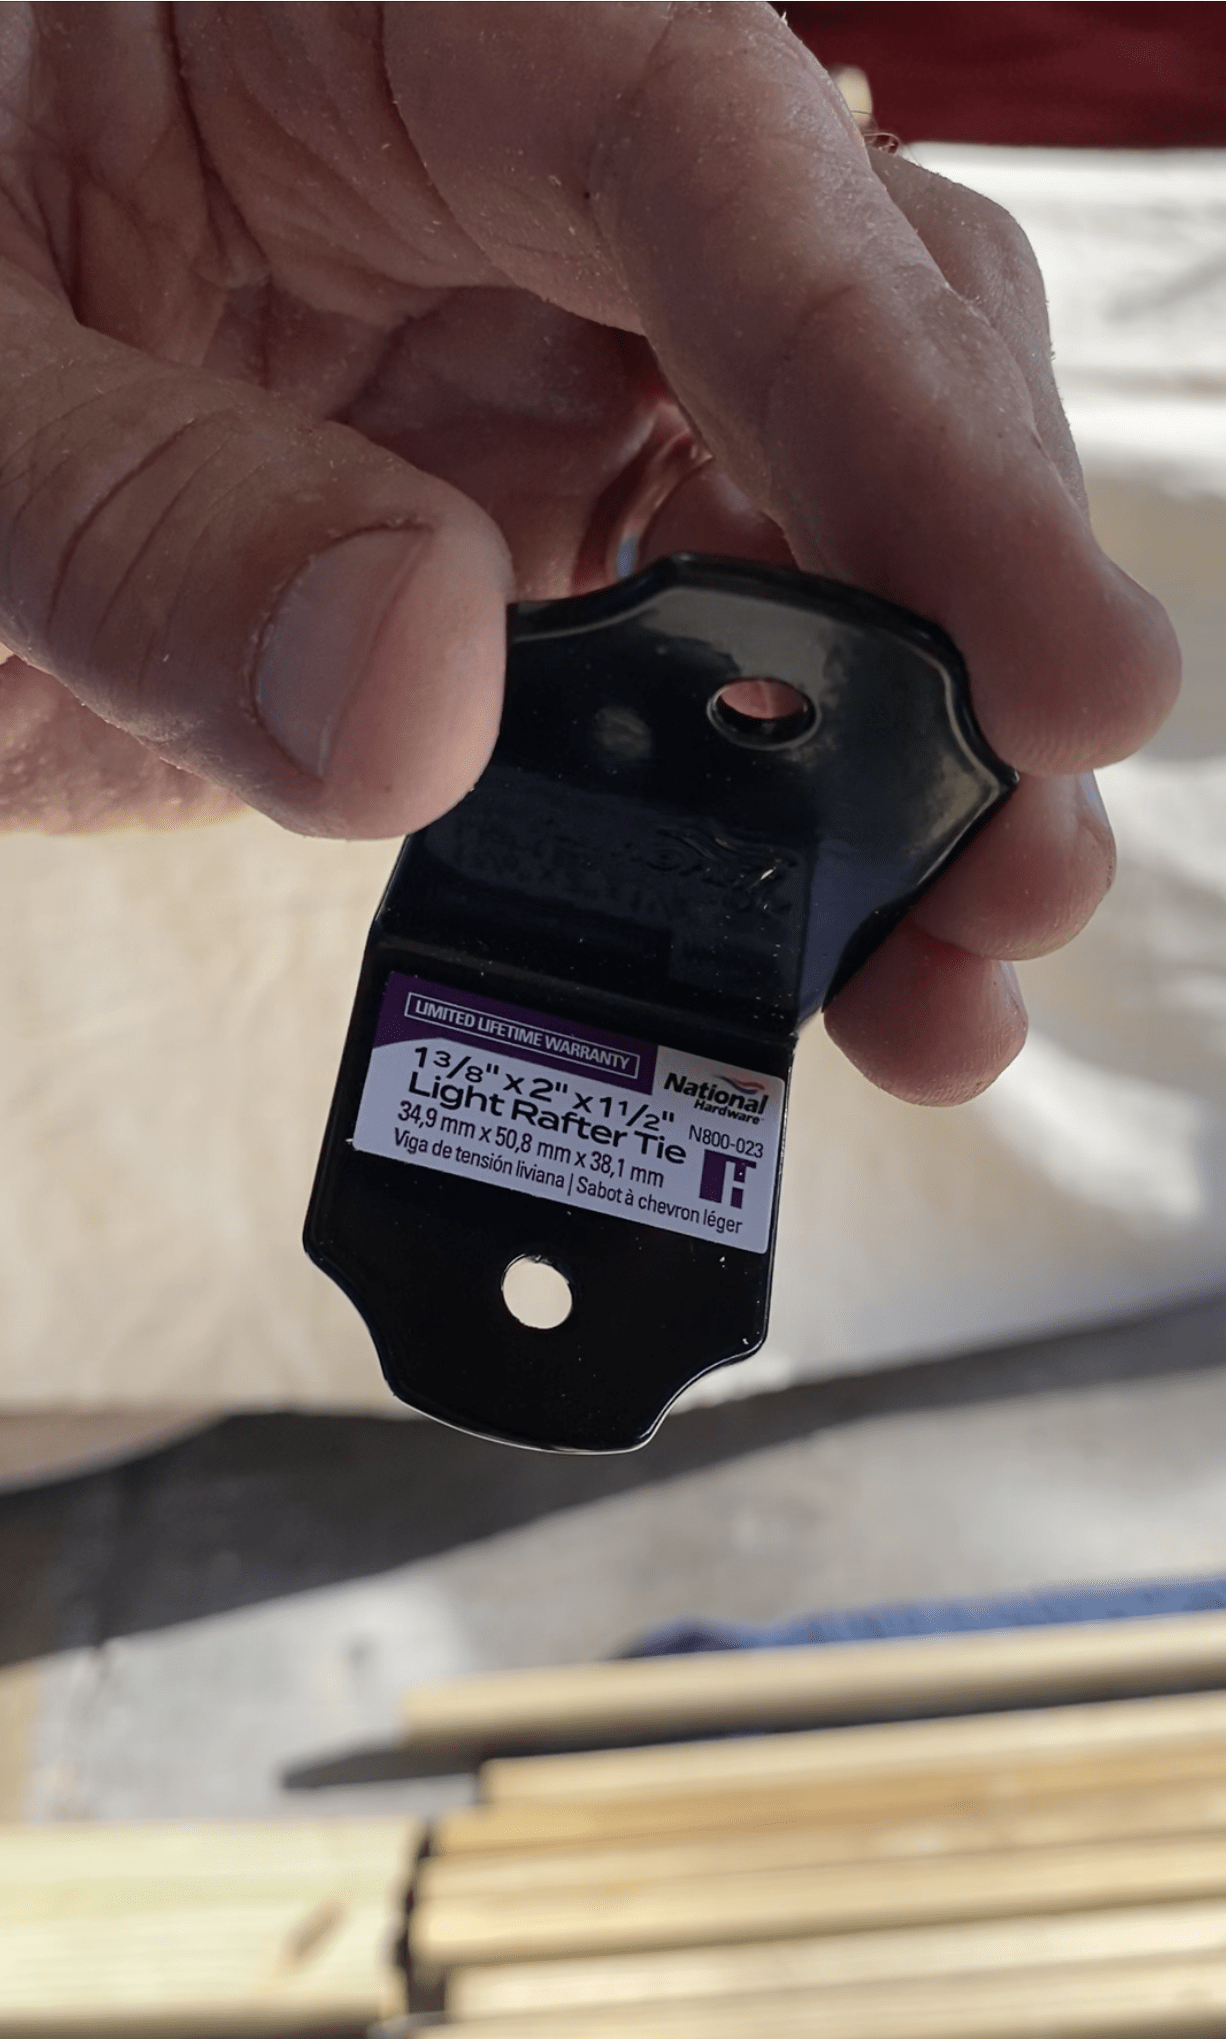
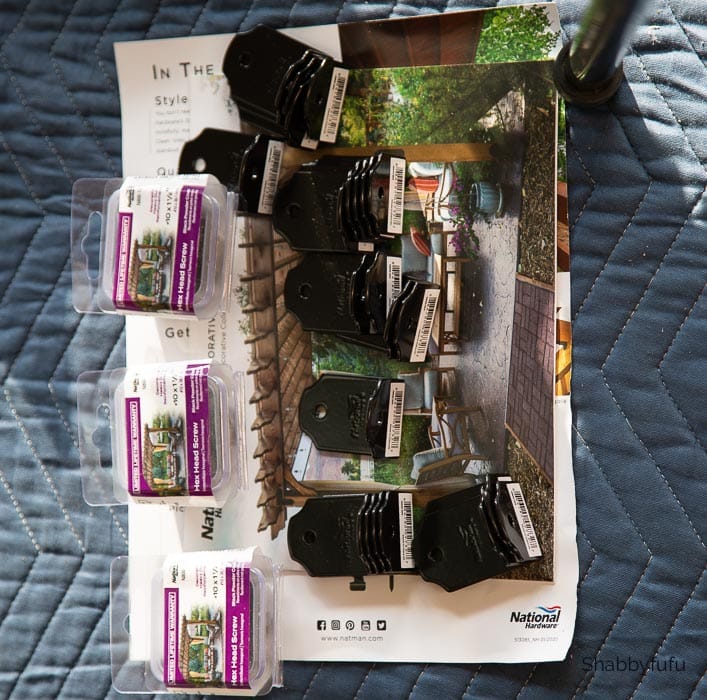
You can find the National Hardware Light Rafter Ties that we used on their WEBSITE, and source where to purchase there as well.
Materials Needed
- 7 – 2 x 4 – 8′
- 7 – 2 x 2 – 8′
- 4 – 1 x 6 – 6′
- 20 National Hardware Light Rafter Ties
- National Hardware Hex-Head Screws
- 2 1/2″ deck screws
- 1 1/4″ deck screws
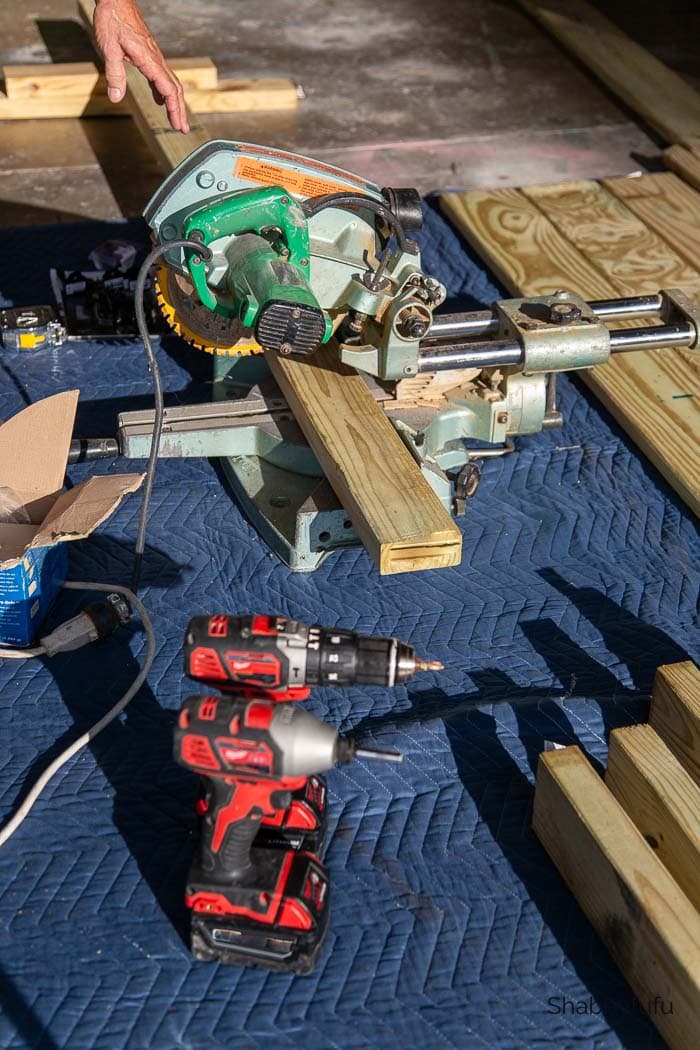
Tools Needed:
- Chop Saw
- Screw Gun
- Socket Set
Instructions – Simple Pergola Bench
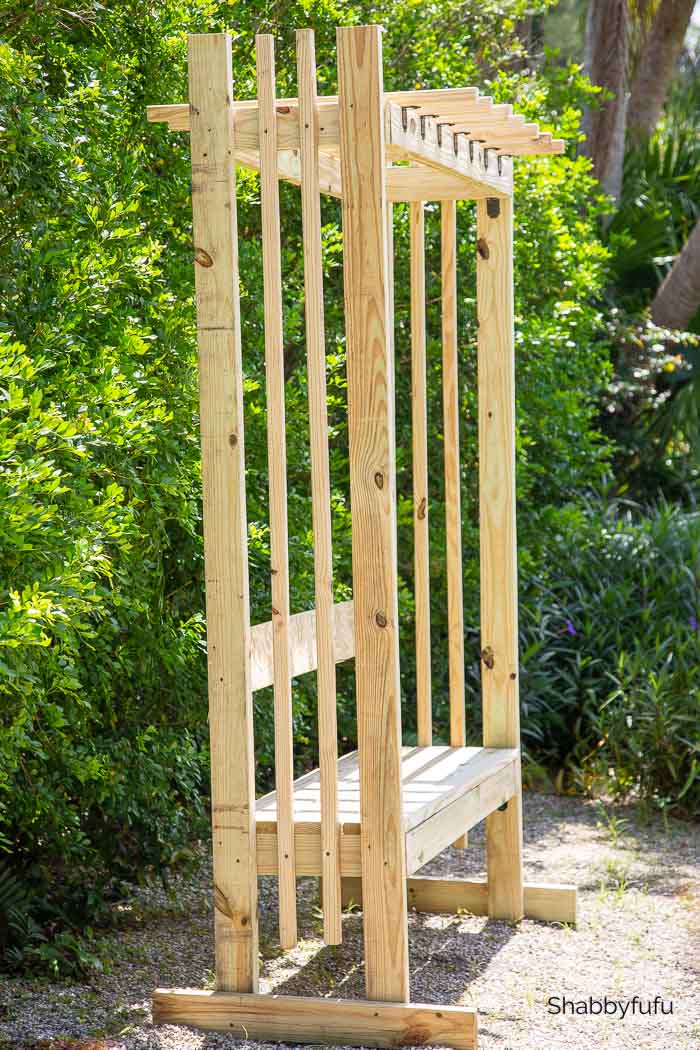
First we measured out and precut all of the pieces of the southern pine lumber according to our design sketch. We worked in our garage because it’s hot as blazes outside!
*Please be sure to wear goggles and protective gloves when using power tools. Please be responsible!
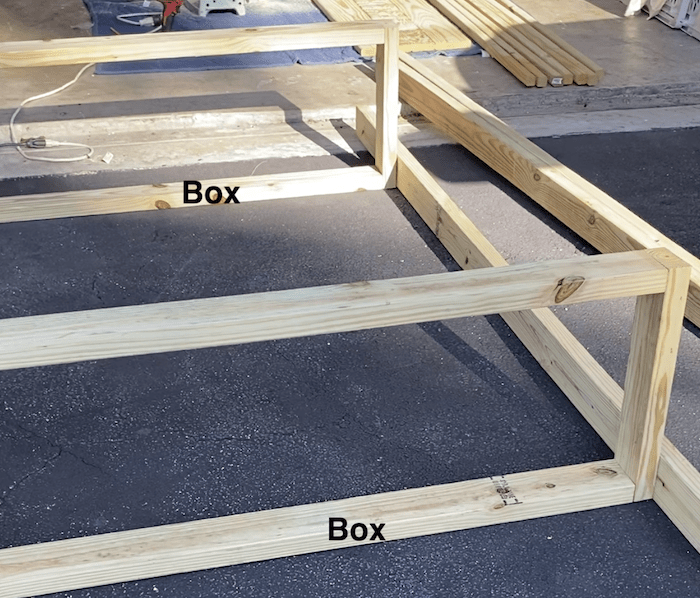
The next step was assembling the two rectangular boxes which would be our bench and trellis support pieces.
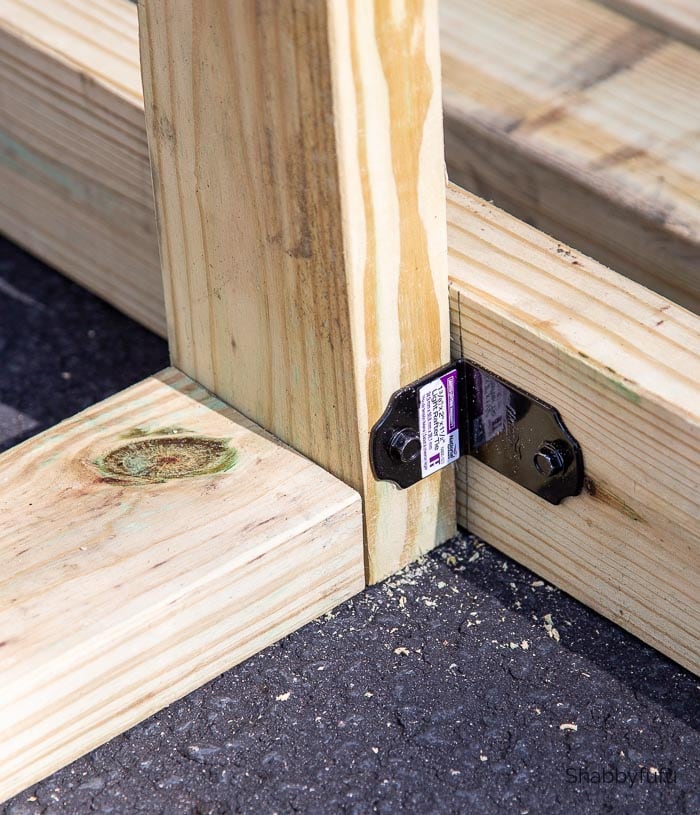
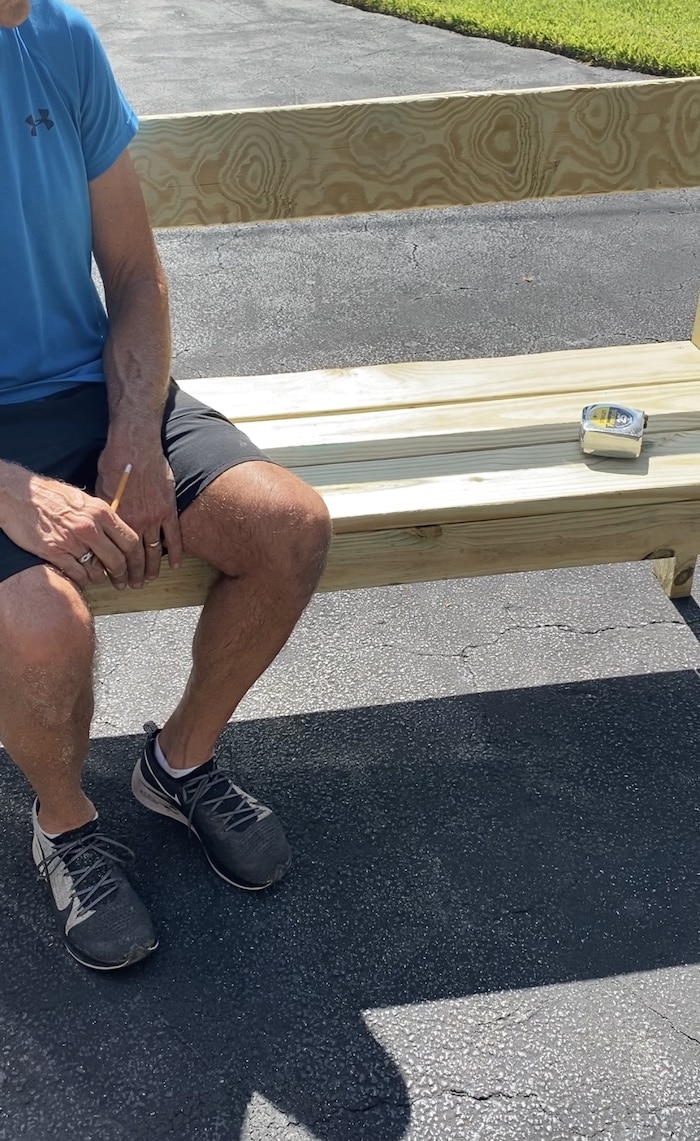
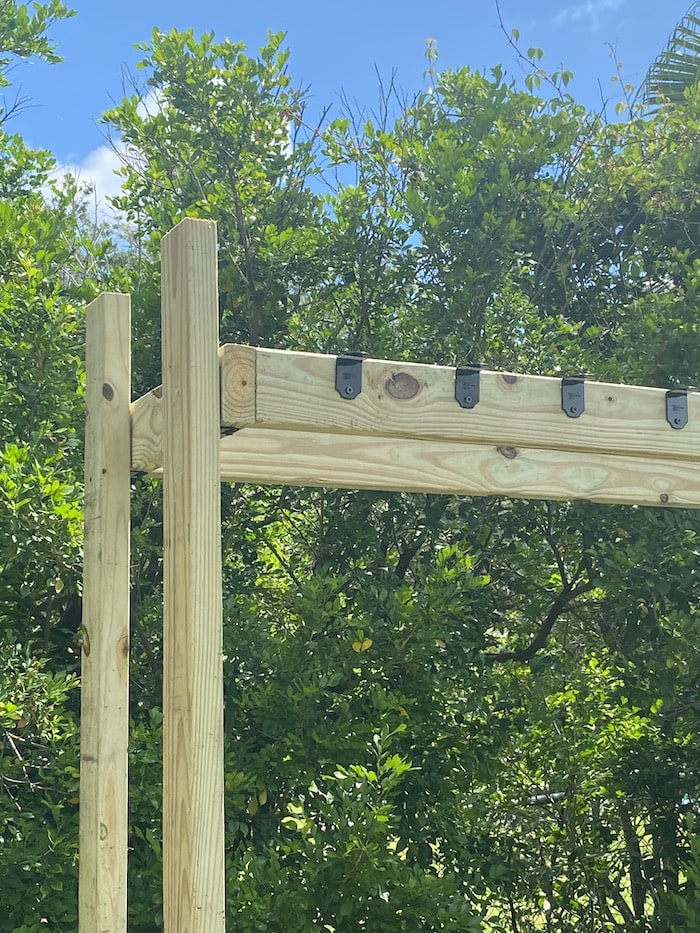
After that we determined the height of the seat. Standard seat height is generally 16″ to 17″. Once we marked off where the seat and trellis piece should go we predrilled for the rafter ties. Then we attached the top piece with structural screws and then added the light rafter ties as a decorative pop. We used the National Hardware Hex-head screws attaching with a socket set.
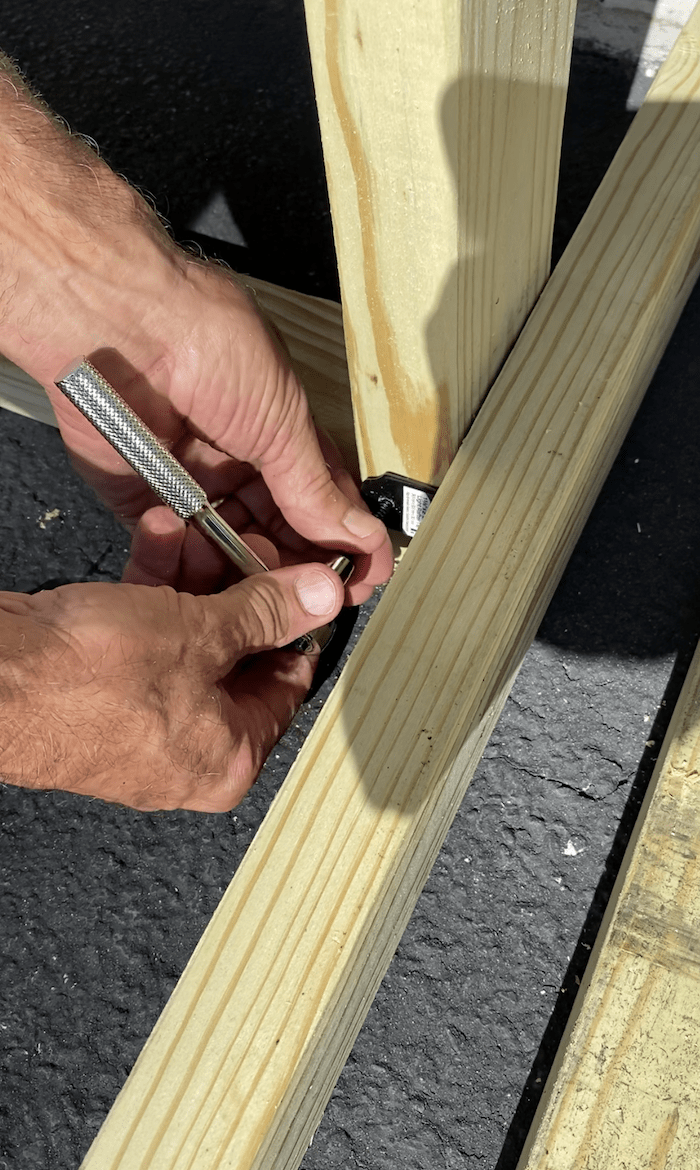
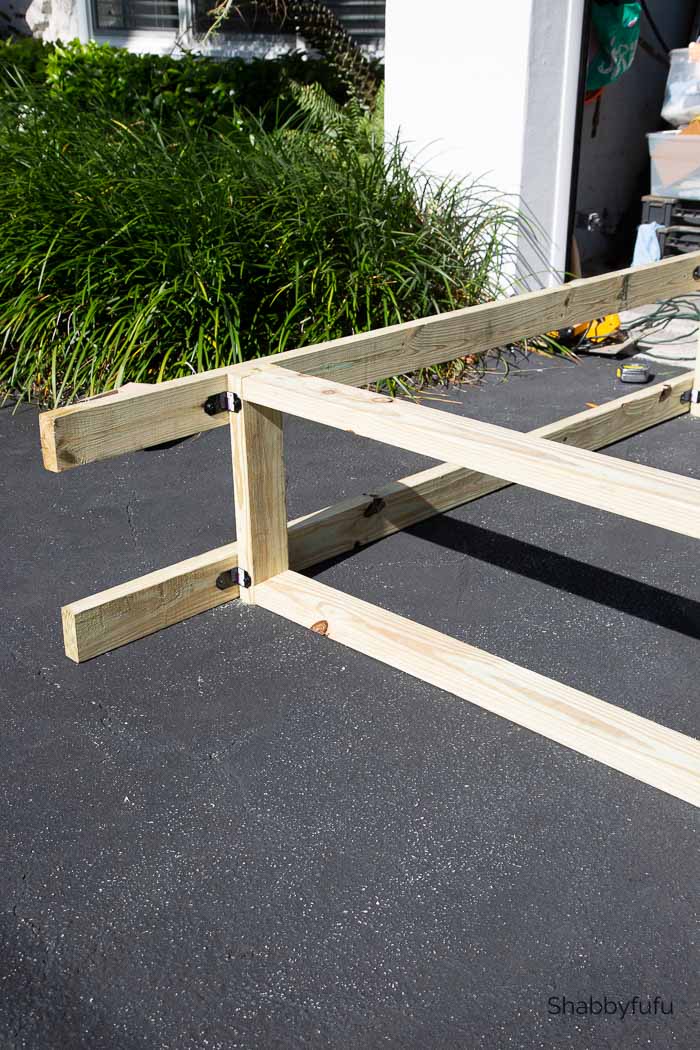
Please note that the decorative light rafter ties and screws need to be reinforced with construction grade structural steel screws that are readily available. We used 2 1/2″ screws to stabilize the structure. We also used the same screws to attach the 2 x 4 platform to the 2 x 4 upright. To make sure that everything was level, we checked it with a square.
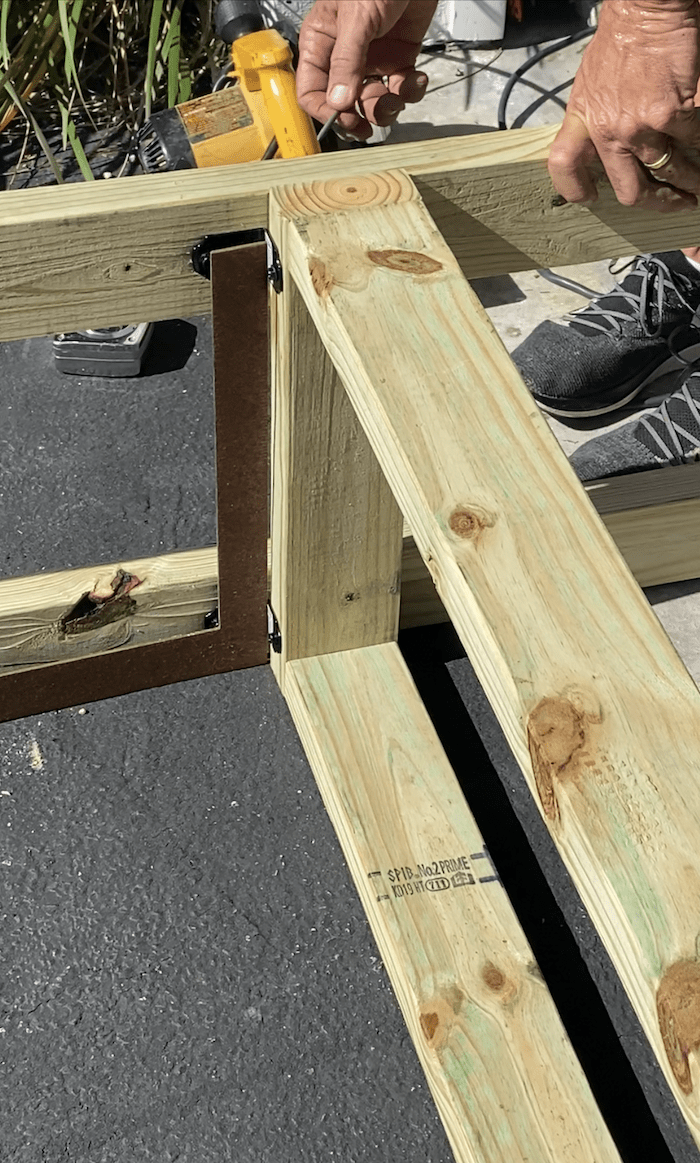
We stood up the structure to add the 3 pieces of wood that composed the actual seat. Just made life easier than trying to do that on the ground! The 3 pieces of 1 x 6 were cut and then screwed to the top of the box piece that was built for the seat, using 1 1/4″ structural exterior deck screws.
The back piece was then attached using 2 1/2″ structural screws that are designed to be outside. The seat back is angled slightly for comfort, because who wants to sit straight up!
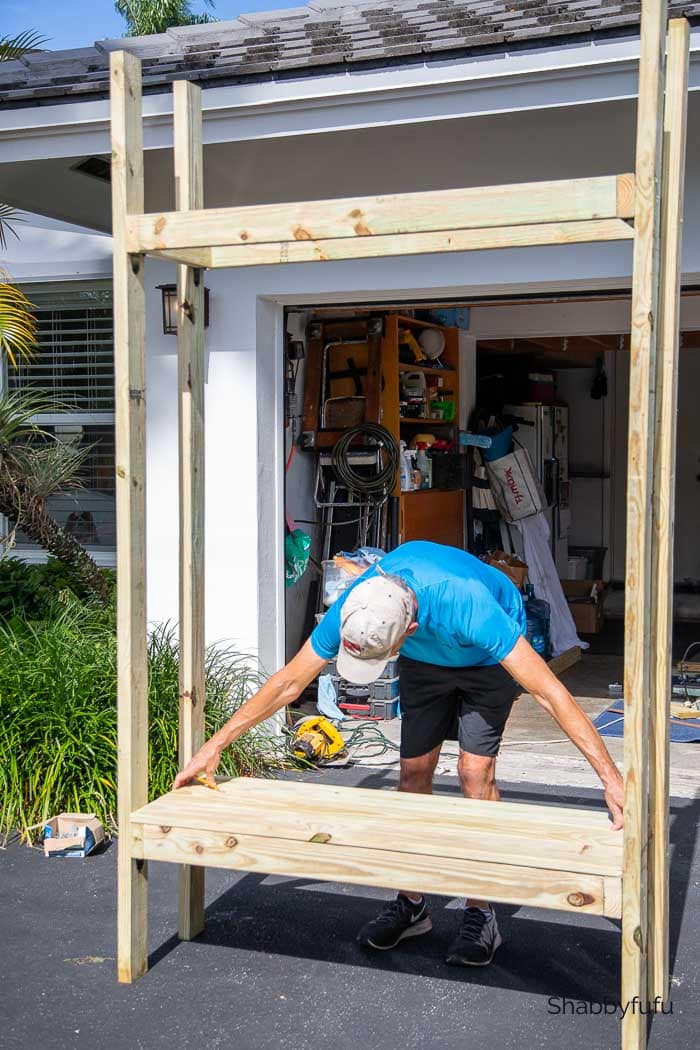
Still in the driveway, we installed the National Hardware Light Rafter Ties for the 2 x 2″ pieces that run across the top. It was a roasting hot day and the asphalt driveway didn’t exactly help, so we decided to then move to the garden to finish construction. Even my camera lens kept fogging up!
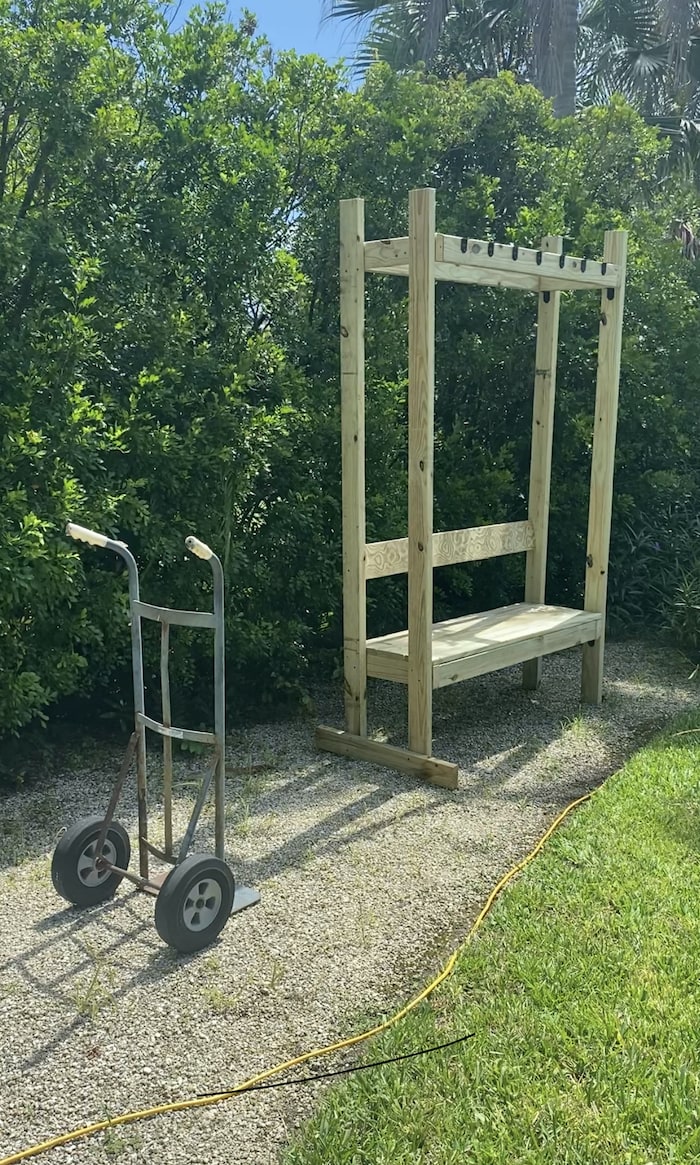
Then we added the decorative lattice type pieces to the side with structural exterior screws. It’s really starting to come together and I’m envisioning decorating it at this point!

The top trellis pieces that made this a pergola were attached next by screwing them on to the rafter ties and reinforcing with structural exterior screws.
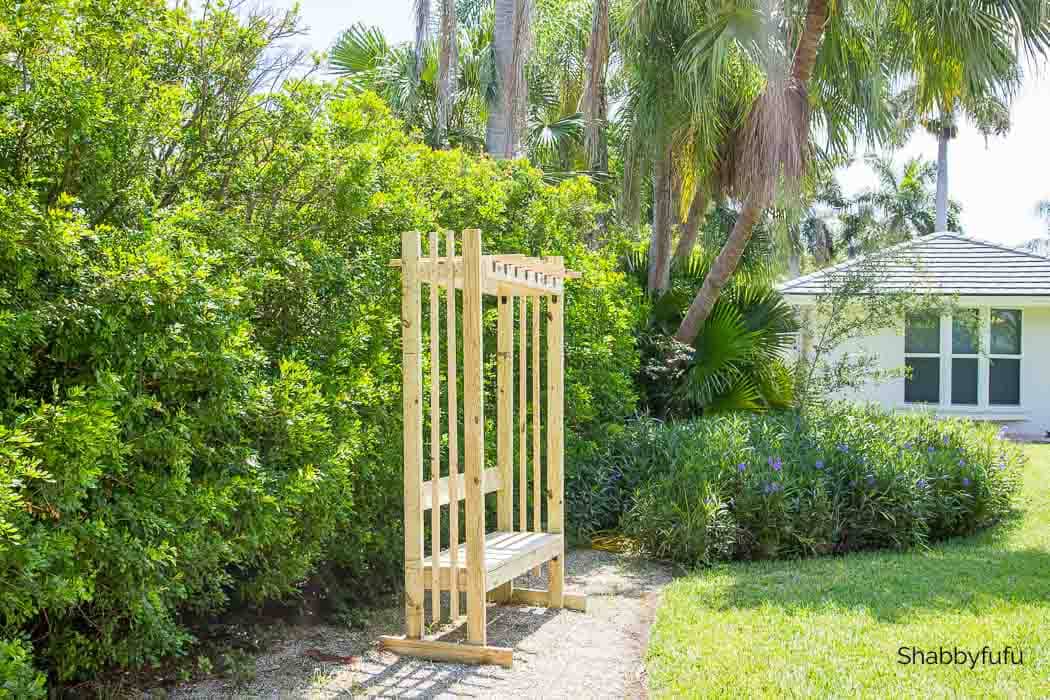
We used pressure treated southern yellow pine and I haven’t decided if I’ll stain it or let it patina on it’s own. Once I foofed it up it blends in well with the area, but my husband suggested painting it green or brown. What are your thoughts on that? Leave me a comment and let me know!
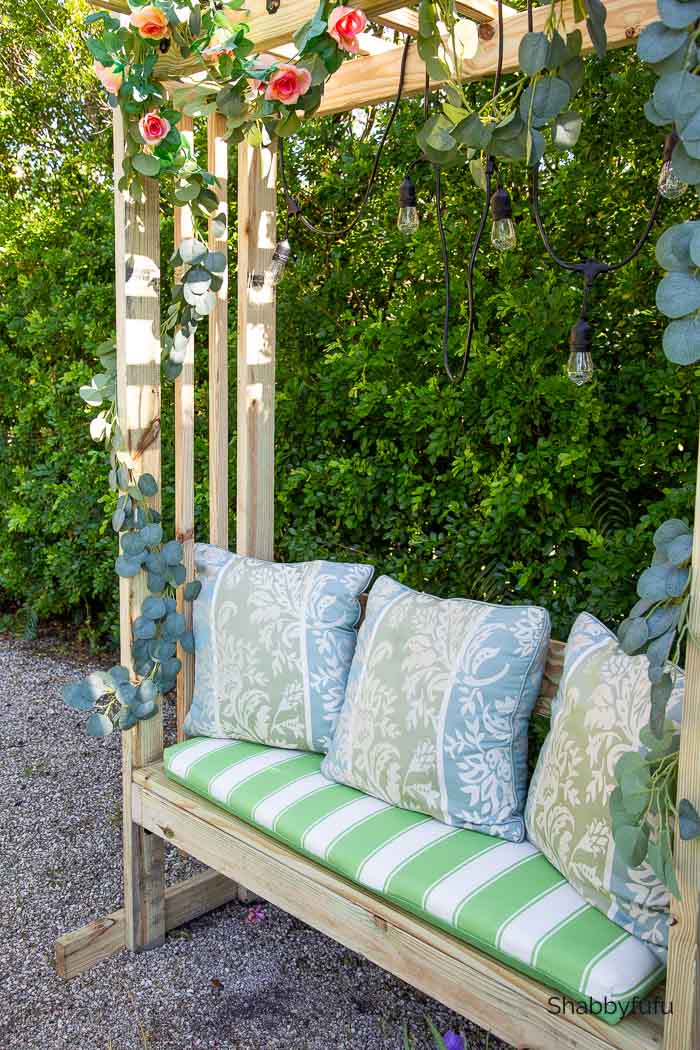
So you know that I had to add some prettiness to it, right?!! I found the cushion at a very reasonable price and added some faux greenery, floral vines and twinkle lights. The outdoor pillows were already part of my stash and just moved from another spot.
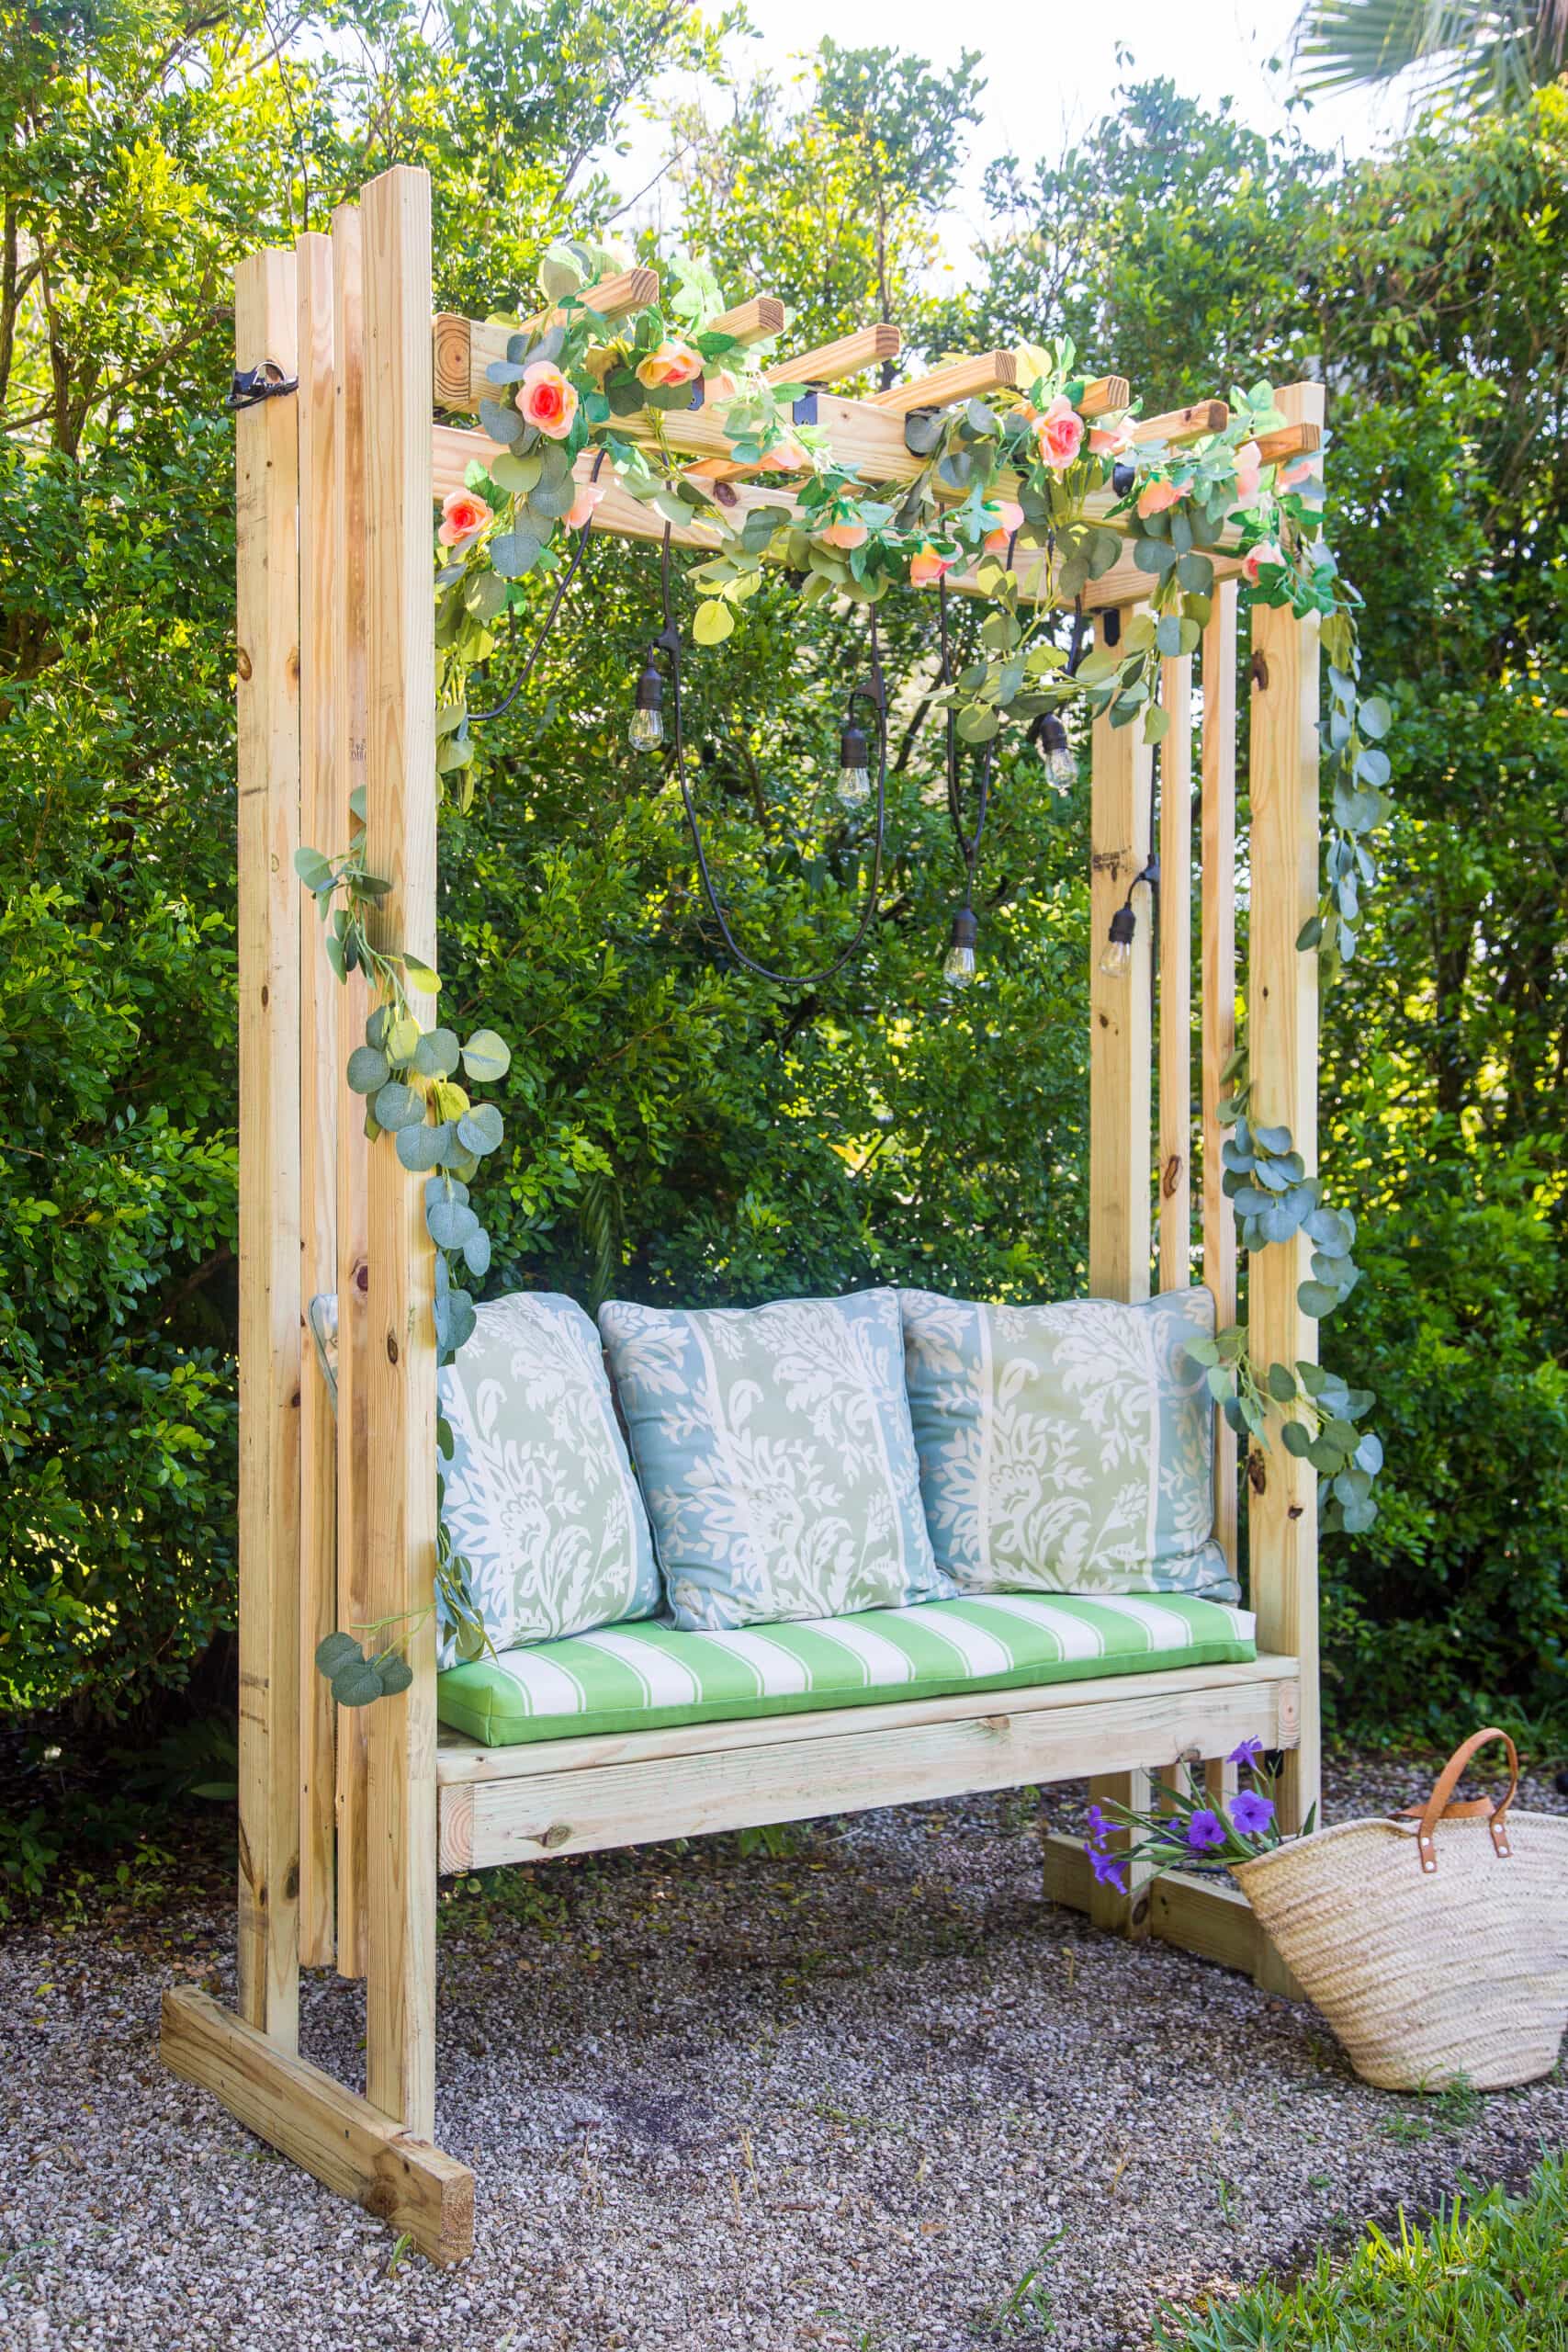
I think that I’m going to be out here often, and this is a nice shady spot…so bonus for that! If you’d like the free plans, you can grab them RIGHT HERE!
PIN BELOW FOR YOUR REFERENCE AT ANY TIME!
This is beautiful! I love the way the pergola turned out…well done!
Thanks so much Ann!
Sorry Hubby no green or brown please…..I would go with white myself or pick an unexpected tone of colour like tourquise or minty green etc. White is always an easy choice to add or change up cushions etc. Also add a second bar across the back for extra sturdiness on hot sweltering days of slumping safely to chill down and relax the back knowing your spine is well supported.
Funny you should mention the 2nd bar, because we were planning on it but ran out of wood!
I am also a fan of white to contrast with the colors of the flowers and pillows.
It’s difficult to do white paint here because it will mildew quickly, but something to consider for the look!
Beautiful, but tell your husband no brown, please. I have something similar, but black steel with a gothic arch style. I am attempting to grow some climbing roses to climb its sides. In a nice shady spot, it is a great, quiet spot to sit and cool off,
I can’t see brown for this either, lol. Your pergola sounds lovely!
Hi Janet,
What a great project! It’s amazing what a little bit of wood and know-how can create. You have a beautiful and unique sitting area! Very pretty and romantic!
I’ll be passing the post along to Bobby!
It’s such a nice little addition to our property that I’m enjoying!
Janet, this came out just amazing!! I would love to try something like this too… 🙂
Thanks so much friend!
Janet, this turned out beautifully. I think I would be inclined to paint it white also. Great job, and thanks so much for the plans.
Thank you, thank you!! xo
Wow, Janet, this looks great! I know you’ll enjoy this cute spot for summer.
It is such a great spot for me to hang out and watch the pups run around!
What a cute idea! The perfect addition to your garden! Hugs!
Thanks so much Leena…I’m enjoying this piece!
A beautiful piece of carpentry, congratulations to your husband. This is something my husband would have done when he was younger. We are in our eighties, but never tire of viewing your posts and the other bloggers for easy ideas to just change the inside and outside our home.
Thank you so much Babs for the lovely compliment and I’m passing it along to my husband! Glad you enjoy the posts!
Hello! That’s a fabulous pergola that your husband built for you! You are really blessed to have someone to be able to create anything for you. Your husband reminds me of my father. Boy, I miss him dearly!! He was the jack of all trades and full of creativity just like your husband. The faux roses on top along with the lights are just so chic. Perhaps you can maybe add stenciling at the bottom. Maybe one day he can do another pergola for you with a swing or chair hammock. I love your ideas! ❤️
Awww, that’s so sweet! My dad was really handy as well.
Lovely!!
Janet why did you take me off your mailing list
Hi Daleann…I have it set to remove anyone who hasn’t opened a single email over a 3 month period. It’s nothing personal, but if folks don’t open and click over to the blog then we assume that they are no longer interested. You should be able to sign back up if you are…love to have you!
It’s amazing what a amount of wood and a little expertise can produce. Your home is beautiful and unique area to sit in! It’s gorgeous and romantic! I’ll pass the link to Bobby!
Thank you and Happy New Year!