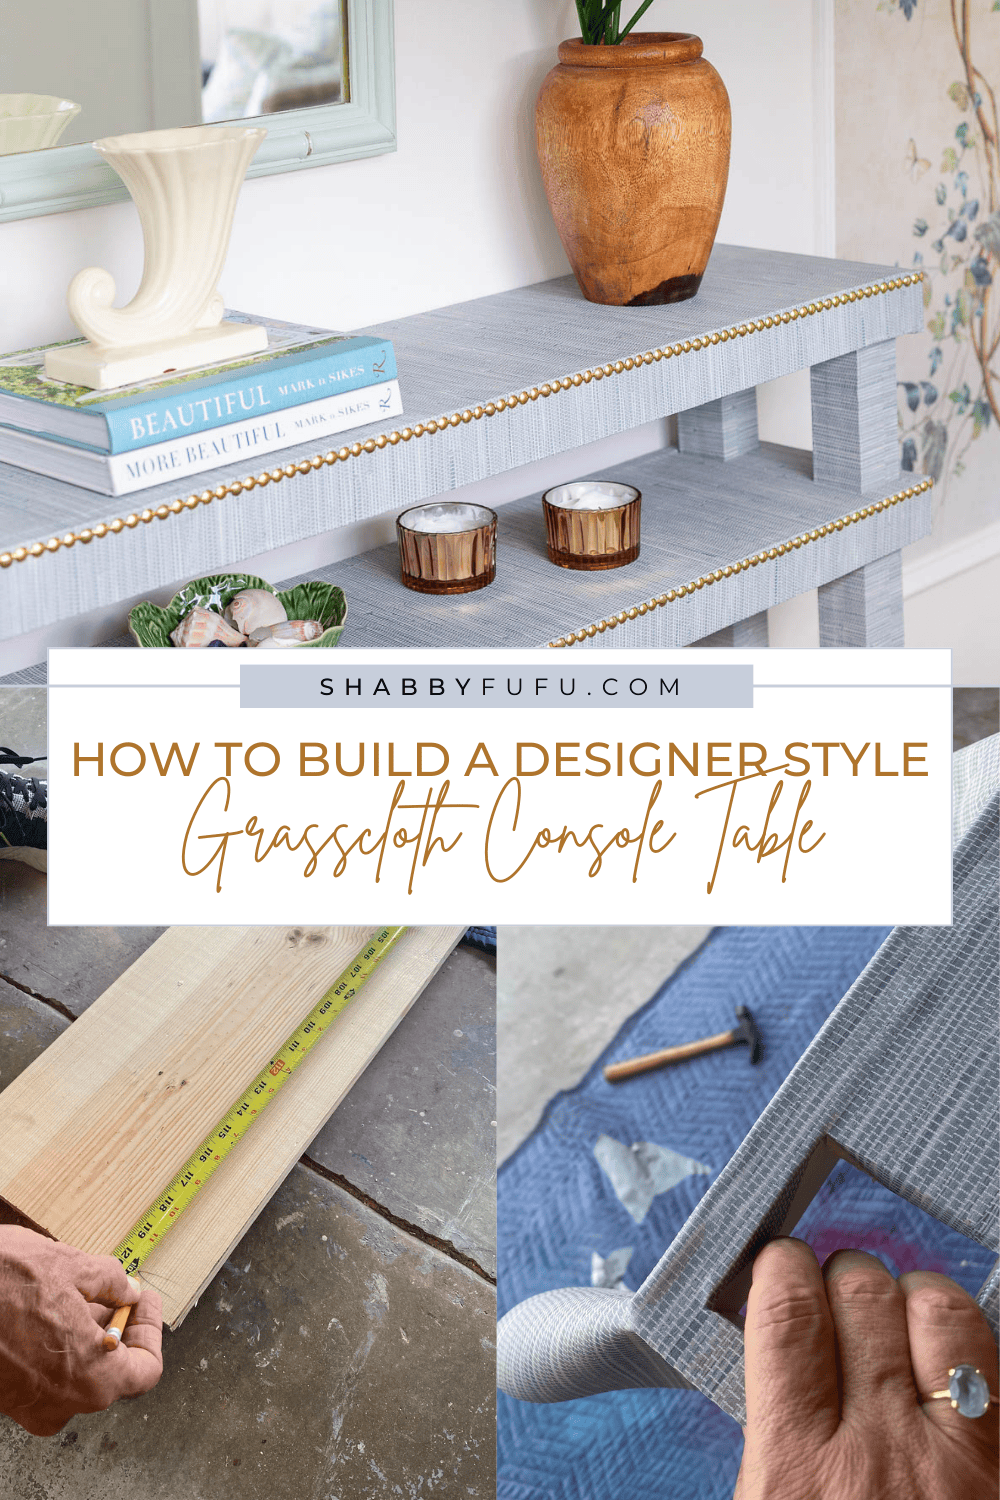
How To Build A Designer Style Grasscloth Console Table
This post may contain affiliate links. For more information, please see our disclosure policy.
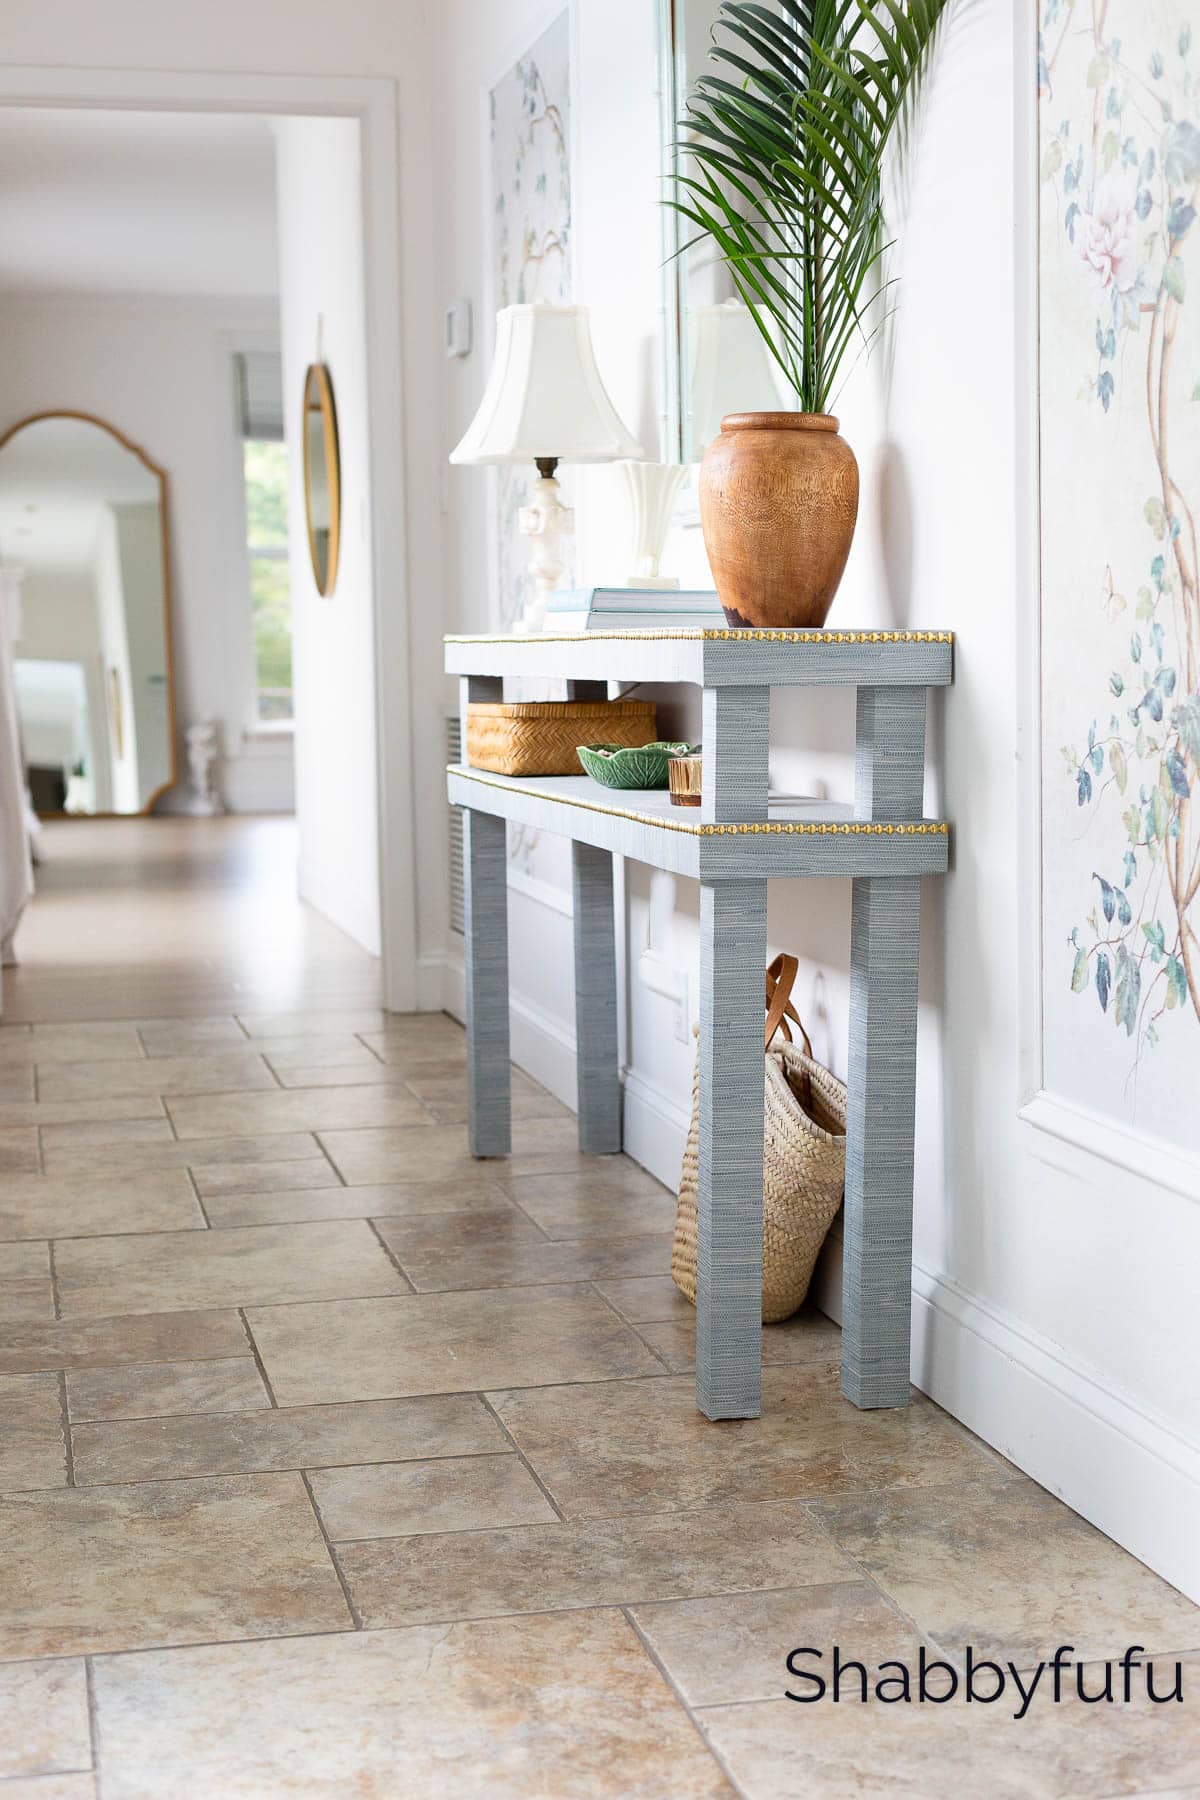
In this post you’ll learn how to build a designer style grasscloth console table from scratch!
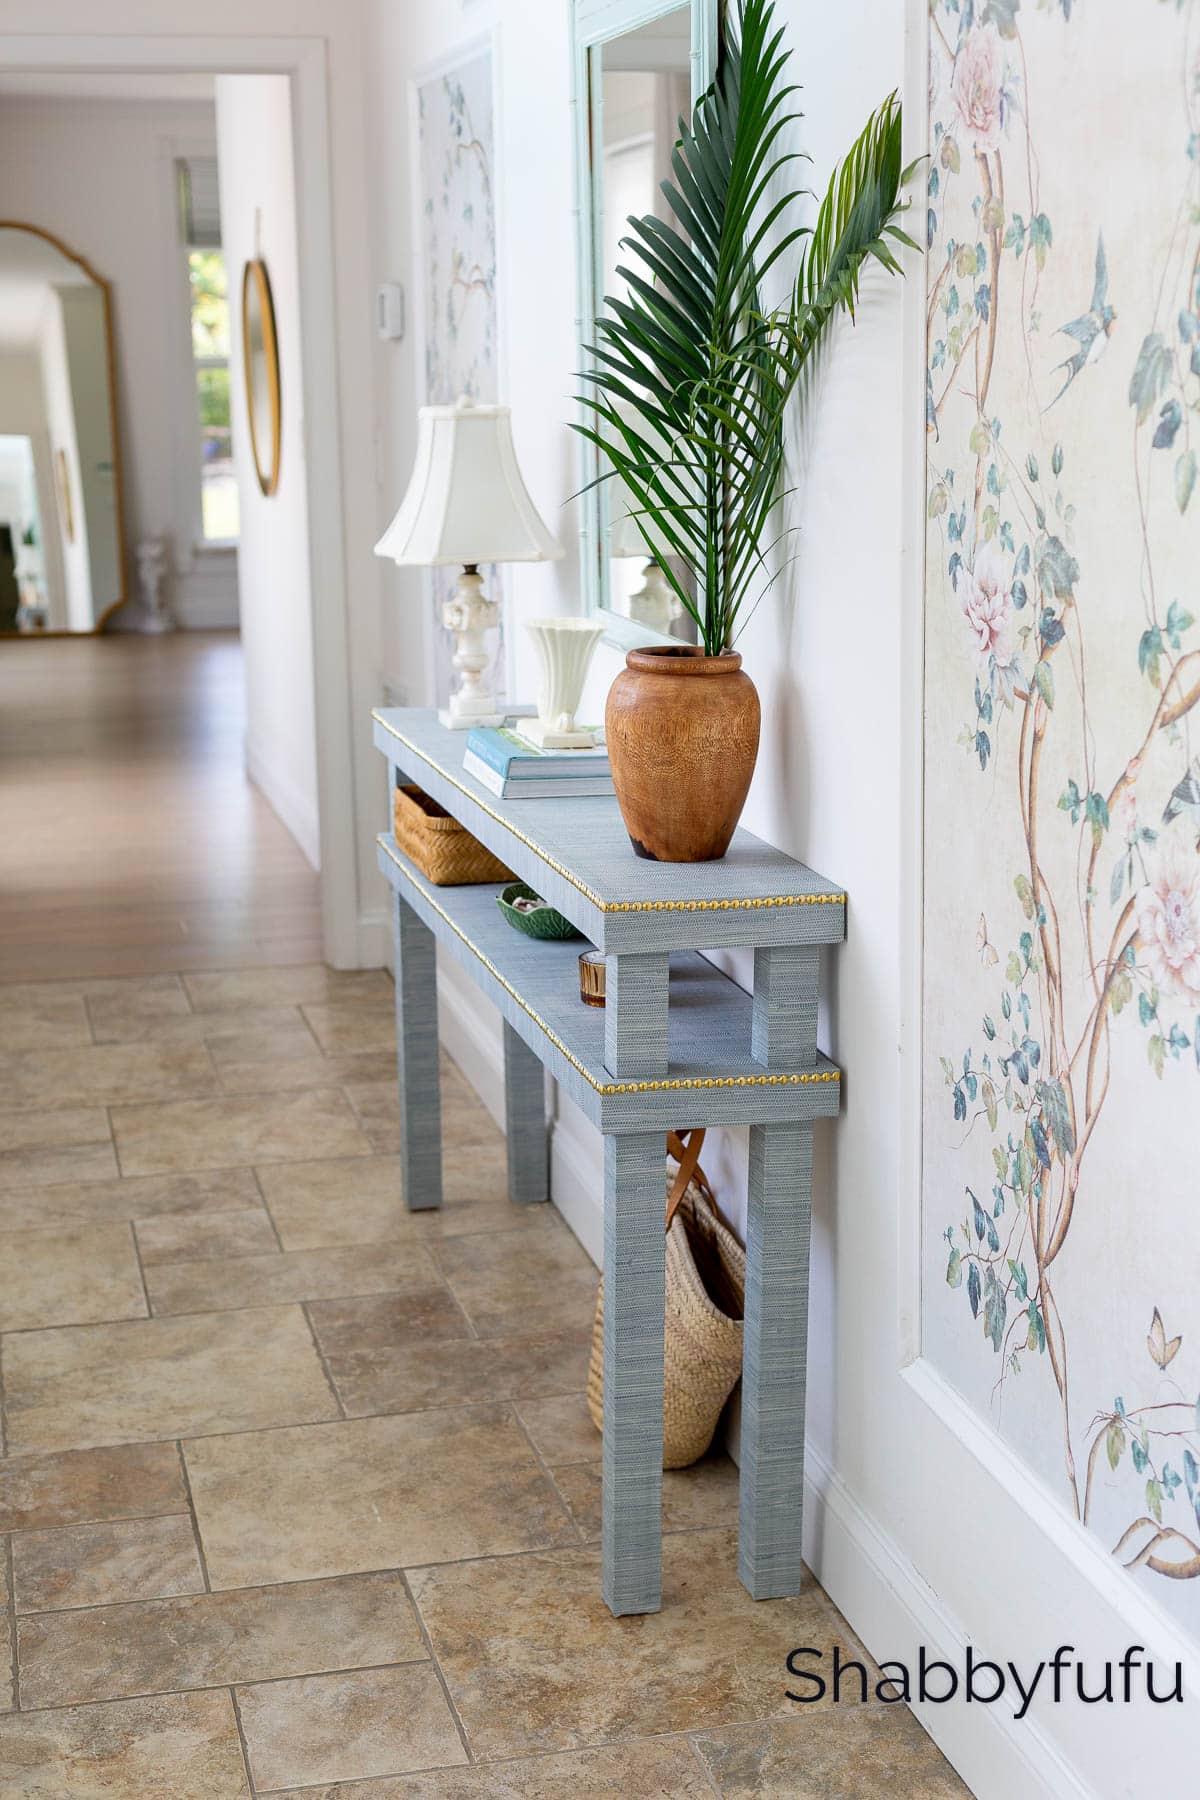
We’ve all seen them and drooled over these pricey tables that have that California casual look. A console table is a versatile piece of furniture that can be used in a hallway or foyer or behind a sofa. Let’s dive right in and see how we built this high end look console table in a DIY TUTORIAL and how it inspired a long hallway redesign!
Inspiration & Thoughts
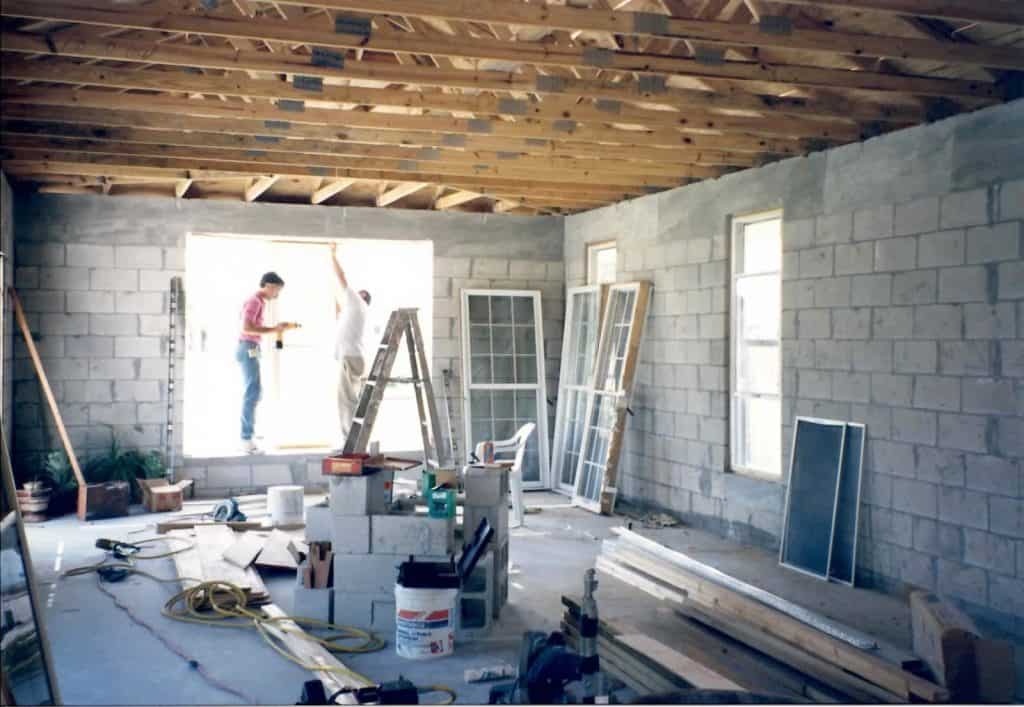
This area is the very long hallway that leads from the family room to our primary suite. Before the area that you see is our laundry room on the right (see that makeover post here) and the pool/patio on the left. We built this area years ago ourselves as part of a large addition to our home. As long time DIYers we were so fortunate to be able to double the size of our home by doing much of the work ourselves! That’s my husband and his first employee Don when he started his construction business way back when. I thought that you might enjoy seeing this in our home that has been a true labor of love!
Now…on to the build of this table and how we were inspired to create a new room of this hallway around it!
A Designer Style Grasscloth Console Table – DIY
This is a paid post in behalf of Spectrum Brands but the work and opinions expressed here are my own.
MATERIALS:
- One – 1 x 10 – 10′
- One – 1 x 4 – 8′
- Four – 1 x 6 – 8′
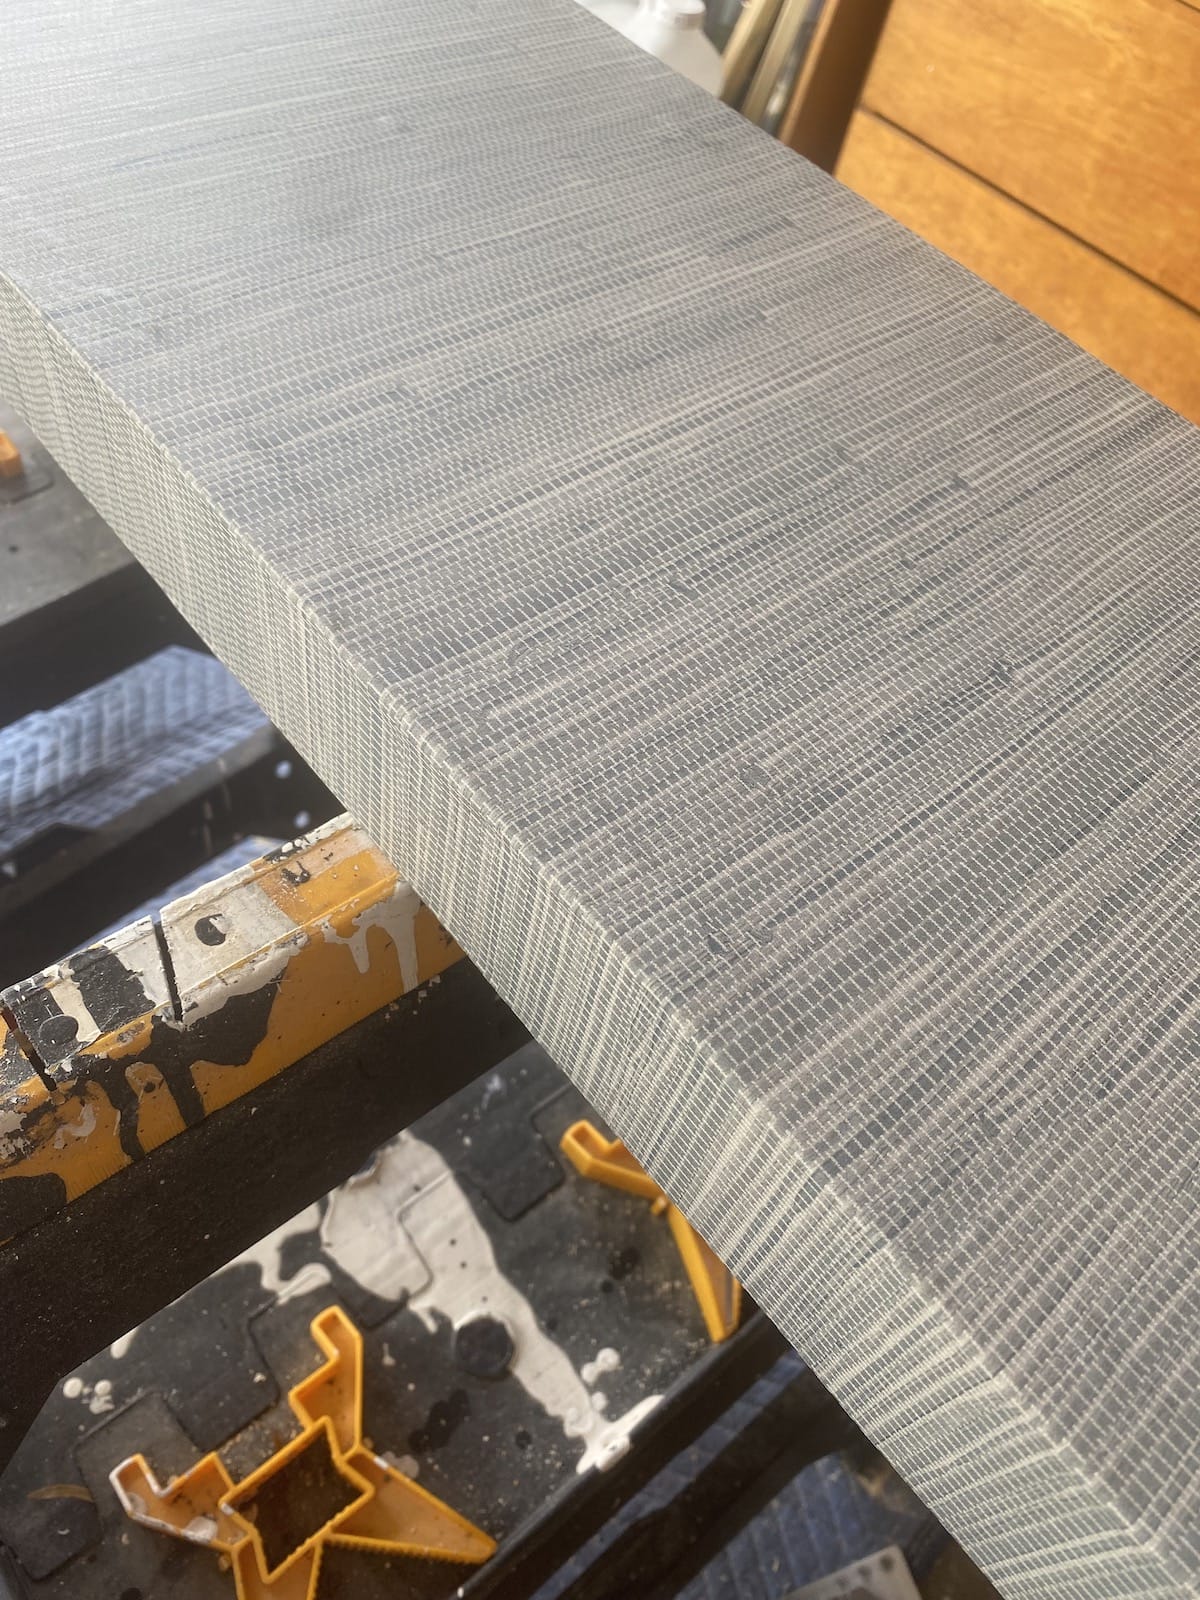
- One – Roll – Peel & Stick Vinyl Faux Grasscloth Wallpaper
- One – Pack Brass Nailhead Trim
FOUR PACKS – National Hardware Decorative Hinges – 2 1/2″ x 1 1/8″ (TWO PER PACK for a total of 8)
TOOLS:
- Chop Saw
- Circular Saw
- Nail Gun
- Screw Gun
- Palm Sander
- Clamps
- Tape Measure
- Level
- Pencil
- Razor Knife
- Tack Hammer
- Wallpaper Smoother
- Tack Cloth
Build Your Own Console Table Instructions:
Building The Shelves
Step 1 –
Measure the 10′ long 2 x 10′ and cut into two pieces that measure 5′ long each. These pieces will be the two shelves of the console table.
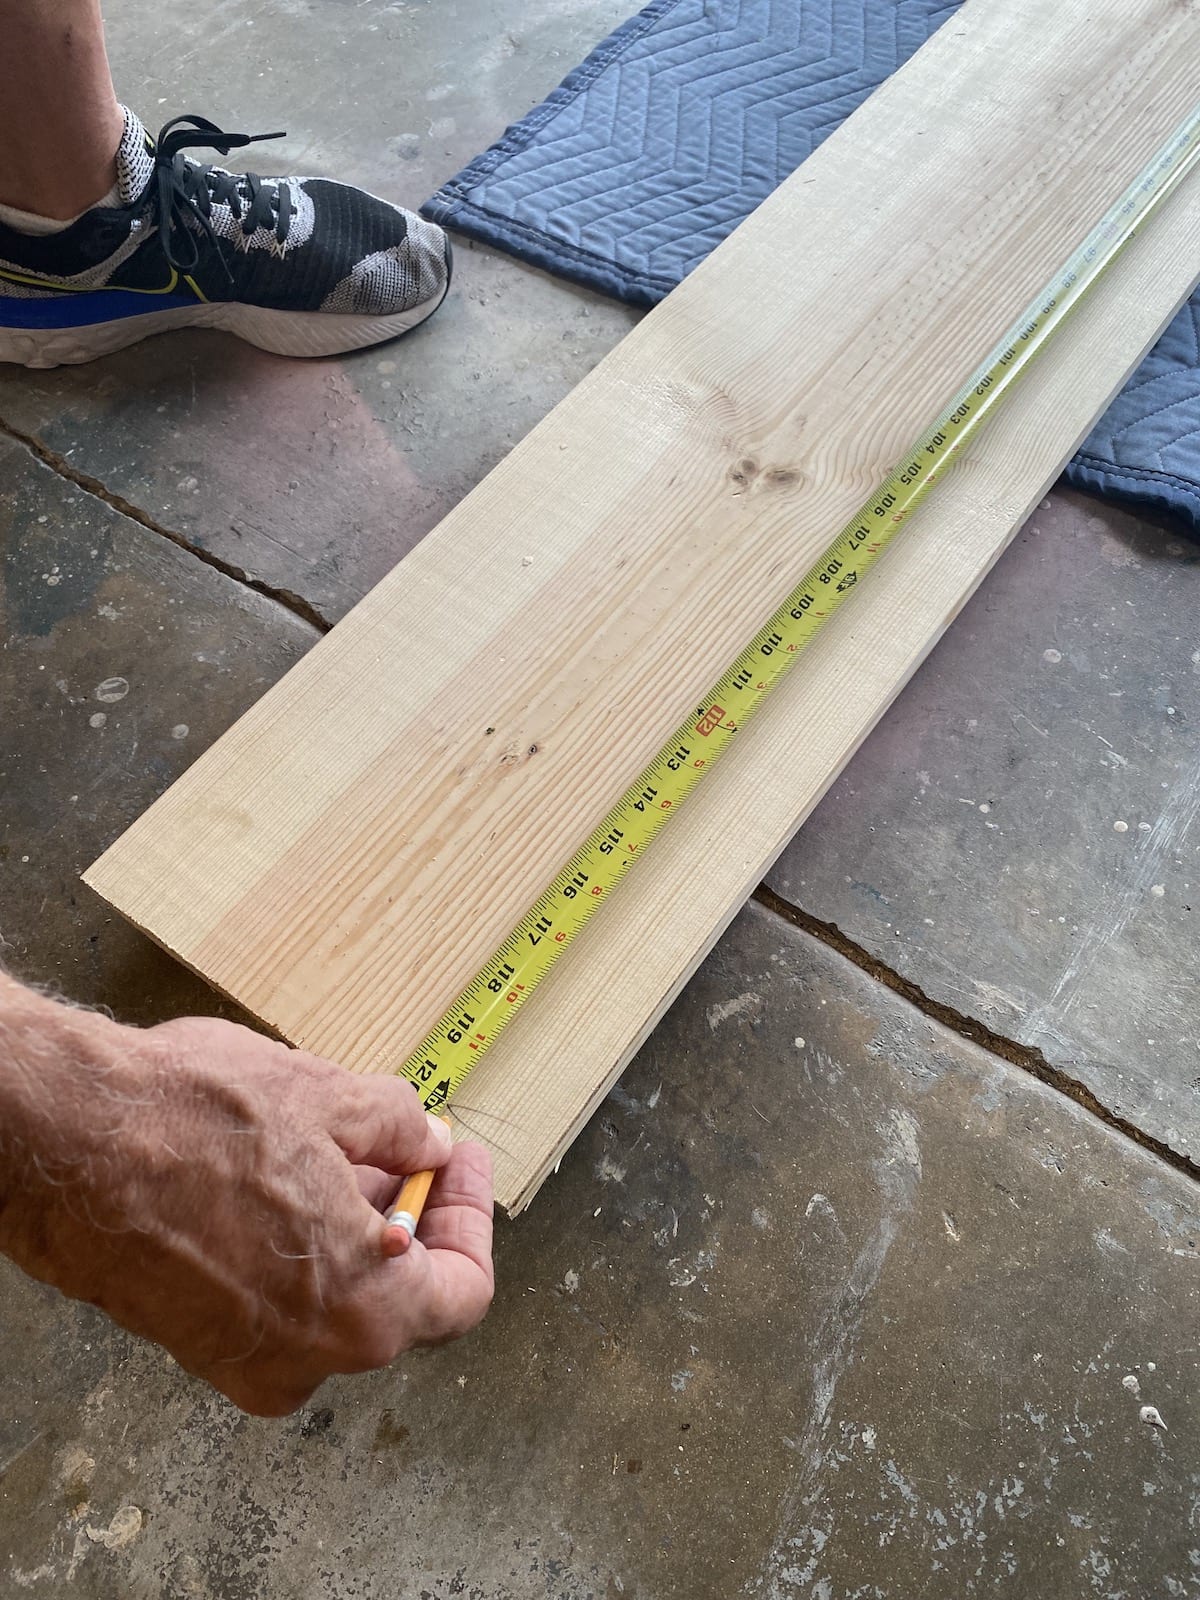
Step 2 –
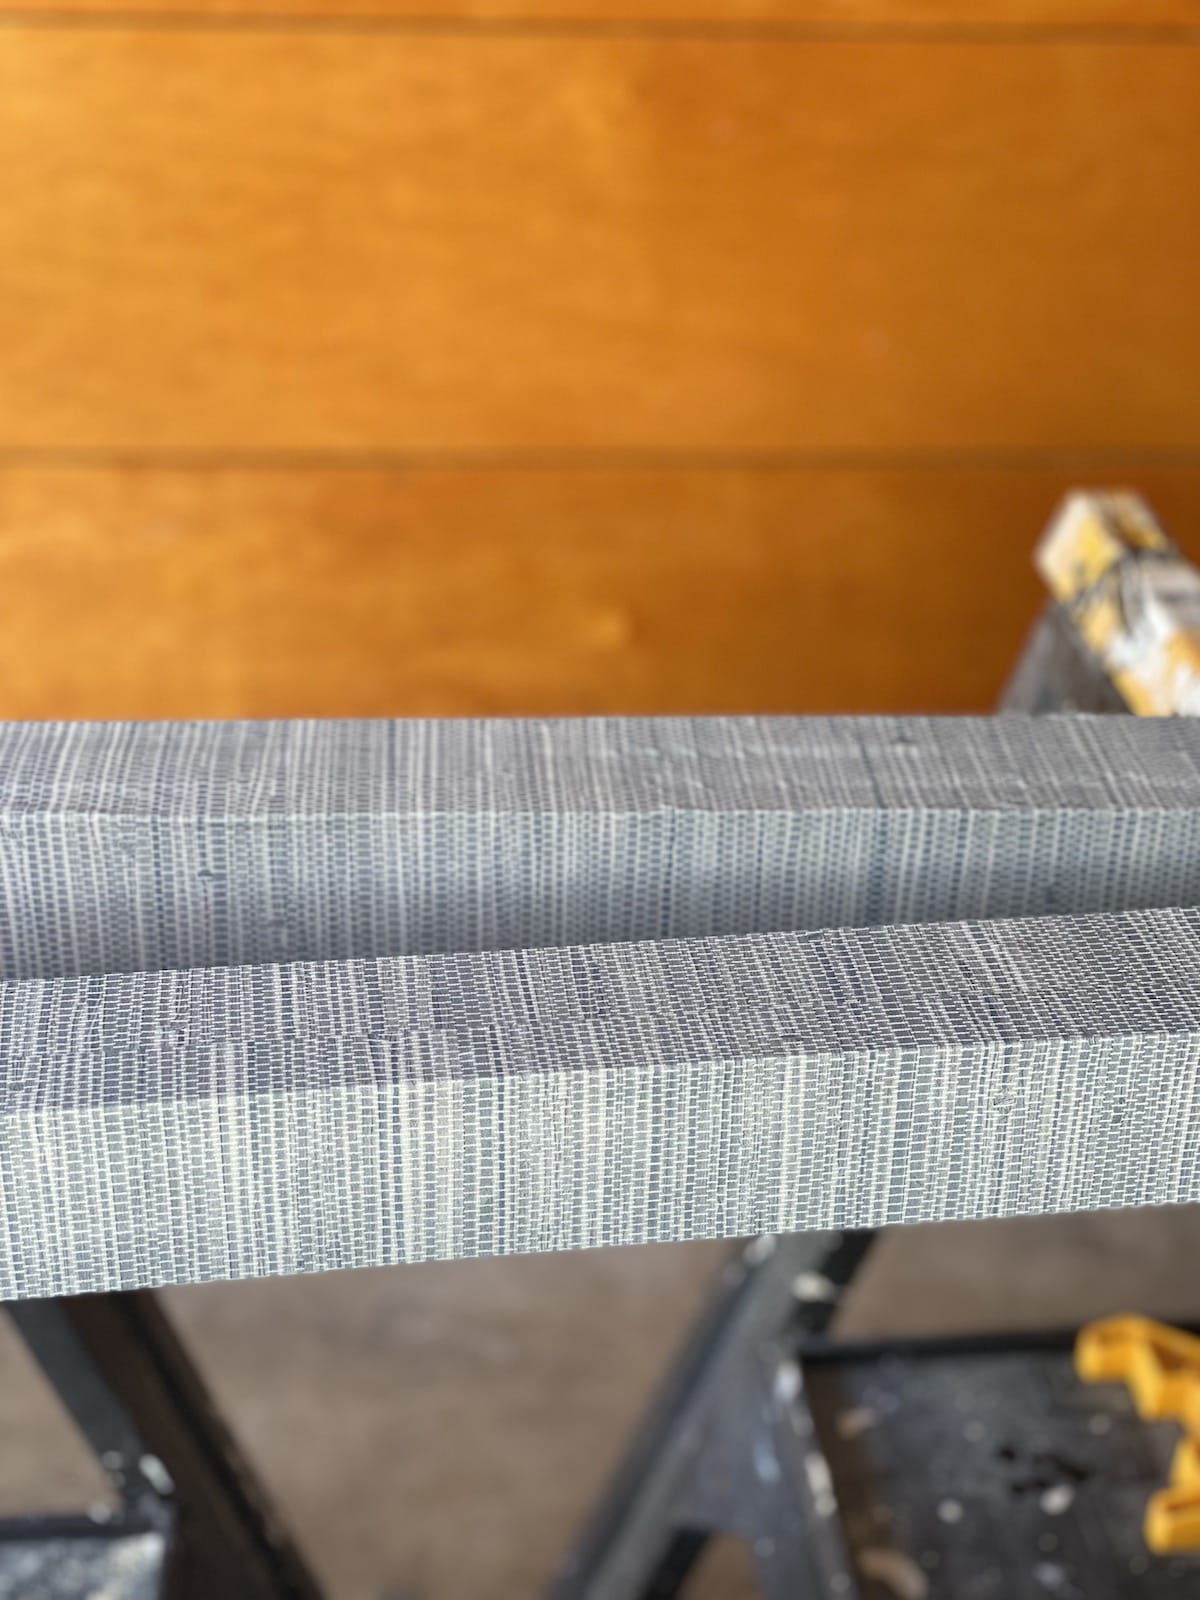
With one of the 1 x 6 pieces of lumber (we used untreated southern yellow pine) cut two 2 1/4″ strips. Repeat this process with one more 1 x 6. You will then have a total of four strips measuring 8′ long x 2 1/4″. These strips will be used to wrap the shelf edges that you’ve previously cut in step one. You’ll have lumber leftover after cutting, which you’ll be using for the legs later on.
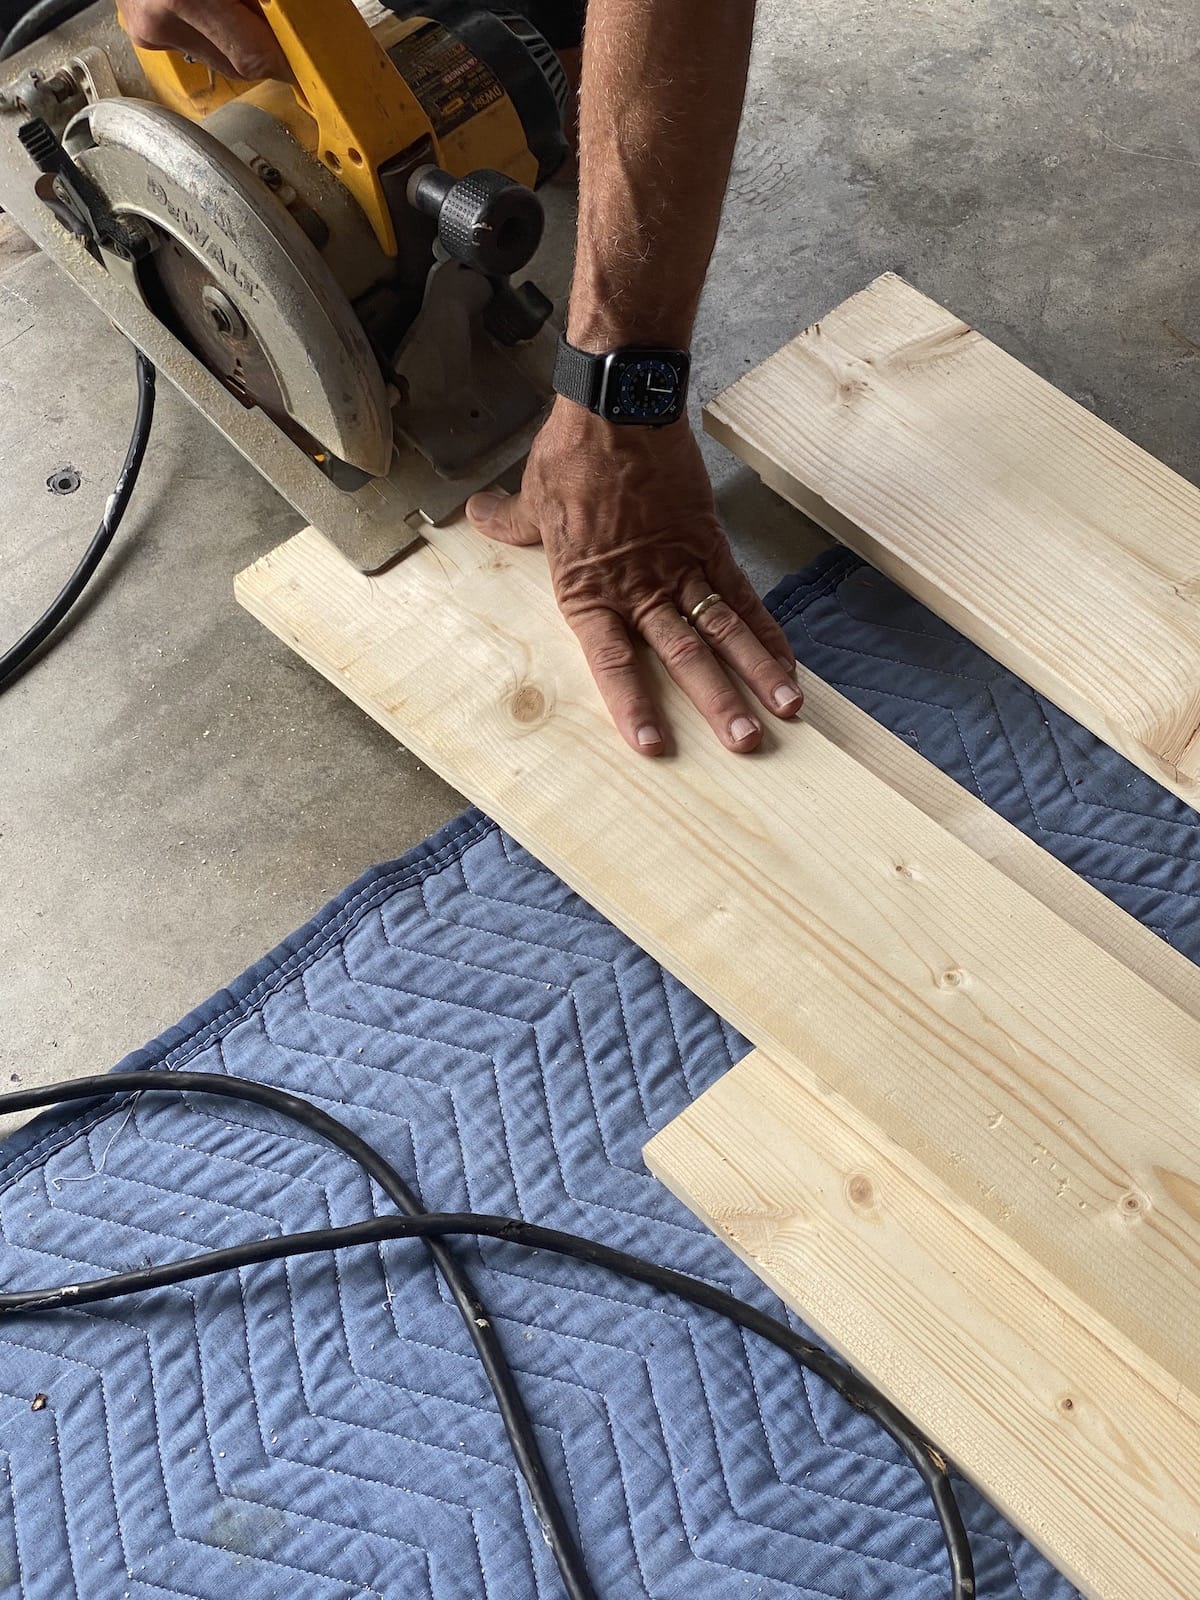
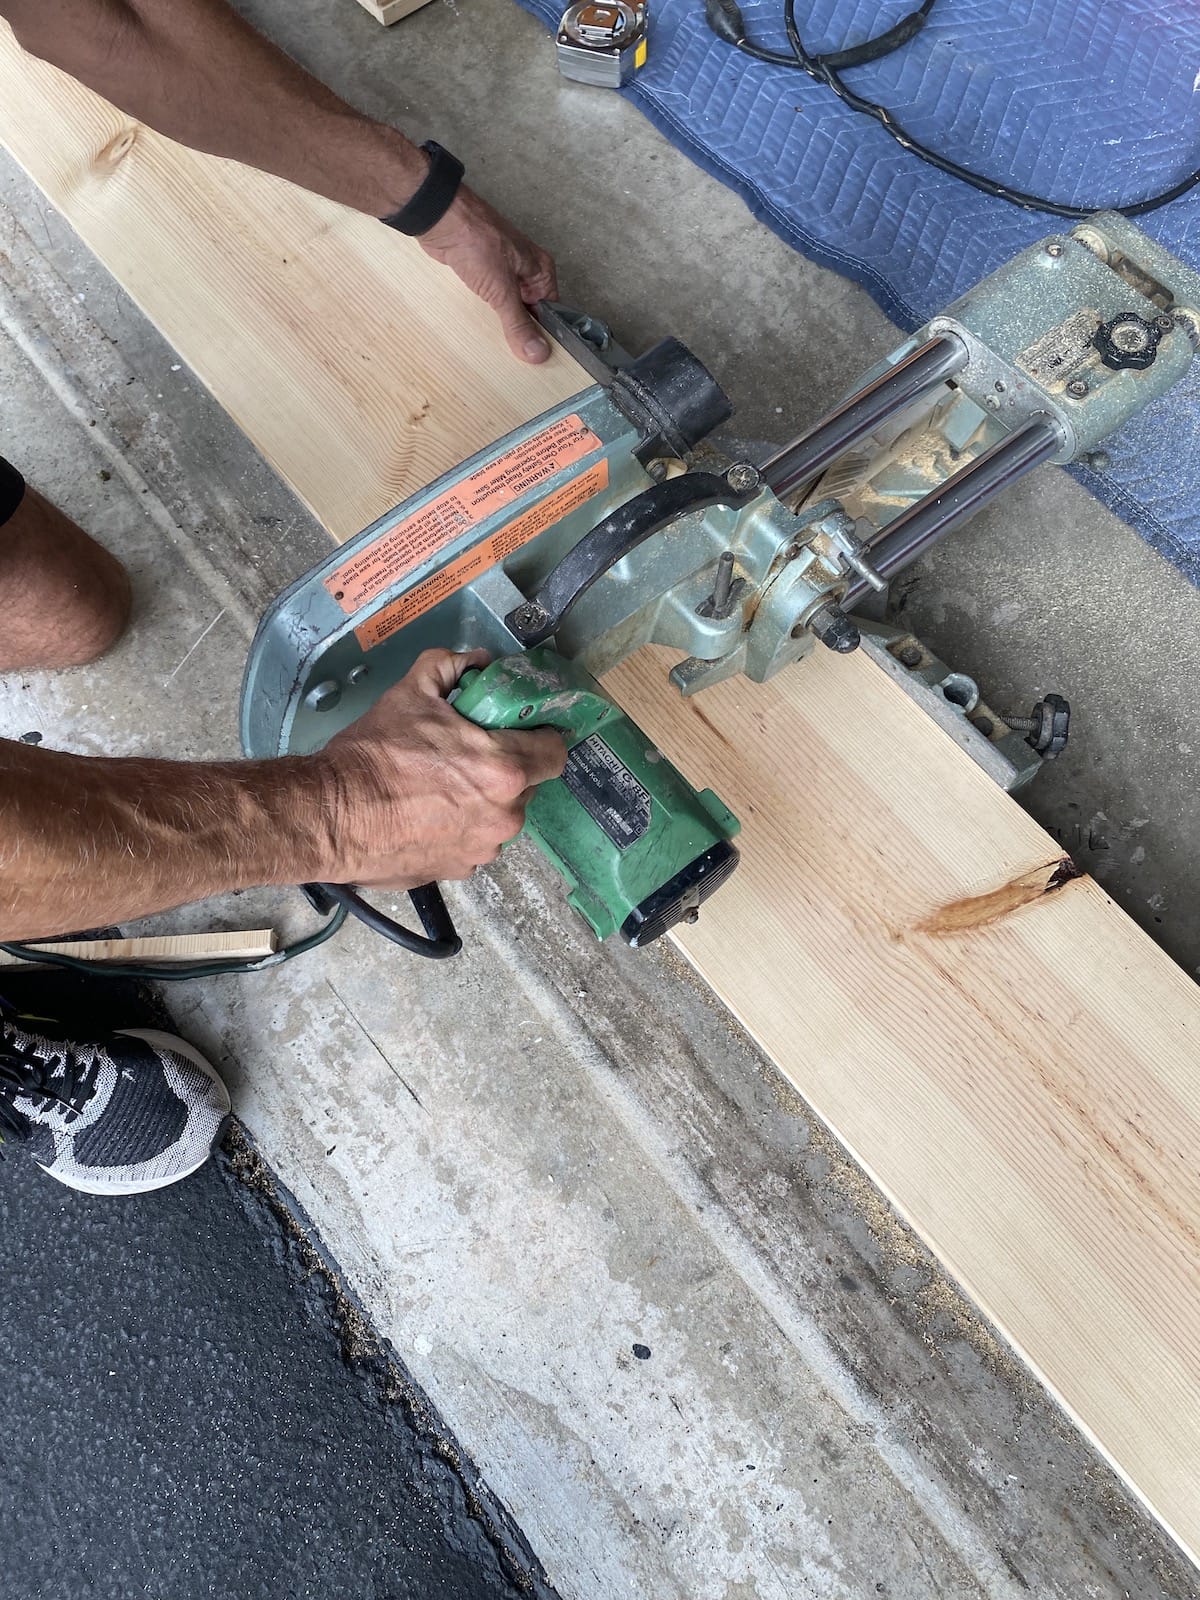
Step 3 –
Next you’ll be repeating the same procedure as above to create the pieces for the designer grasscloth console table legs. You’ll be using the last two 1 x 6 pieces that you have left for this. The cutting will then give you four 8′ long pieces measuring 2 1/4″ wide that will be used for the table legs.
Step 4 –
You will now be creating the edges of the top shelf. Take two of the 2 1/4″ pieces and attach them with a nail gun to the edges of one of the 1 x 10 shelves, cutting them lengthwise to fit. This will create a wrap on the shelf. Do this for the top shelf only. The bottom shelf will be notched for the leg insertion (see step # 8) first and then wrapped in this process afterwards.

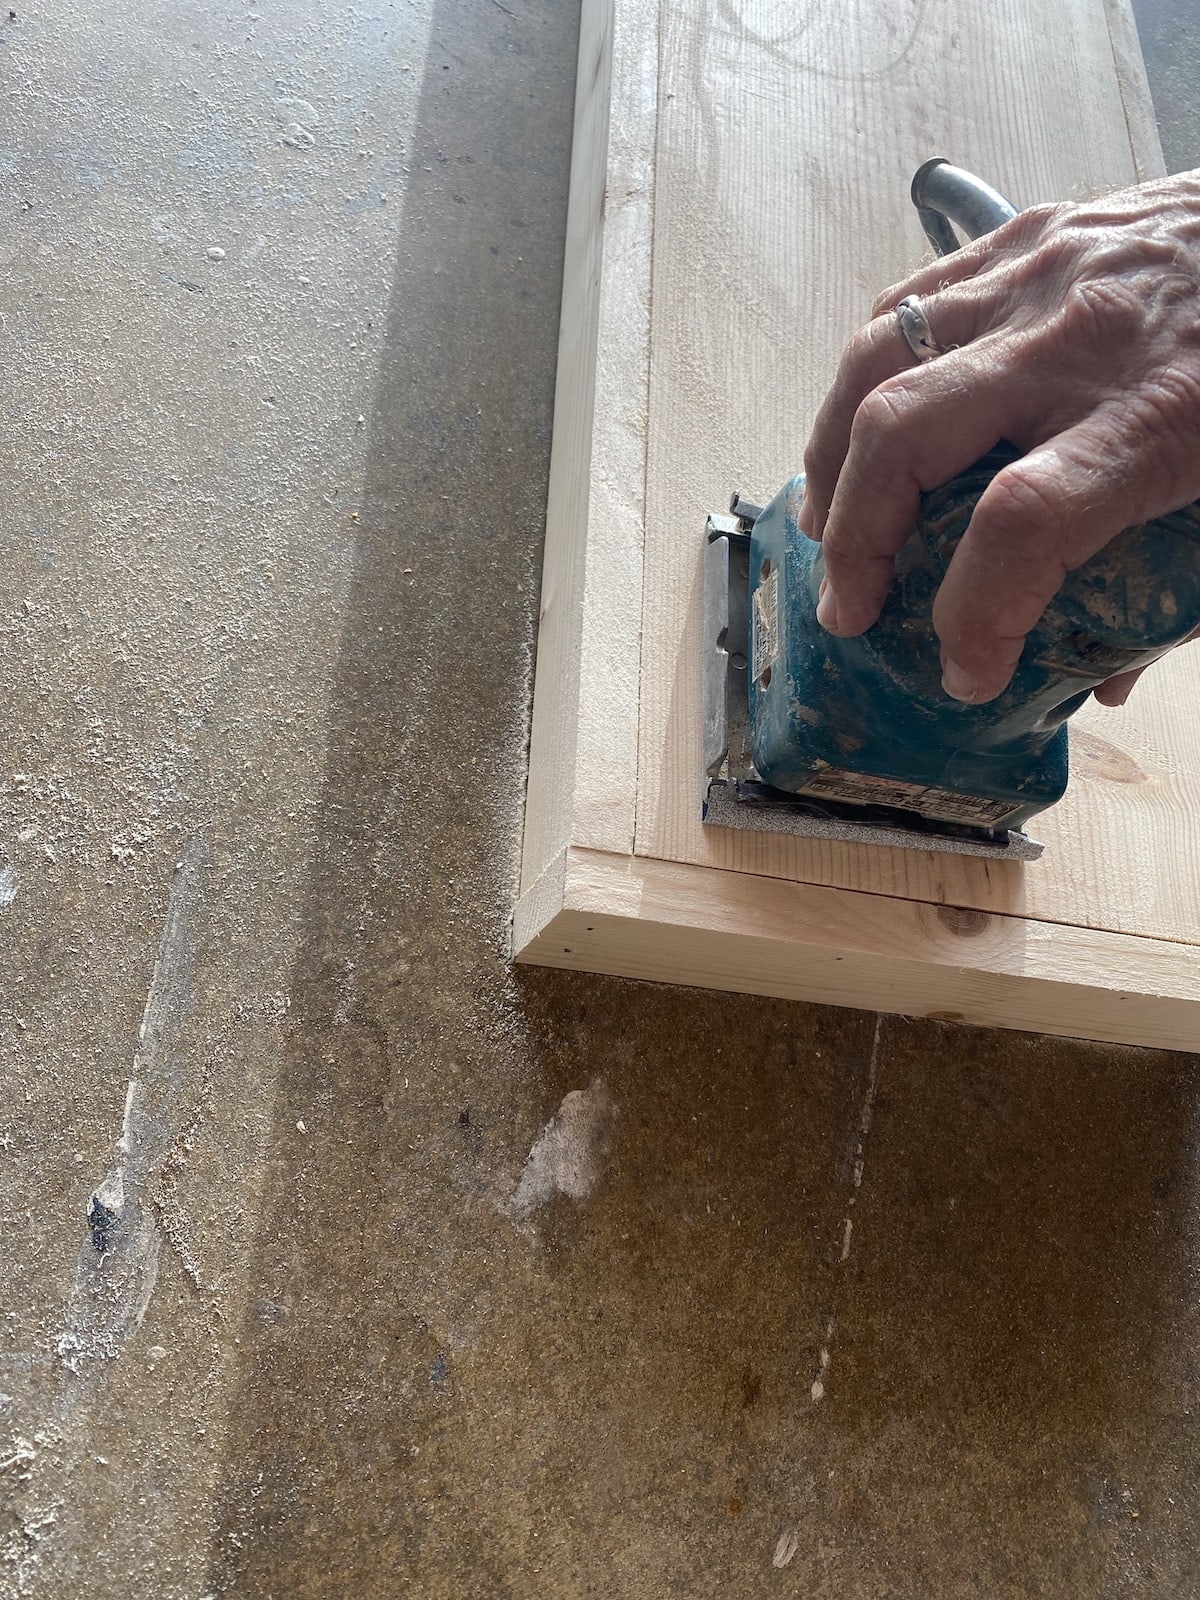
Step 5 –
Palm sand the edges of the shelf for a smooth finish. Wipe it down with a tack cloth after sanding removing all of the sawdust. You’ll need to do this step to insure that the peel and stick wallpaper has good adhesion.
Building The Legs
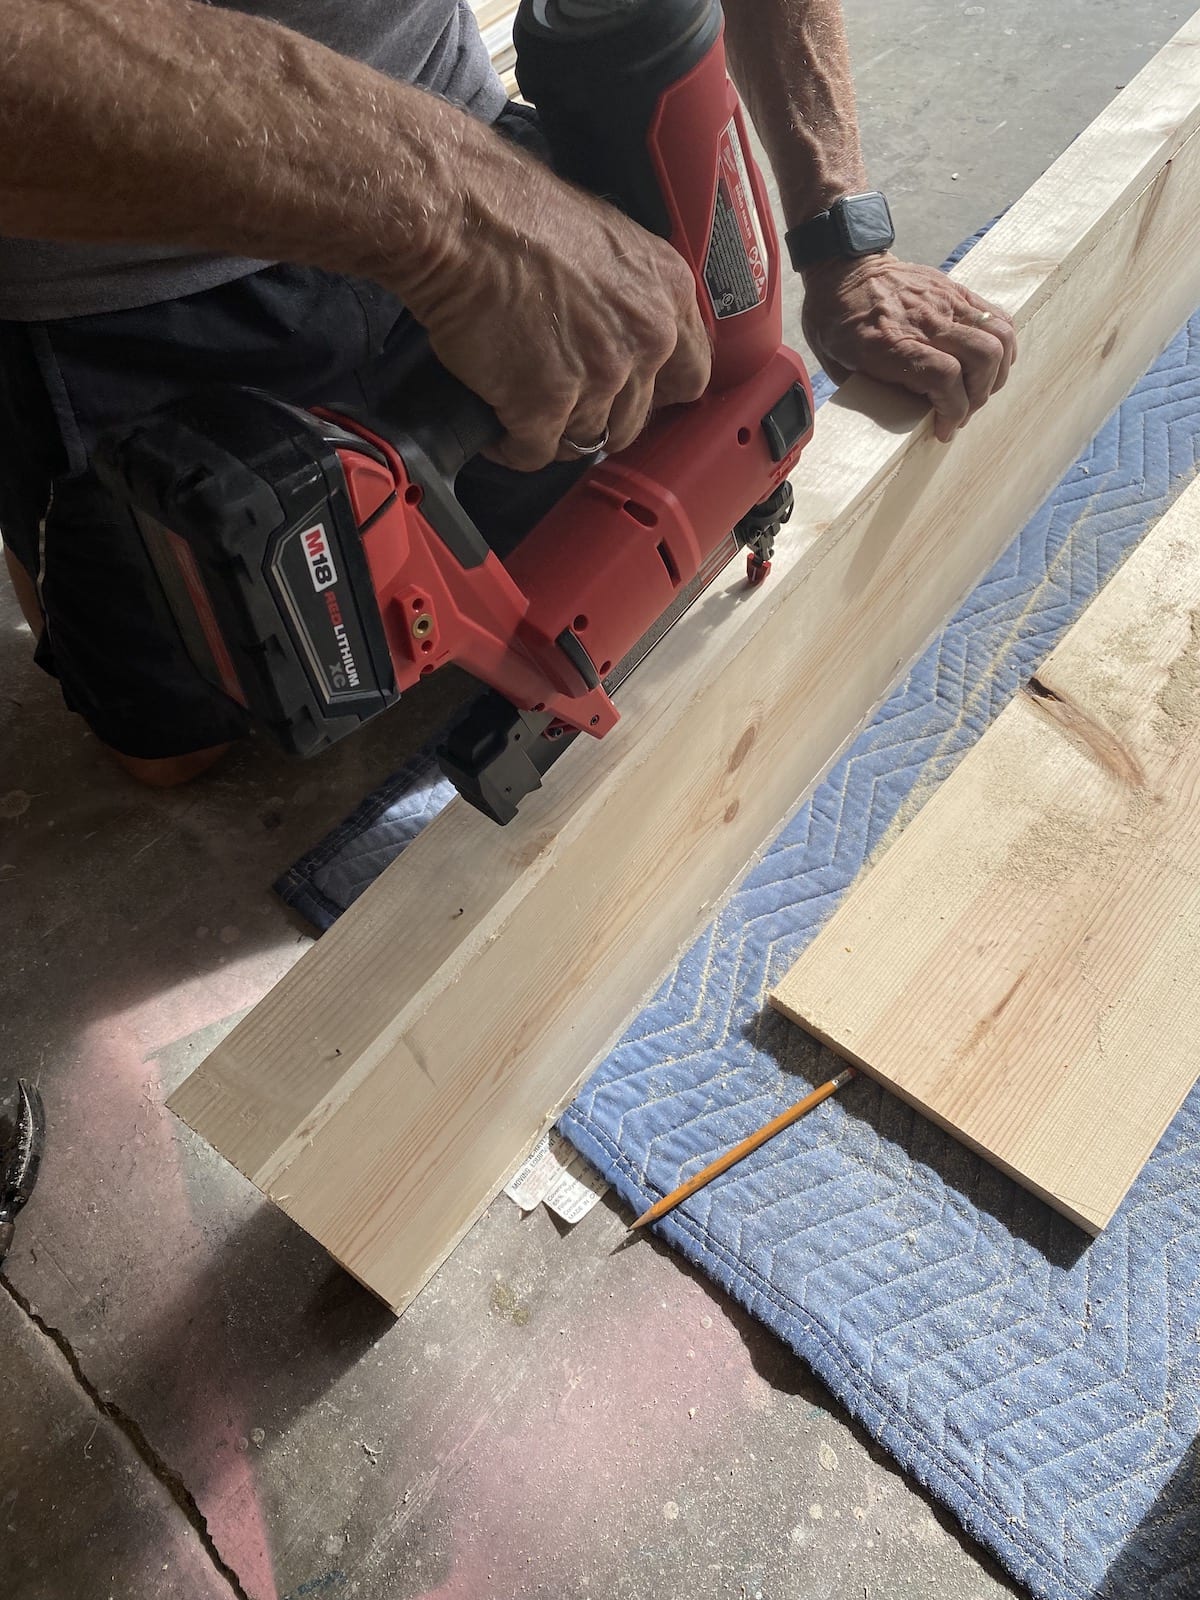
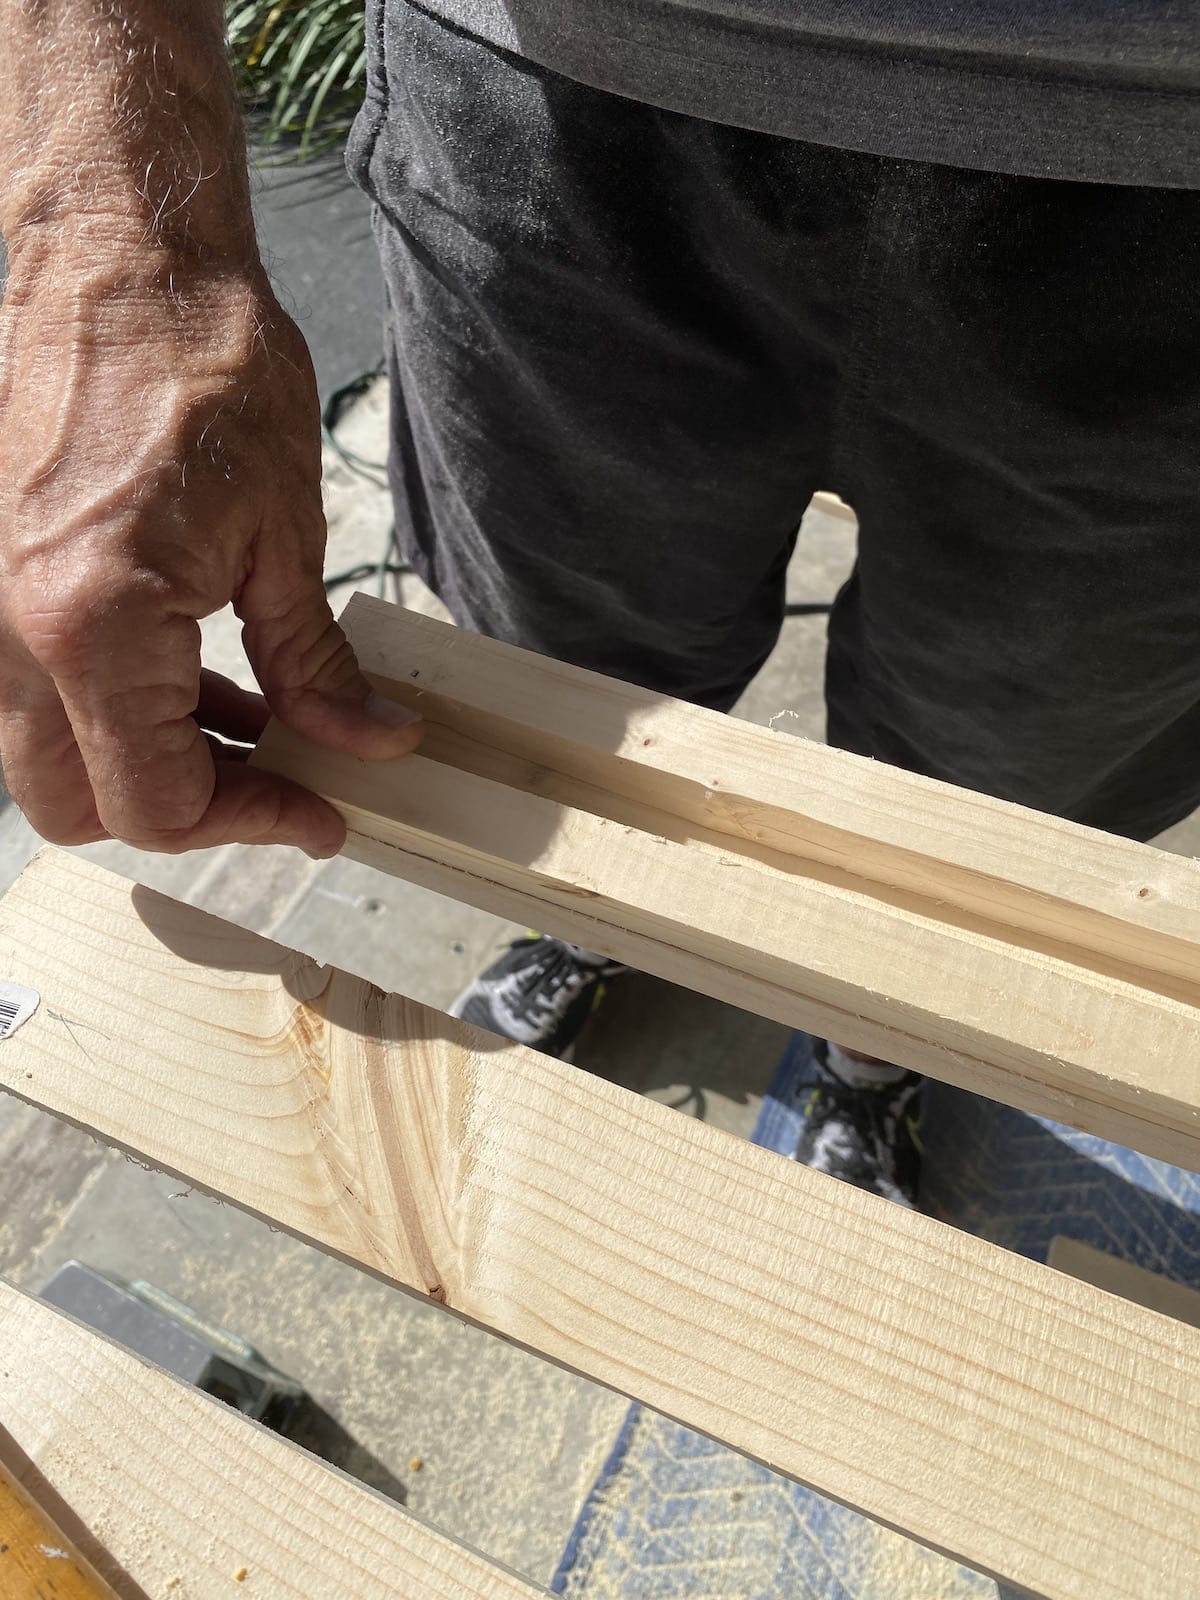
Step 6 –
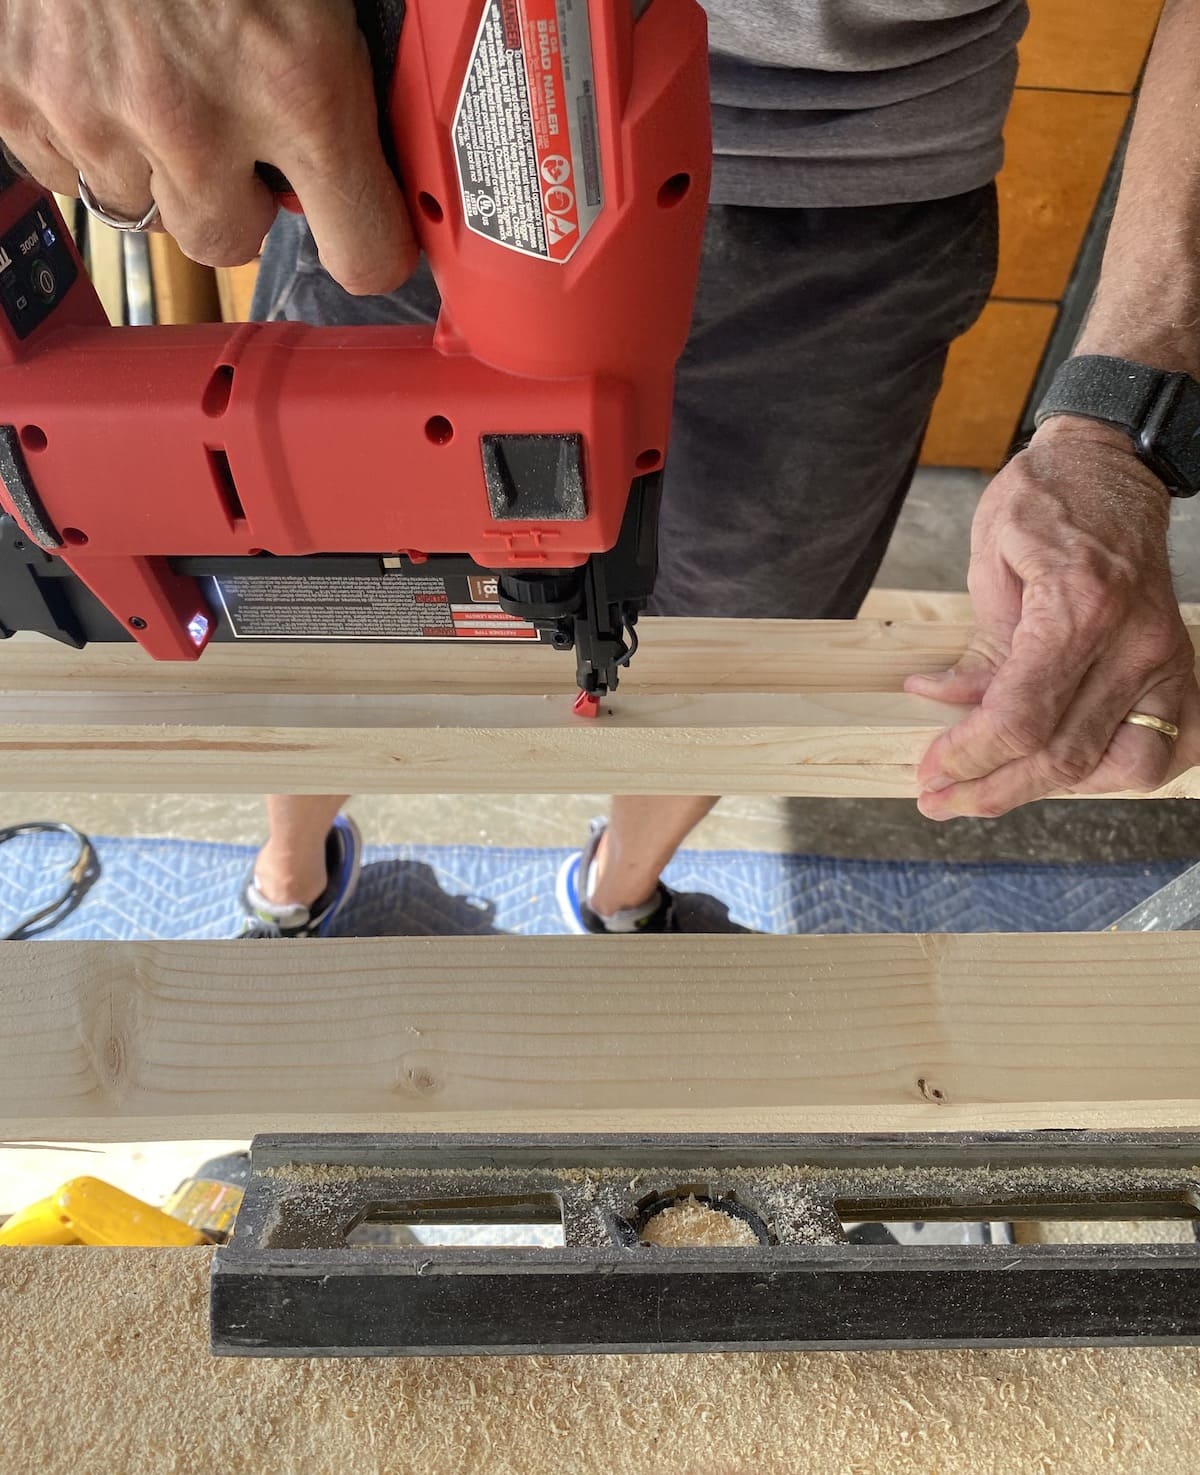
Using the 3/ 4″ pieces left from the cutting in step 2, place them on top of a 2 1/2″ piece as shown in the photo below. Then take an additional 2 1/4″ piece and place on top of this (as shown) to sandwich the pieces together. You’ll be making square legs that will measure 2 1/4″ in diameter. Repeat this process to make 4 table legs.
Put the legs together with a nail gun and it will go rather quickly!
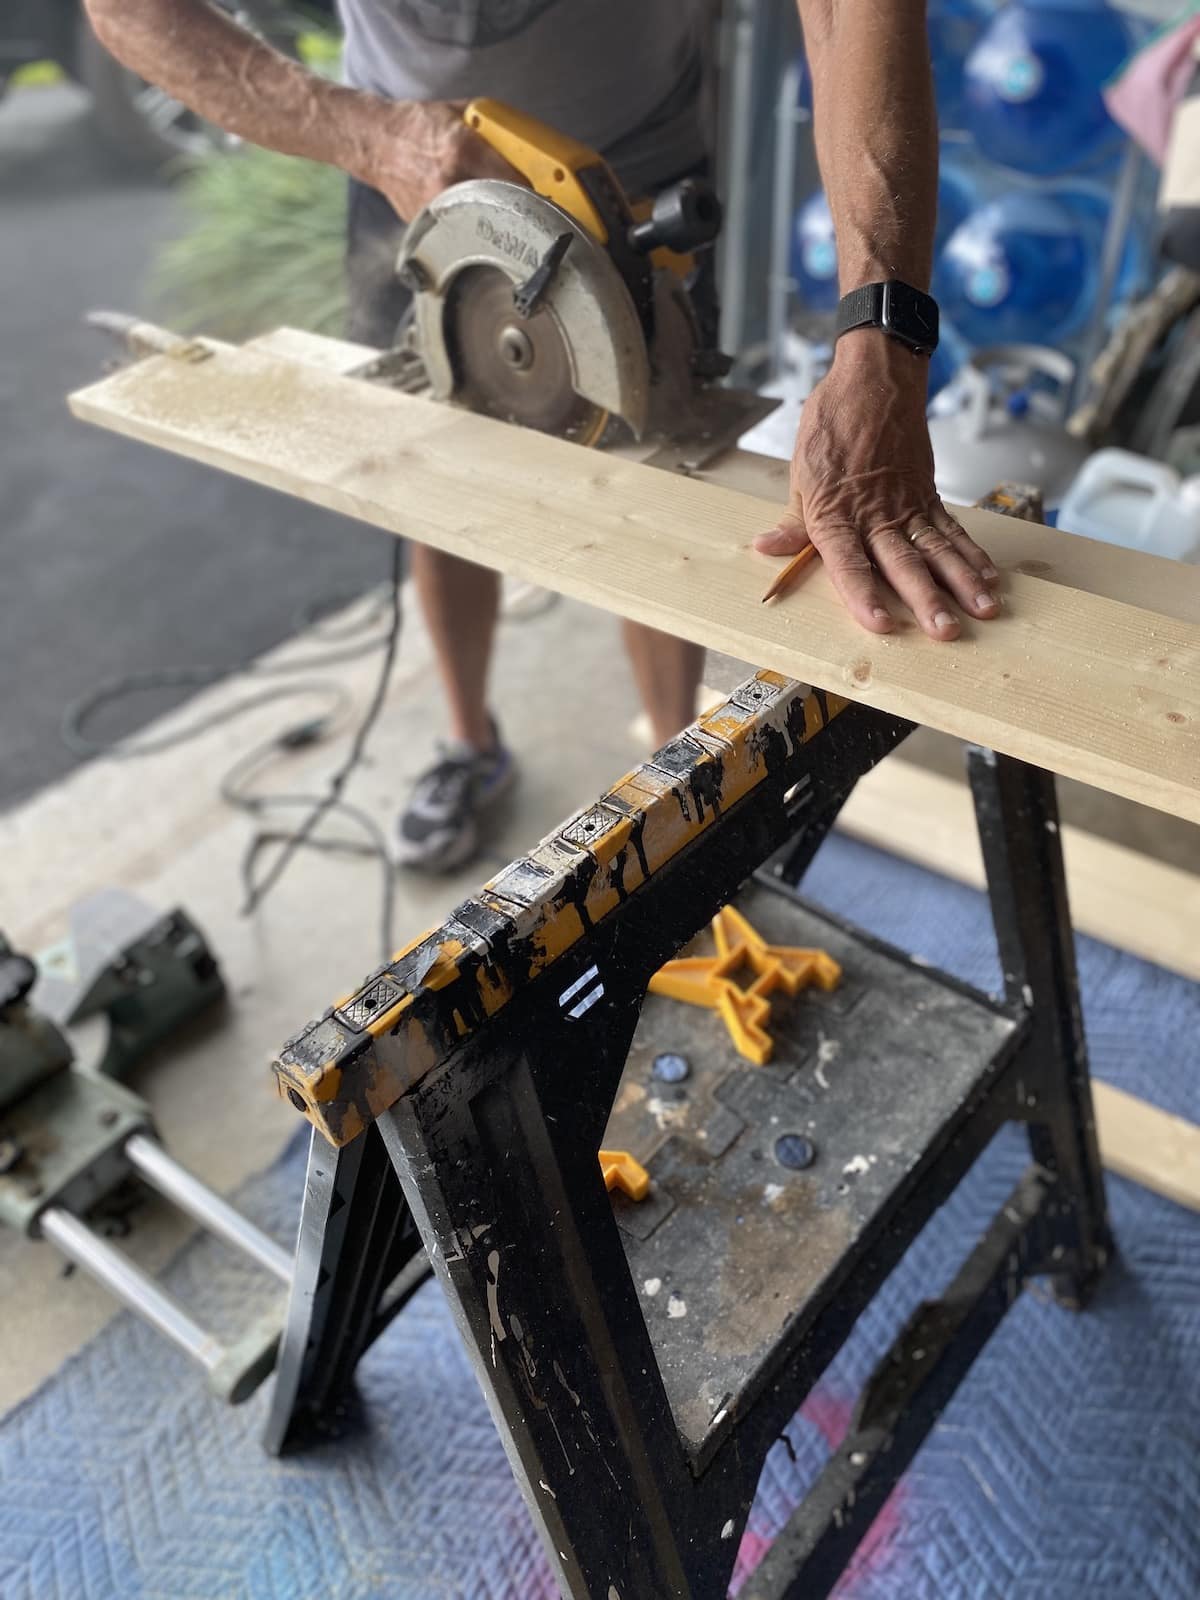
Step 7 –
Trim the legs to 35″ in height, or whatever height you would like your table to be once the top is attached.

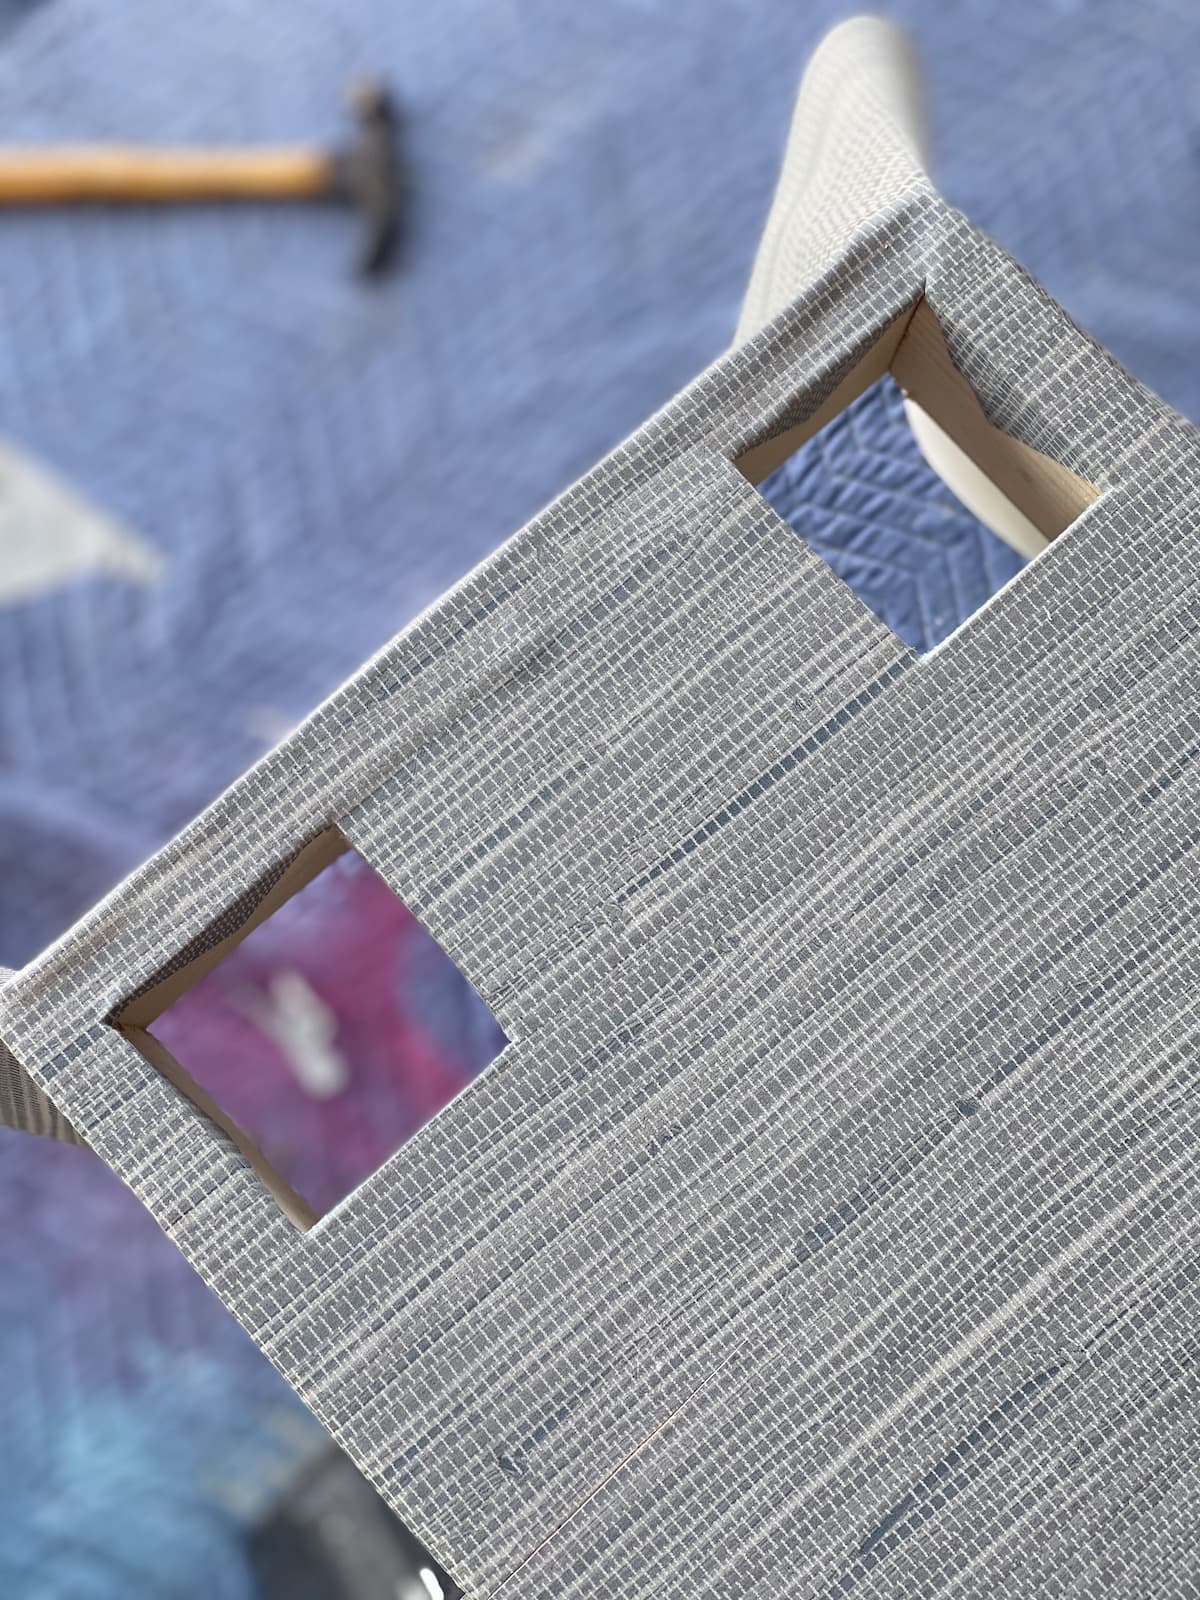
Step 8 –
In this photo you’ll see the construction of the four legs and the upper shelf. The bottom shelf will be notched at all four corners to allow for the legs to slide through. Use a circular saw to notch each corner to accommodate the legs. Each opening for the legs will measure 2 1/4″ square.

Below you see the opening (notching) for the table legs on the bottom shelf. Once the bottom shelf was wrapped in wood as in step #4, the wallpaper was added.
Step 9 –
Wrap, wrap and wrap…smoothing along the way with either a wallpaper smoother or a credit card!

Wrap everything that will show in the vinyl grasscloth wallpaper leaving enough room in the bottom shelf notches for the legs to slide though.
Step 10 –
Attach each of the four legs to the top shelf from underneath using the National Hardware Decorative Hinges
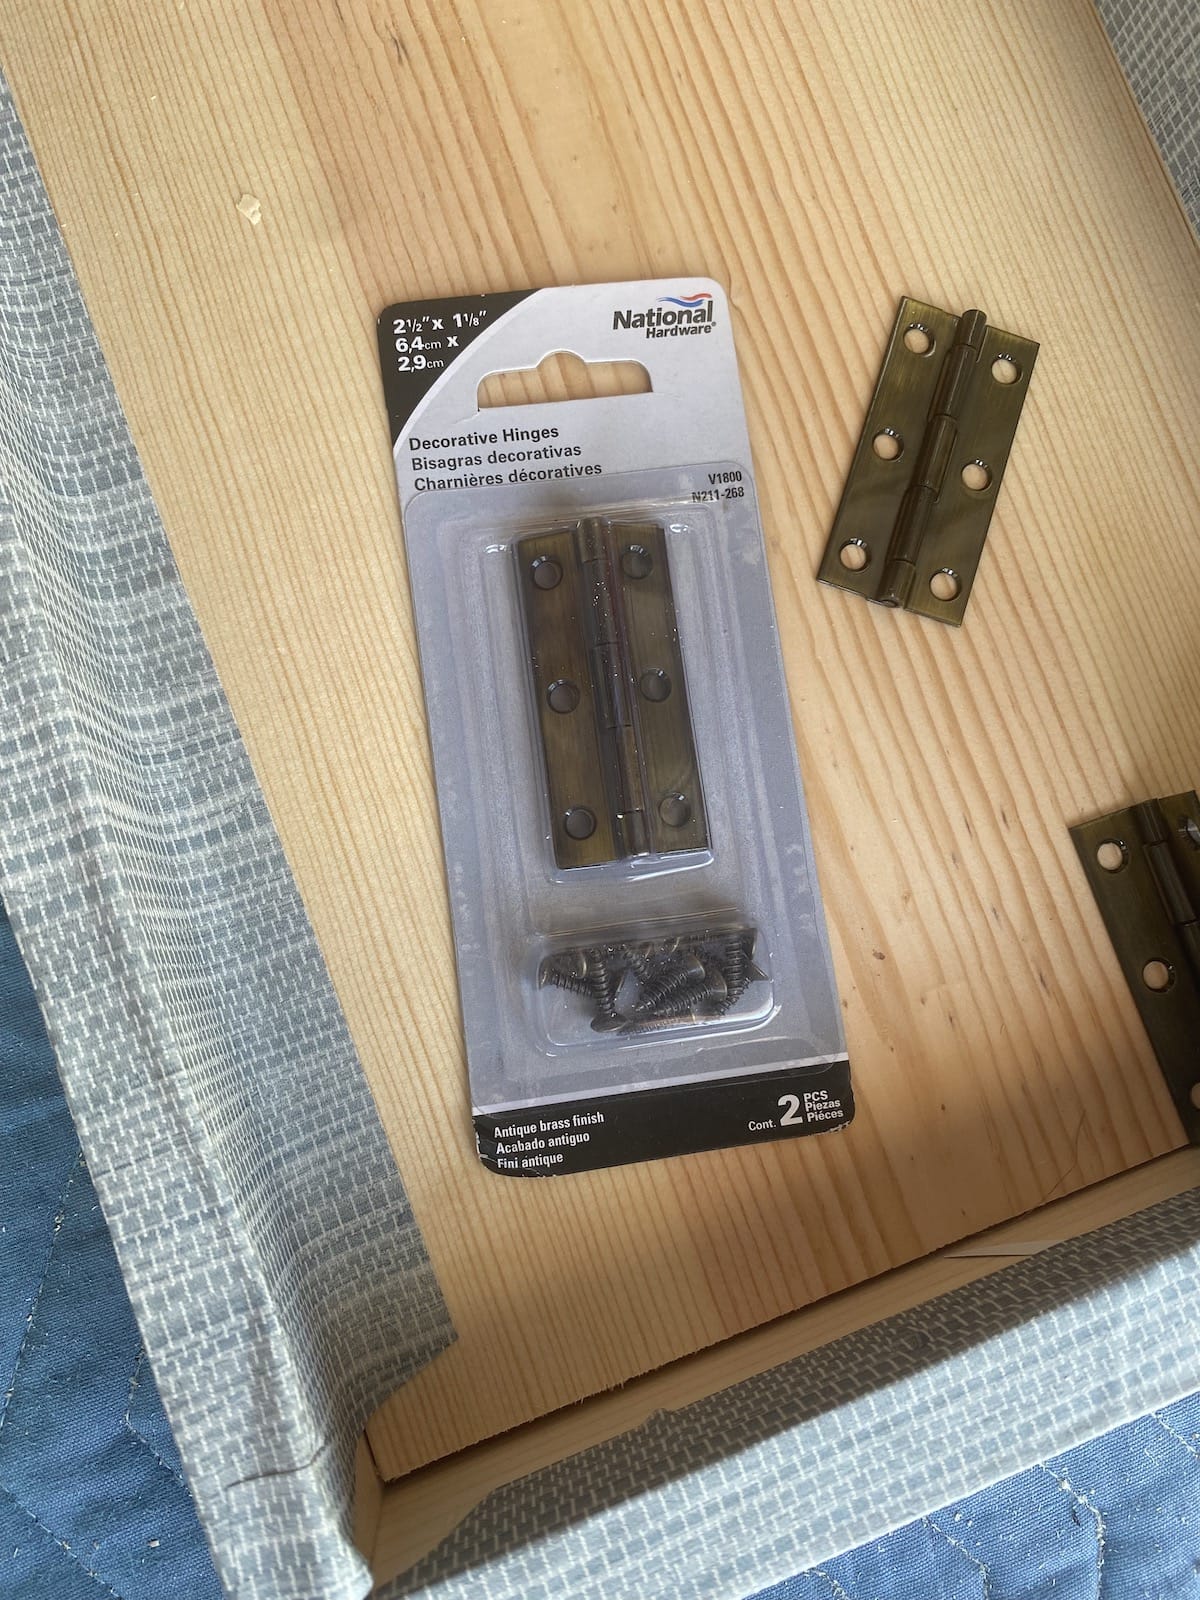
Attach the decorative hinges using a screw gun. For extra stability, angle brackets can also be added if necessary.
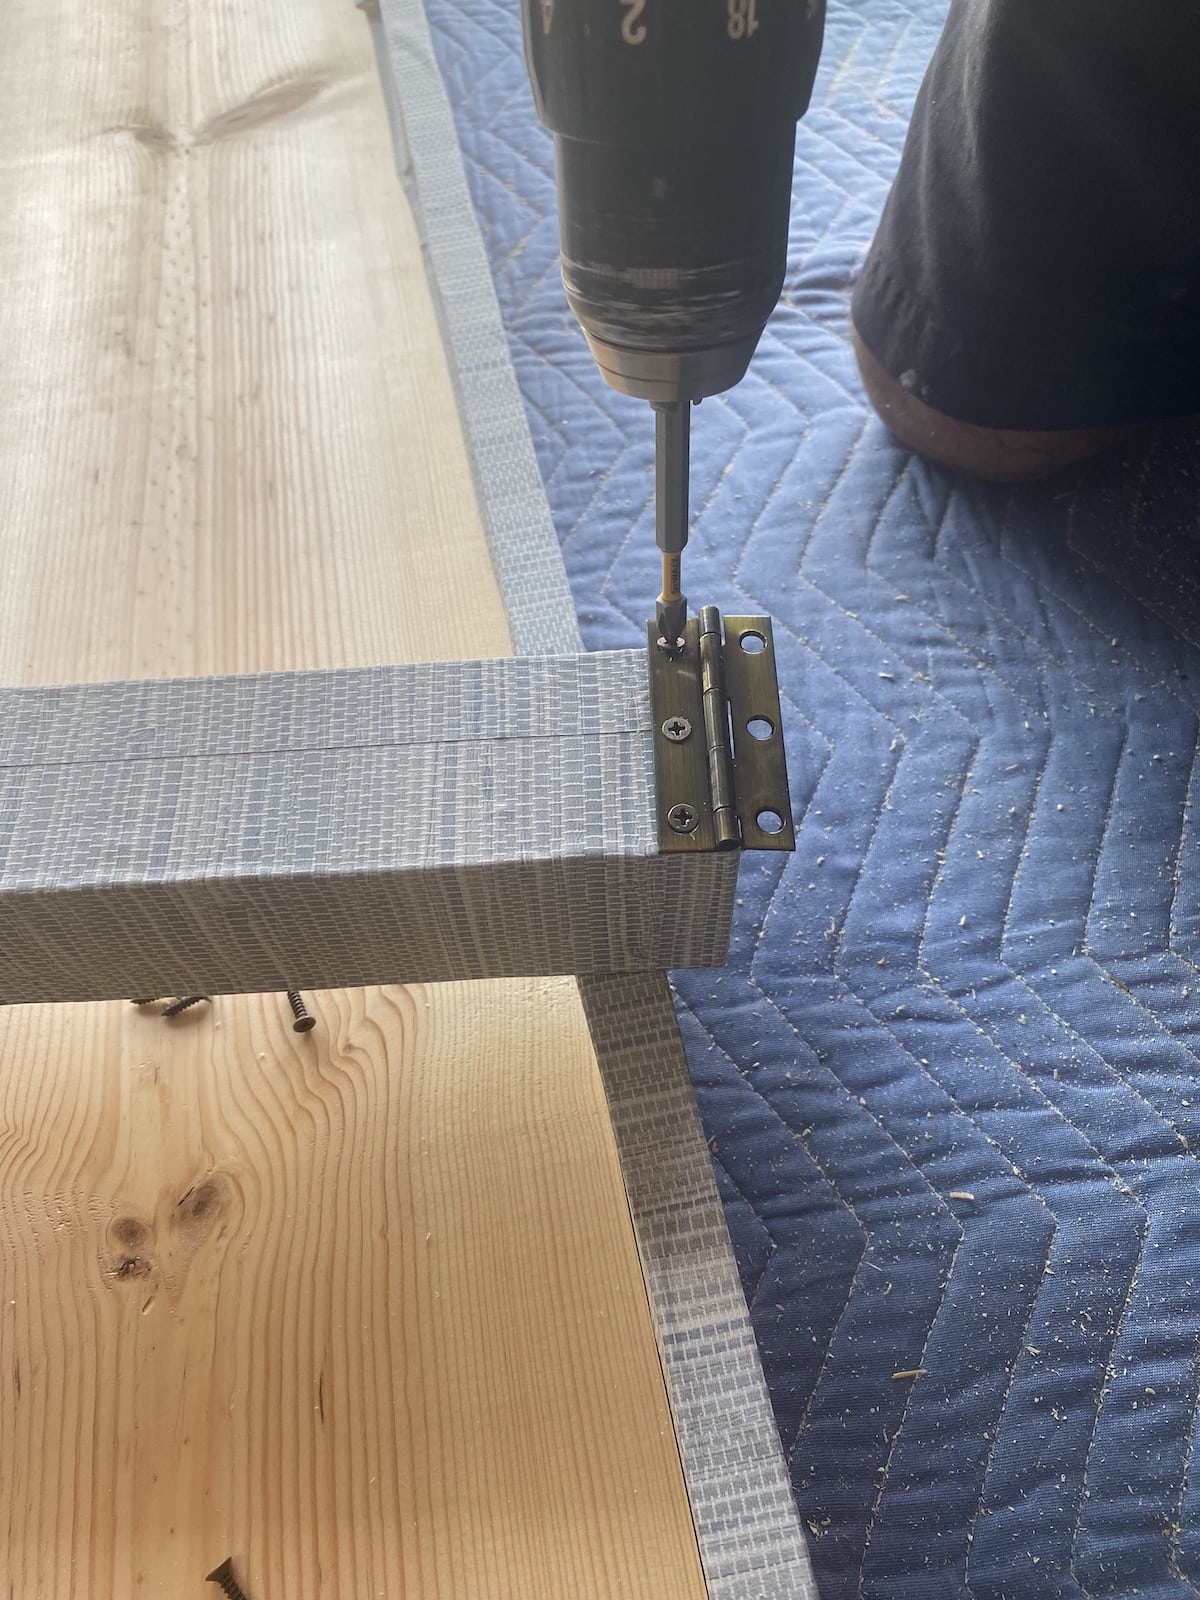

Step 11 –
Once you’ve attached the four legs to the top shelf, slide the bottom shelf over the four legs inside of the notched areas. As a result the space between the shelves will need to be about six inches. Then attach and secure the bottom shelf from the underside with one of the National Hardware Decorative Hinges in each corner.
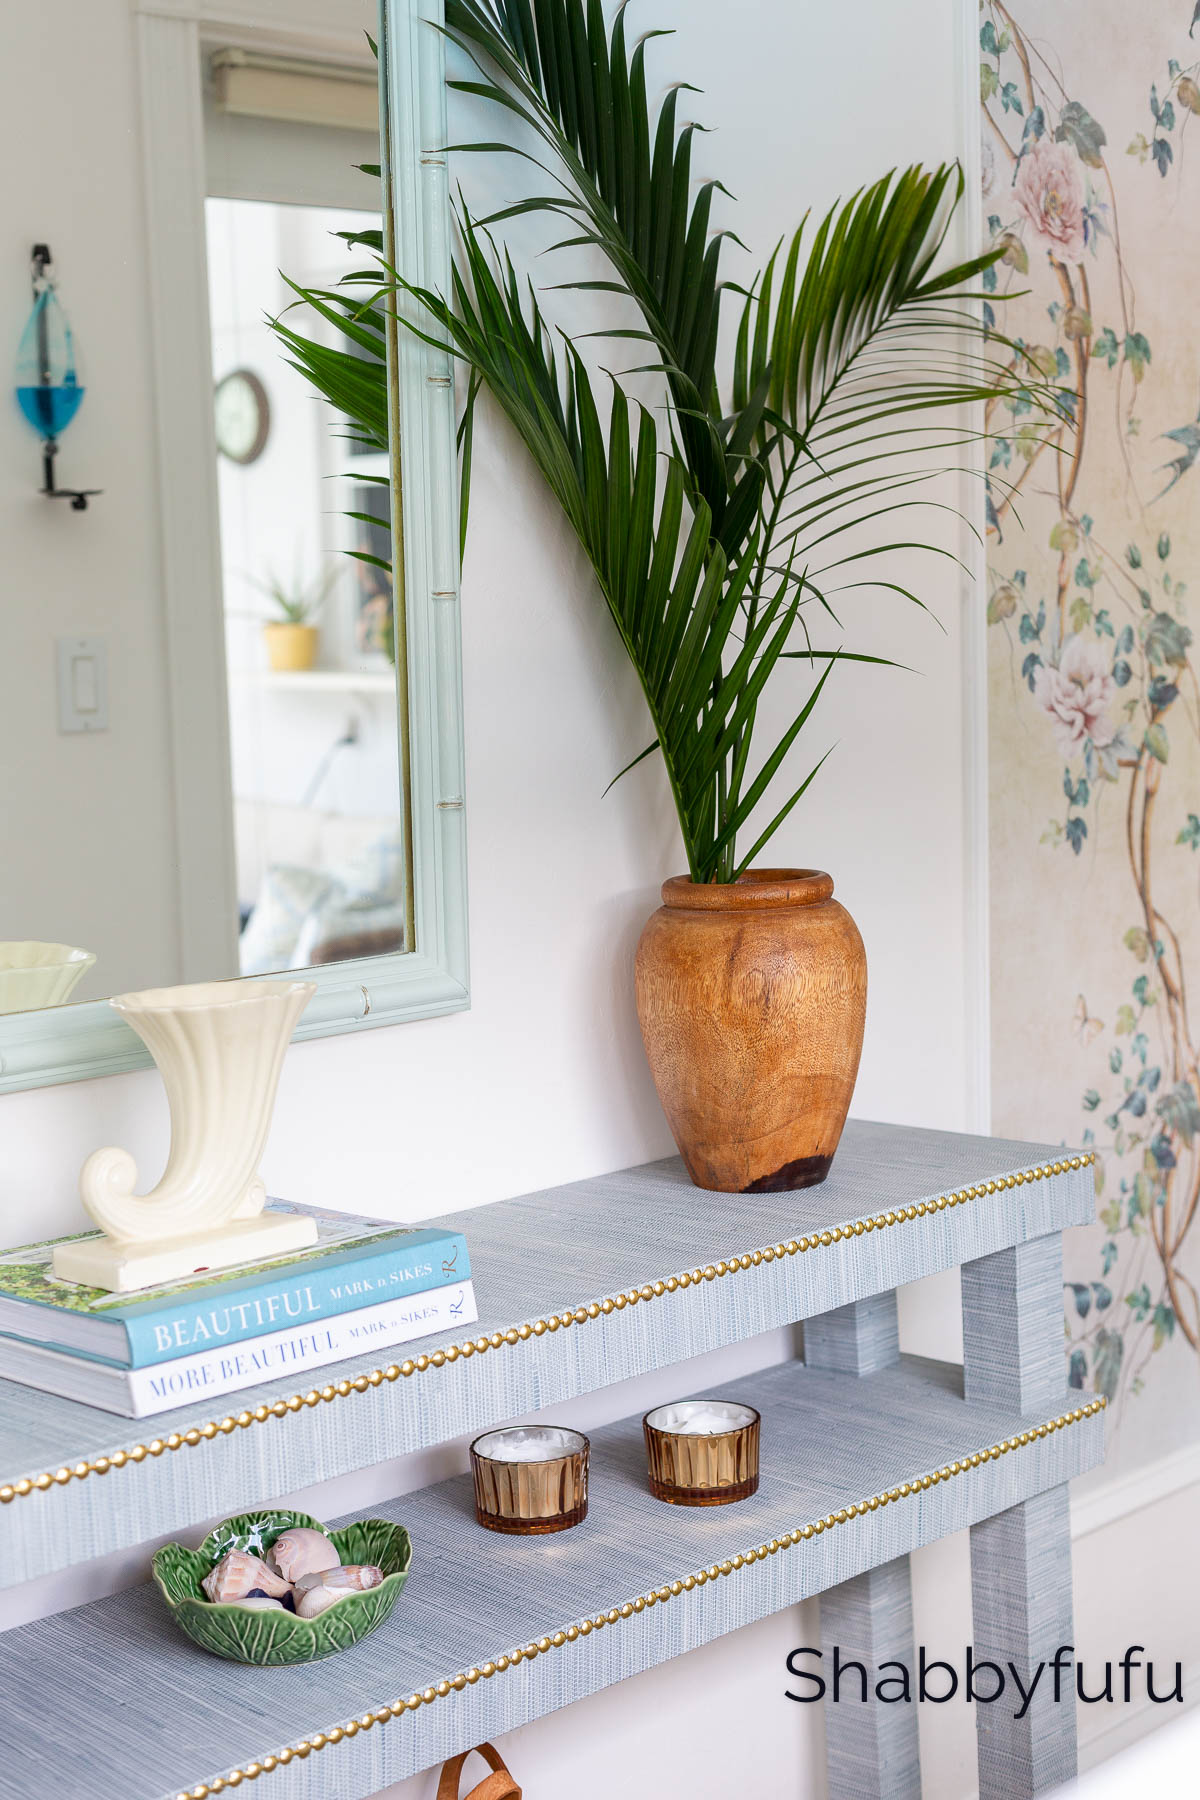
A Finishing Touch To The Designer Grasscloth Console Table!
The table construction is now complete! After we finished we decided to add to add a row of Brass Nailhead Trim to the rim of both shelves.

Below you can see how the bottom legs were pushed through to create the second shelf!

Ideas For Decorating A Long Foyer
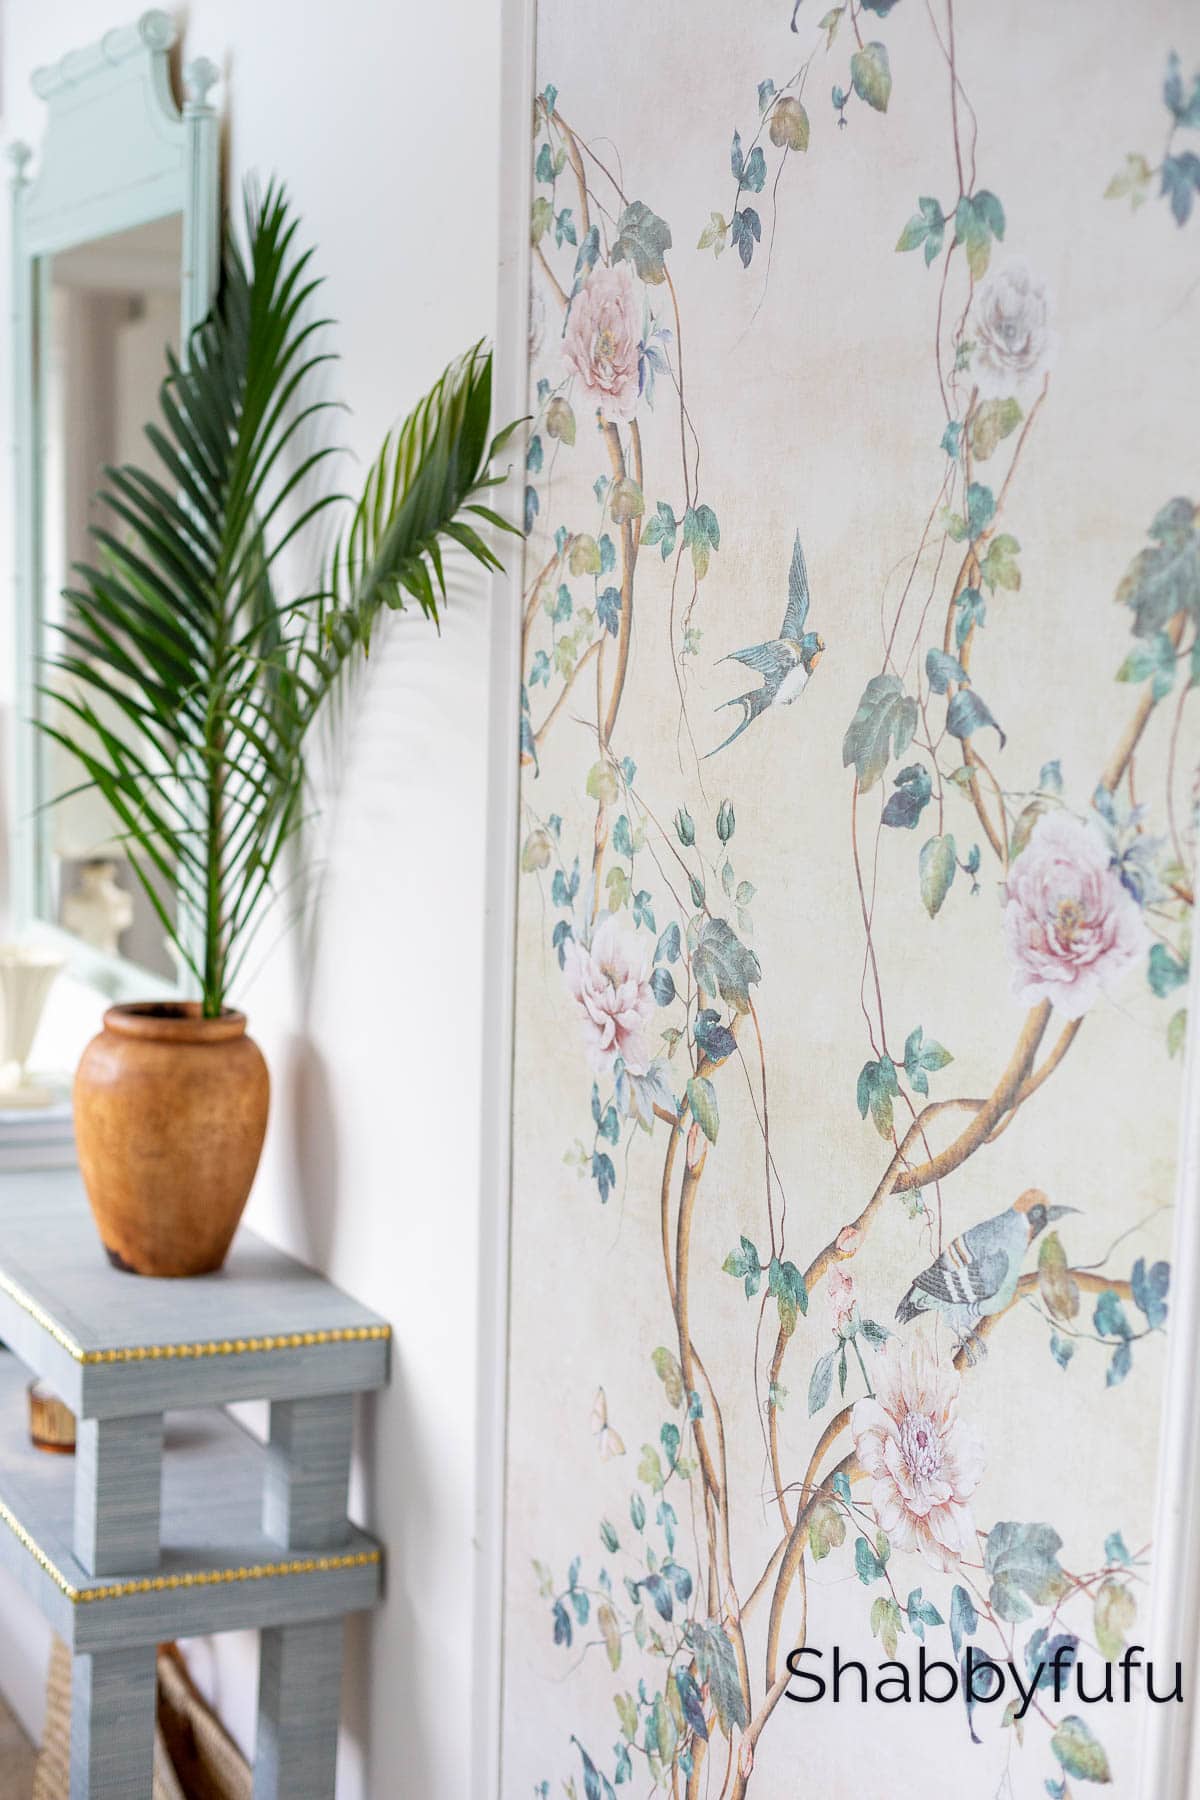
In addition to the designer grasscloth console table idea I knew that I wanted to make this foyer more of a room, rather than a bland place that you just pass through. As mentioned, this hallway faces the pool and garden…so a tropical touch was on my radar. This Gracie Wallpaper dupe was settled on, after getting some samples and communicating with the overseas seller.

While it’s gorgeous peel and stick wallpaper I didn’t want to do the entire wall or the typical half wall with a chair rail underneath. I ordered two panels measuring 30″ wide by 60″ tall and we put picture frame molding around them.
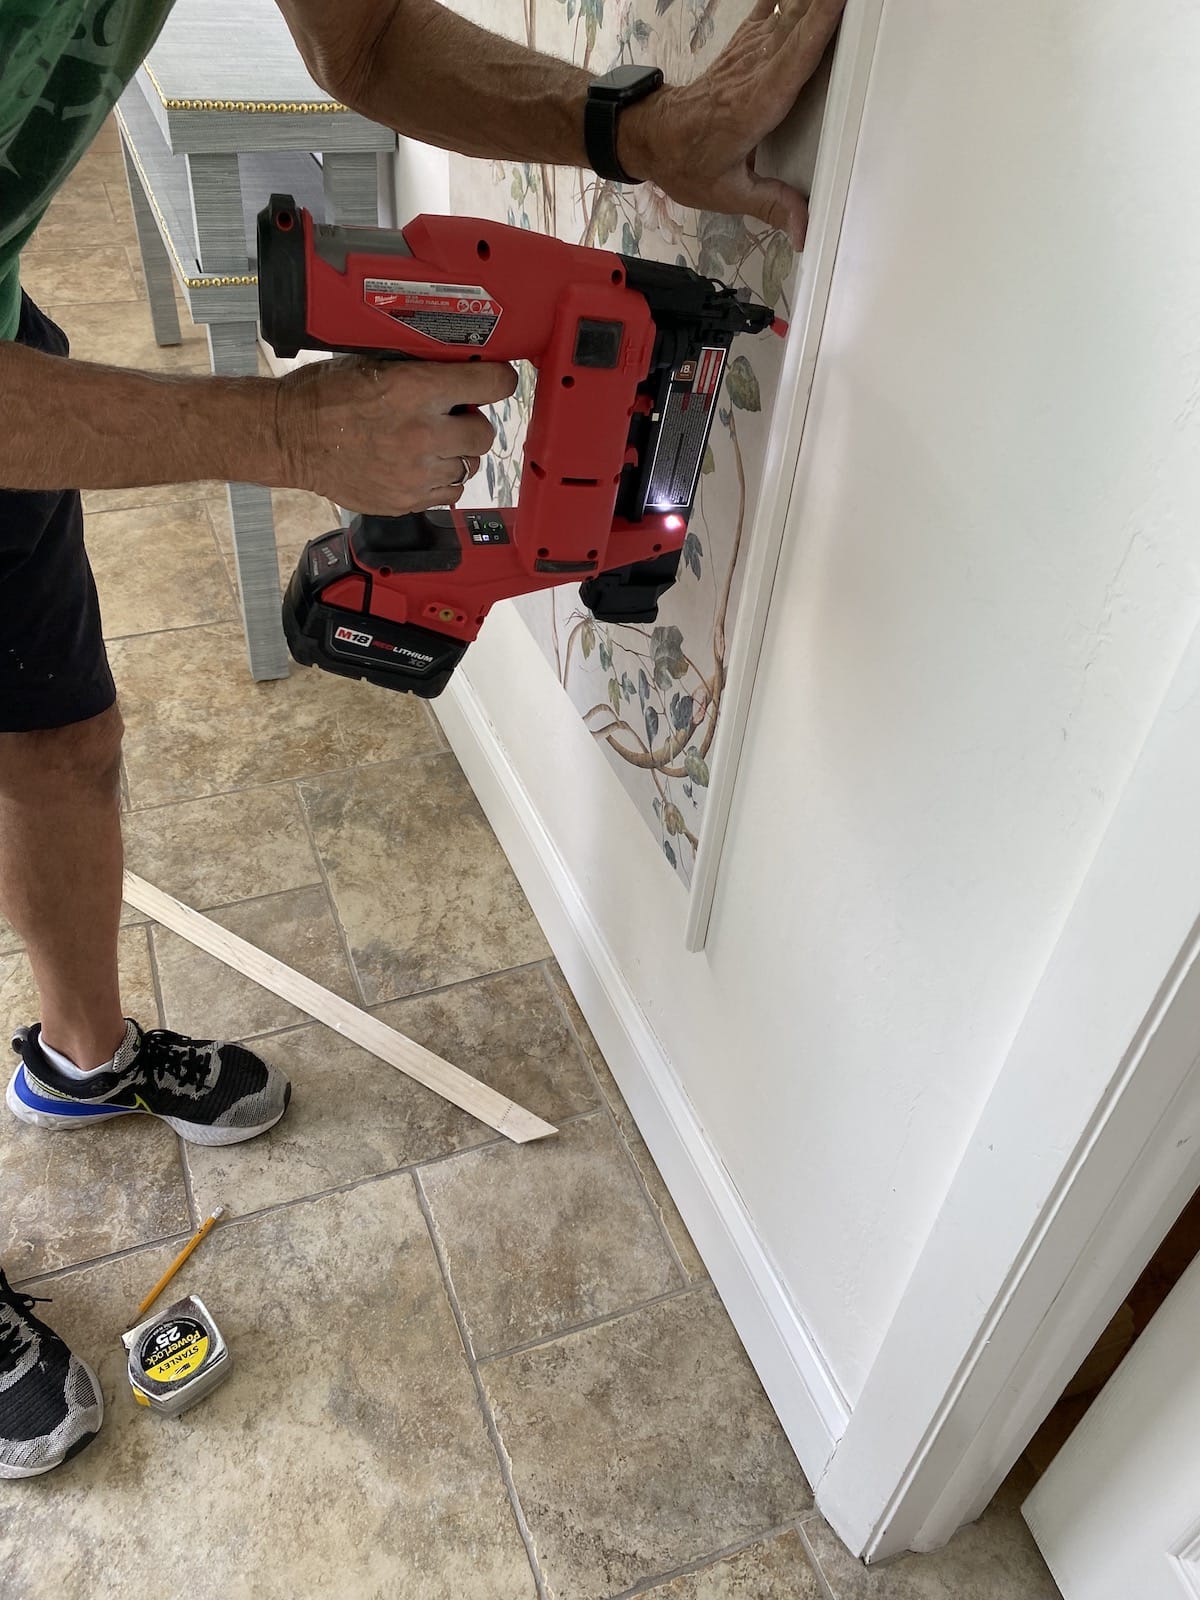
It’s not overwhelming and doesn’t look like what I see so many others do. Best part is that it’s peel and stick and went on easily in under 1/2 hour. Should I tire of it, just peel it off and do something new! In the meantime, these Chinoiserie wall panels really make this room come alive!

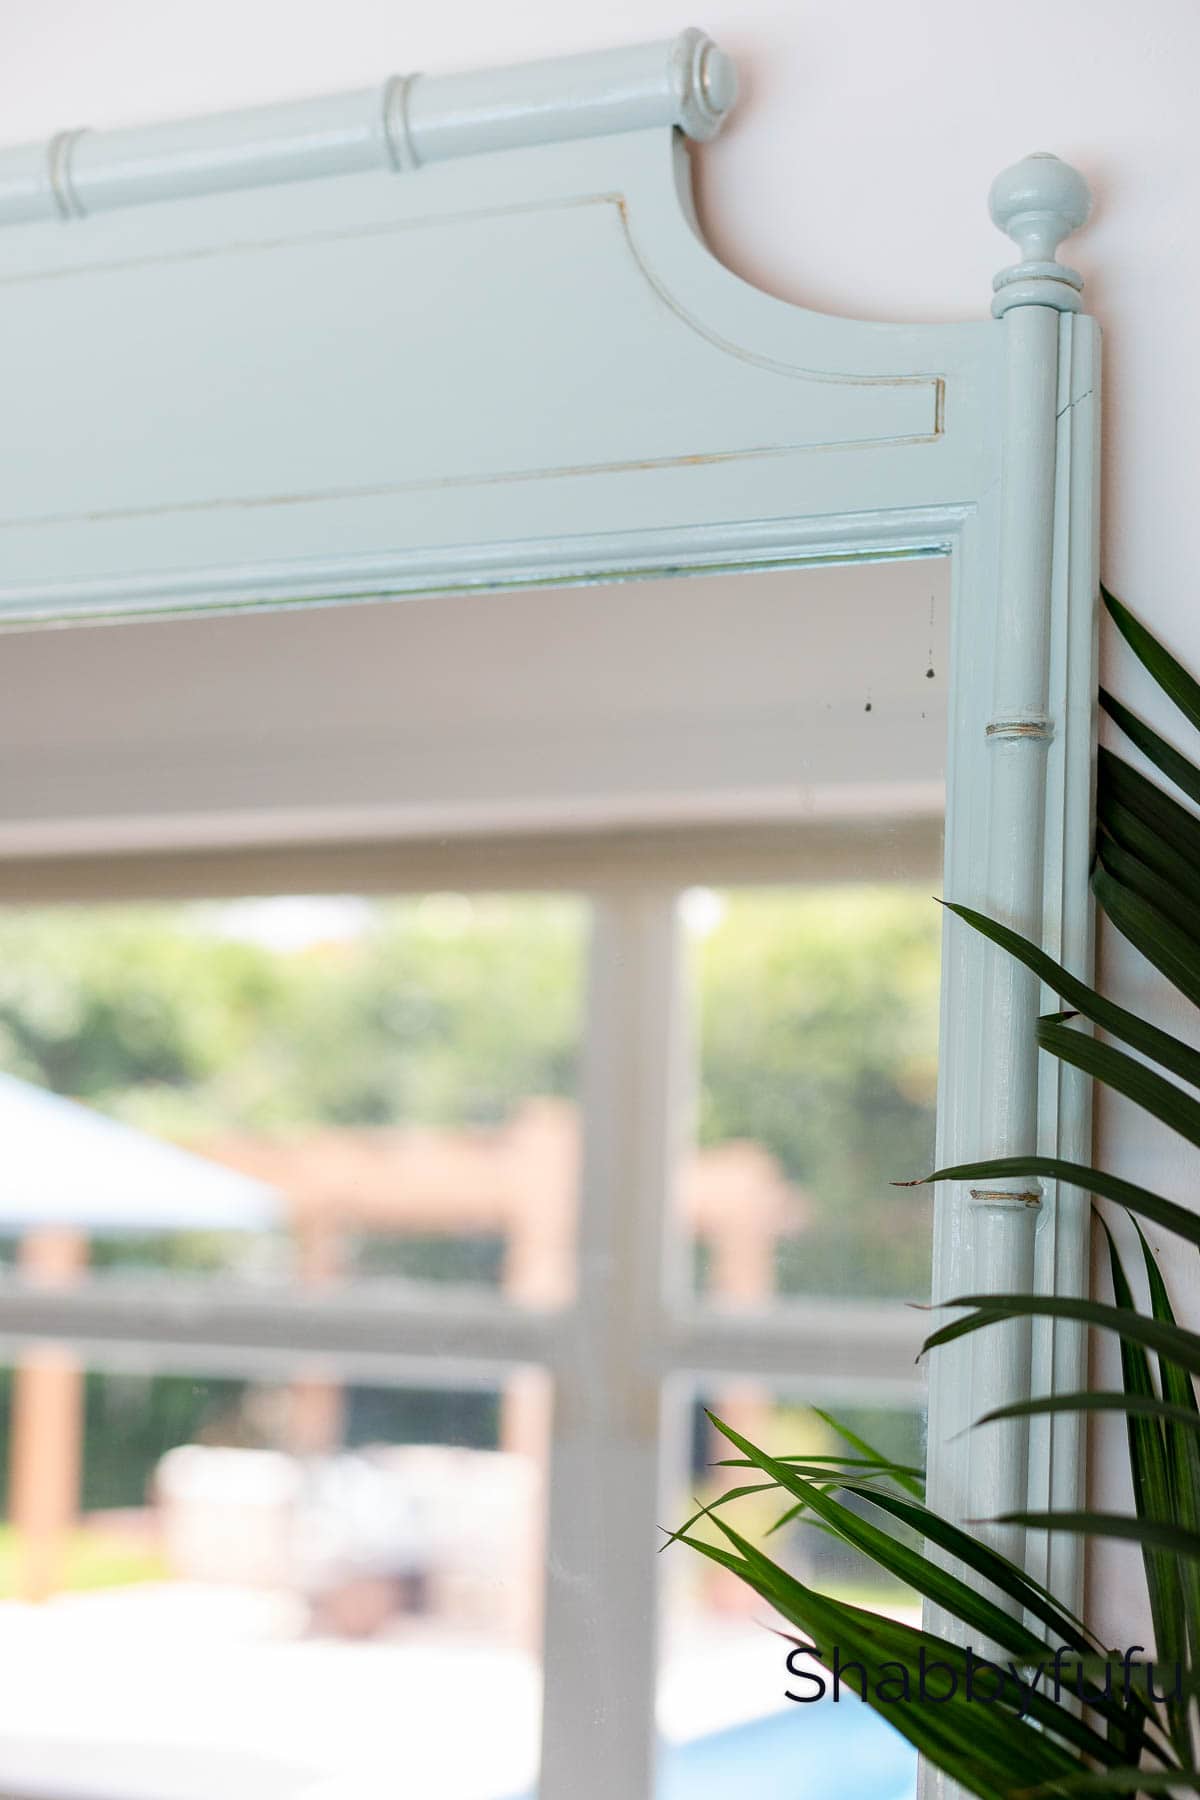
You may have noticed the green vintage bamboo mirror above. It was a $10 score about 6 months ago on FBMP and someone’s project that she never finished painting! I knew that I’d find a place for it and was happy to take it off her hands.
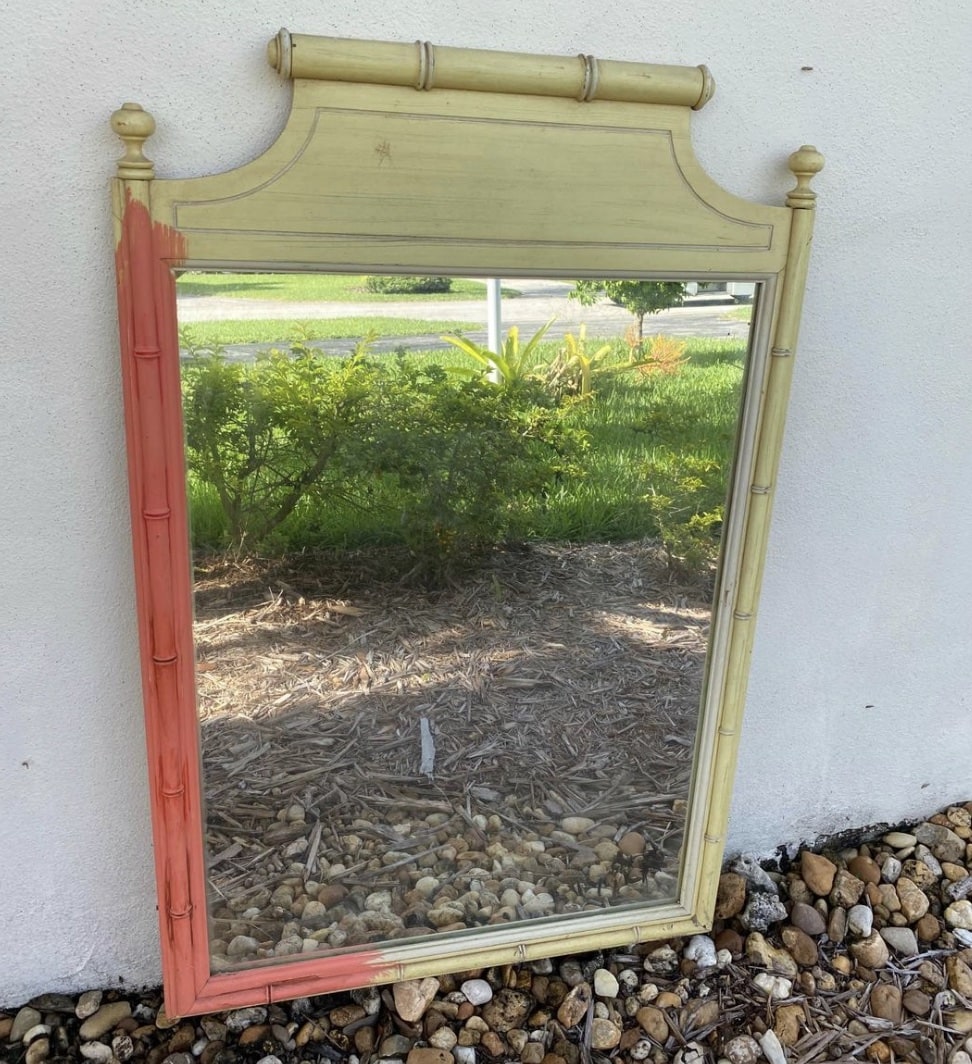
The color that I painted it is Benjamin Moore Palladian Blue, which I knew to be actually green. Just a bit of gold Rub N Buff and I love this piece now!
Styling The Room With The Designer Grasscloth Console Table
Here’s a view looking in the other direction towards the family room that lies beyond the French door. Everything on the table is something that I already owned and the palm leaves were clipped from my garden!

You truly can have a beautiful home on ANY budget with just a bit of patience, ingenuity and some elbow grease! I’m looking for a long runner for this hallway and haven’t found just the right one yet.

I hope that you’ve been inspired by this post, whether it’s the table itself or how to style a long foyer! The cost of this designer dupe? Right around $100 and looks like a million!
I love this finished table and want to make one for myself. I don’t understand why you used hinges on the legs where they joined the table. I think right angles would work as well if not better. Please explain.
Thank you, Kay
Hi Kay…I’m glad that you’re inspired to make one and I am just in love with the one that we made! Either could work, but we used the hinges because once they are screwed in they don’t move in this application and hold well. The right angles would work as well, but we found that they would have shown from the side and didn’t use them.
I just love the table. It is absolutely gorgeous. I have a long hall that one would fit perfectly in. And, ….the grass cloth just put the finishing touch to it. Also the mirror, what a find for that area!
I have to tell you Brenda that it’s one of my very favorite pieces that we’ve ever made! I love that hallway now that was formerly so blah!
I absolutely love you wall paper with the birds. It’s beautiful.
Thanks so much Linda…it’s enchanting paper!