Rustic Wood Shelves – Easy DIY From A Pallet
This post may contain affiliate links. For more information, please see our disclosure policy.
In this post you’ll learn how to make rustic wood shelves from a pallet. An easy DIY project and this framed out shelf is handy for display!
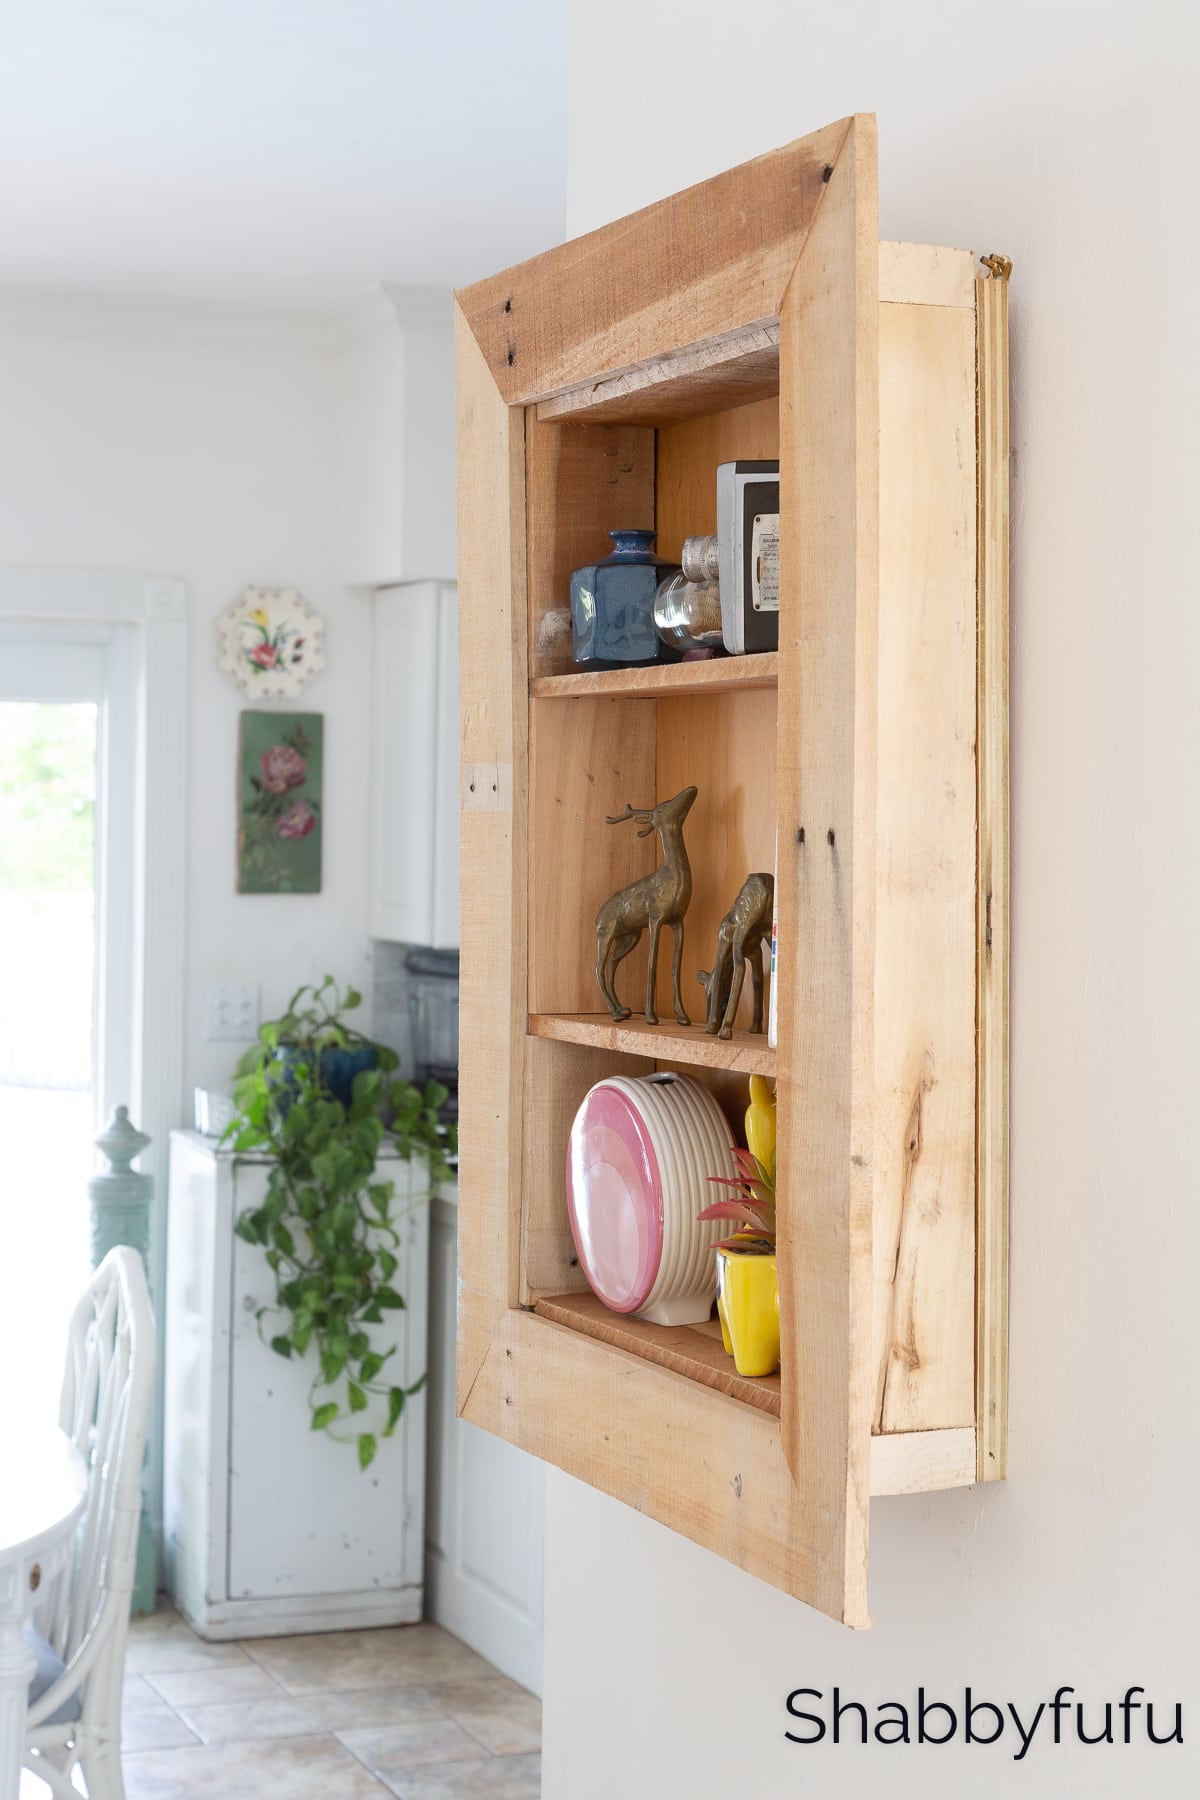
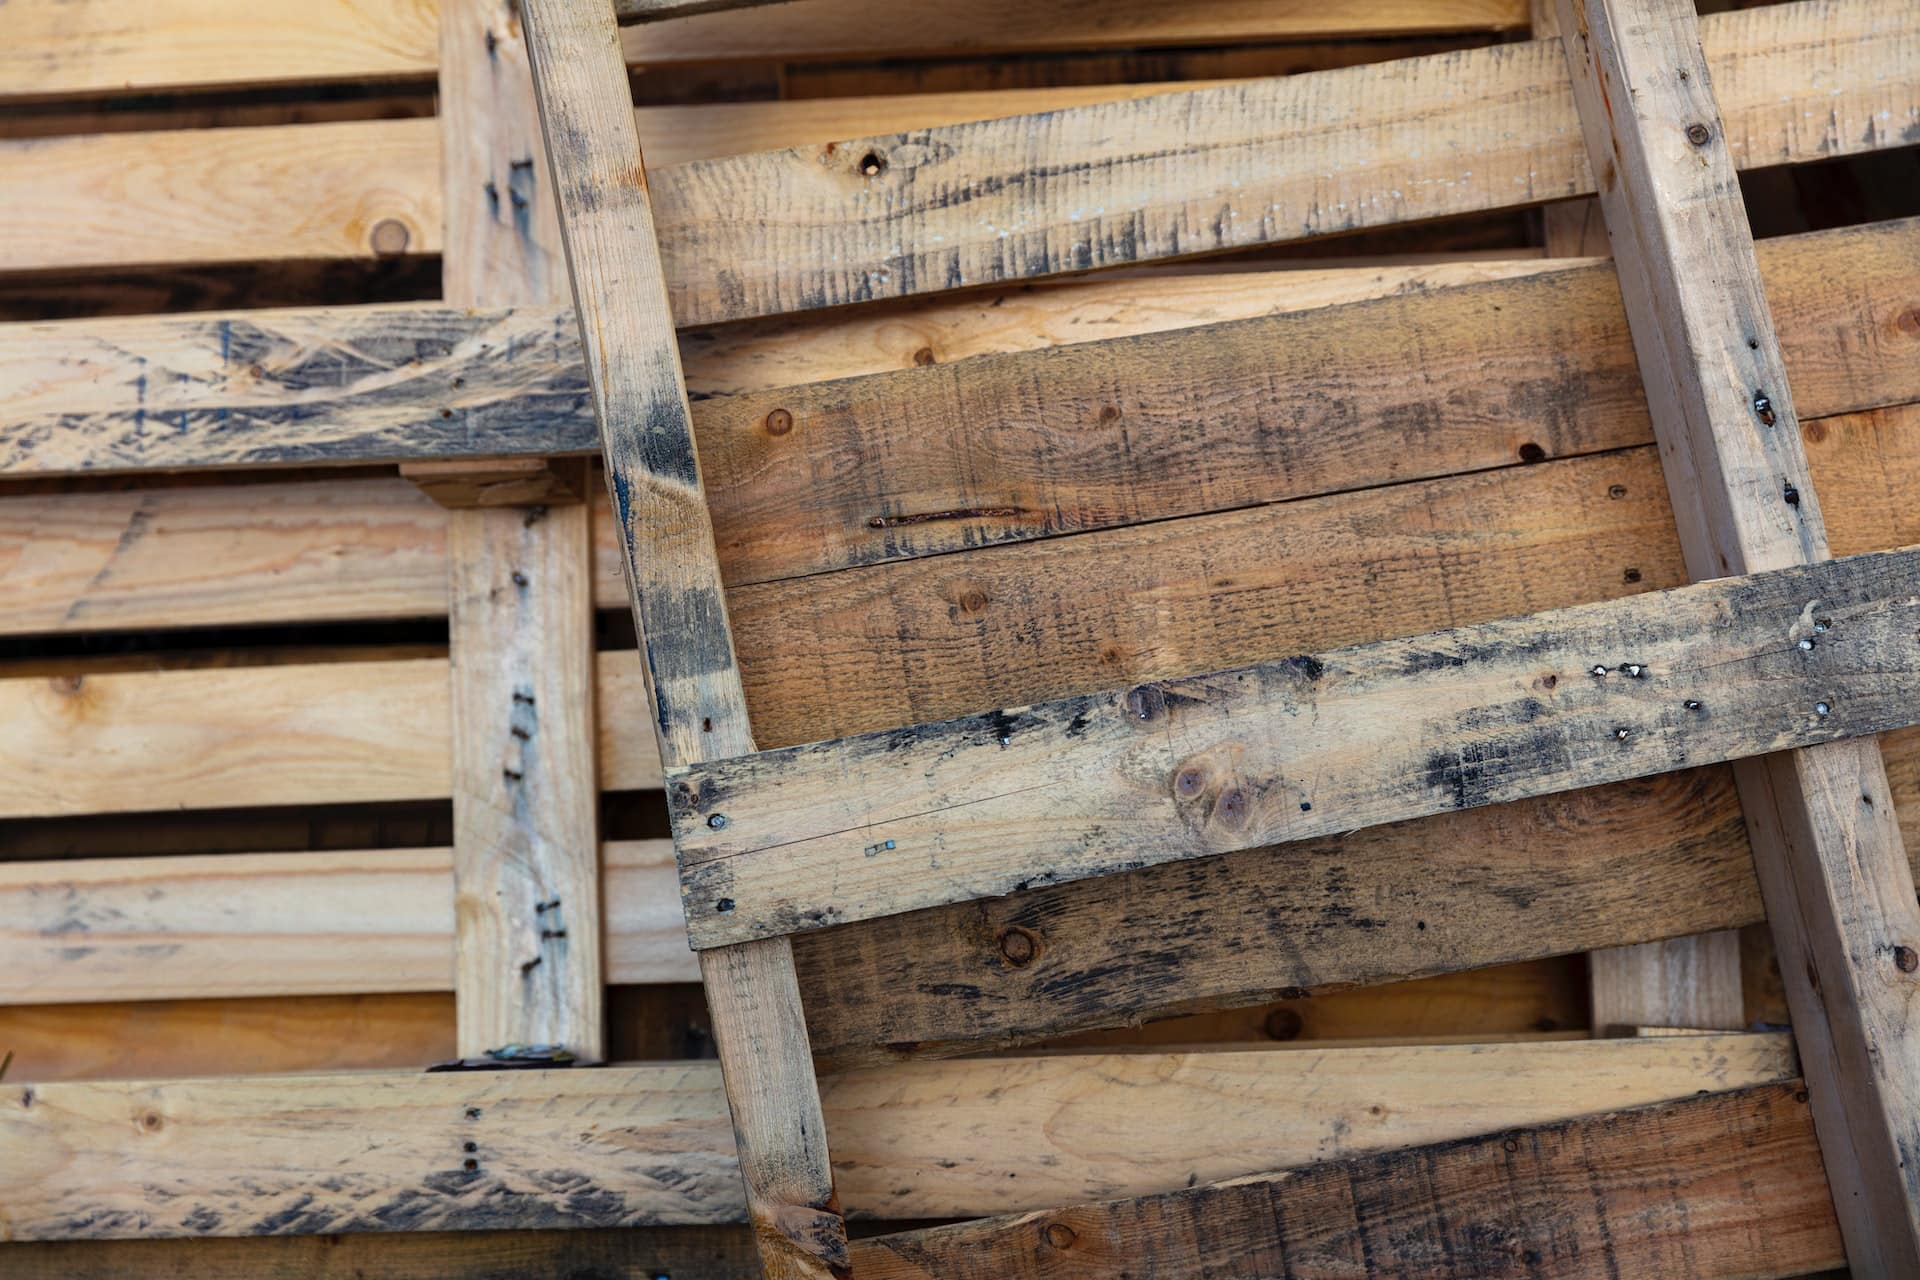
Have you ever purchased heavy items from the home improvement store? If so, then you know they are often delivered on a pallet. Since we are about to undertake a full kitchen remodel, that’s what inspired us to make this shelf system! We have had several items delivered sitting on wood pallets and they were just too good to scrap. Now we have this cute shelf that is framed out and with the rustic look it’s perfect for displaying collectibles! Let’s learn how easy it was to make this and we hope that it inspires you to create the look too!
This is a paid post in behalf of Spectrum Brands but the work and opinions expressed here are my own. As always, use the proper care and safety equipment when working with power tools.
How To Make Rustic Wood Shelves From A Pallet – DIY Instructions
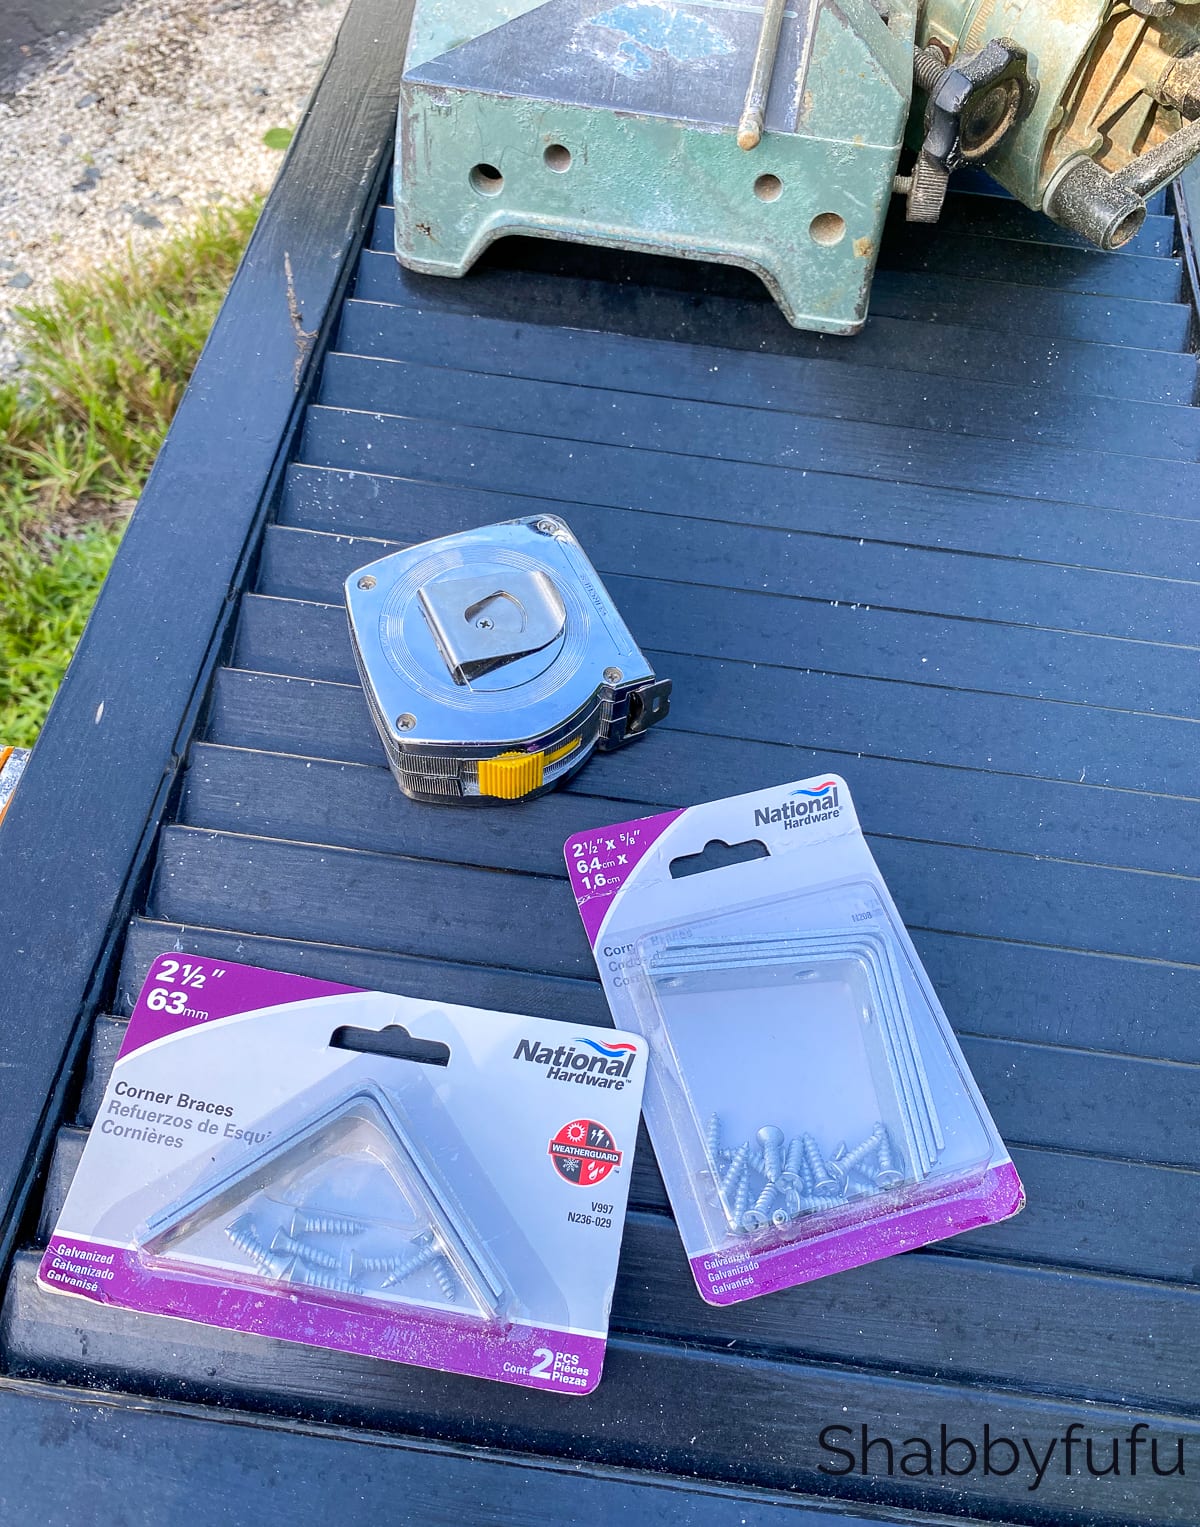
MATERIALS:
- One pallet
- Four – National Hardware 2 1/2″ Corner Braces (Galvanized)
- One – 25″ x 18″ piece of birch plywood
- Eight – 1 5/8″ deck screws
TOOLS:
- Mallet
- Hammer
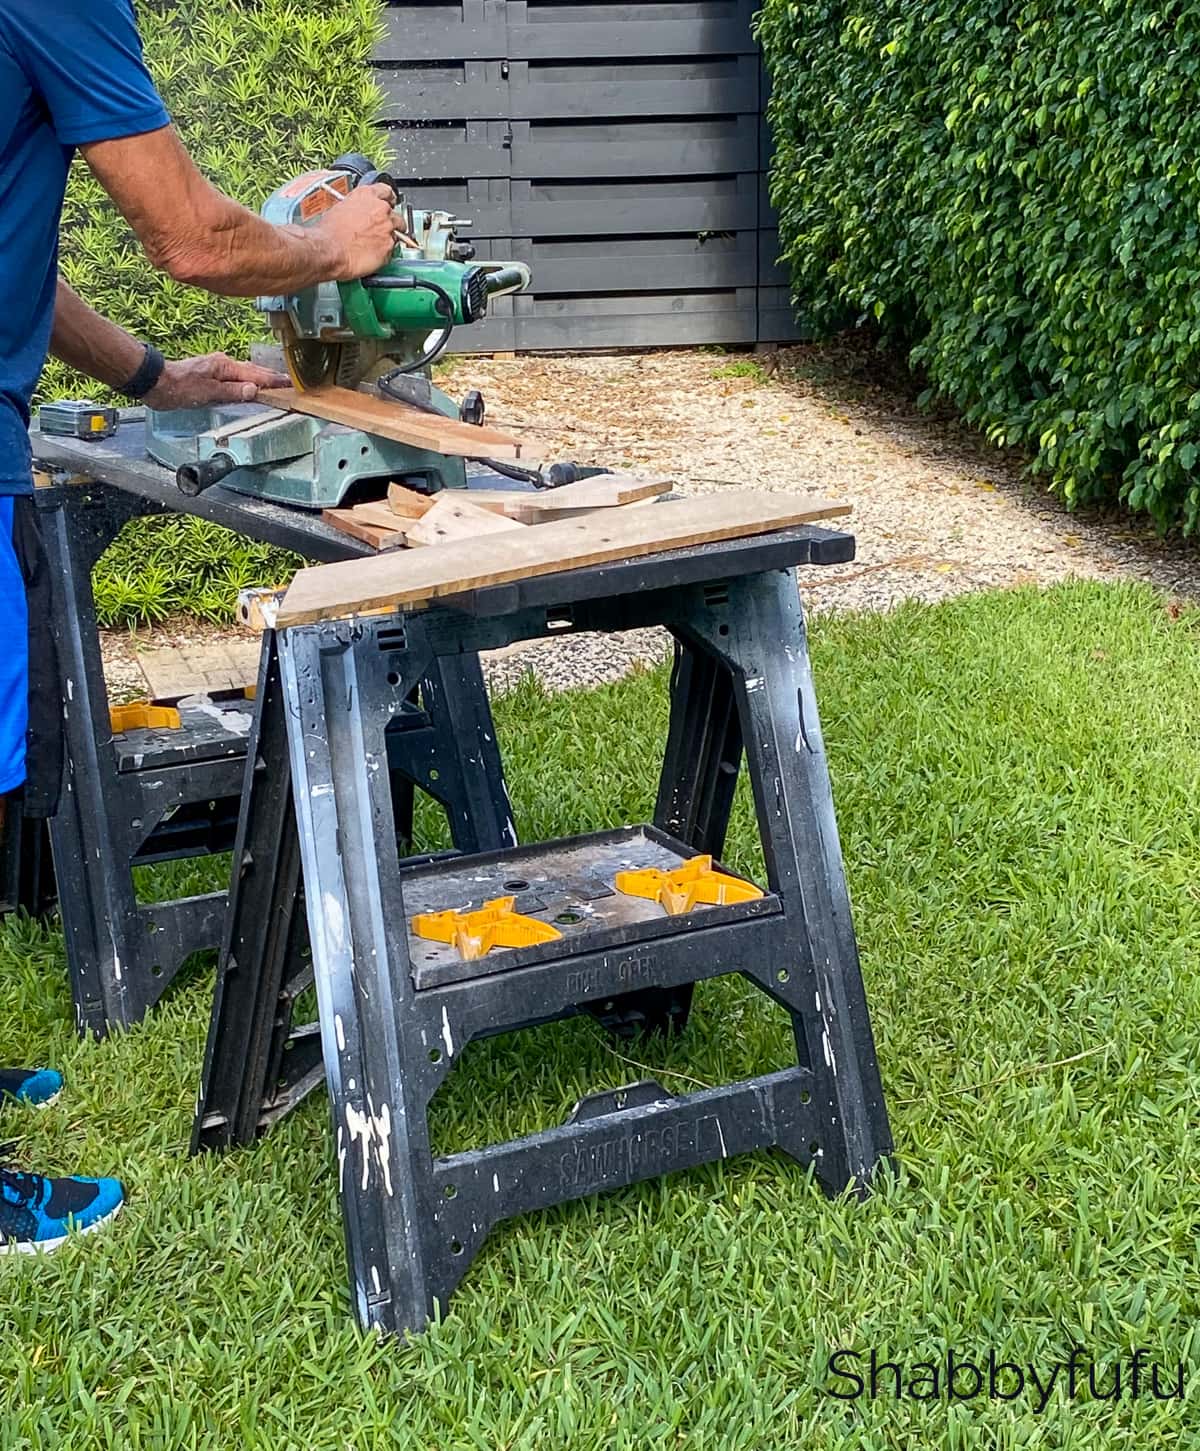
- Chop Saw (Mitre Saw)
- Circular Saw
- Screw Gun
- Nail Gun
- Tape Measure
- Pencil
BUILDING THE PALLET SHELF – INSTRUCTIONS
STEP 1 –
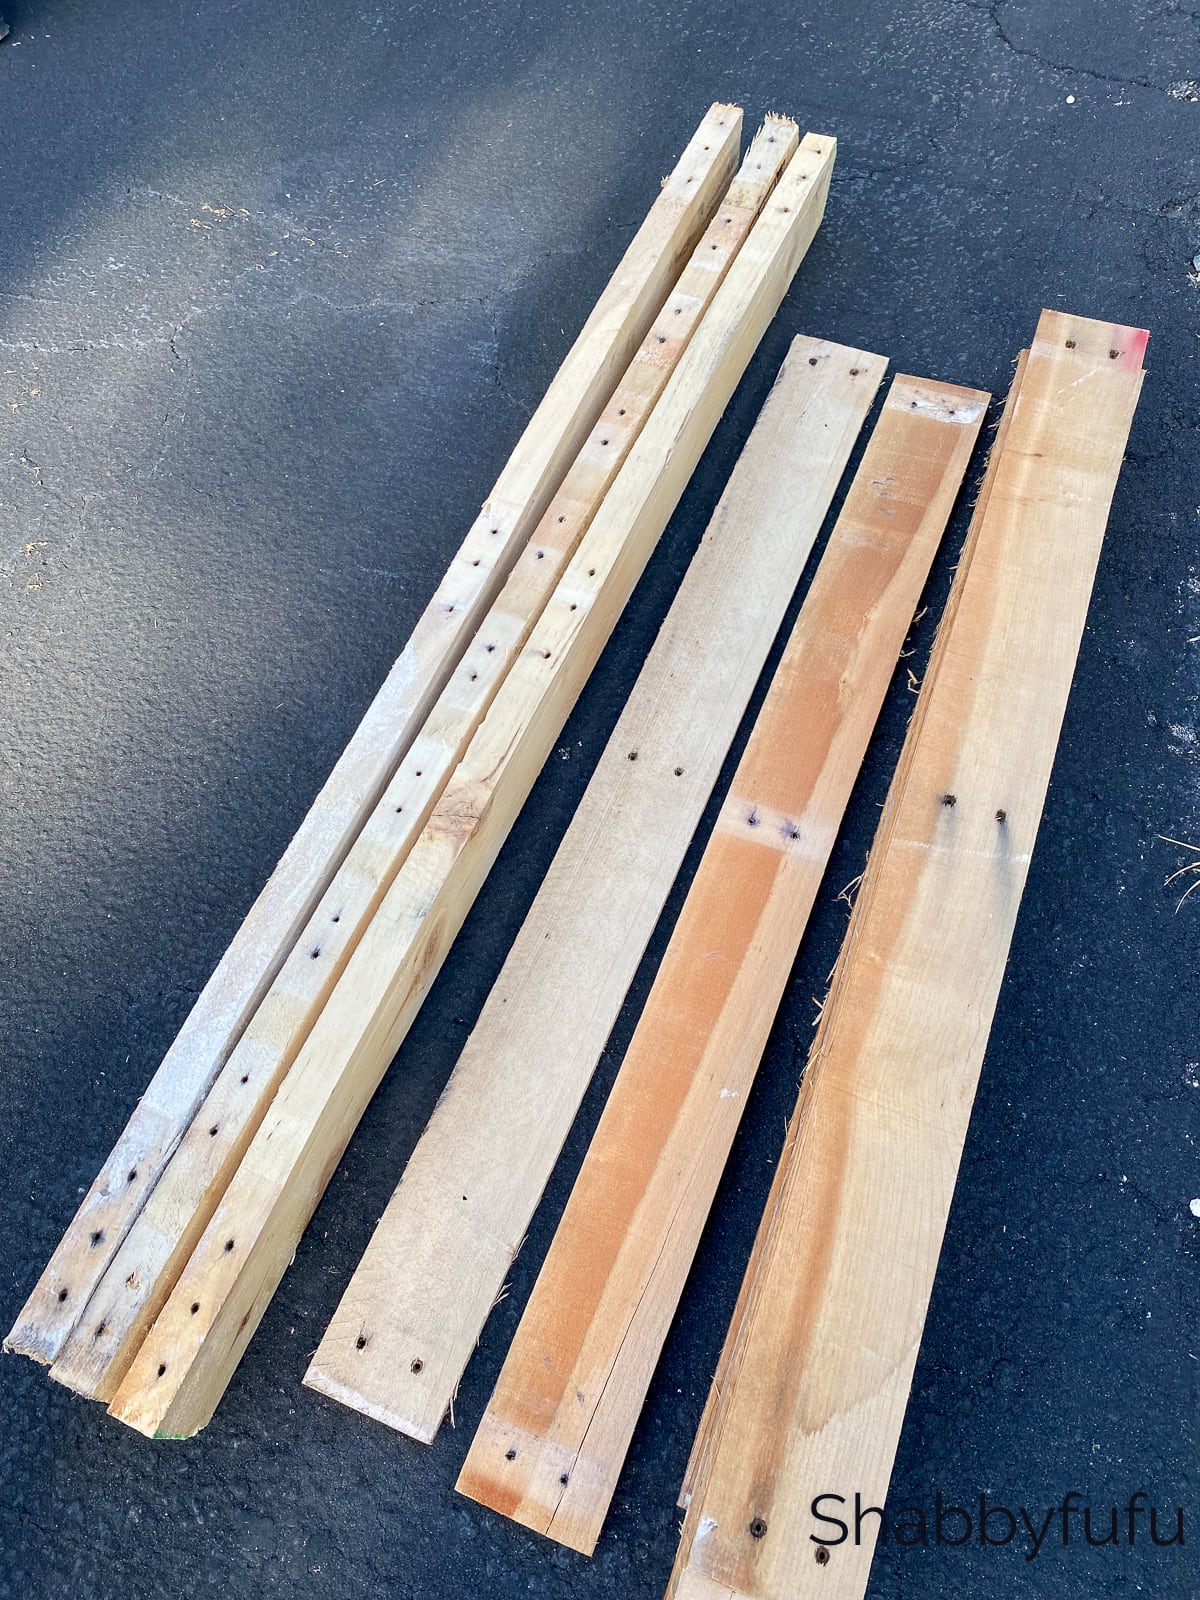
Once you’ve found a solid pallet to work with, take it apart with a mallet. If they are dirty (as the above stock image) I would keep looking for something better. Don’t hit the pallet too hard to avoid splitting the wood. Once you’ve removed the wood slats and the 2 x 4s, remove the nails by tapping with a hammer. Sand off any rough edges by hand if desired.
STEP 2 –
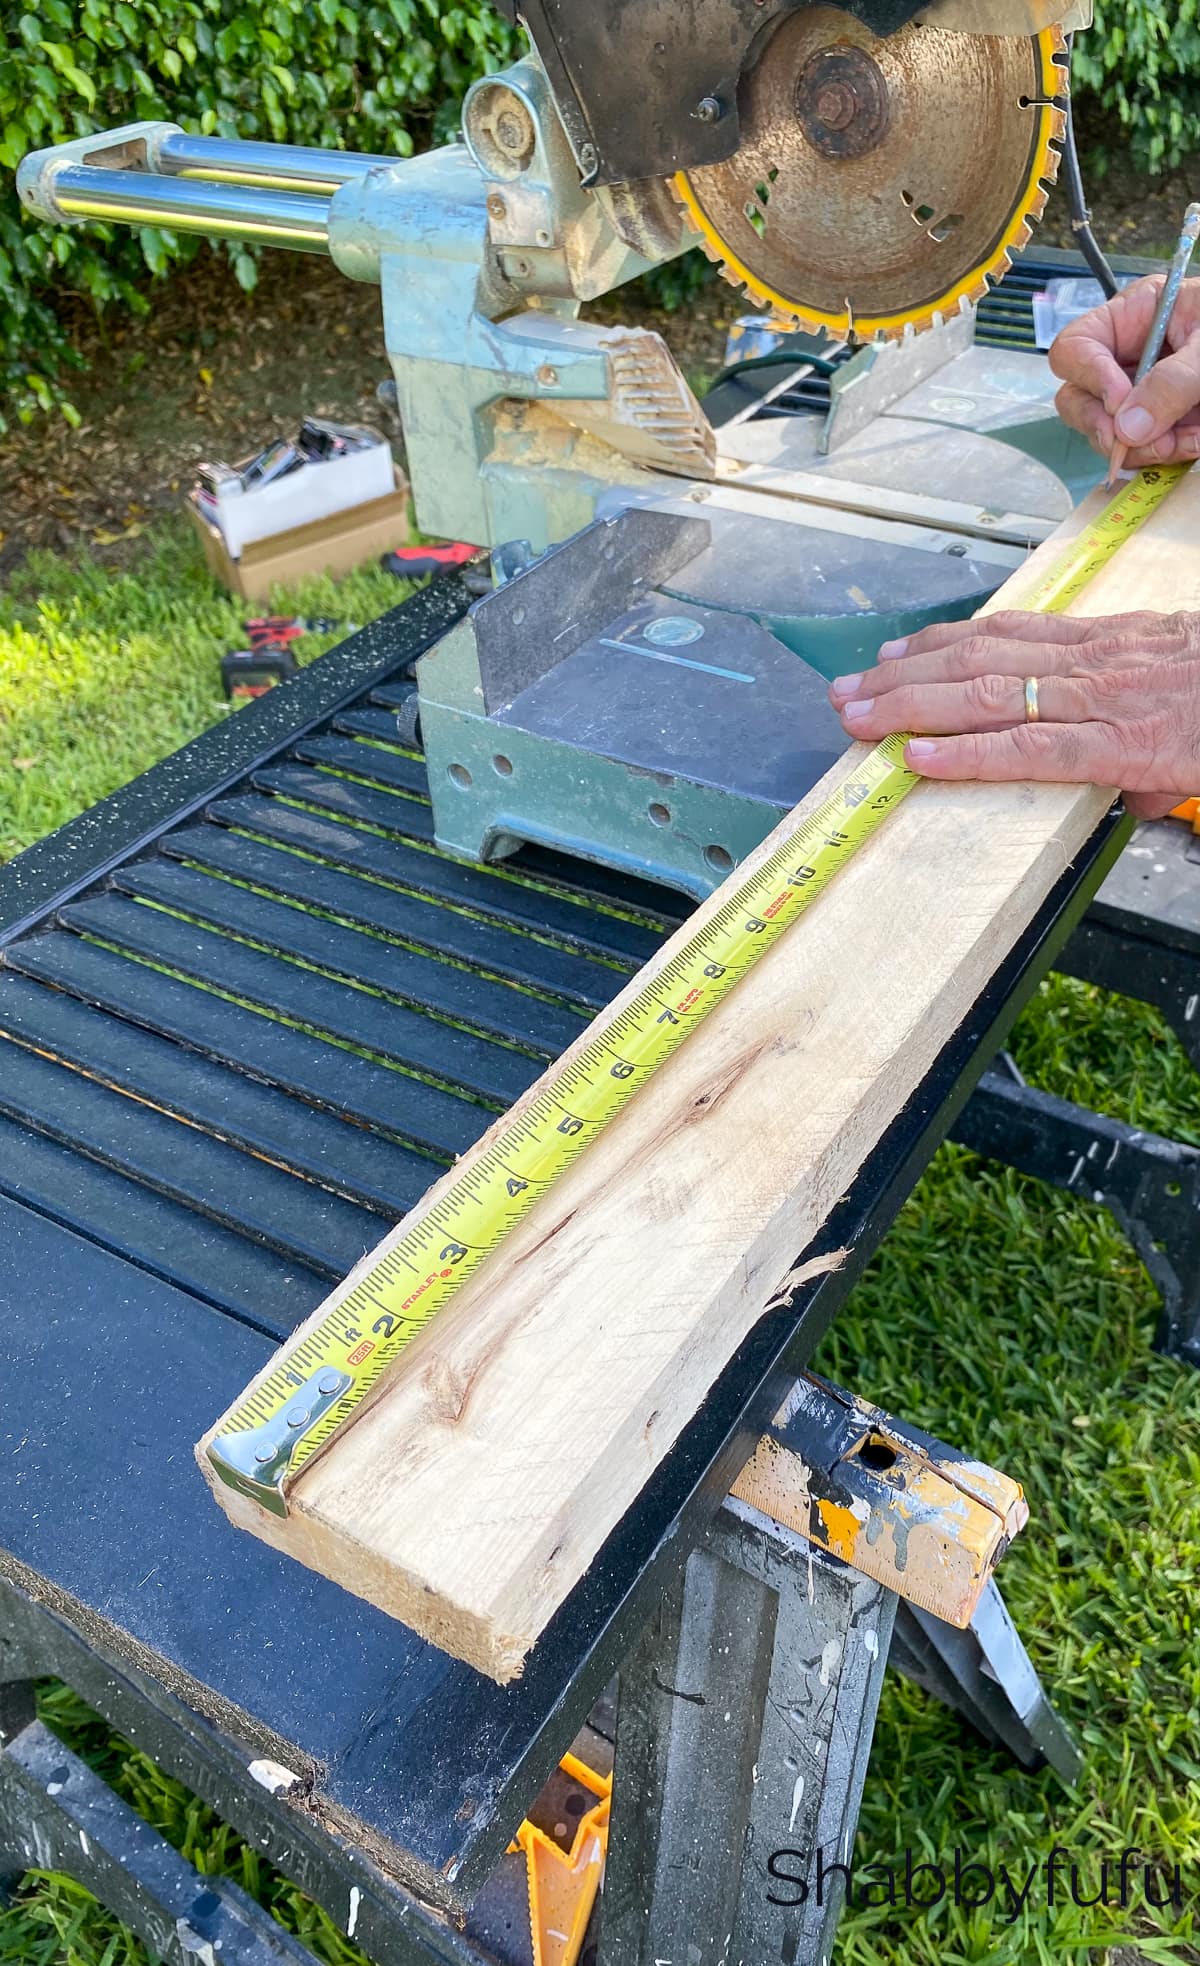
Measure and cut two 2 x 4’s to be 23″ in length and two 2 x 4’s to be 18″ in length.

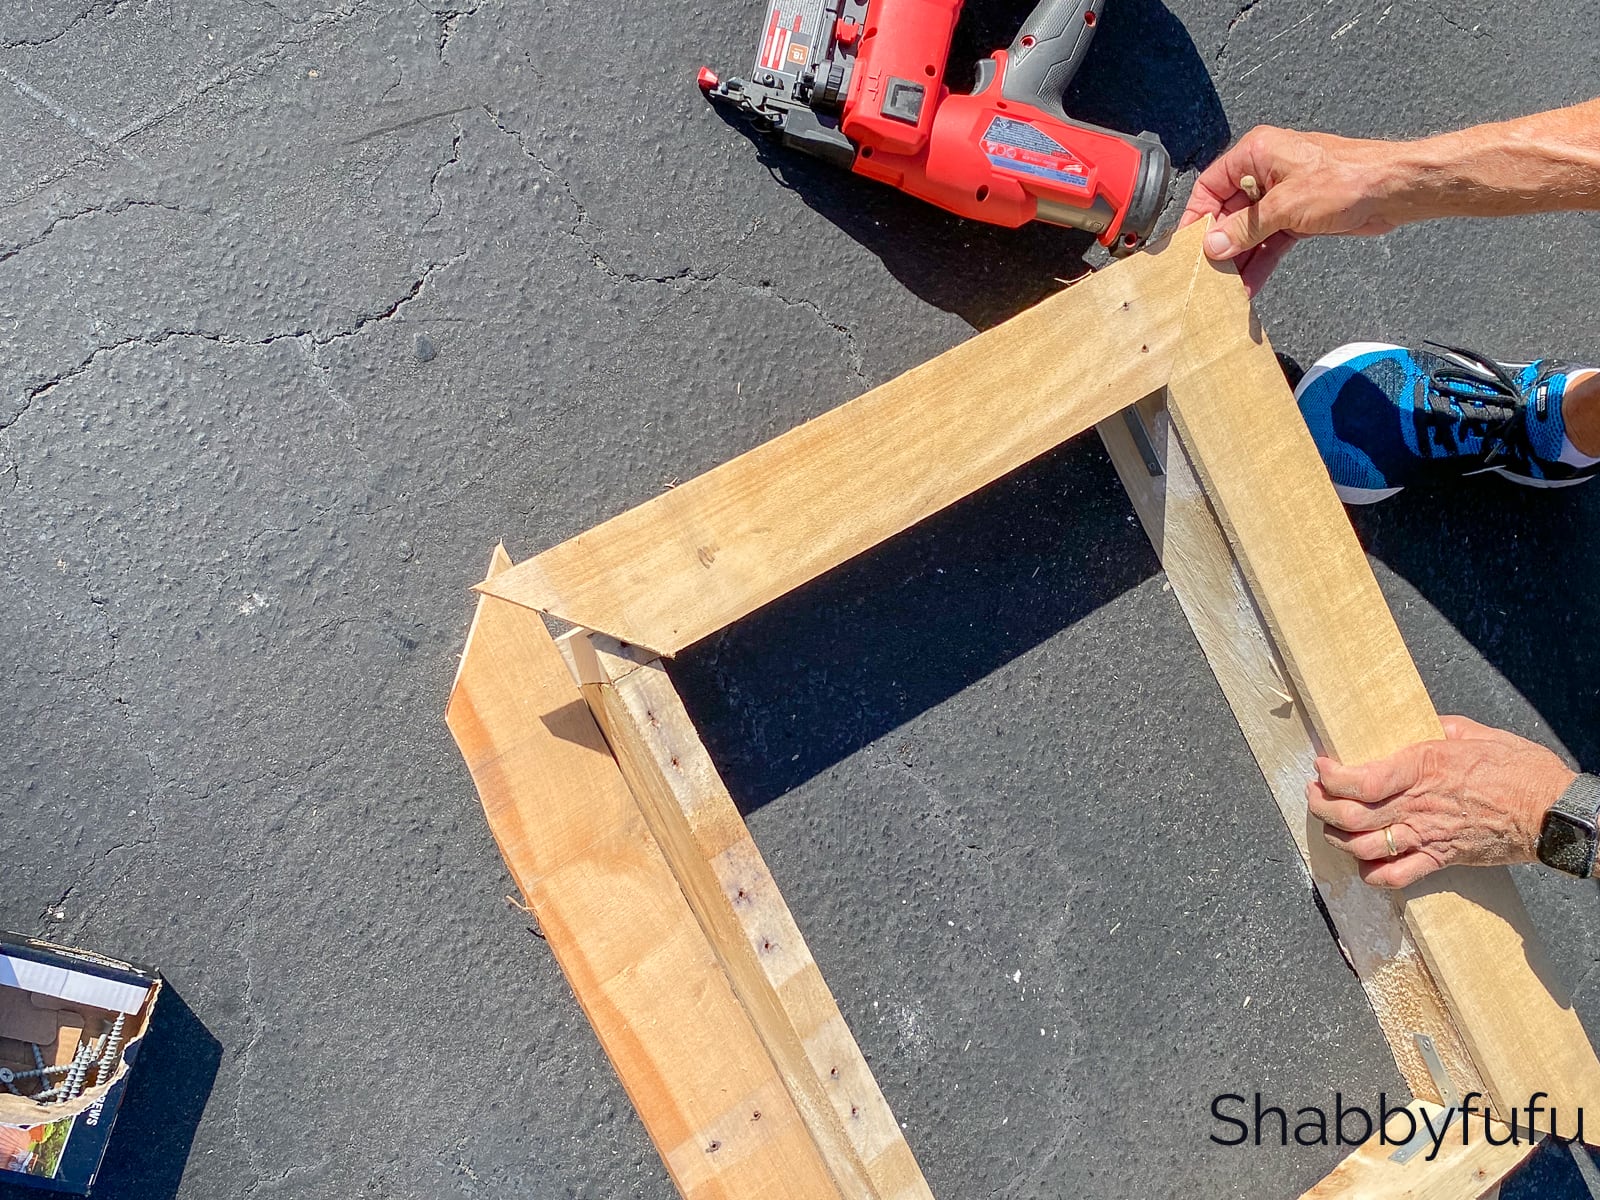
STEP 3 –
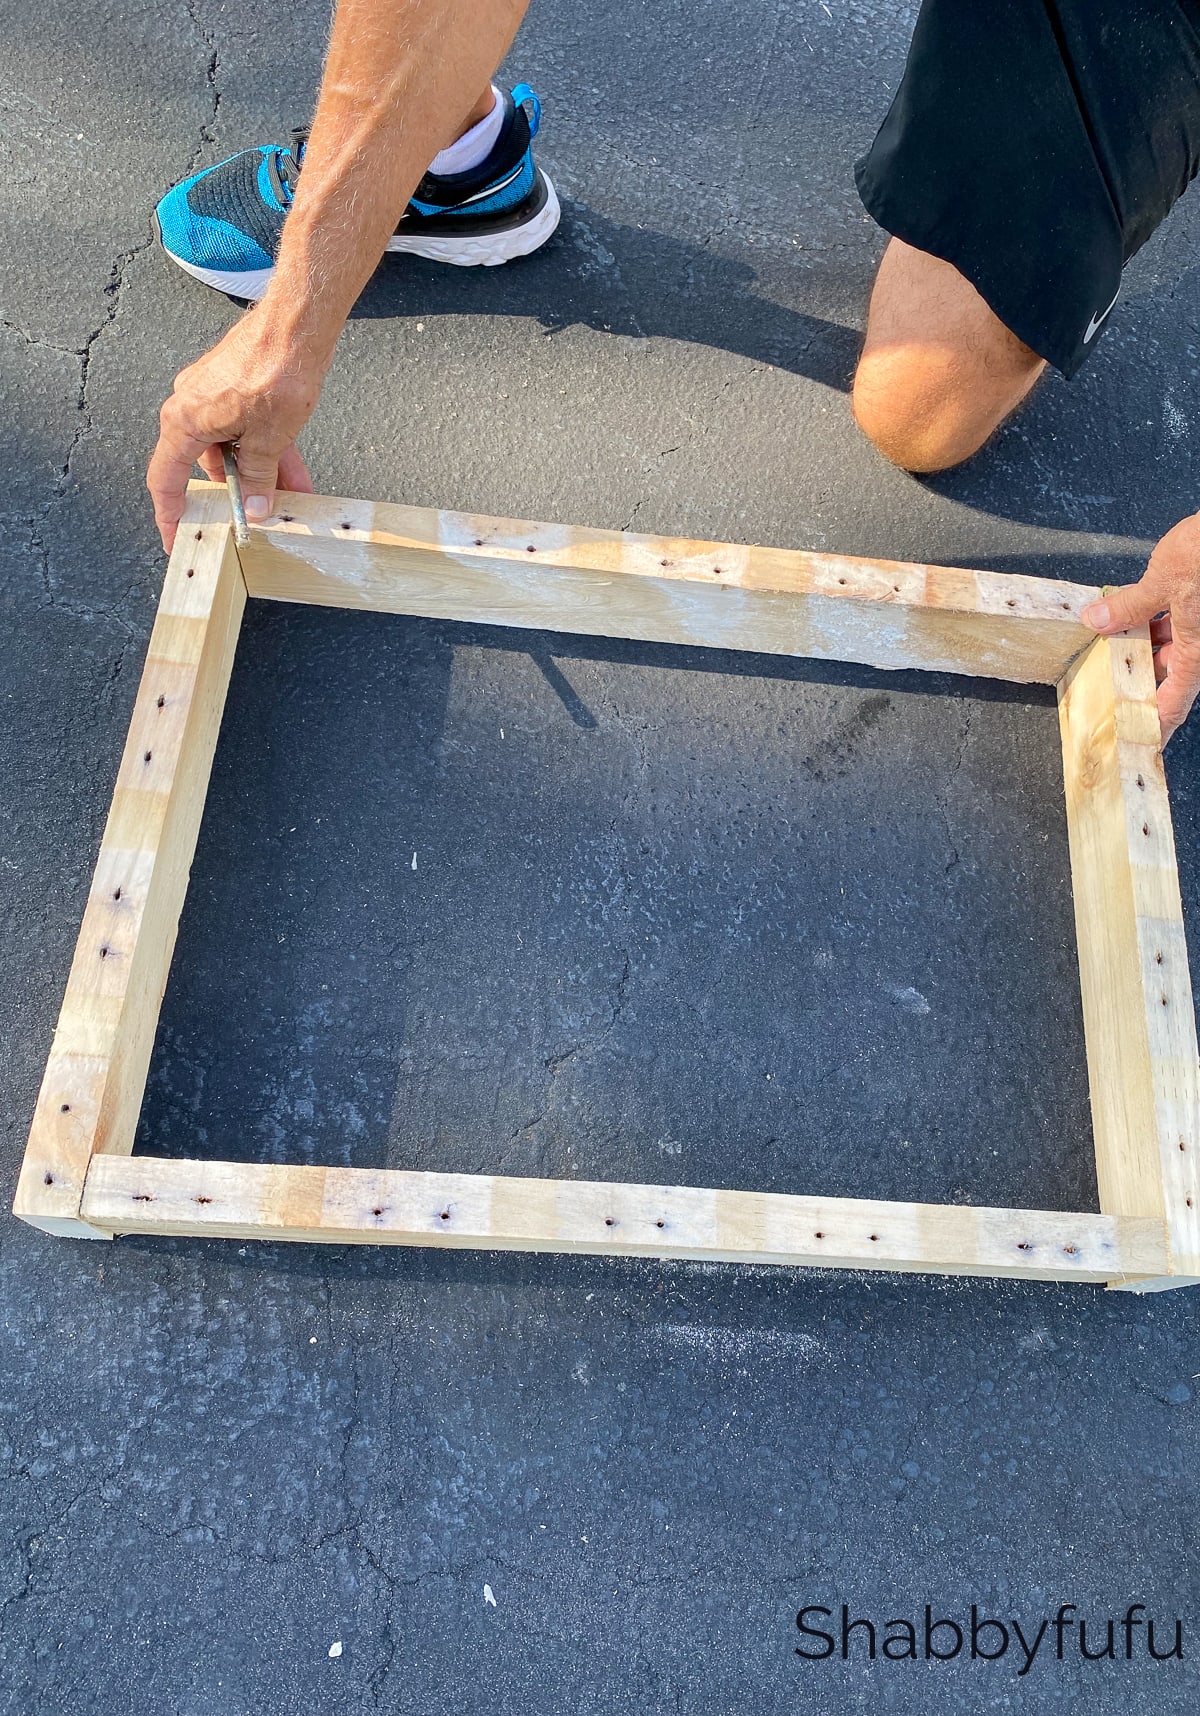
Assemble the frame using all four 2 x 4’s. First lay out the wood pieces and make sure that you’ve cut correctly and then make any necessary adjustments.
STEP 4 –
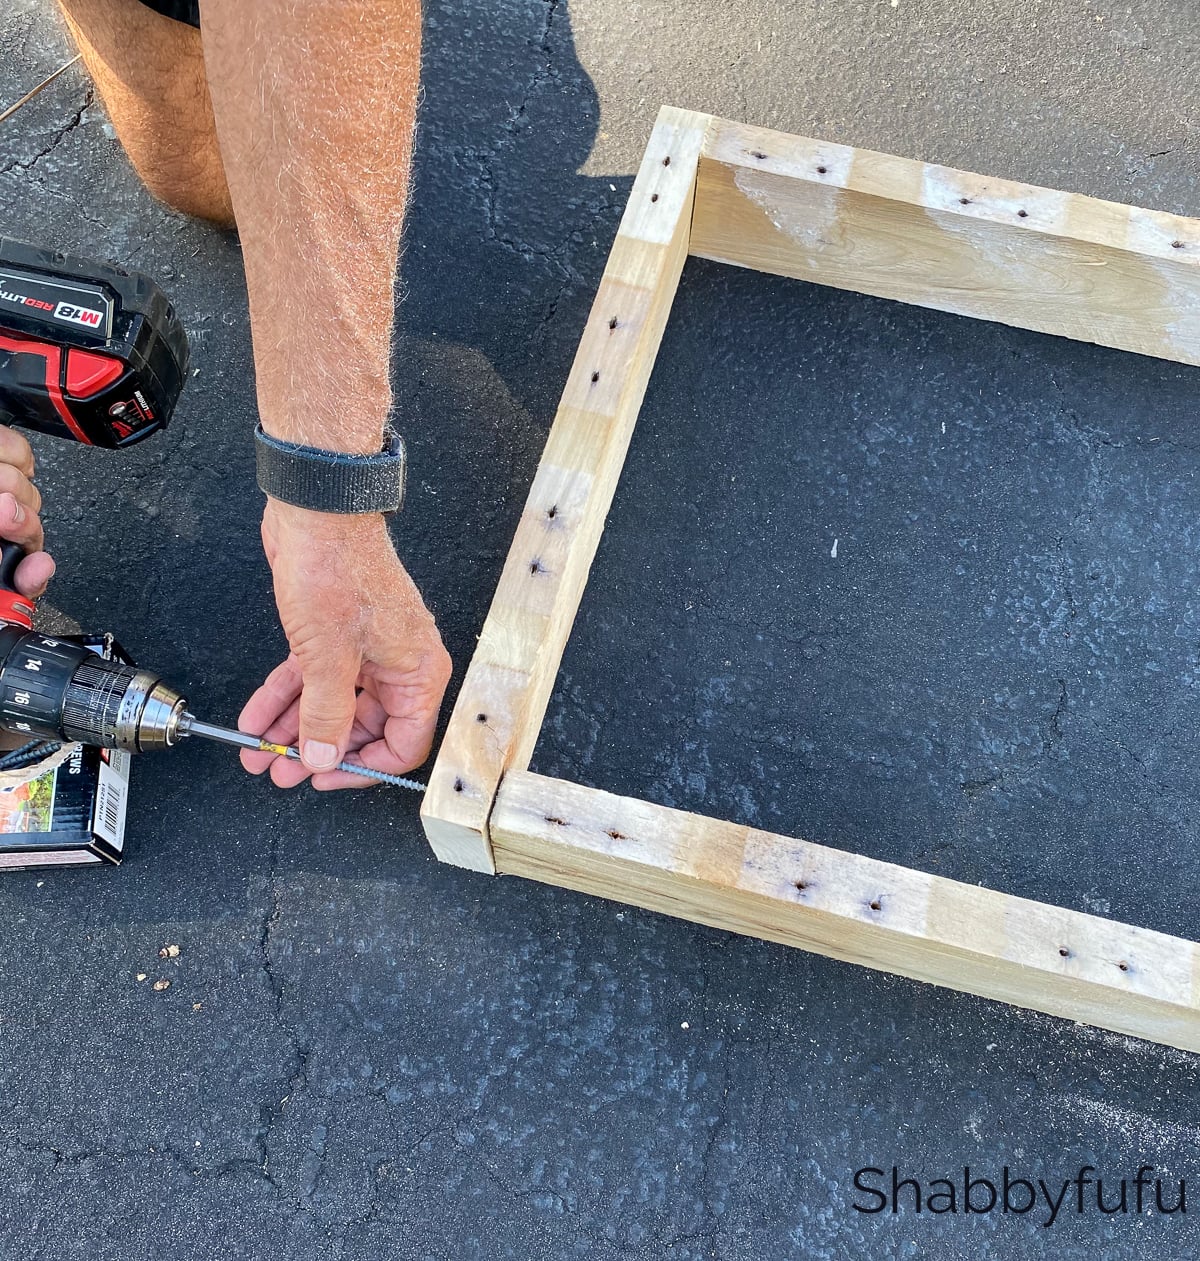
Screw together the frame with 1 5/8″ screws using your screw gun.
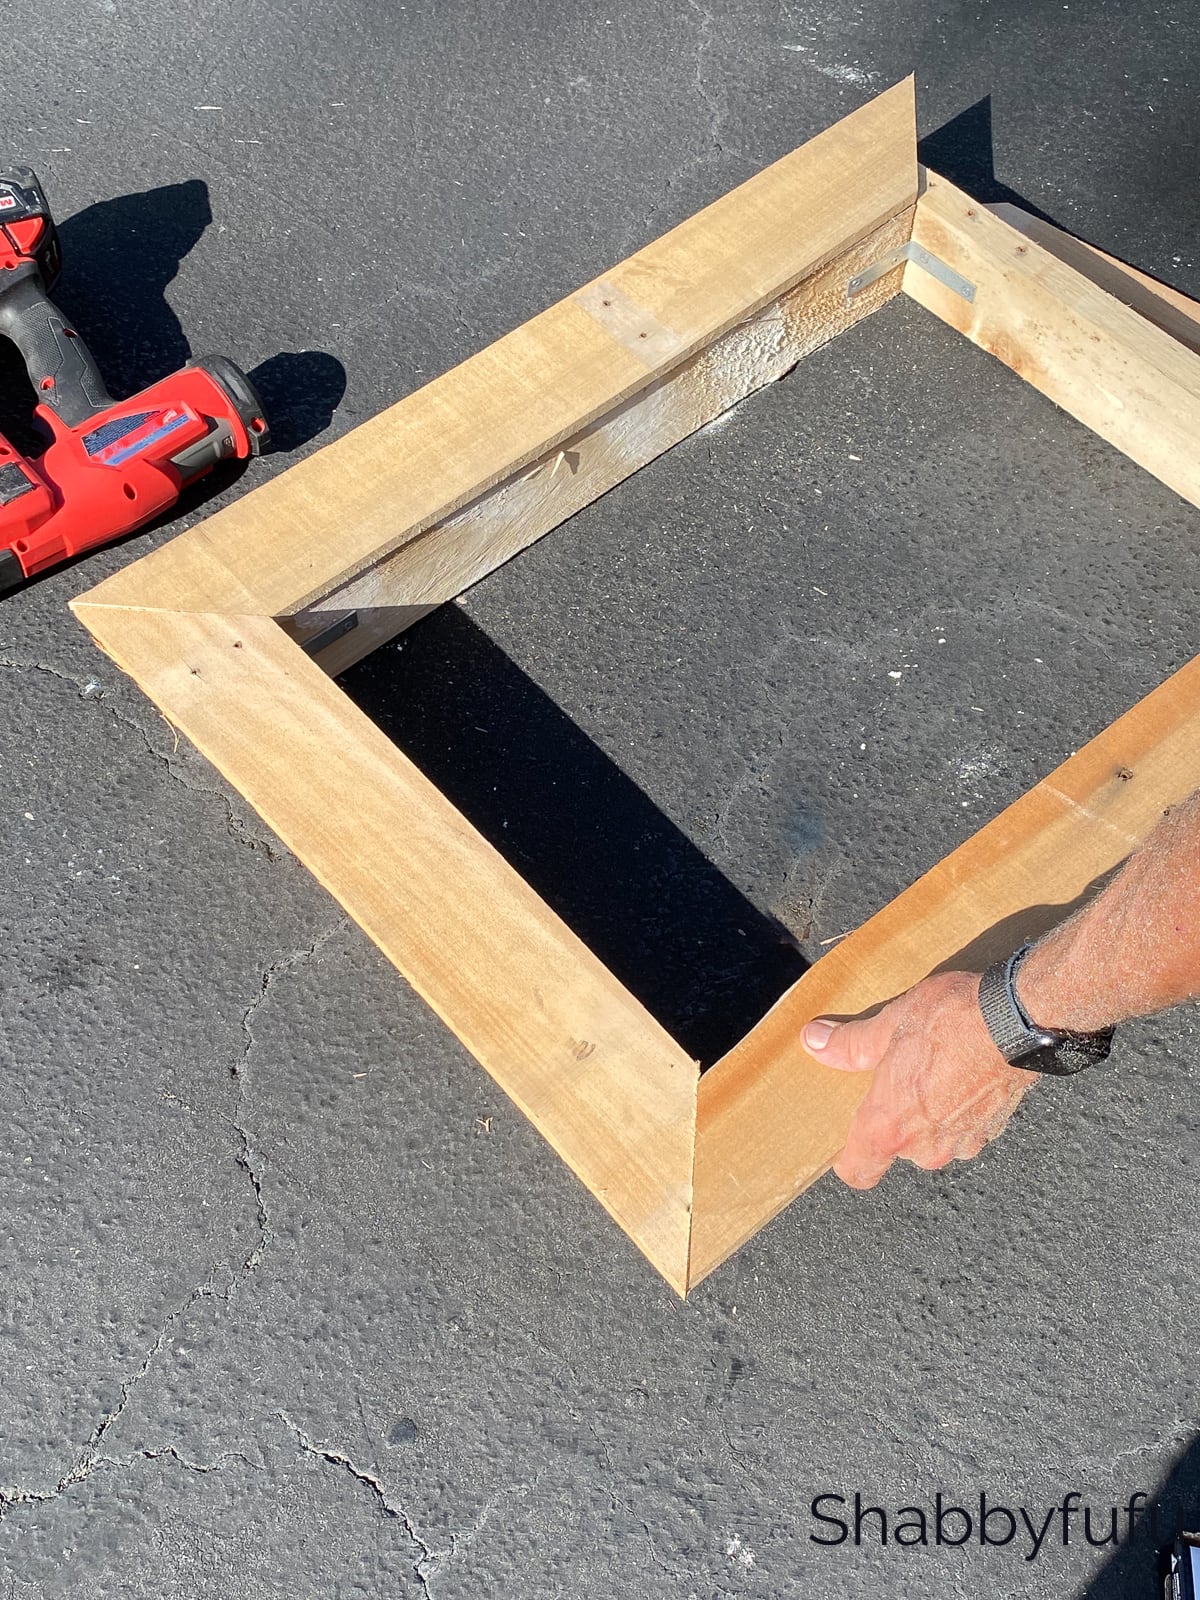
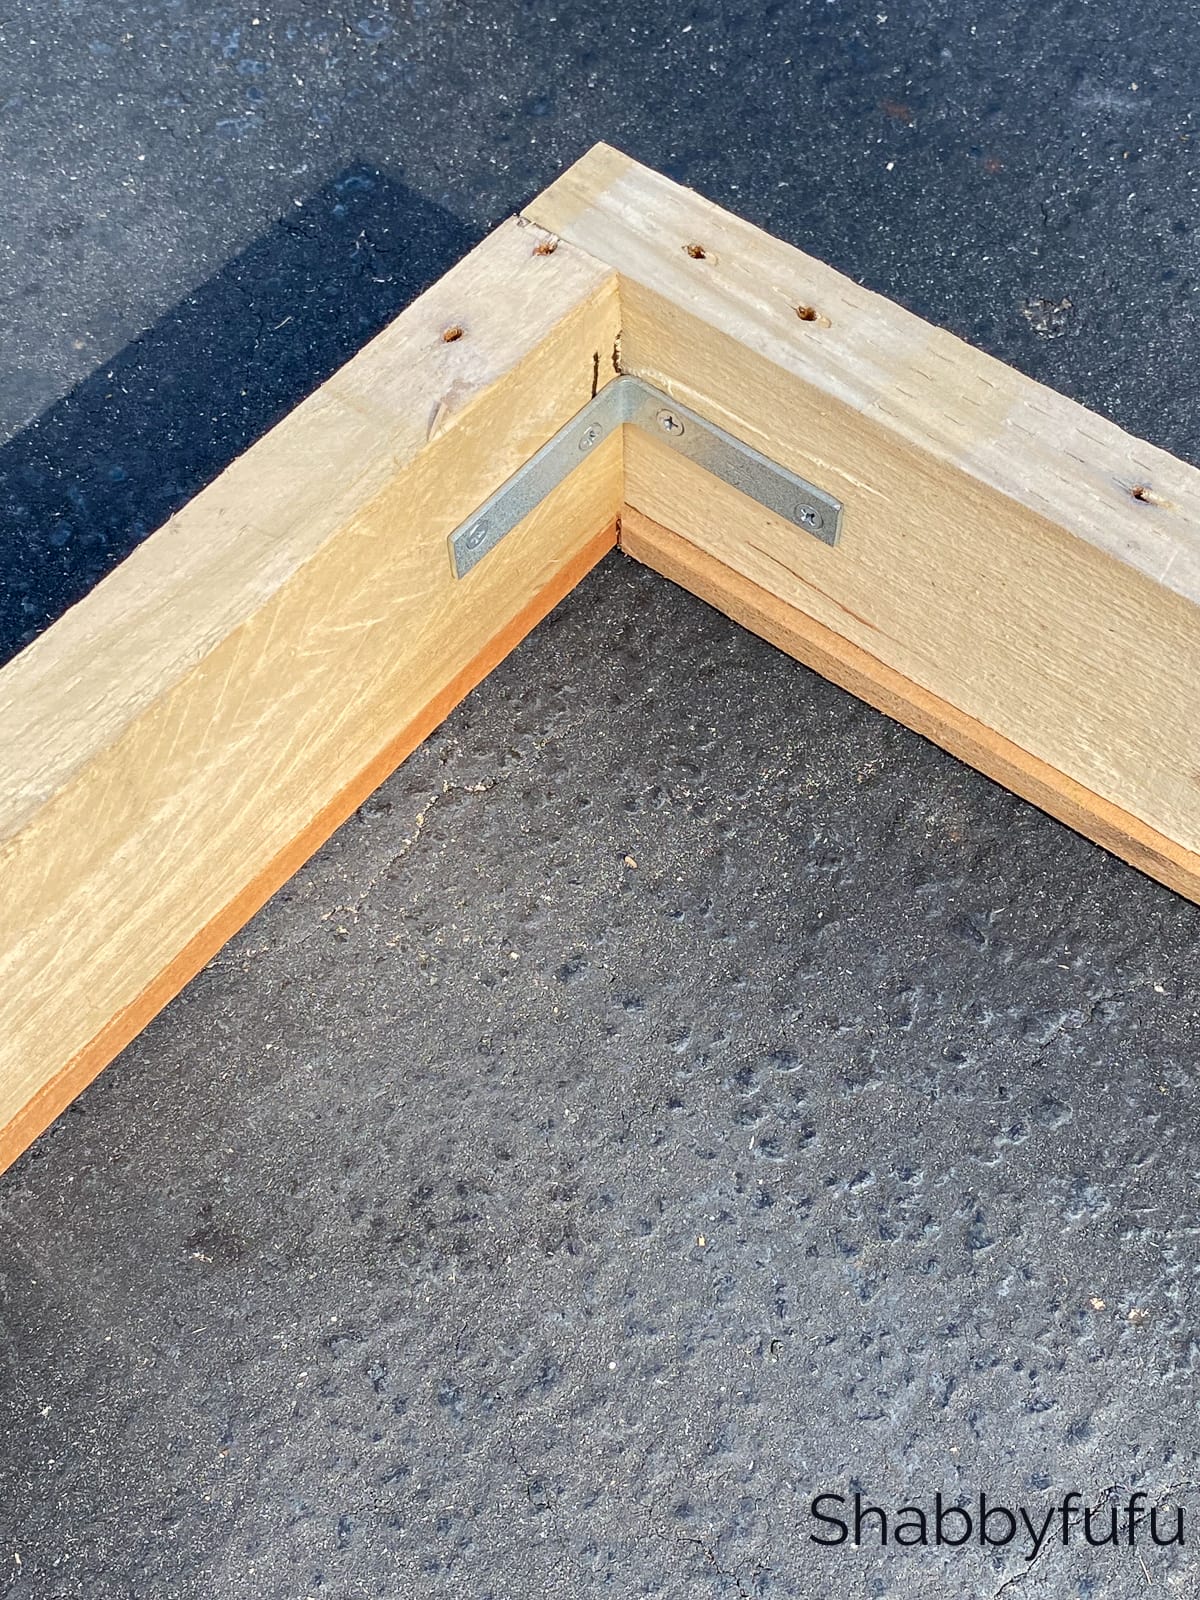
STEP 5 –
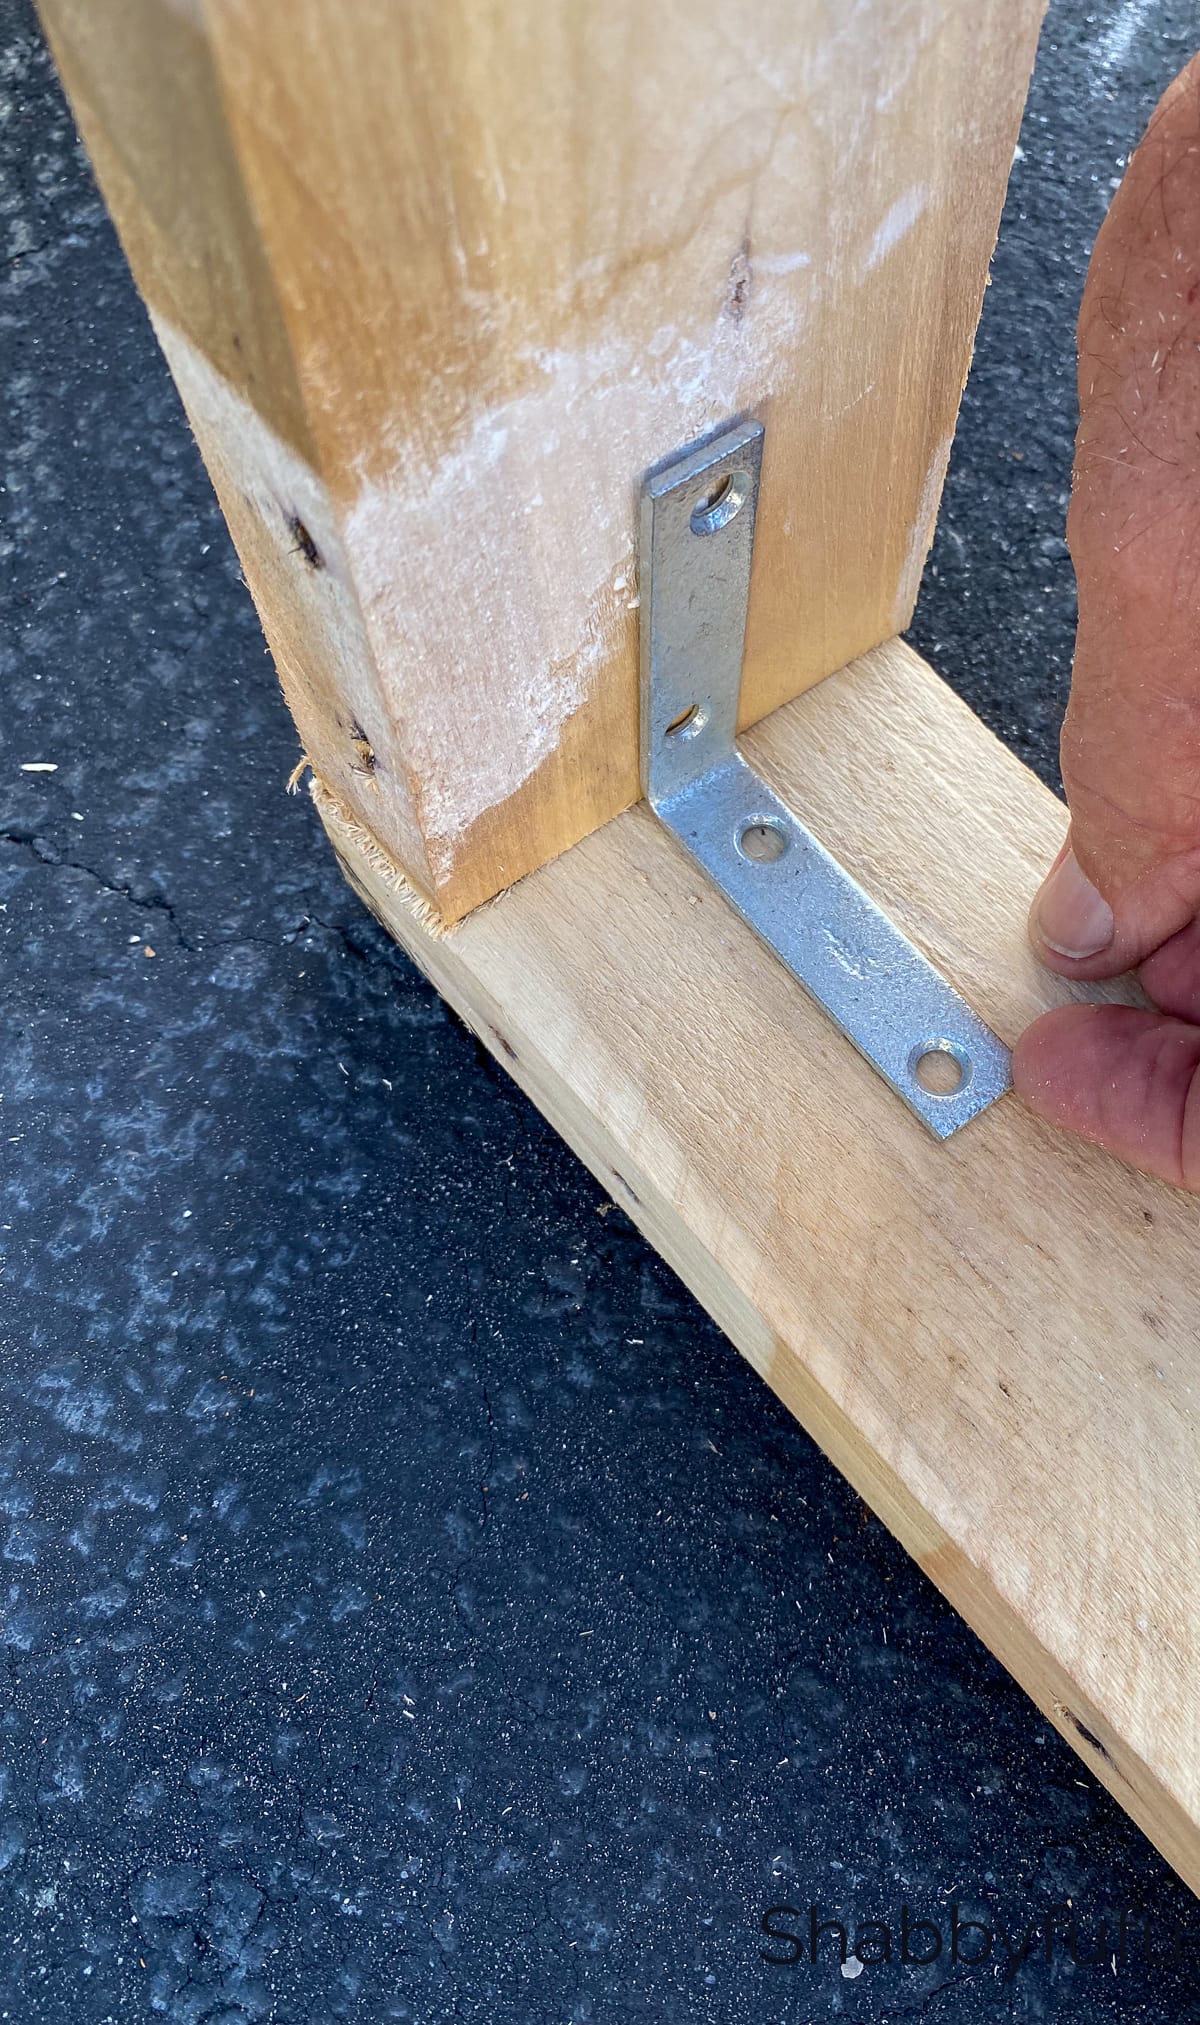
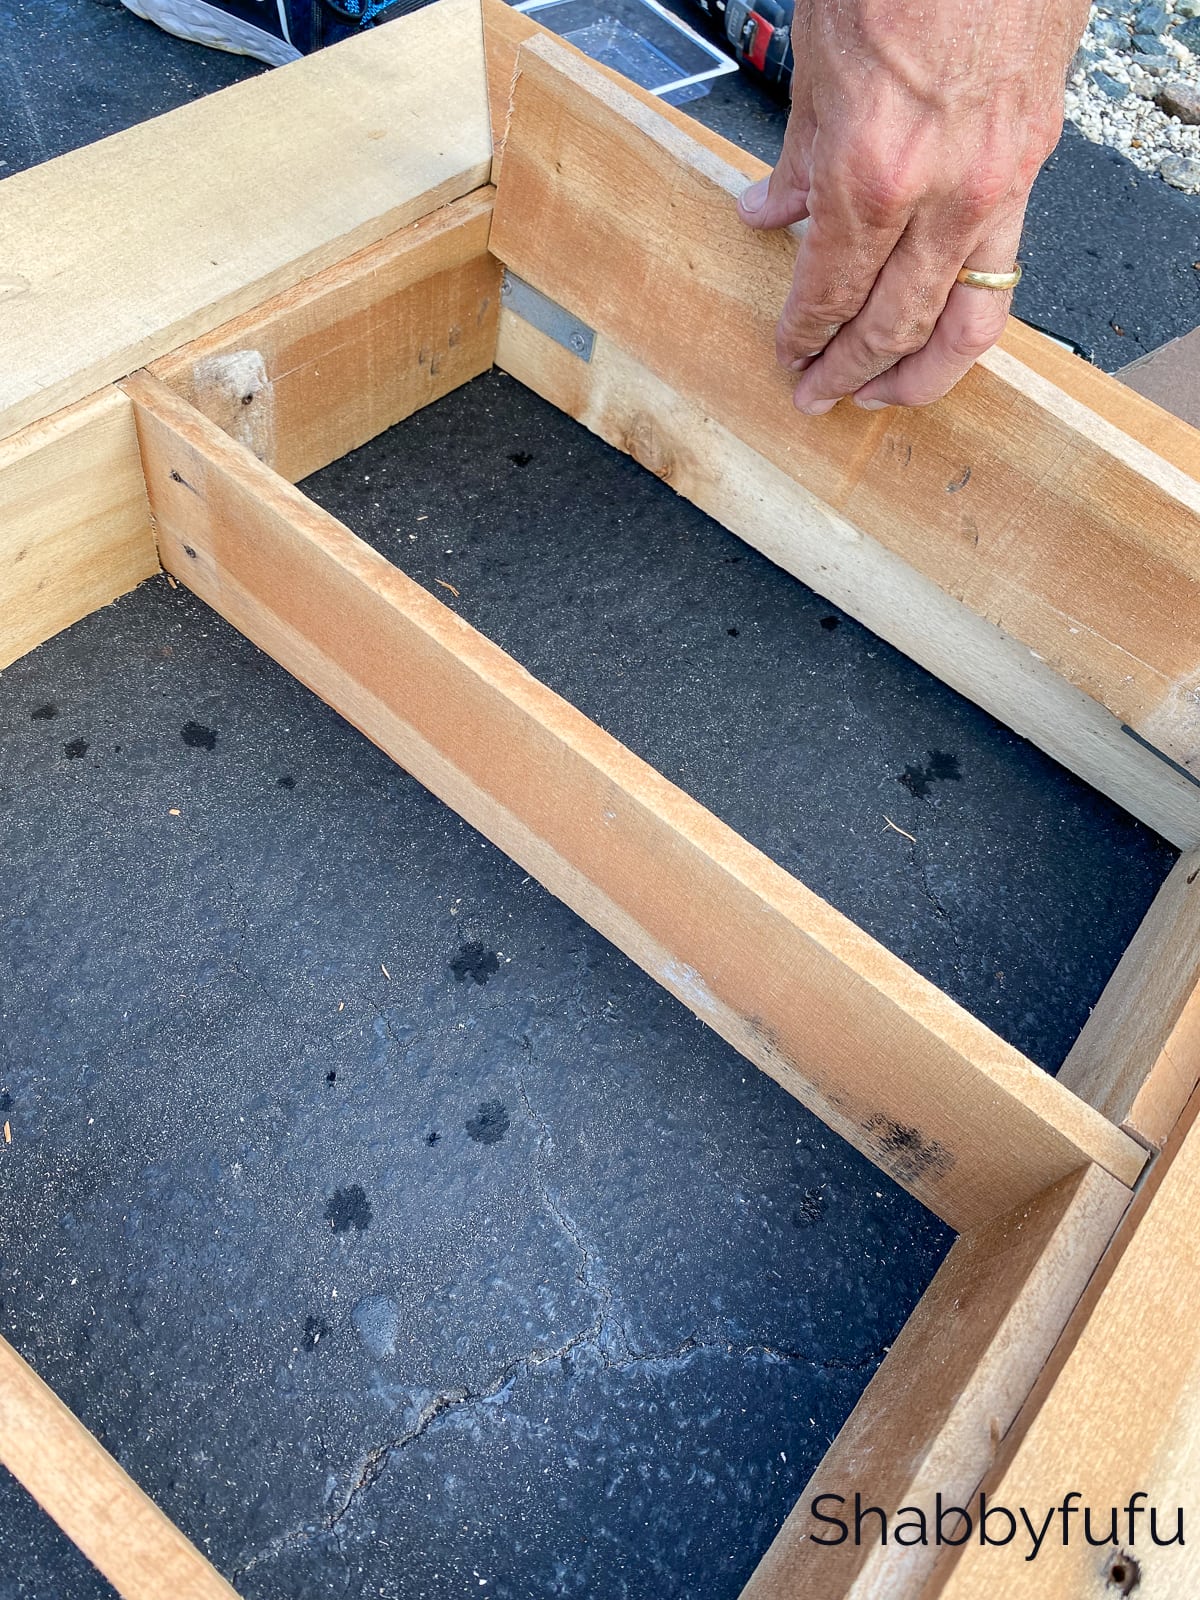
Next add one of the National Hardware 2 1/2″ Corner Braces to each corner on the inside of the wood pallet frame. Use the screws provided in the package that will be a perfect fit! This will stabilize the box.

STEP 6 –
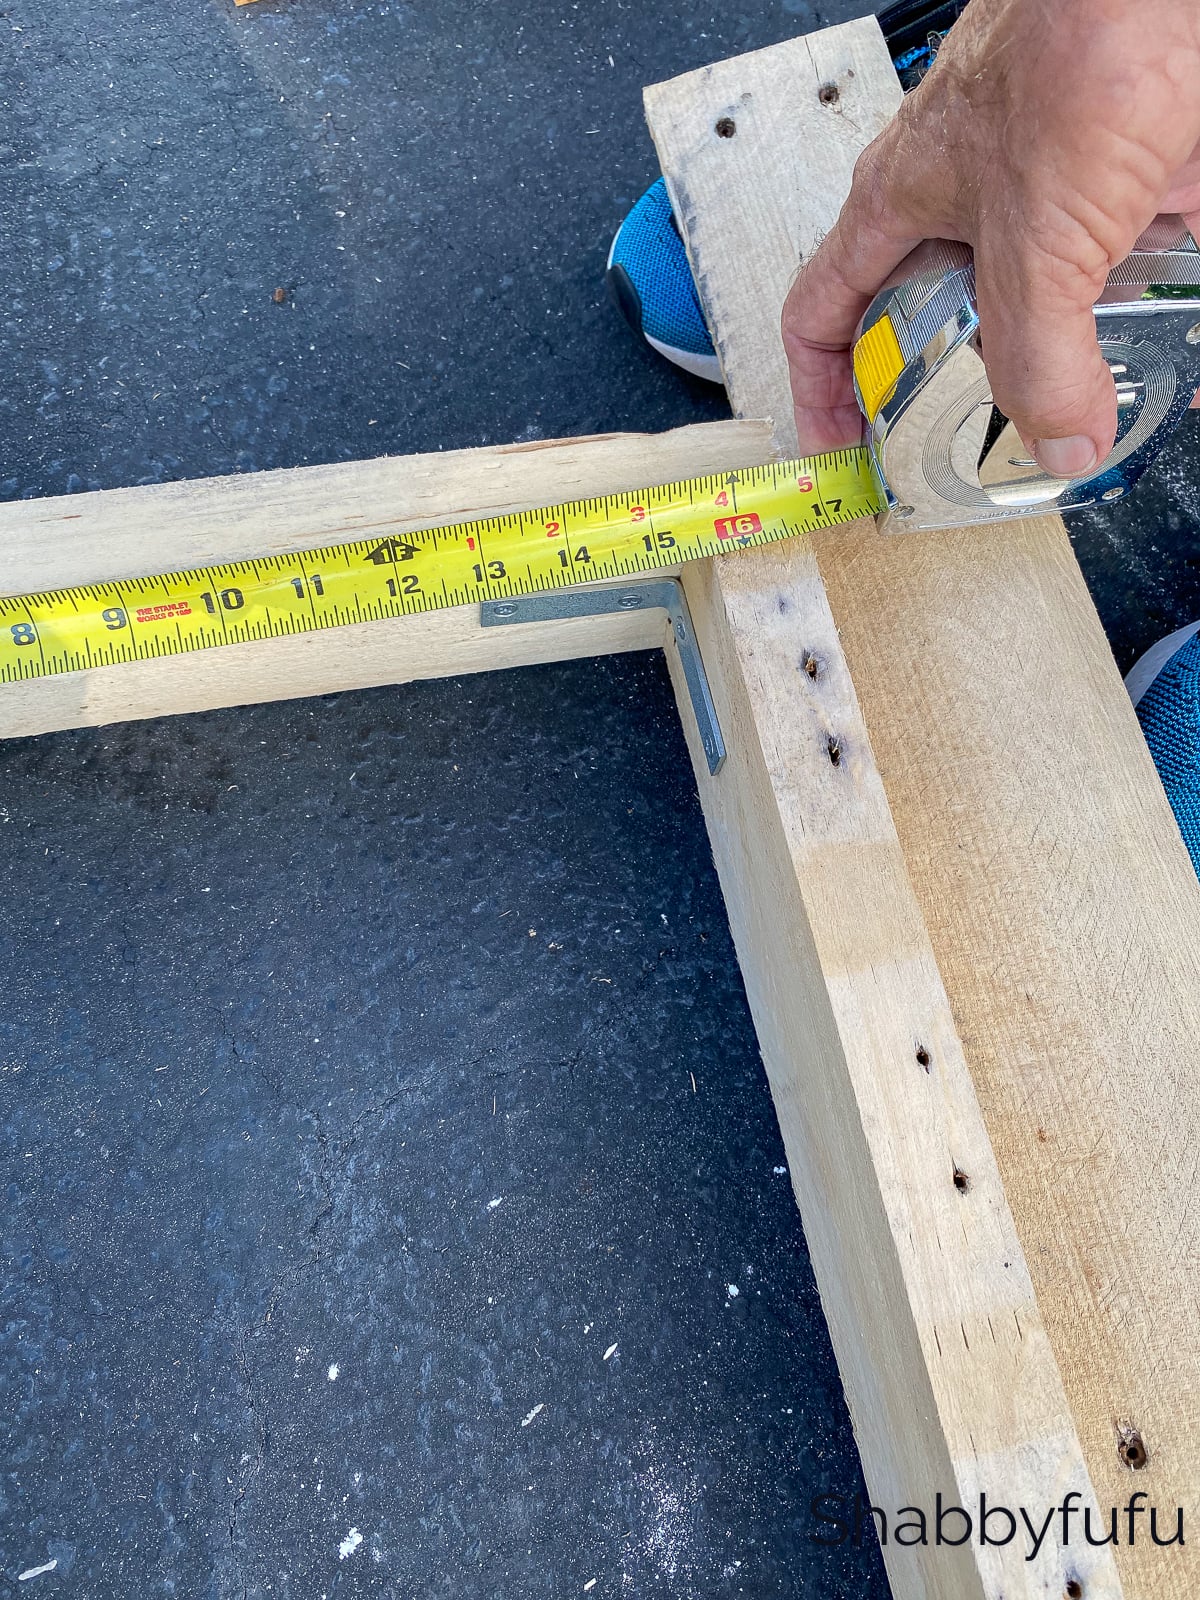
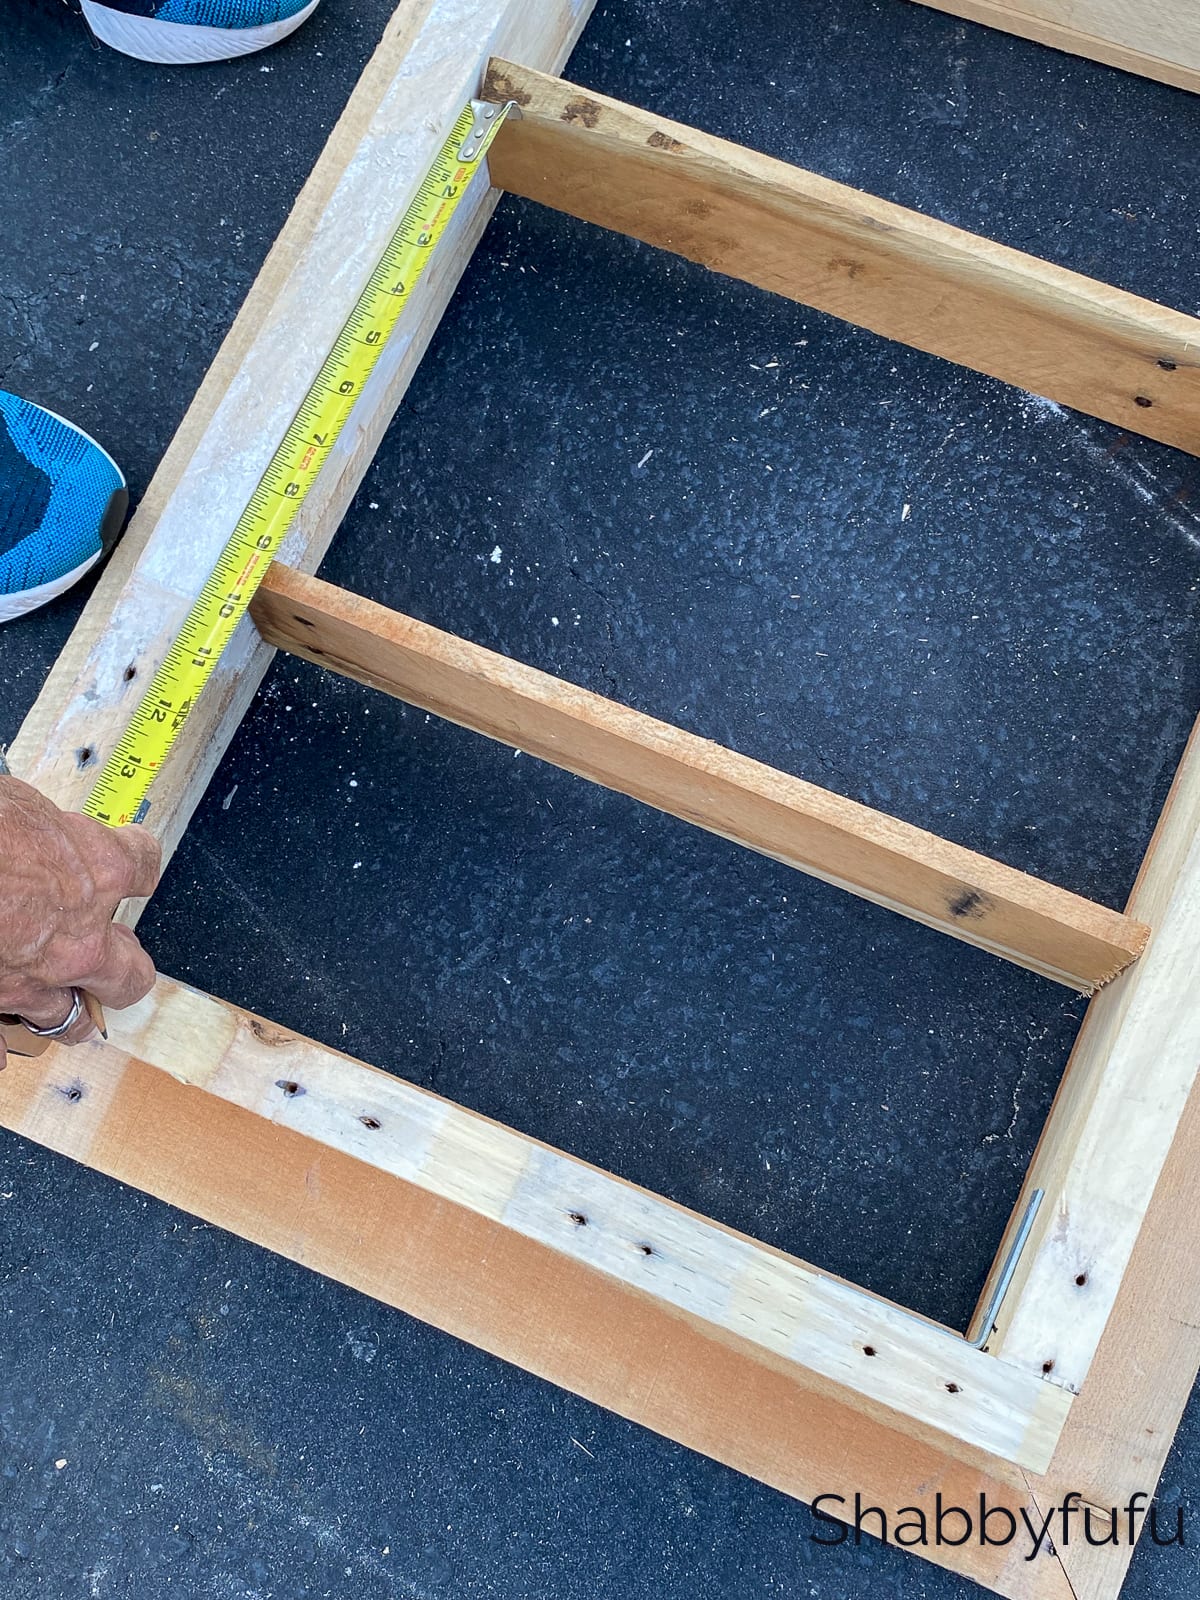
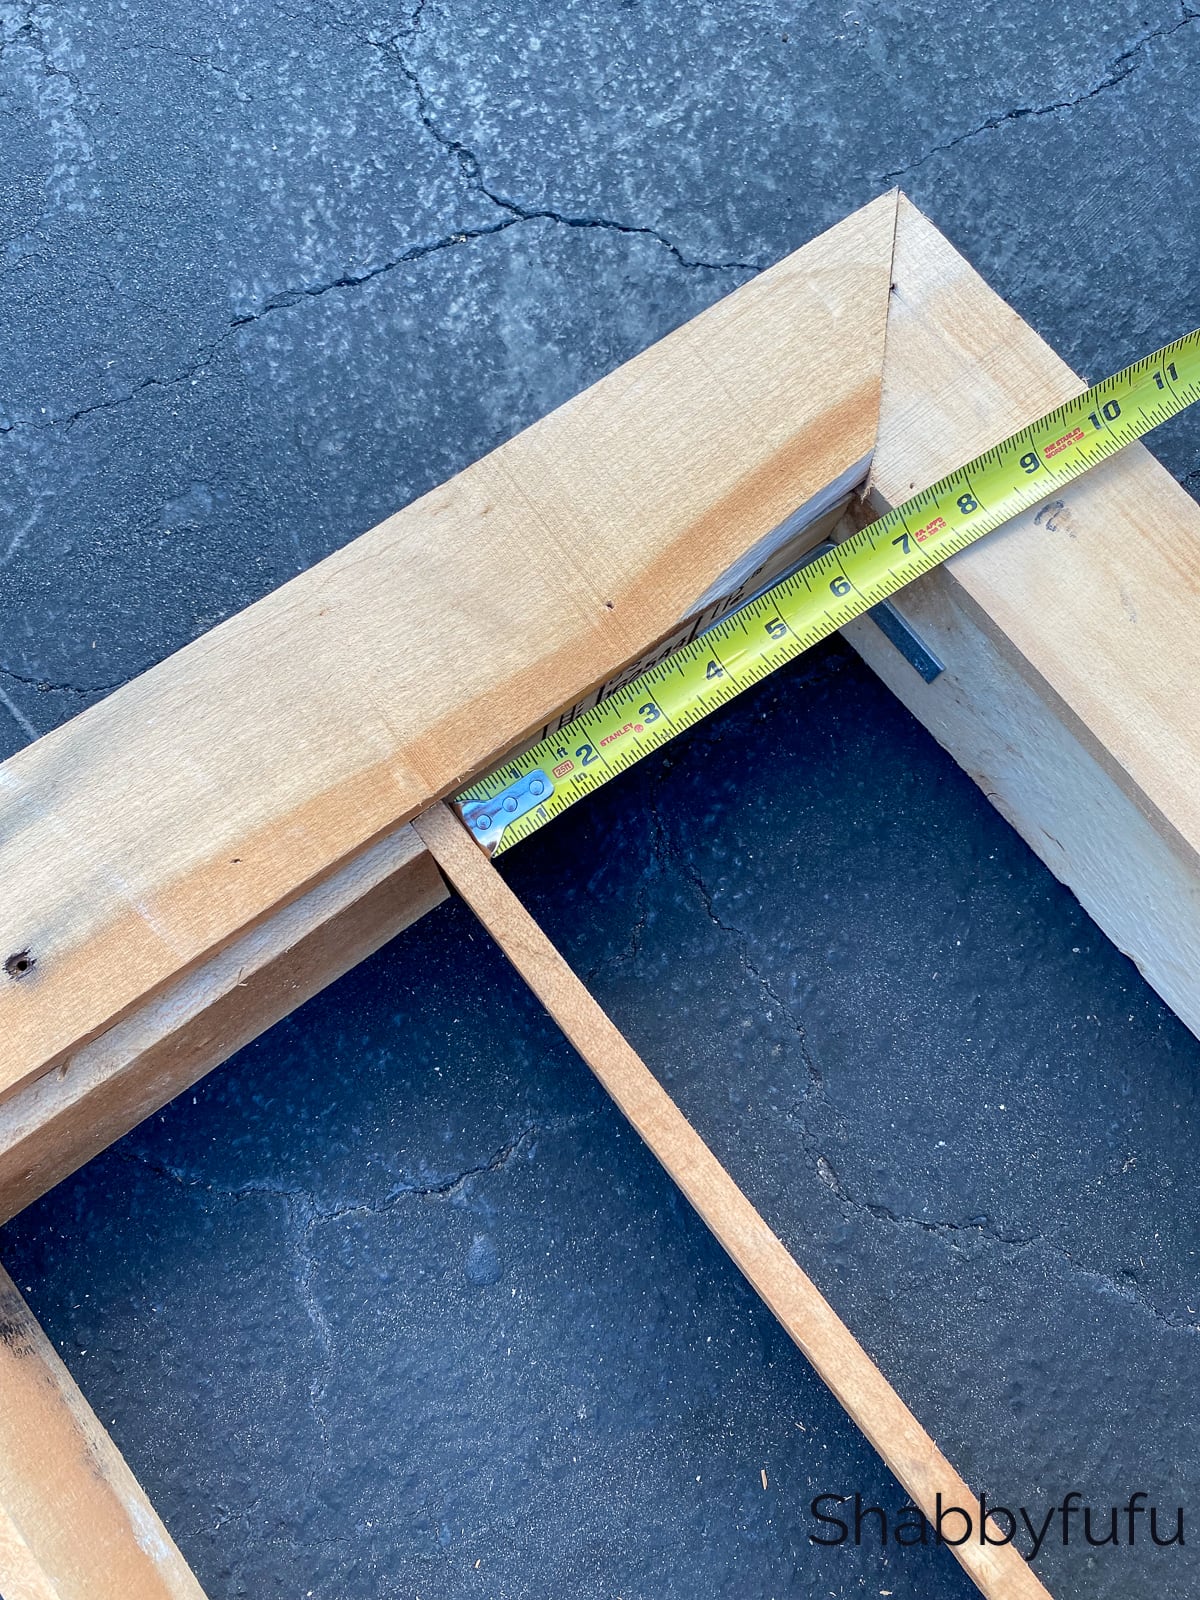
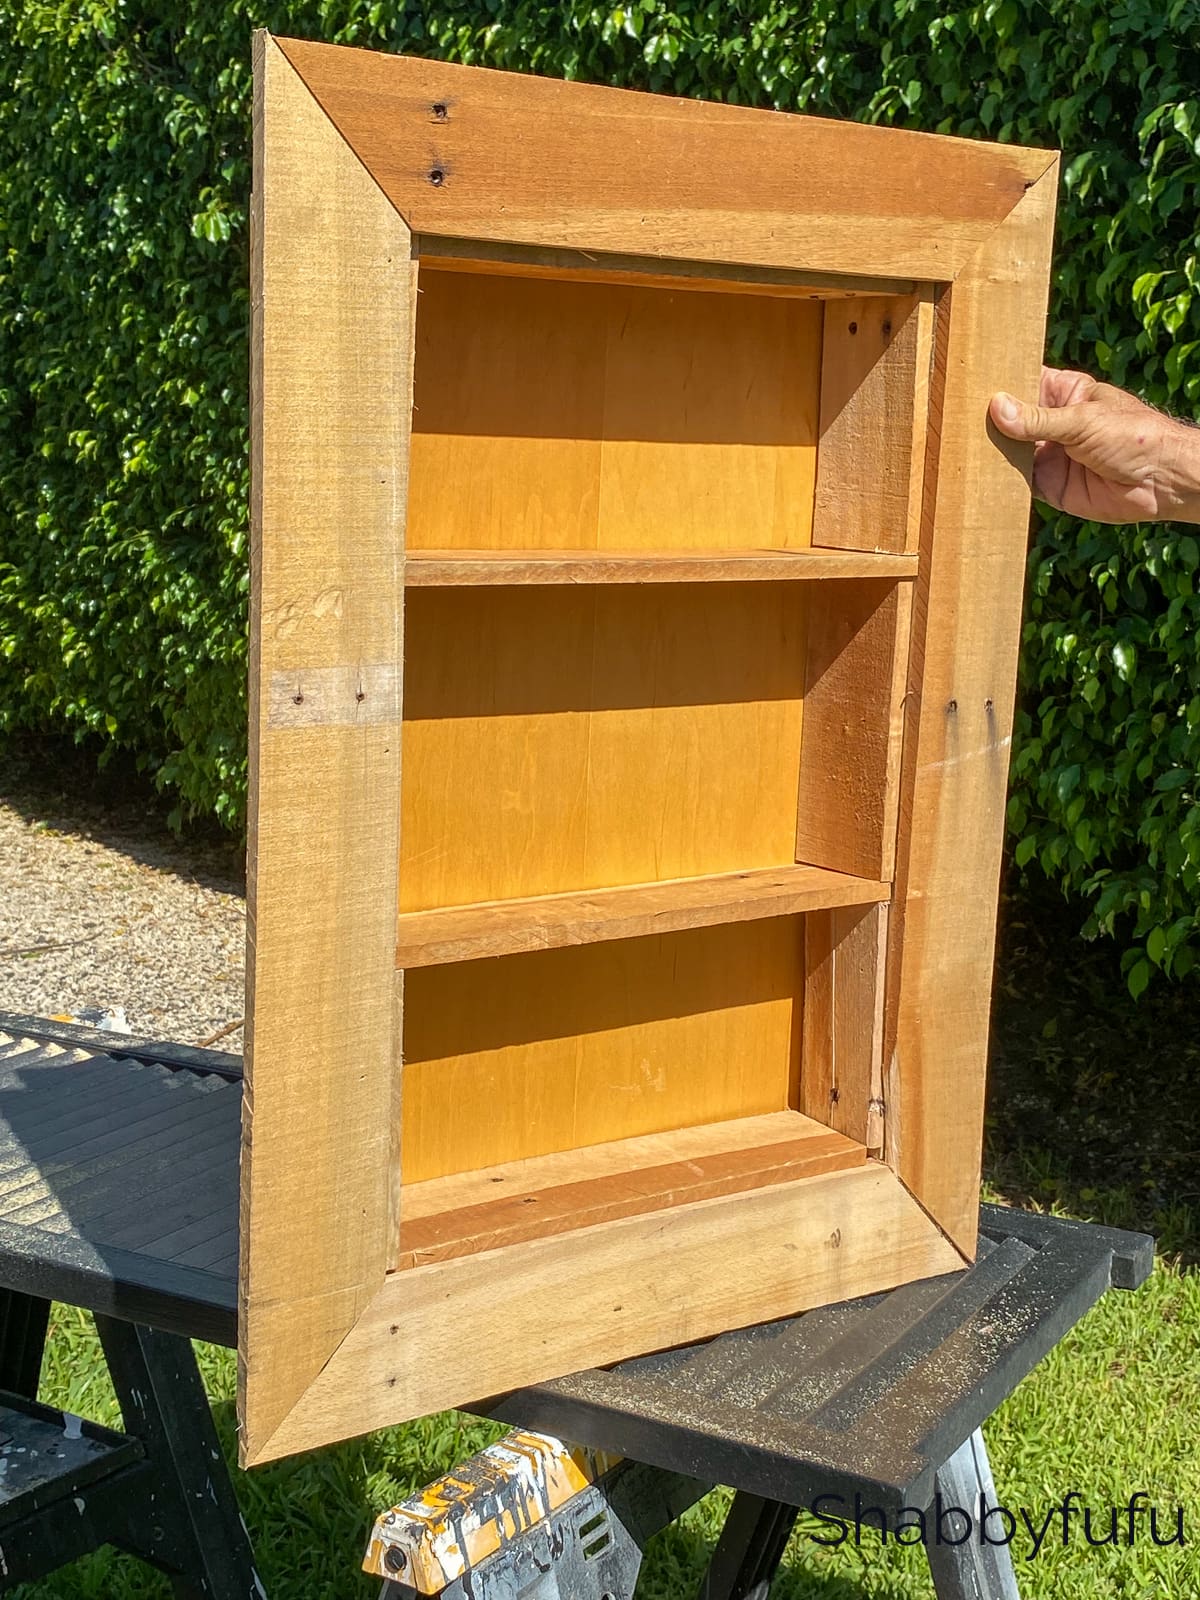
Measure the interior dimensions of the box that you’ve built on both sides. Next it’s time to build the front face frame.

Framing Out The Rustic Wood Pallet Shelves
STEP 7 –
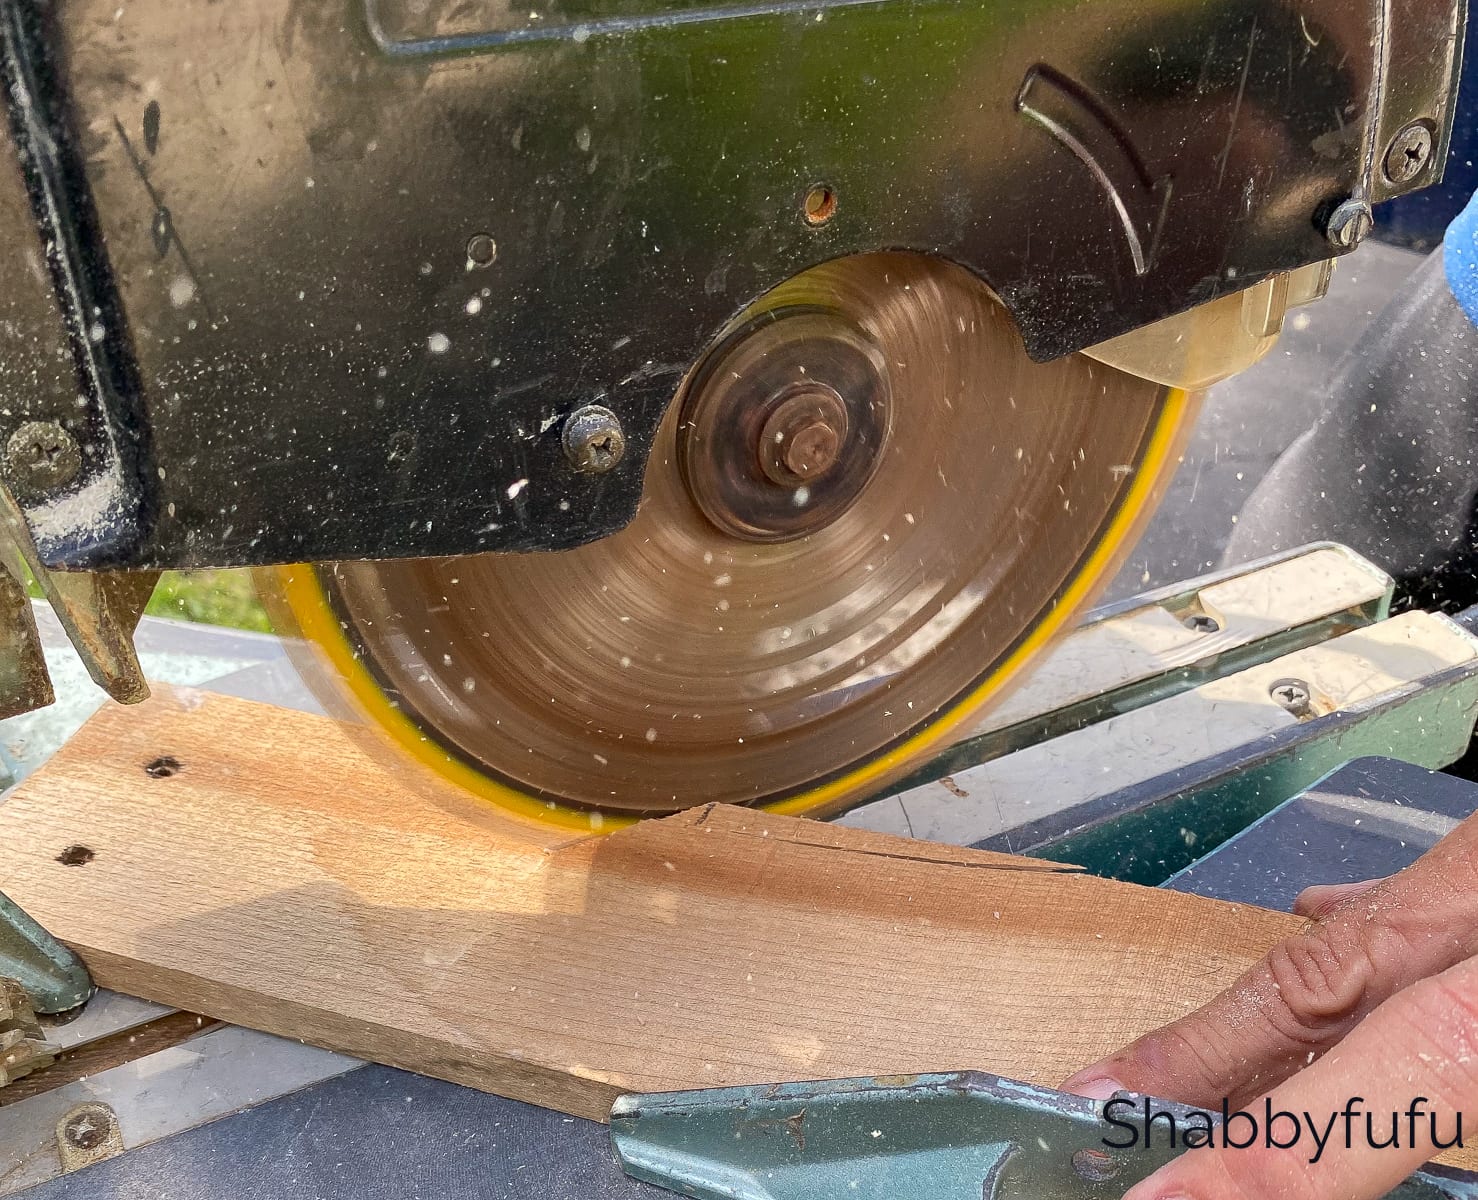
Adding a picture frame of sorts gives a finished look to the rustic wood shelves. Cut two of the pallet slats at a 45 degree angle using the mitre saw. The interior dimension will be 29 1/4″ long. Next cut two of the slats at the same 45 degree angle to measure 22 1/4″ on the interior dimension.
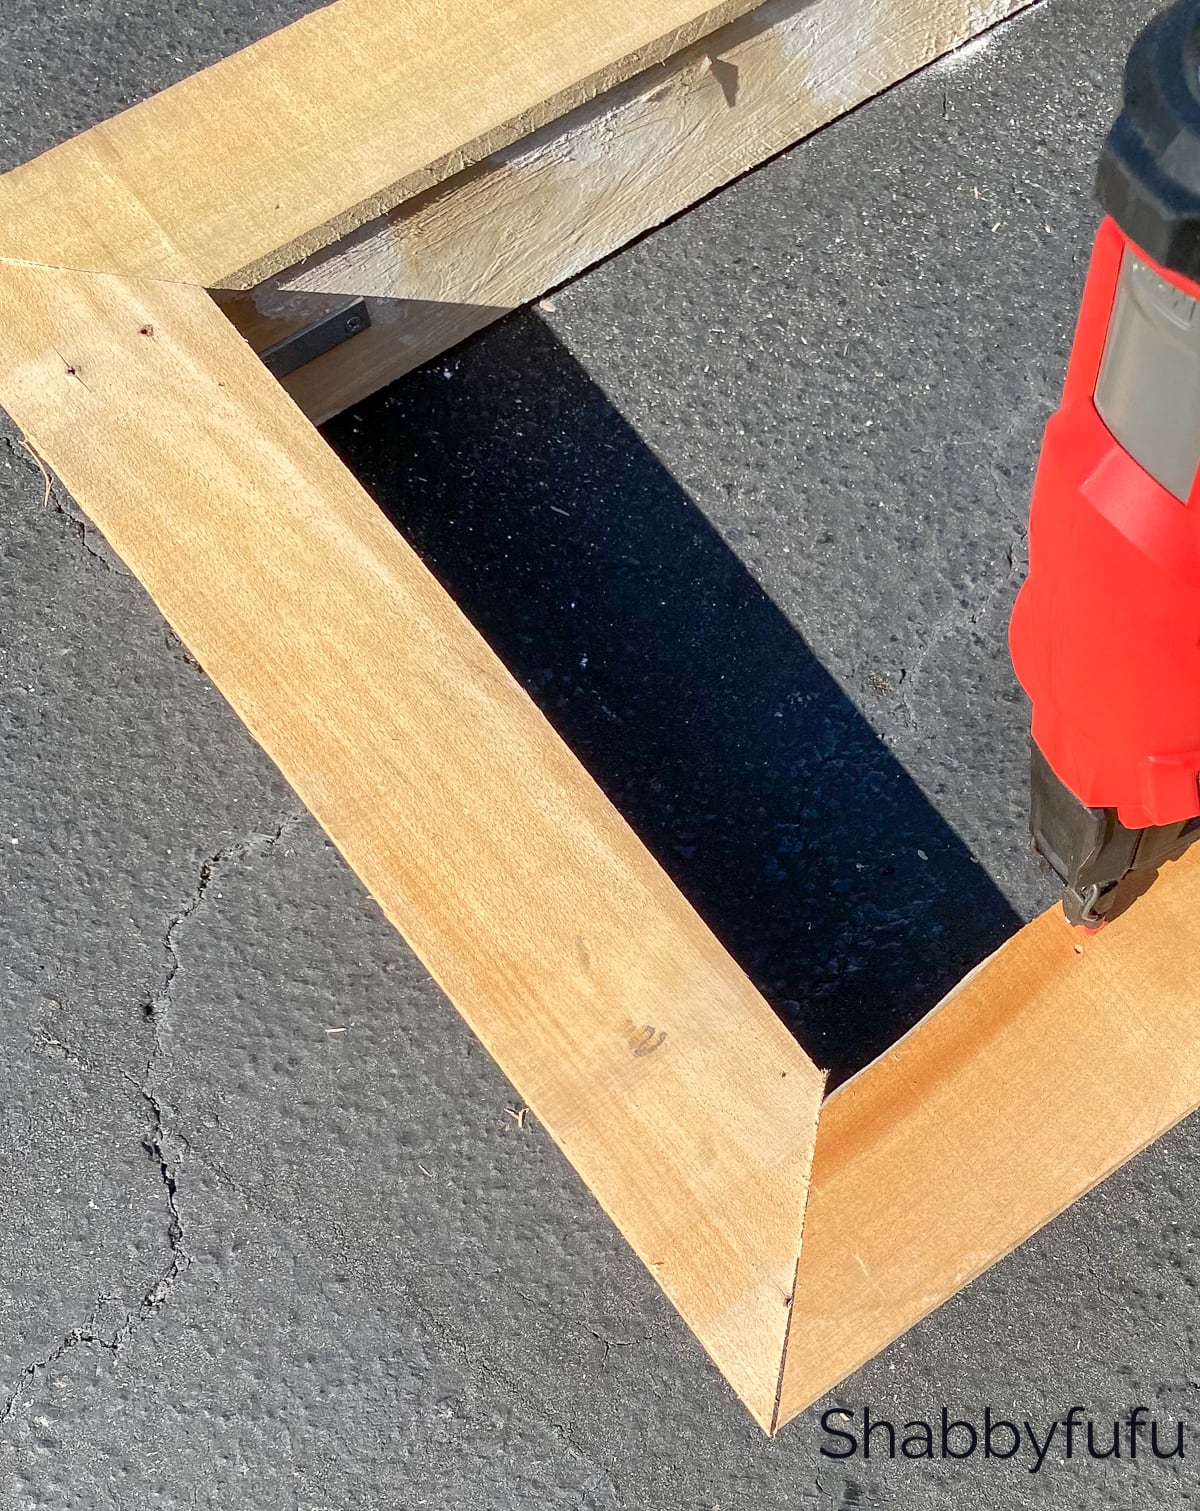
STEP 8 –
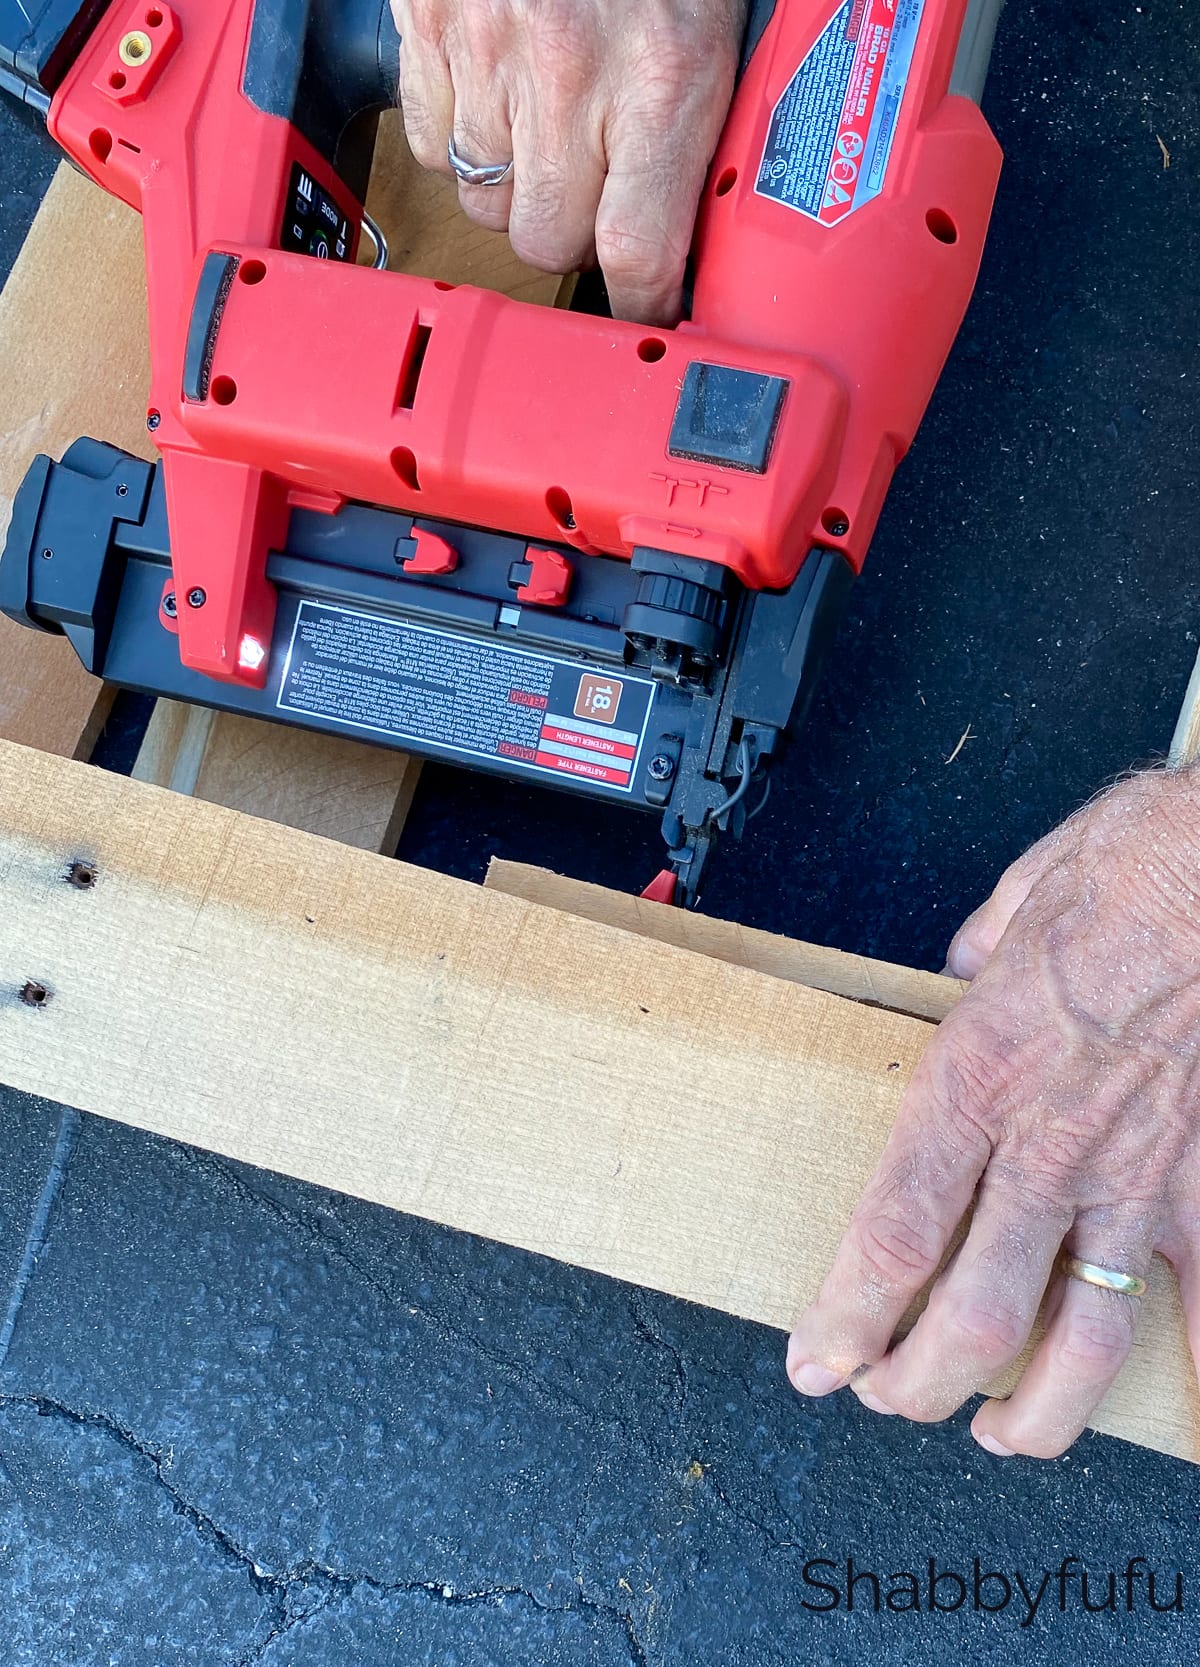
Next assemble and then attach the outside frame to the box frame using your nail gun. A nail gun is such a handy tool to have for any diy enthusiast.
STEP 9 –
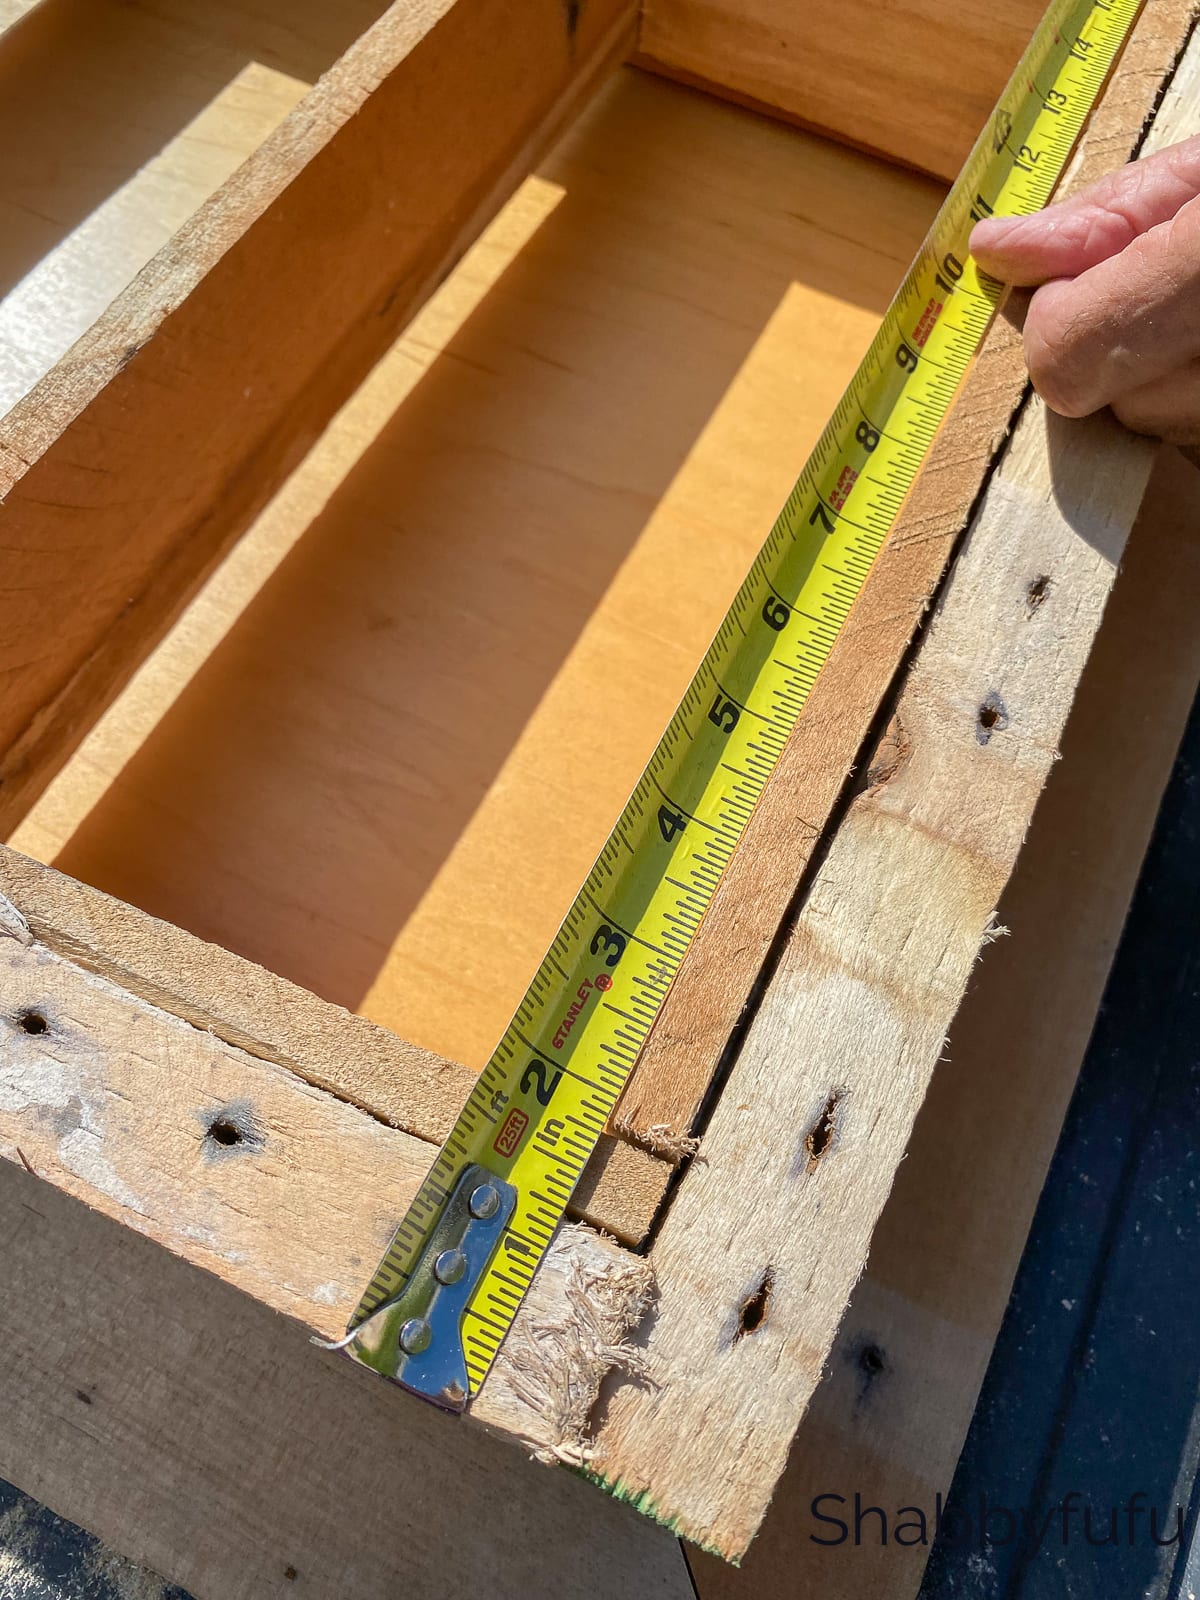
Cut two pieces to measure 15 1/2″ long. These pieces will be for the shelves.
Step 10 –
Decide how far apart you would like your shelves. We spaced our shelves out to be 8″, 7″ and 6 3/4″ apart from each other. We found it to be more interesting to have varying heights in this situation! Cut the brackets to the above measurements to hold the shelves in place.
Step 11 –
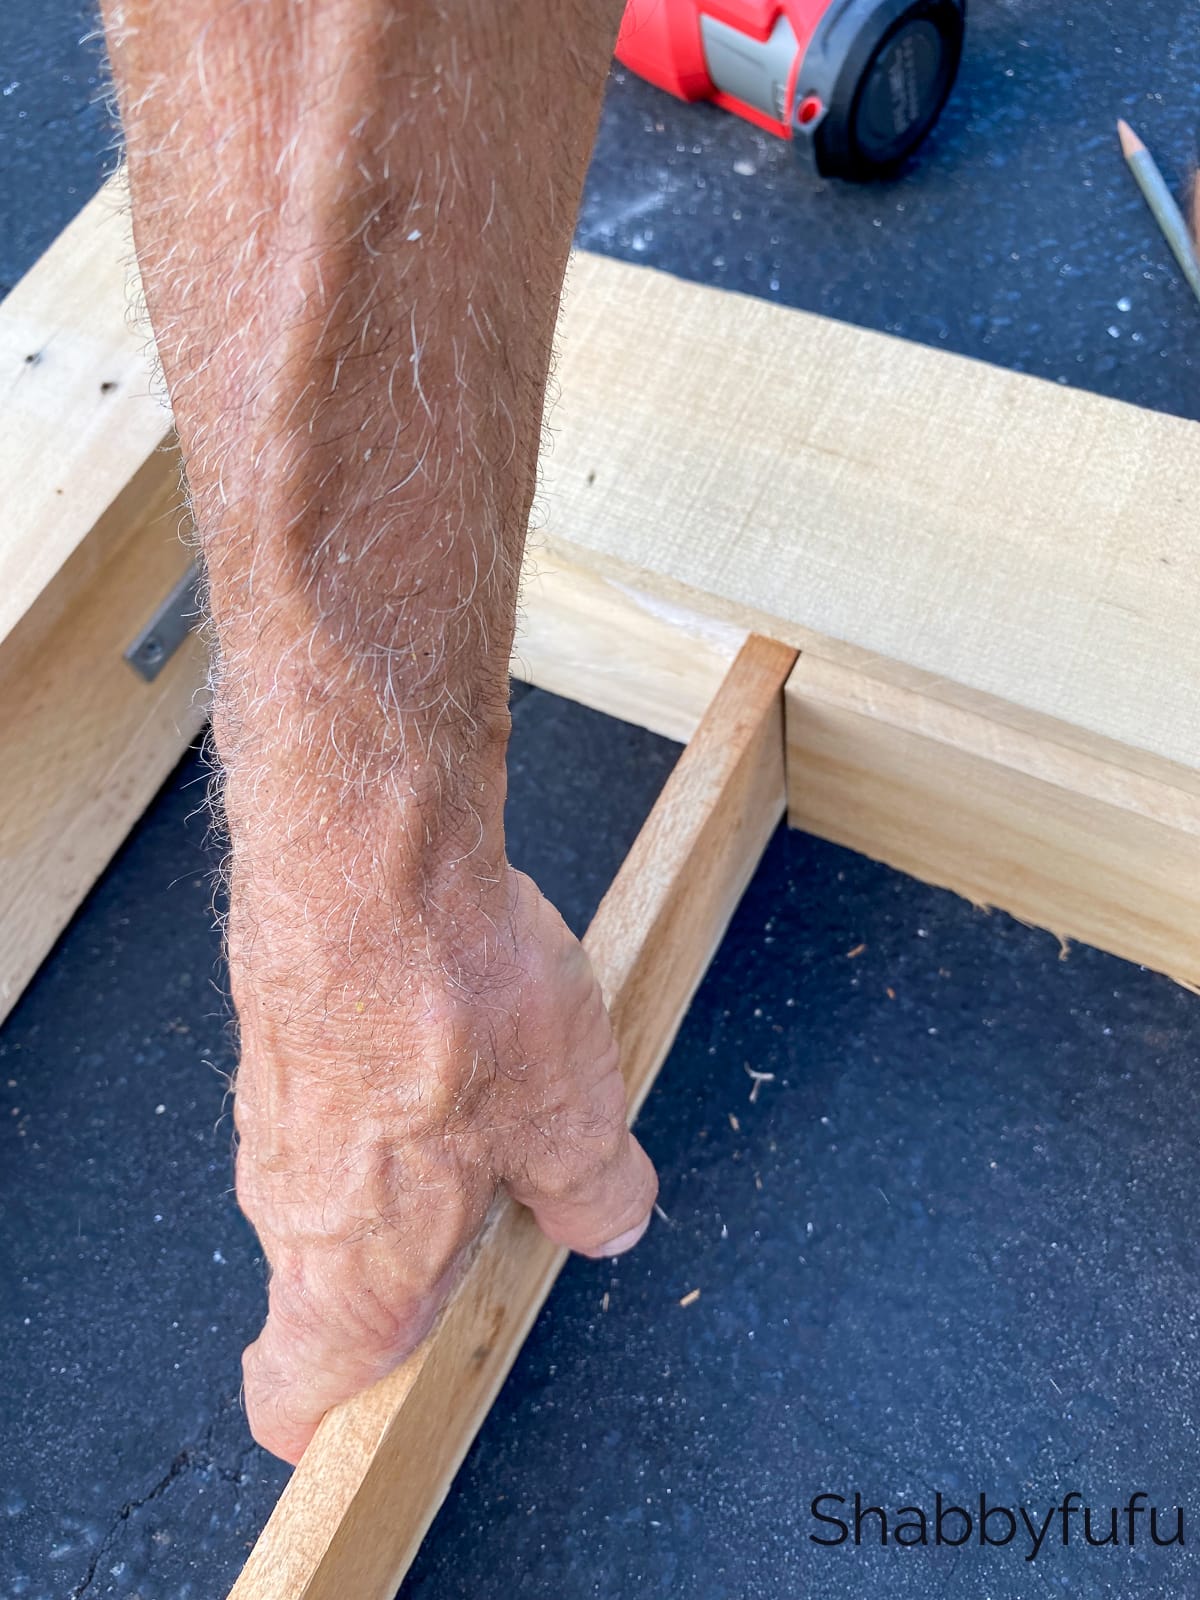
Using your nail gun, start with two pieces cut to the same length. Nail one on either side of the inside of the box opposite each-other. Place a shelf on top of the two pieces that you’ve just installed.
Step 12 –
Take two more pieces that measure the same length and nail them inside the box for the second shelf. Place the shelf on top of the bracket.
Step 13 –
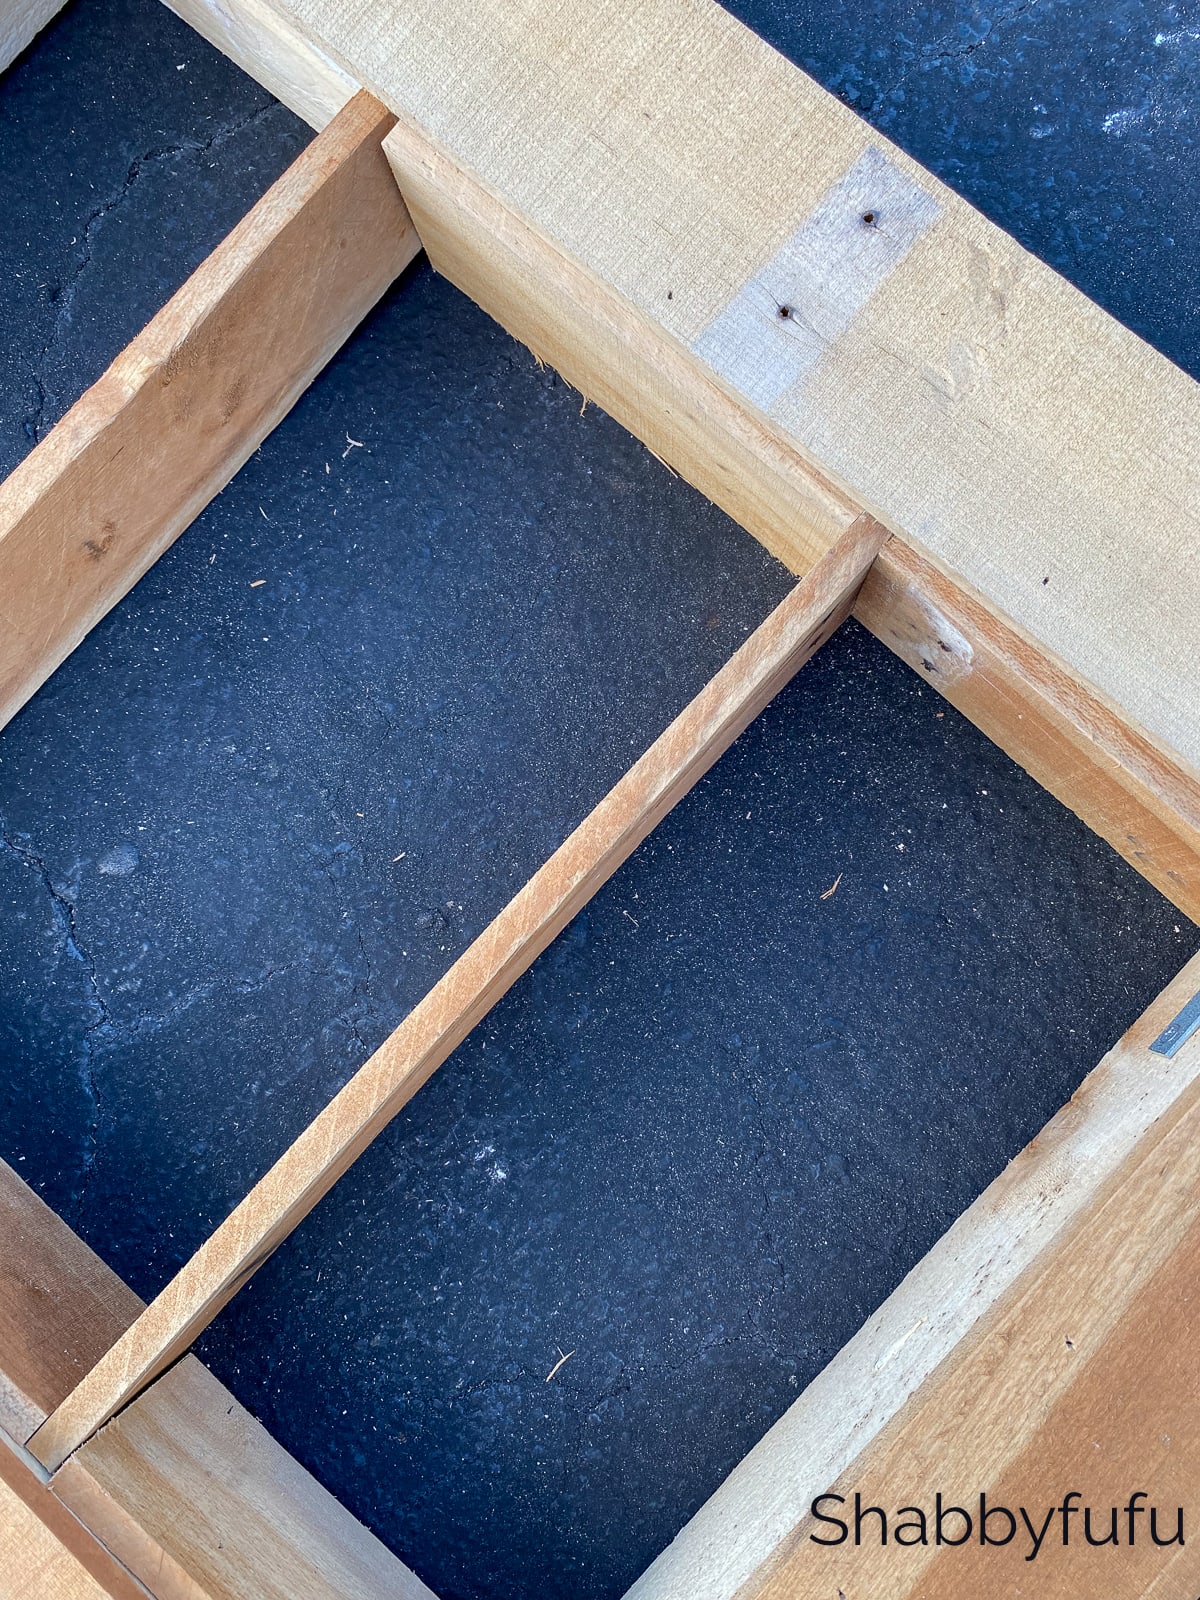
Measure the final space to make sure that the pieces you’ve previously cut fit. If not, now is the time to trim them.
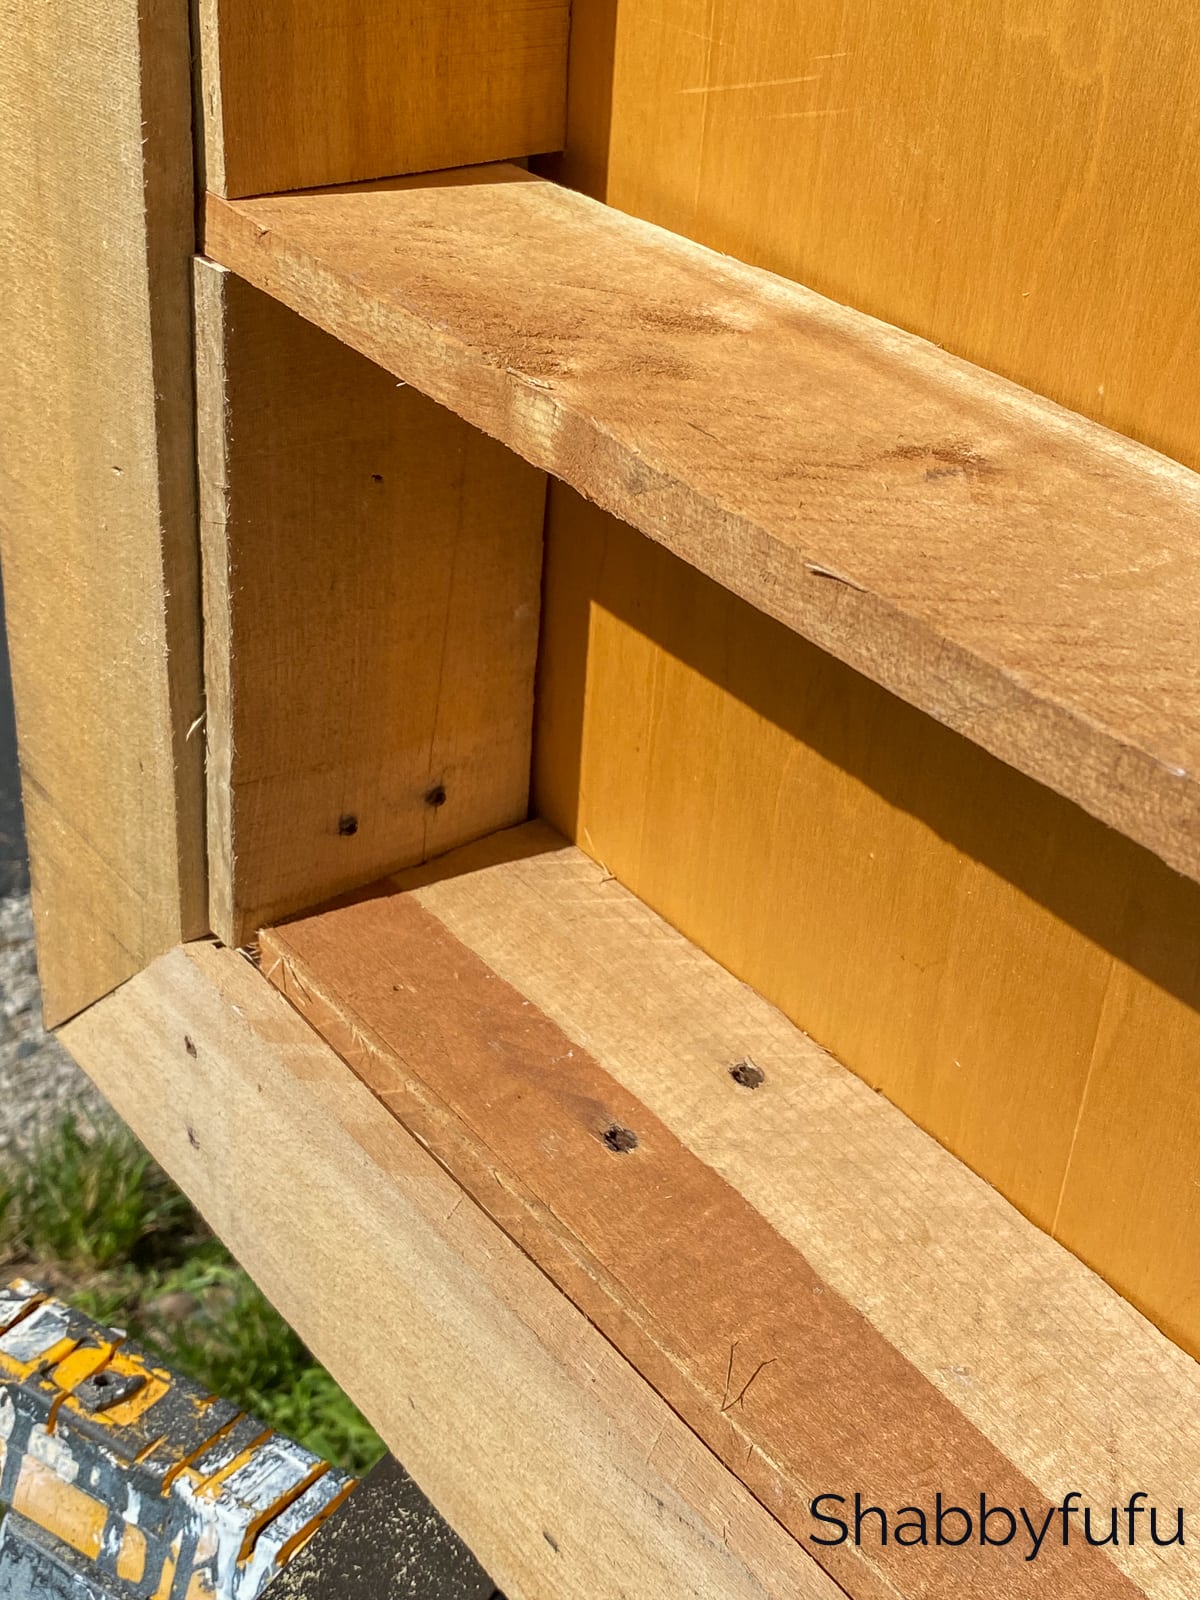
Step 14 –
You may want to hide the corner braces for a more attractive look. In this case cut two pieces to measure 14 1/2″ and nail them into the top and bottom inside the frame.
Adding A Back To The Rustic Wood Shelves
Step 15 –
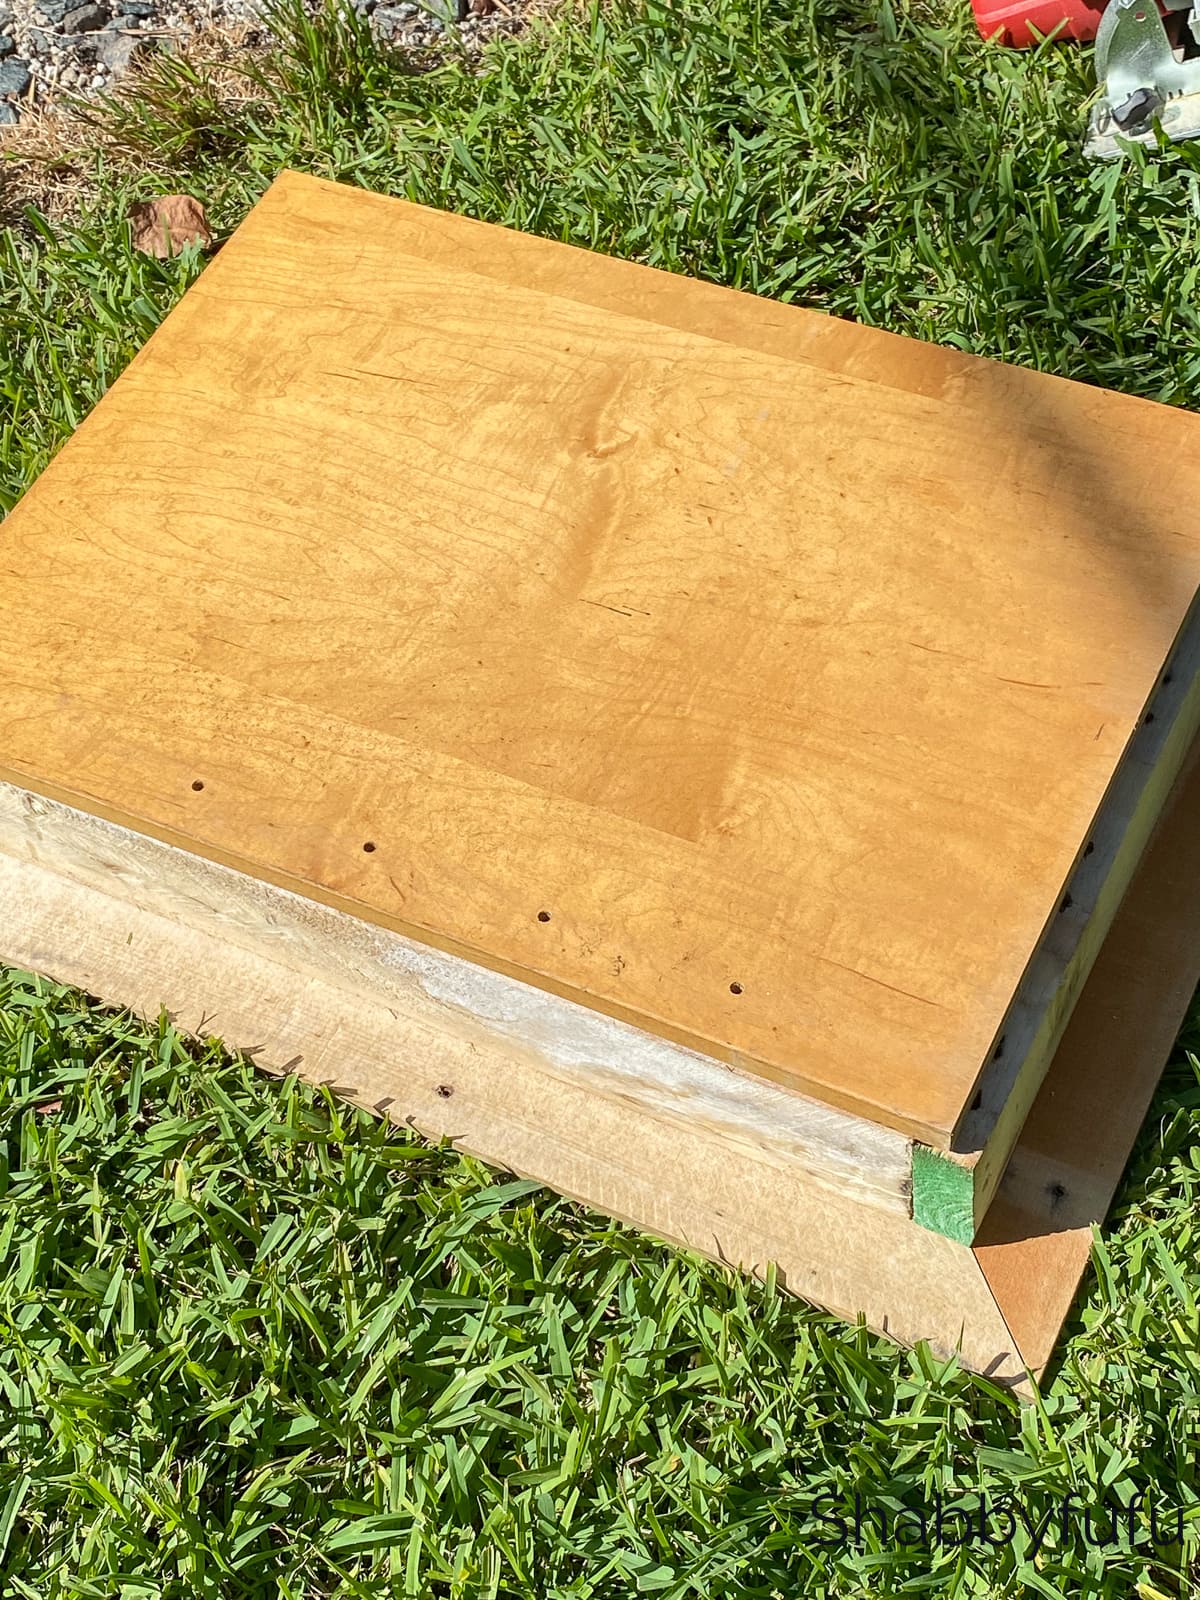
We had a piece of birch plywood left over from a previous project. A serendipitous moment, since we could use this as the back of the pallet frame shelf. You could just leave the back open and hang on the wall. I like the look of a back so that it appears more as a furniture piece than just a frame shelf. If you are indeed a DIYer as we are, be sure to save your leftover wood scraps for future projects if you can. I can’t tell you how many times we have saved money by reusing wood pieces! Plus, it’s good for the environment too!

Measure, cut and nail on with nail gun.
As you can see this is a rustic piece and the nail holes do show. We chose to leave it just as is. You definitely could take it a step further if desired and fill the holes plus paint or stain the wood.
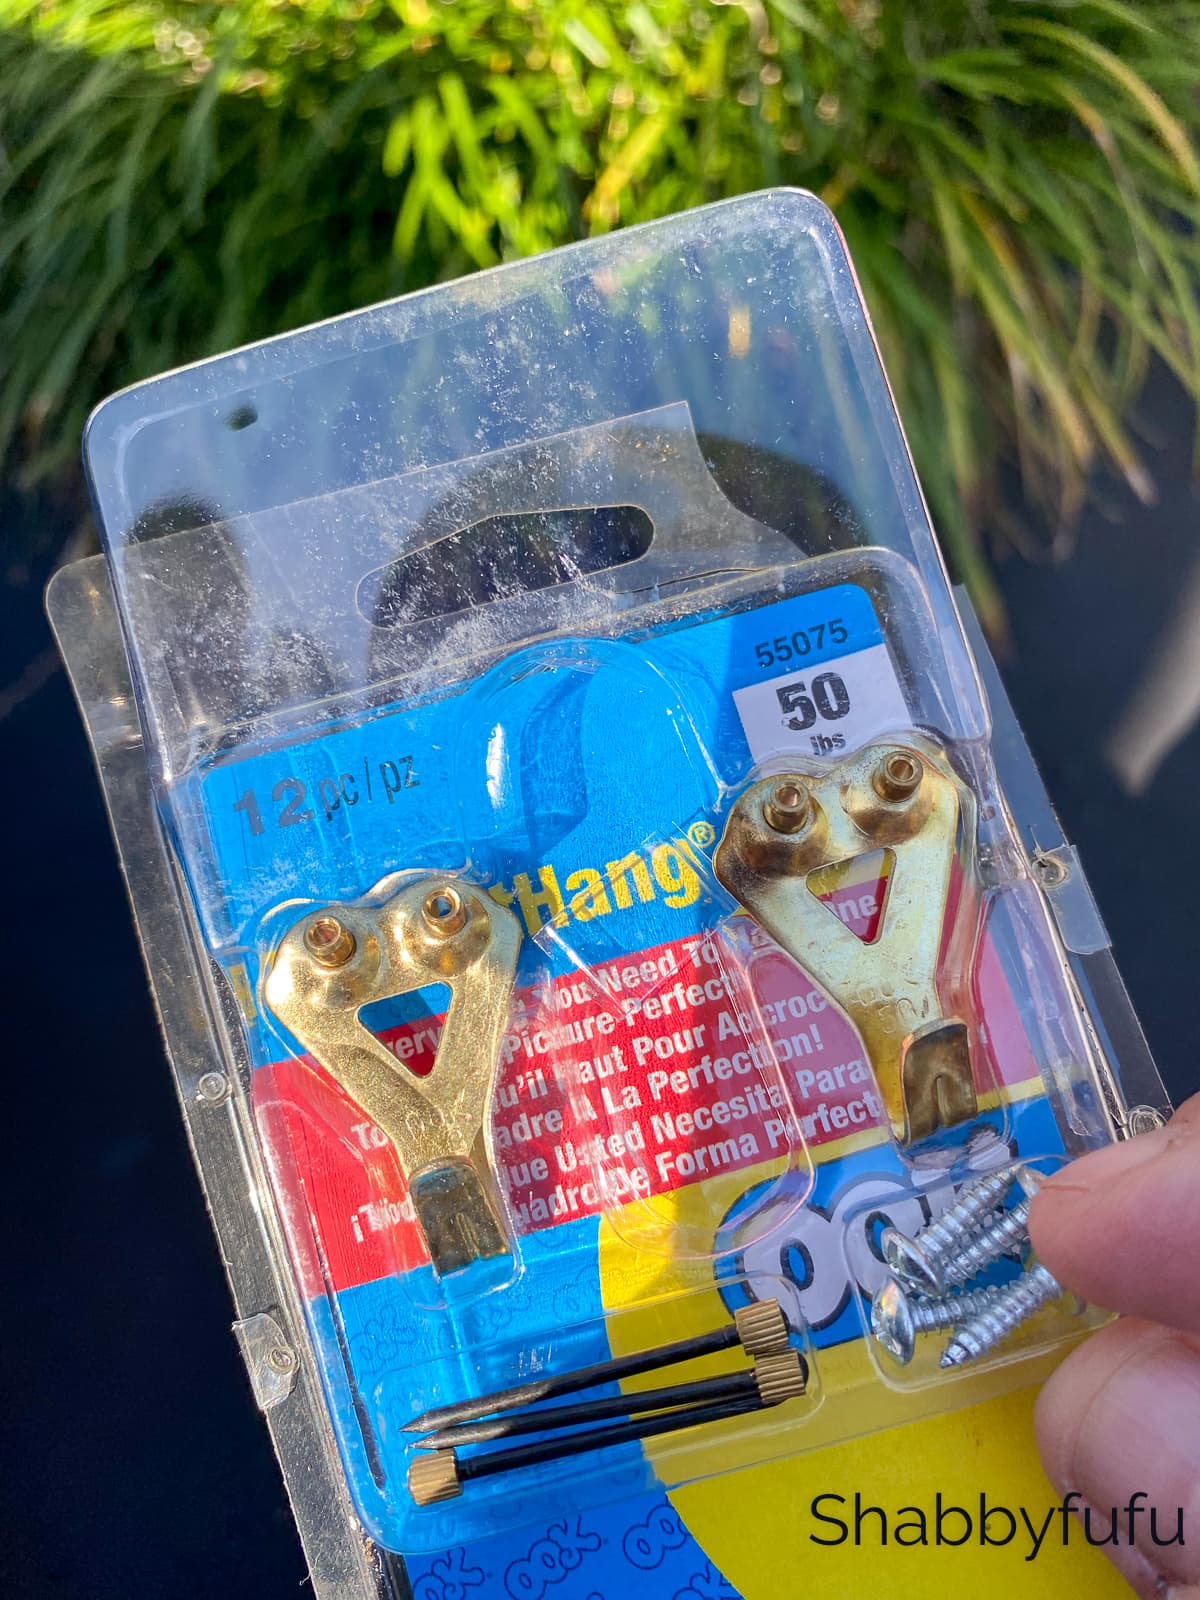
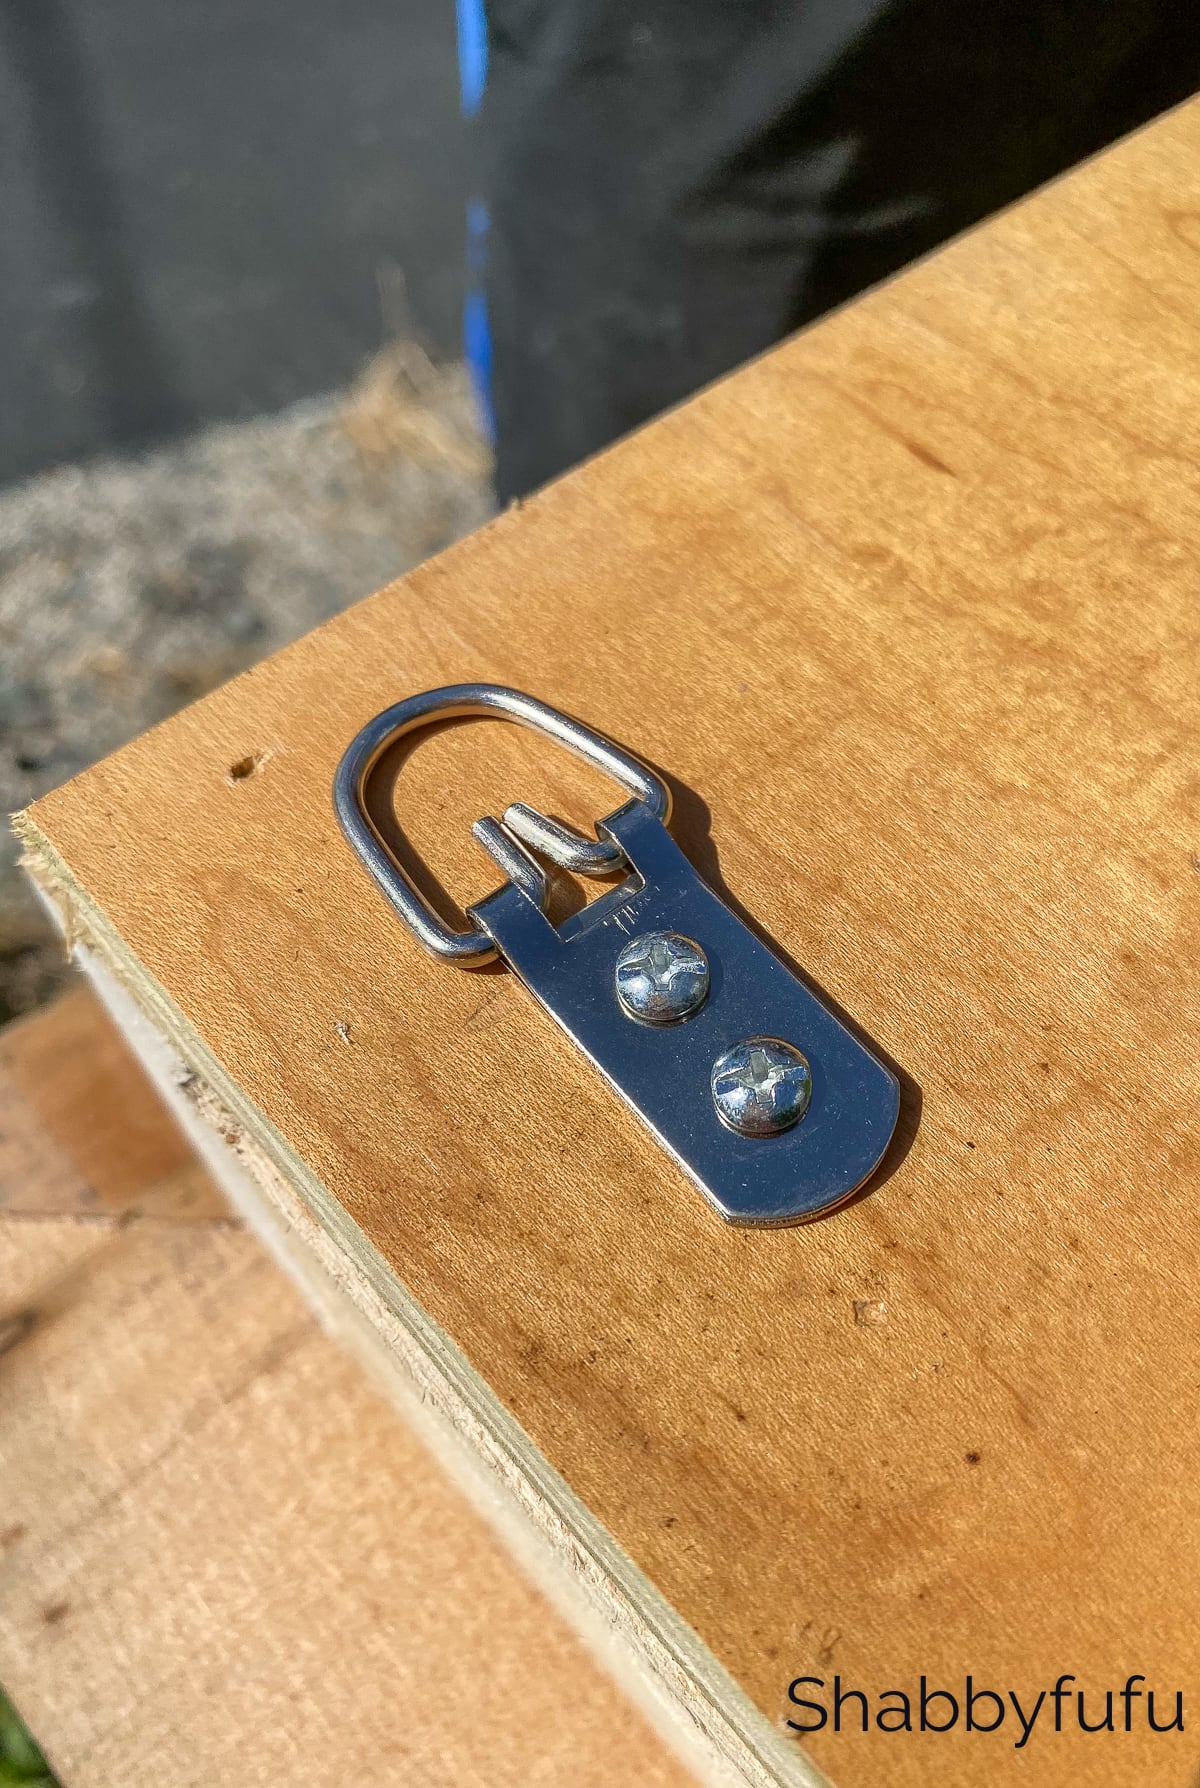
Attach heavy duty hangers (such as these) to the back of your shelf and you are ready to hang!
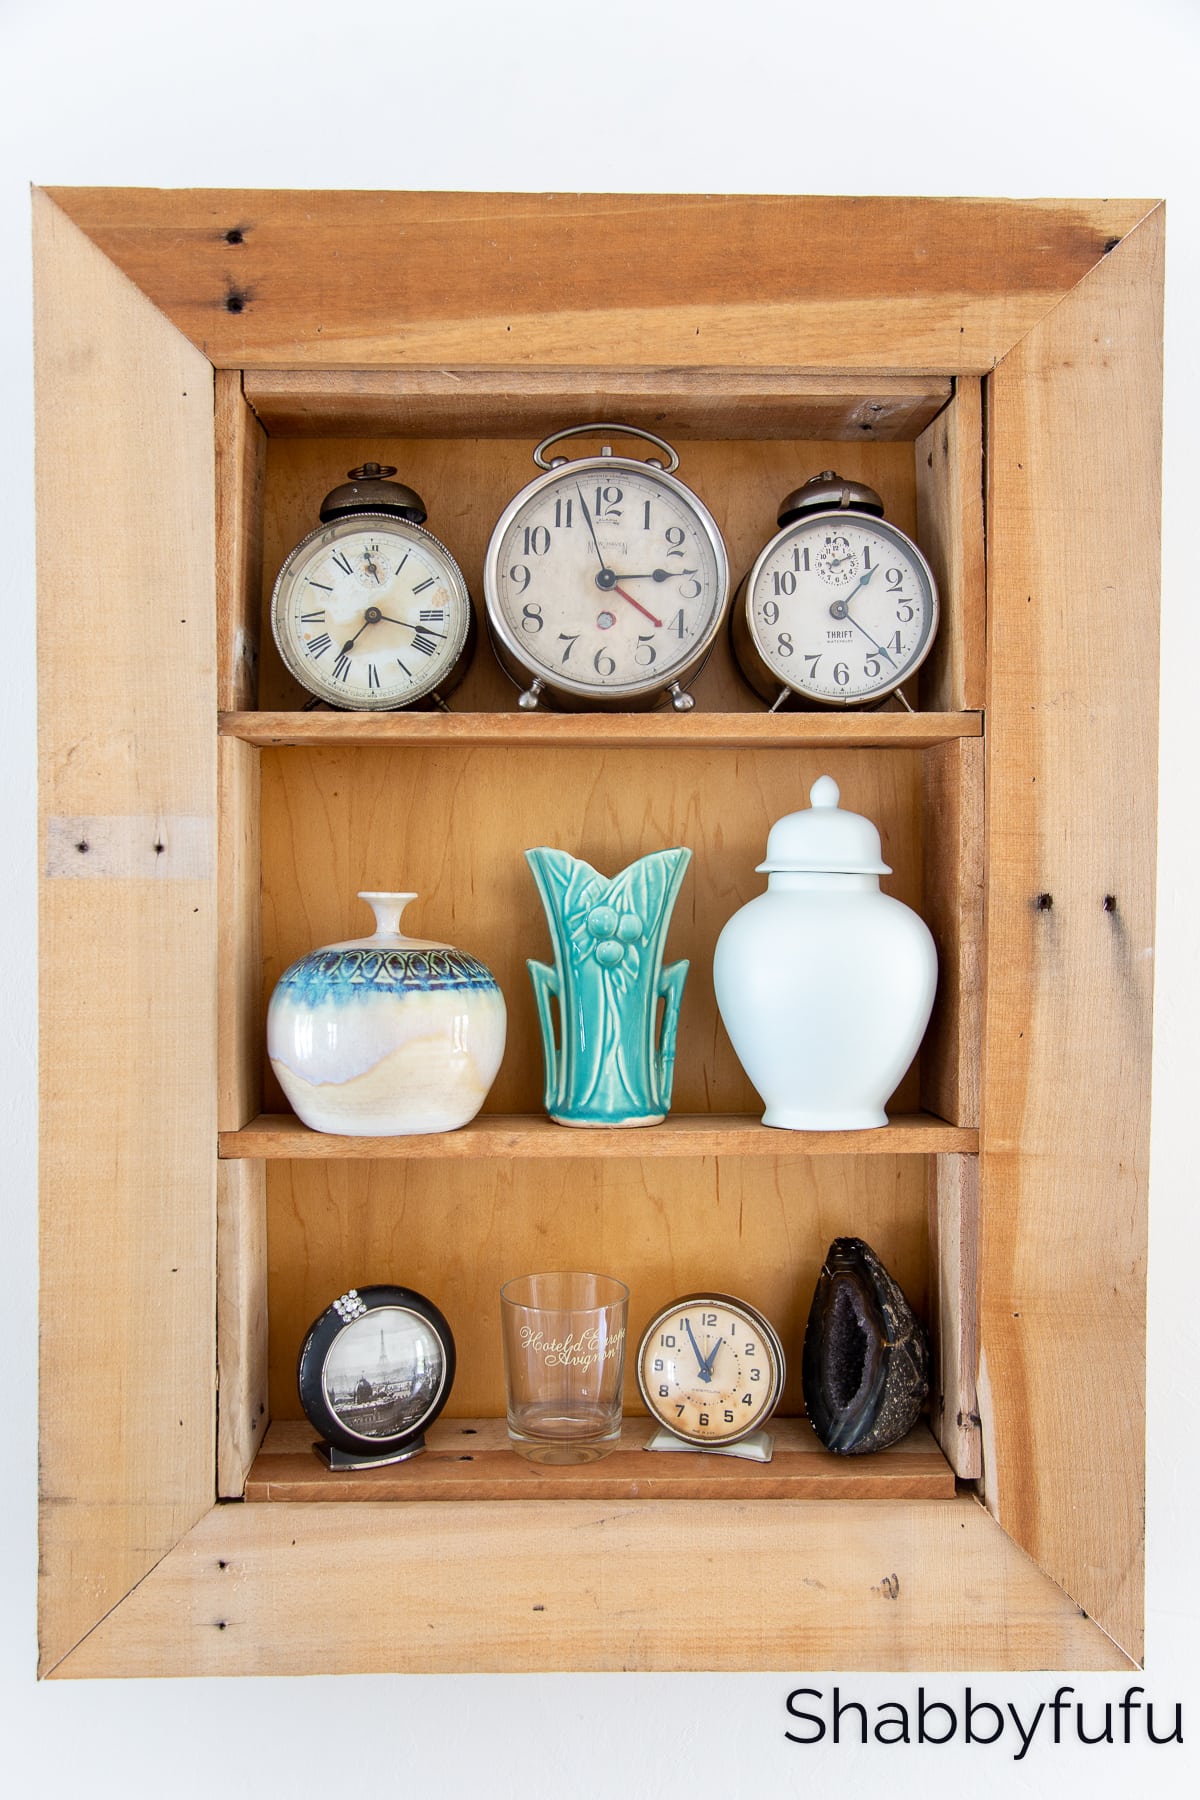
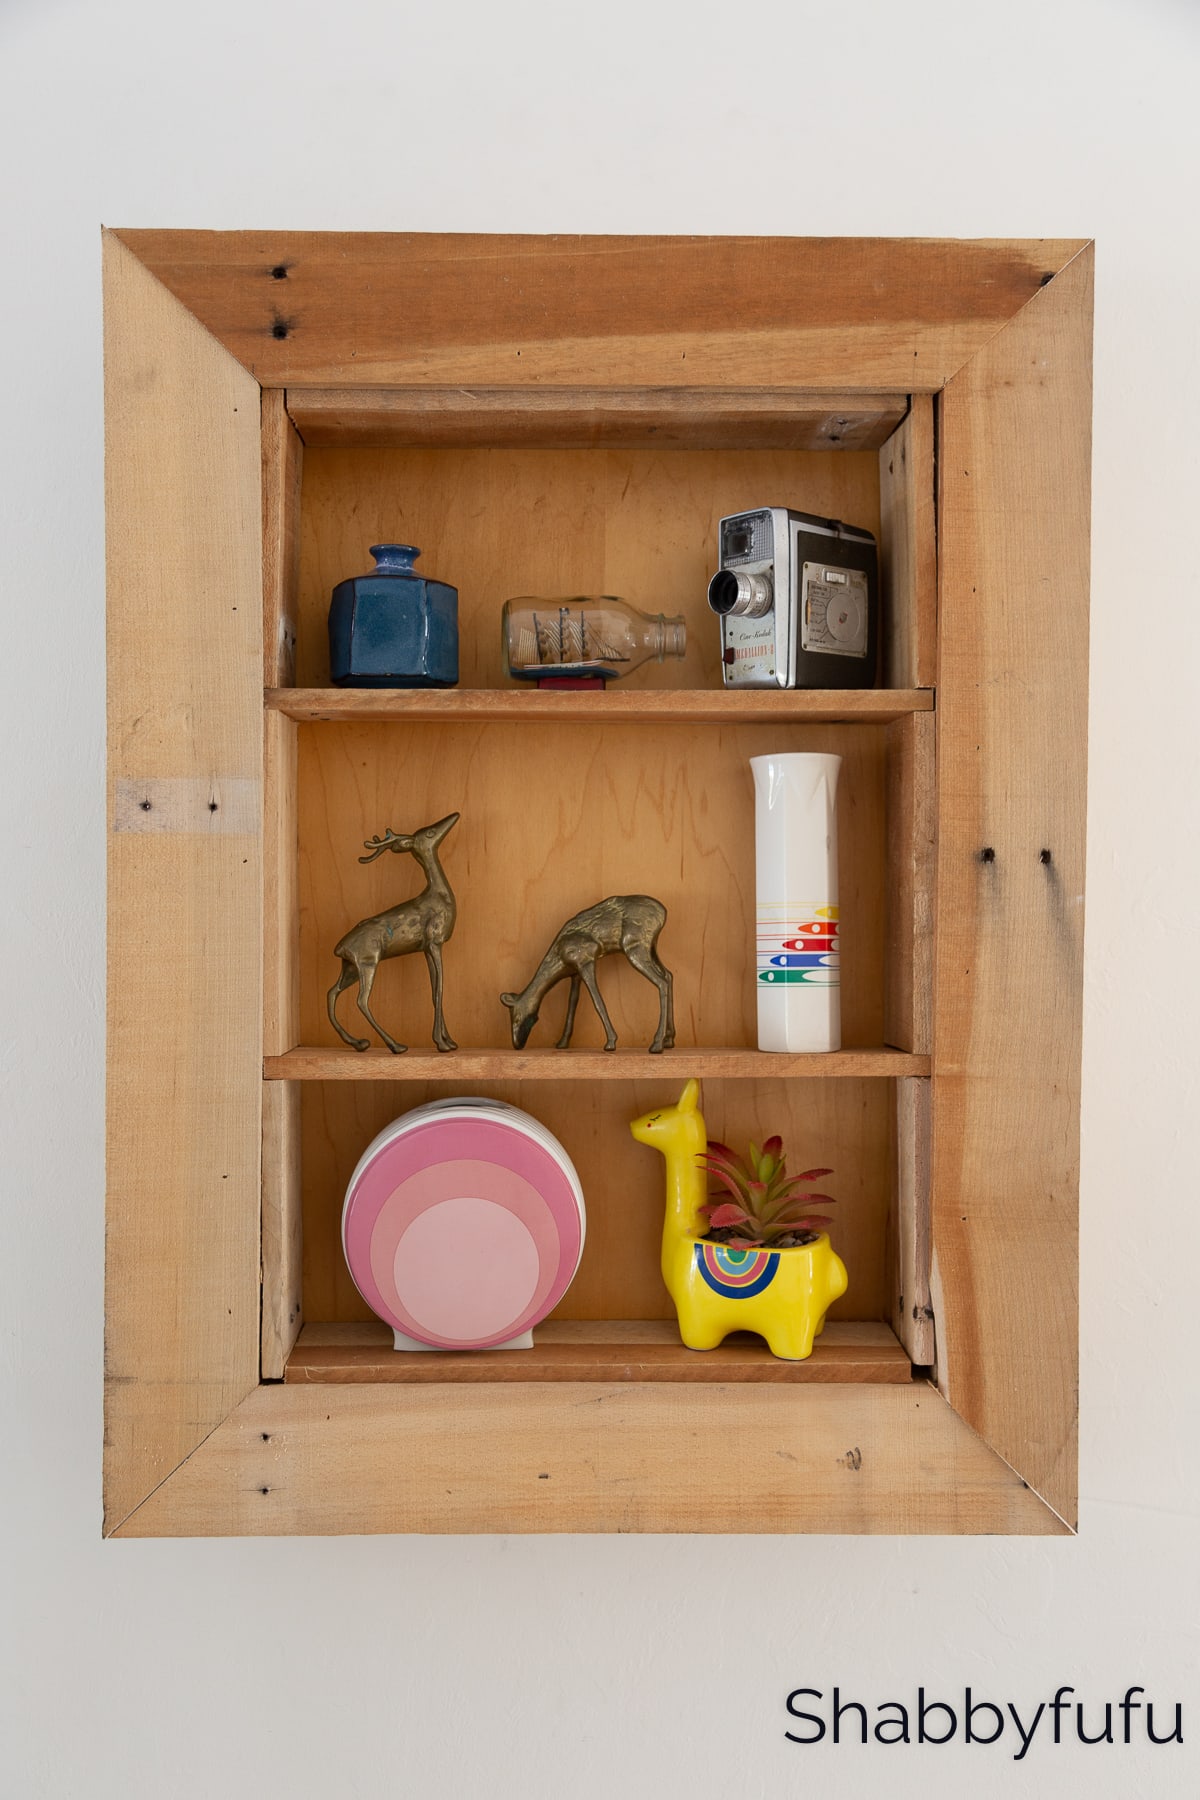
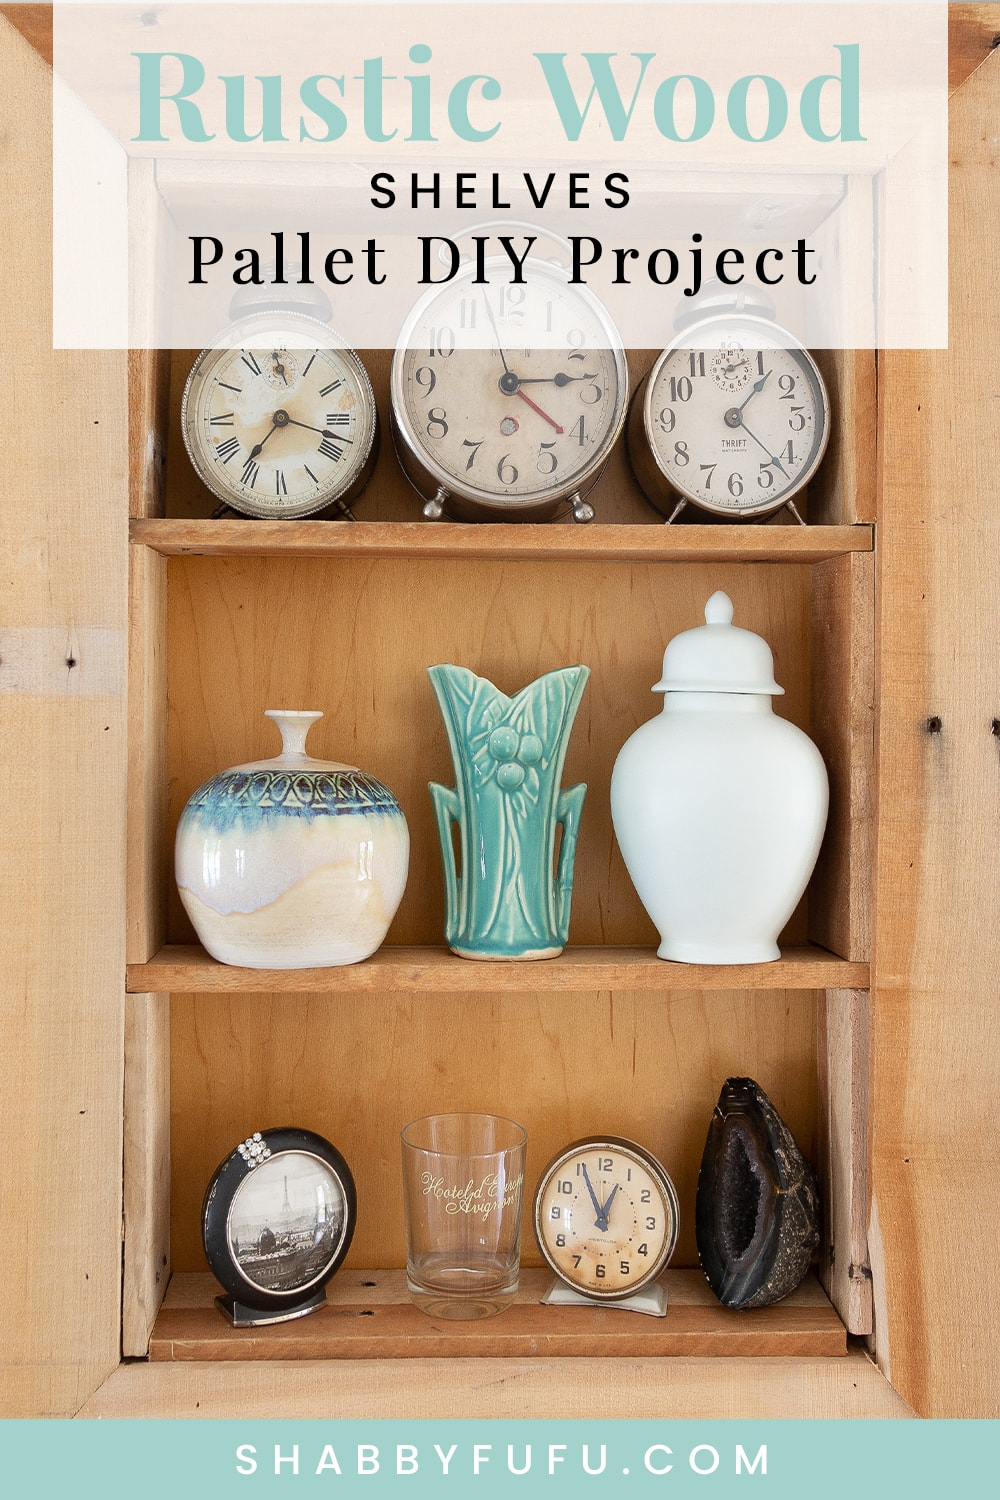
The Finished Rustic Wood Shelf
Where and how can you utilize a shelf system like this?
- In a den, family room or home office to display collections.
- A bedroom – in fact one of our daughters claimed this for some of her vintage modern displays (below)!
- Kitchen nook or pantry for spices or small items. Just be sure to space out the shelves correctly your needs.
- Bathroom – if your style is more rustic chic this is perfect for storage of bottles and jars.
- Outdoors on the patio for small plants and cuttings.
This project costs nothing, since we used a free pallet and wood for the back that we already had. While there are many, many project ideas that you can use pallets for, this one is quite easy and practical as well. Let us know where you would use something like this idea, and pin the post below to save the DIY for later!
I try to keep every wood board we end up with after a project as well. What a neat idea Janet!
I have those same reindeer I sit on our shelves especially for the winter and fall.
You are blessed to have a handy helper too. I wonder if you sand those pallets down if they ever get really smooth or stay rough due to the wood type? This would make a good shelf for the laundry room for those small things I use like lint stone, bar cleaning soap for stains (which I keep losing) and essential oils you might use on your dryer balls….just an idea:0)
We have little room for the extra wood and store them in the garage under my husbands race care that barely gets used…hah! Good idea for the shelf!
Excellent! Excellent project!! Pleased lotsssss more!!! Thanks! Debbie
I’m so glad that you enjoy the DIY projects here Debbie! If you click on DIY on the top bar of the site you’ll see all of the many projects that I’ve posted to date!
I really like this, so functional. You guys can most likely put puzzles together fast. lol
The shelves look like they could slide in & out. Great job
The shelves do slide in and out Rhonda and we love to tackle DIY projects as a team ;-))