Wreath Making For Summer – Vintage Style
This post may contain affiliate links. For more information, please see our disclosure policy.
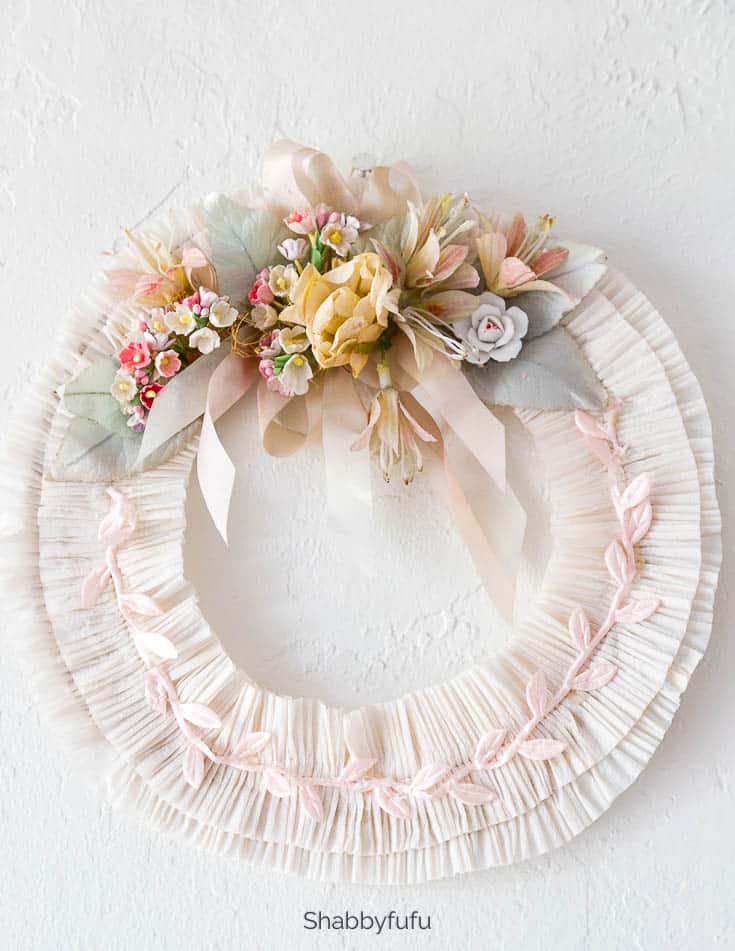
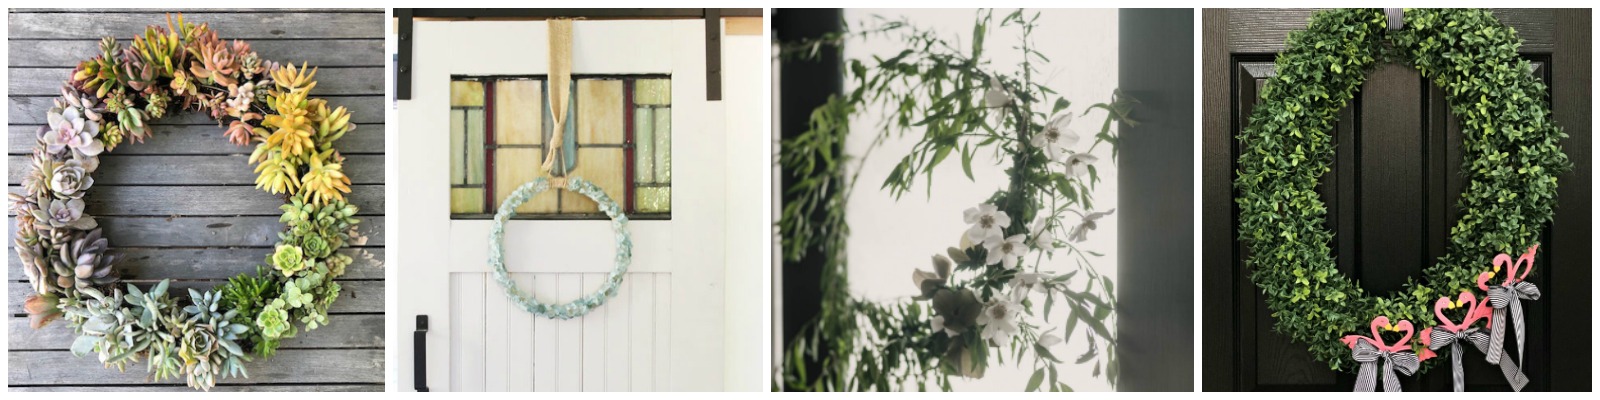
Are you are looking for wreath making ideas for summer that are different from the rest? In this tutorial you’ll learn how to make a pretty vintage wreath with crepe paper and flowers.
I have to admit that while my home has been going through a KonMari moment, my office/studio is a hot mess overflowing with supplies! Difficult to part with the bits and bobs that I’ve collected for crafting over many years and when an idea pops into my head it does come in handy. This pretty summer wreath or vintage wreath is quick and easy and I feel like wreath making ideas are just that…ideas, and then you make it your own. I’m joining some others in a summer series today, hosted by my friend Krista of The Happy Housie…scroll all the way down for more!
This summer wreath is created on a cardboard background, which is a bit unusual for a wreath and you wouldn’t hang it outside. However it’s perfect for indoors…on a wall with a nail or a door. Do you have a home office of your own? Make one…and I am starting out with a list of supplies that I’ve hunted down for you below. Click on any image for more info.

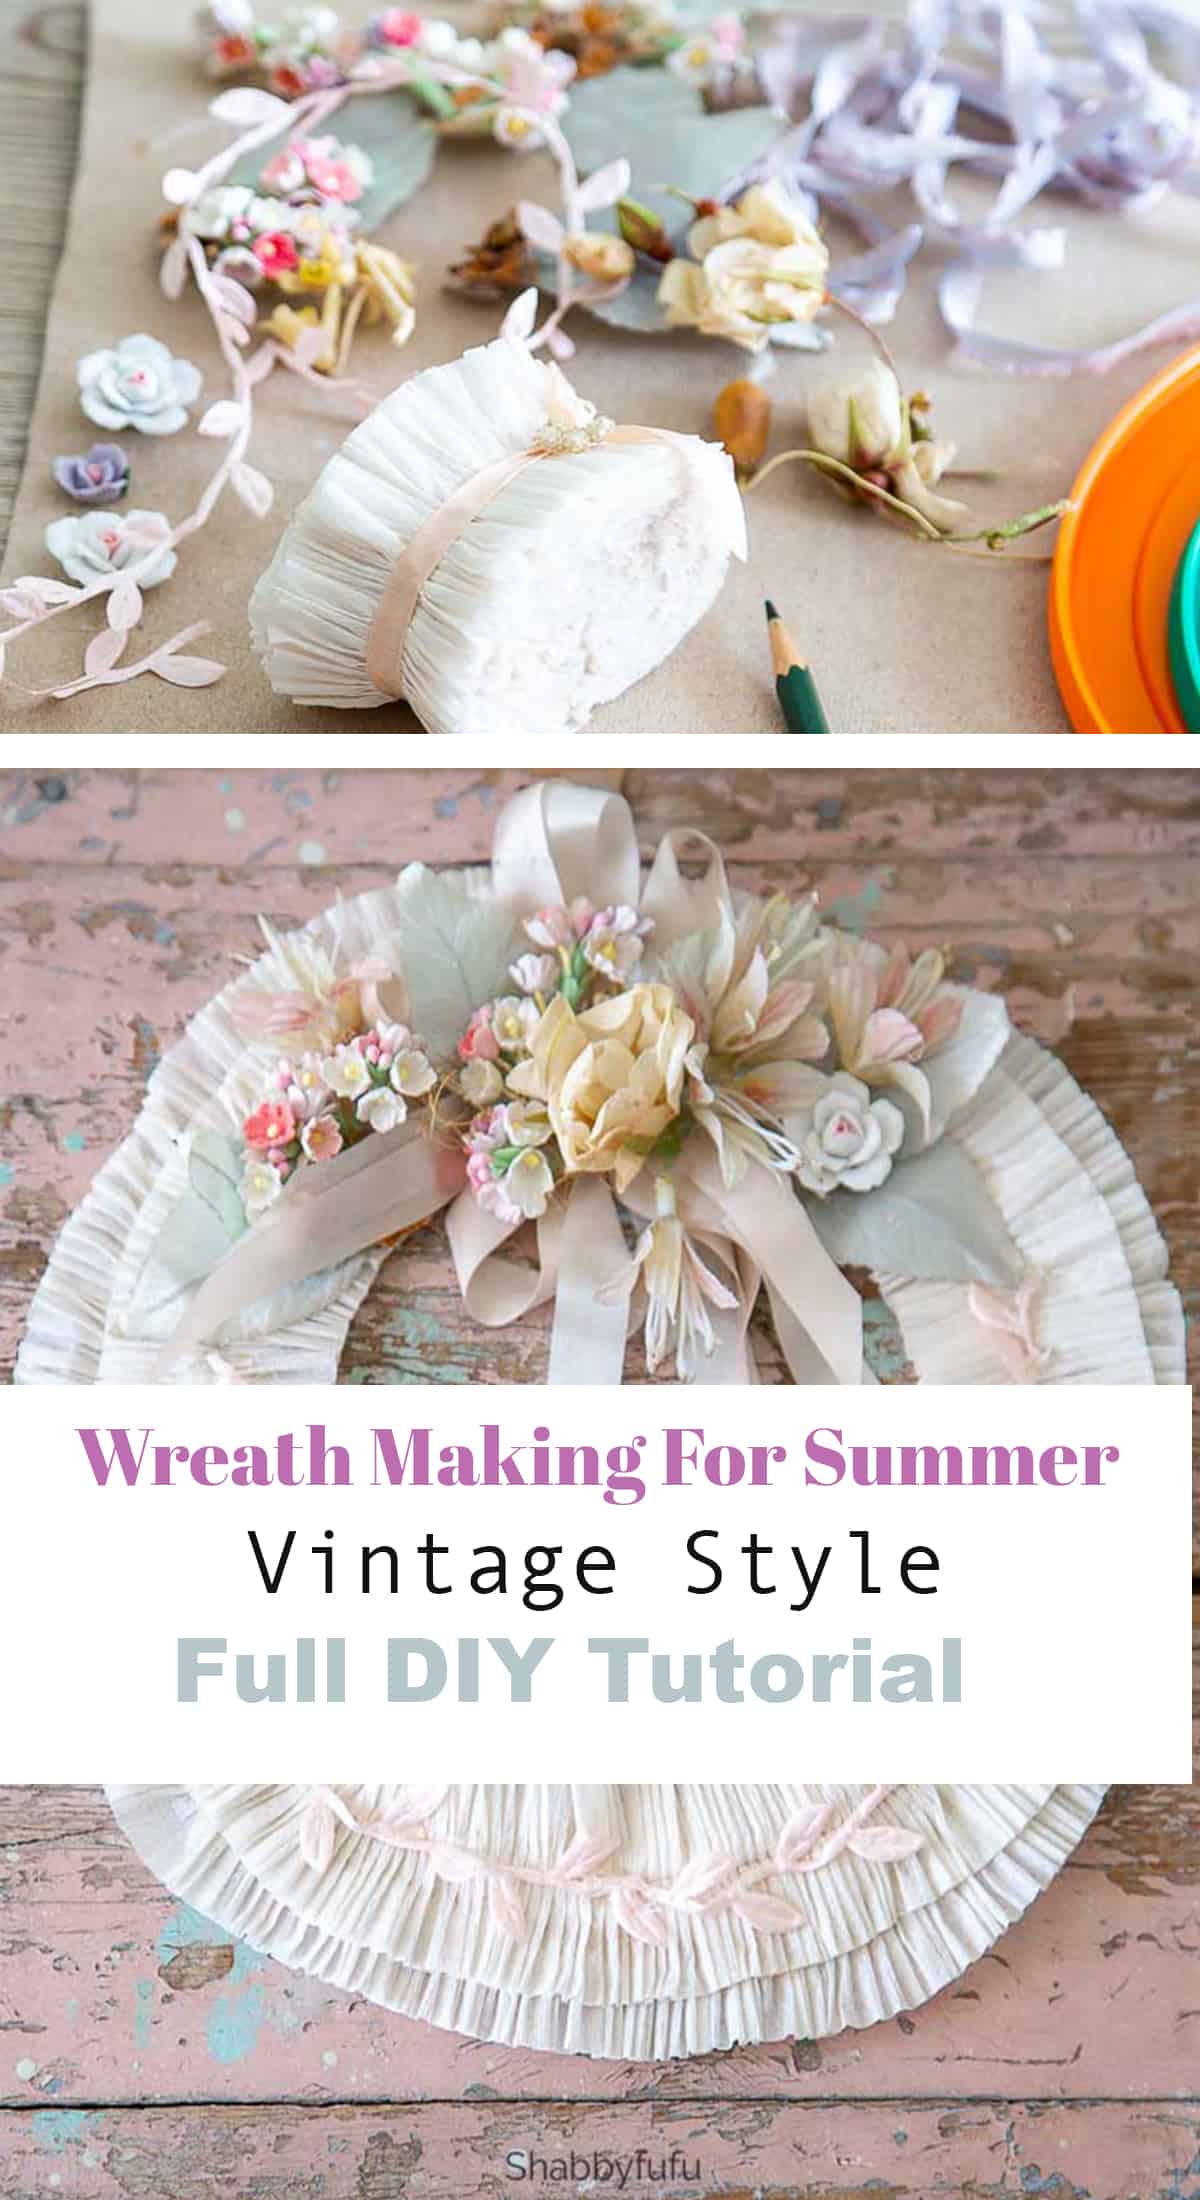
A detail shot showing the bevy of beauty in supplies put together without much of a plan. This wreath took me about 20 minutes to create and honestly it’s one of my favorite wreath making ideas to date!

Vintage Wreath For Summer
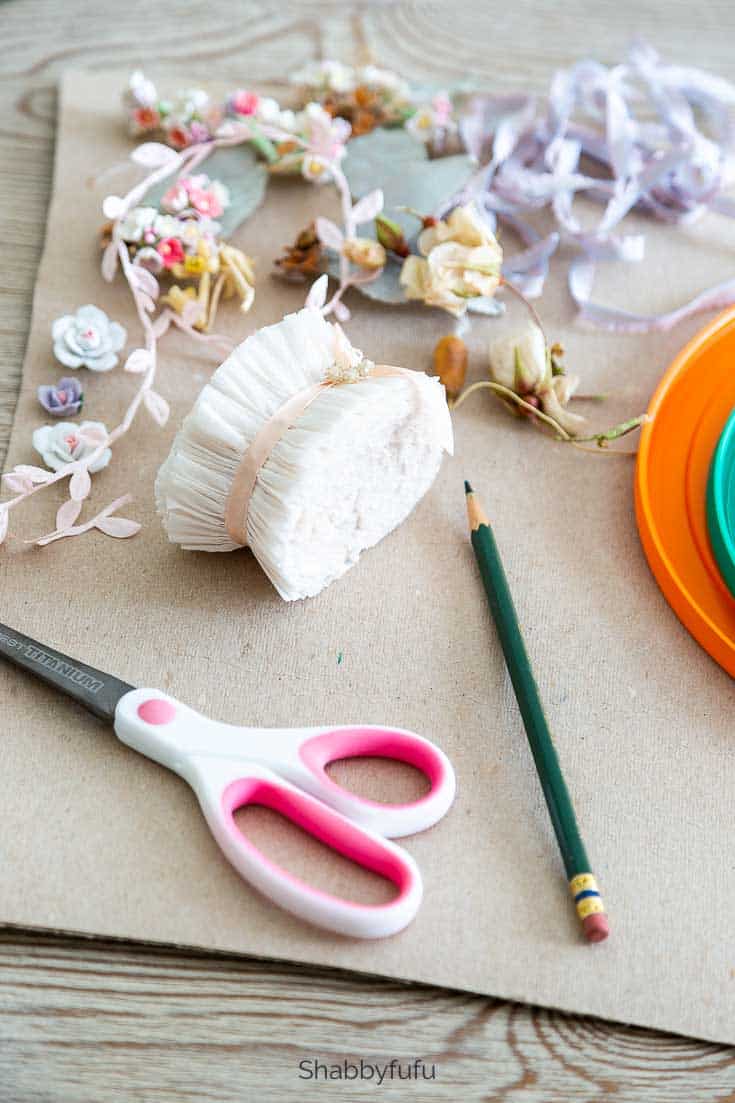
What You’ll Need (Supplies)
- A piece of cardboard larger than the size of the wreath you’ll want.
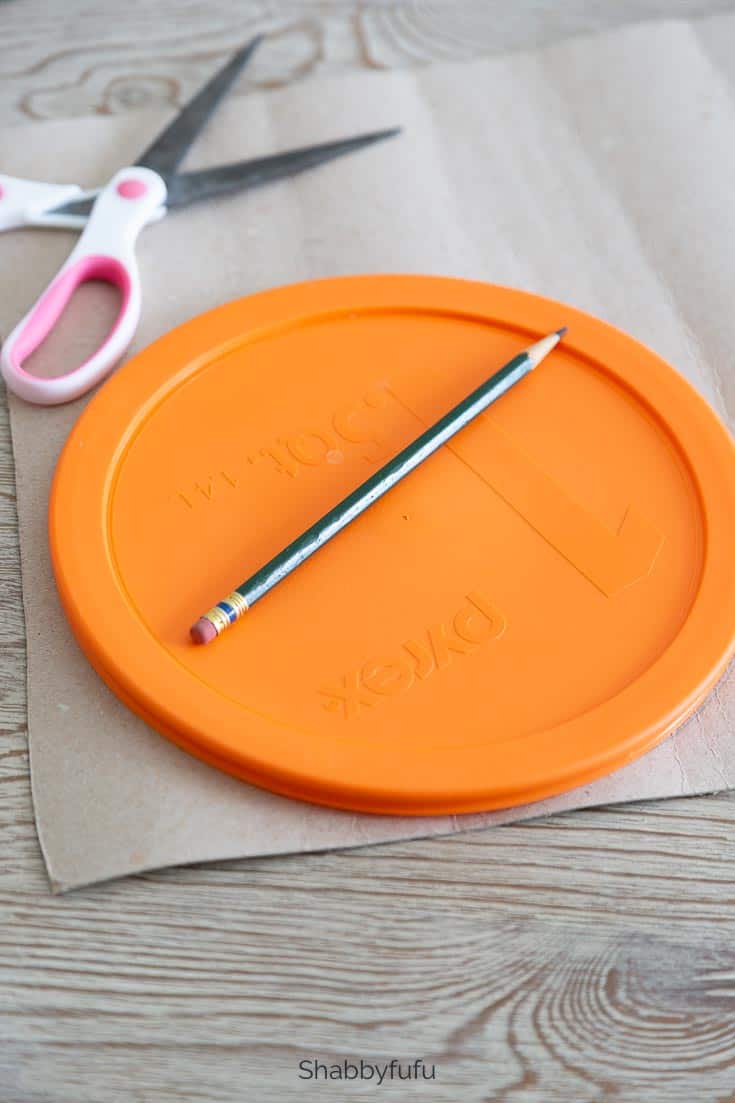
- Circular objects (one about 3″ larger than the other) to trace for your wreath form. I used plastic food container lids and bowls work well too.
- Scissors and a pencil for tracing.
- Wire for making a hanger.
- Glue gun.
- Crepe paper streamer
- Assortment of vintage millinery flowers, ribbon and trims.
Wreath Making Ideas – How To Make A Paper Wreath
Using your lids or bowls, trace a circle shape that will be cut out for the form of the wreath. If you’re a confident cutter then simply trace an inside measurement when finished tracing the first circle leaving 2-3″ for your wreath form. Cut out your form and don’t worry about perfection because you’ll be covering it up anyway. Wreath making ideas for the home crafter should be fun and not stressful.
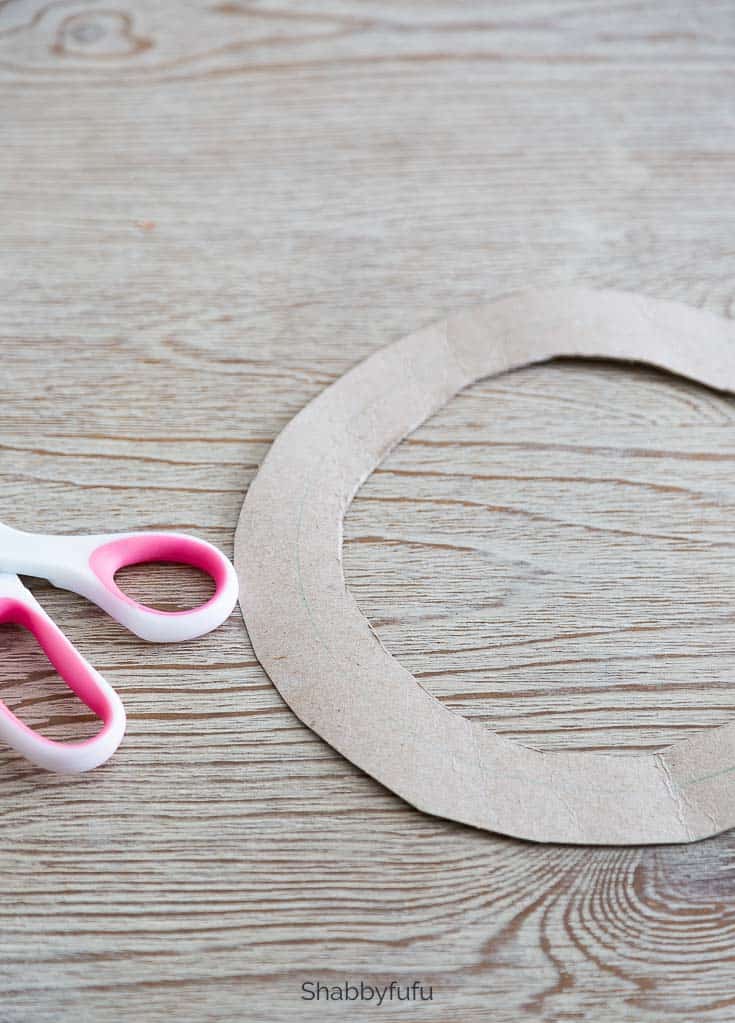
Poke a hole up at the top and insert a piece of wire long enough to twist around to make a hanger. Shown is the back of the wreath and you won’t see much of it from the front.

If you know have a sewing machine, crepe paper is very easy to ruffle. Back when I was doing a lot of selling of my art pieces I ruffled yards and oodles of crepe paper streamers. For this project though I was in a time crunch and had some pre-ruffled that I purchased on Etsy (links are above for your convenience).
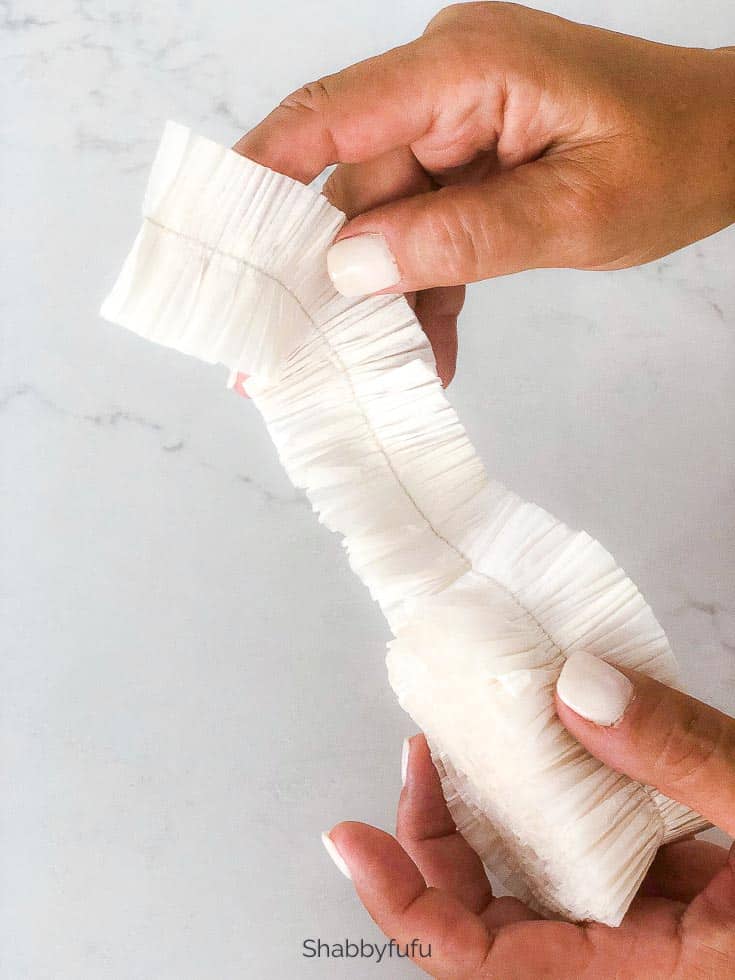
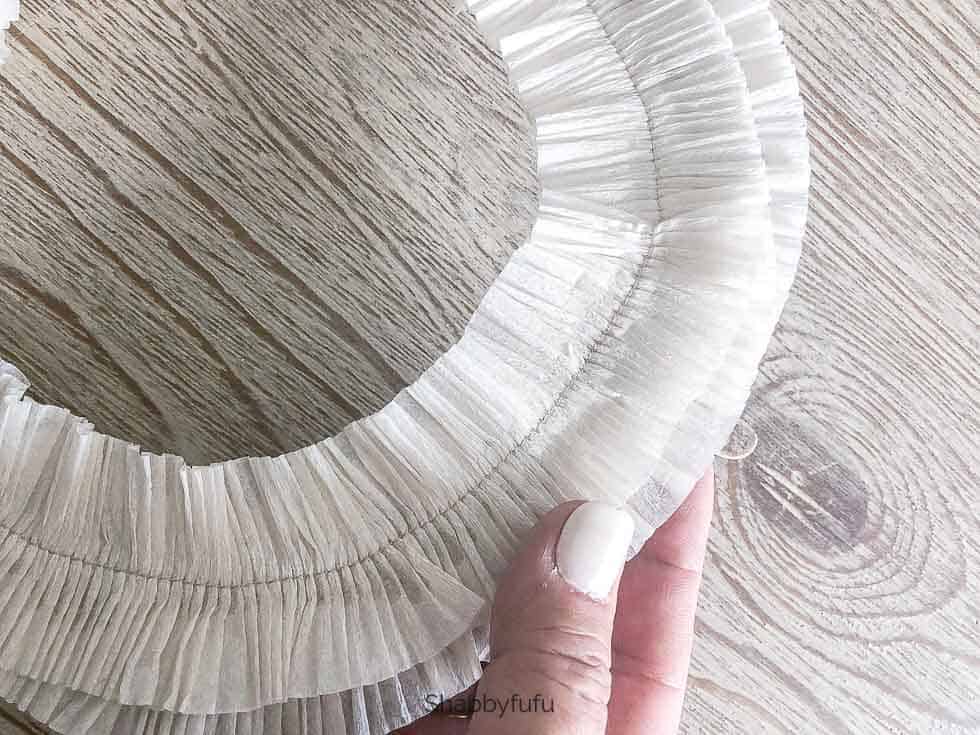
With a hot glue gun, use a small line of glue in the center…working your way around the wreath form. Once finished with your first layer you’ll repeat this and create a second layer to give a fuller appearance.
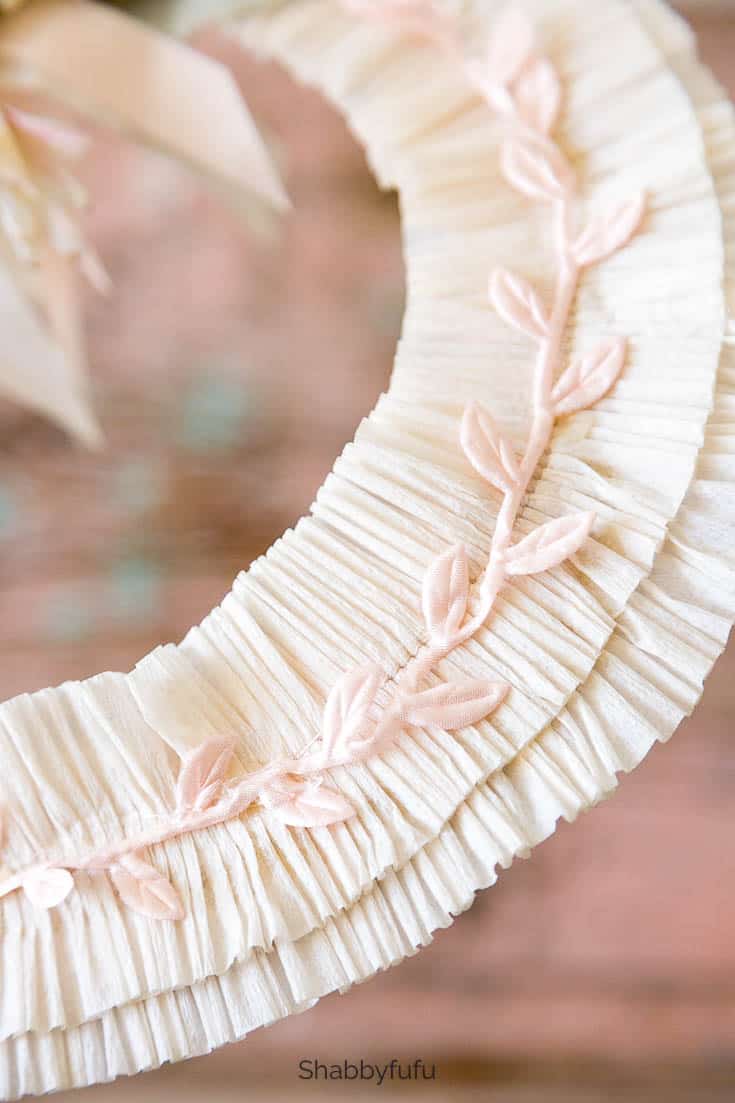
Then comes the fun creative part of making this summer wreath…adding the bits and pieces that will finish it off! This is where your imagination will fly. Rather than covering up the entire wreath, create a cluster of flowers in layers. I started with some silk ribbon hanging down over the form in the middle, then added vintage millinery leaves and lastly the flowers.

I felt like it was lacking oomph at the bottom and glued on some delicate millinery left trim in pink.
** UPDATE – SOLD** The finished wreath measures 9″ in diameter and I’m offering it up for sale. Included will be some lovely ribbon and a small variety of vintage findings to create a project of your own! Paypal link below (there is only one, first purchaser will get this).

If you LOVE VINTAGE as I do…you’ll find more wreath making ideas with loads of vintage charm HERE!


Today I’m joined by a fabulous group of blogging friends who are also sharing their Summer DIY Wreath Ideas as part of the Seasonal Simplicity Summer Series. Click on the links below their wreath design to see exactly how they made it…
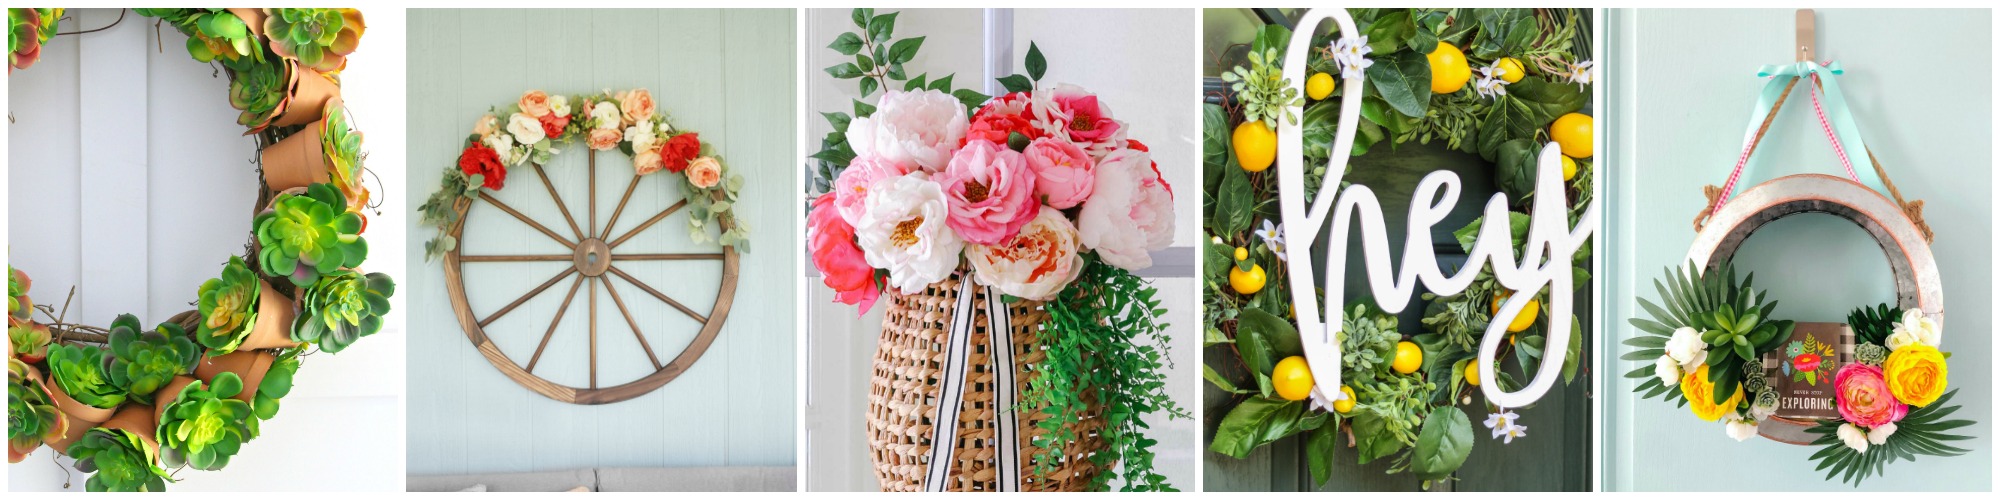
The Happy Housie // Lolly Jane // Modern Glam // The Turquoise Home // Tatertots & Jello
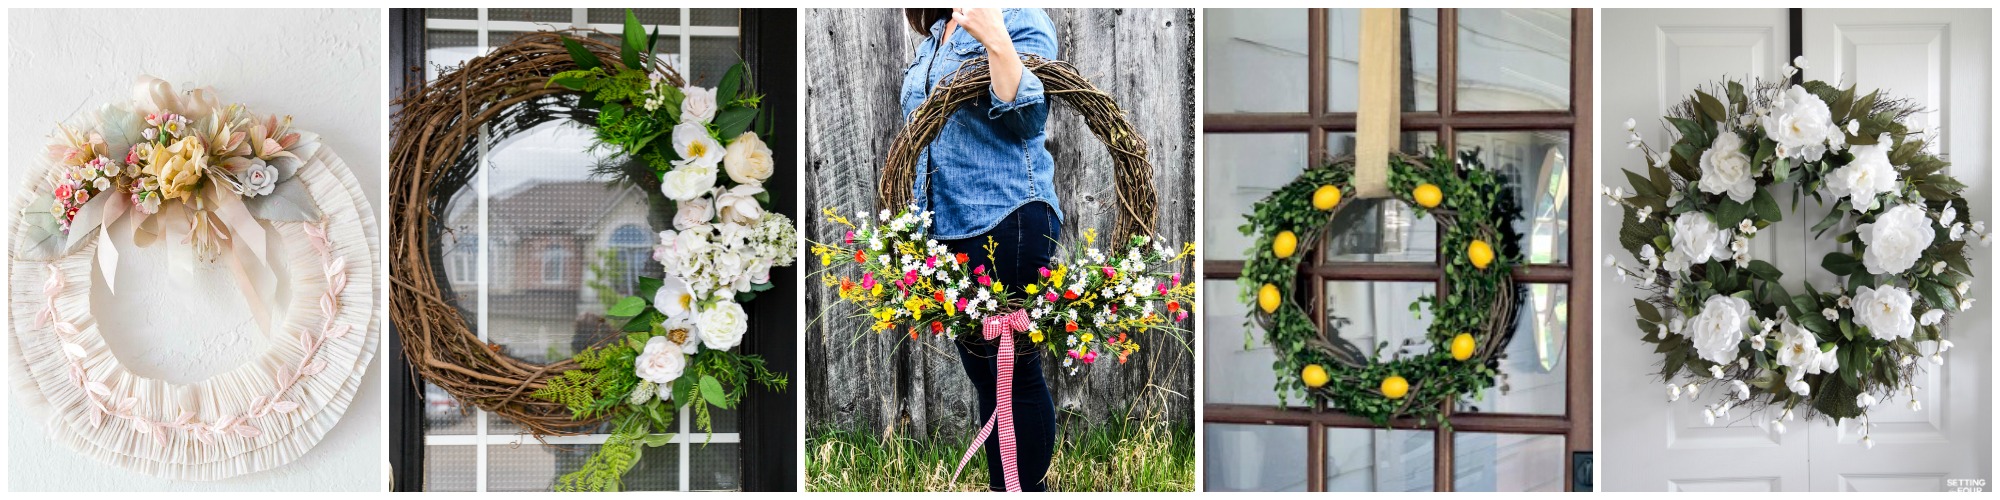
Shabbyfufu // Craftberry Bush // A Pretty Life // Southern State of Mind // Setting for Four
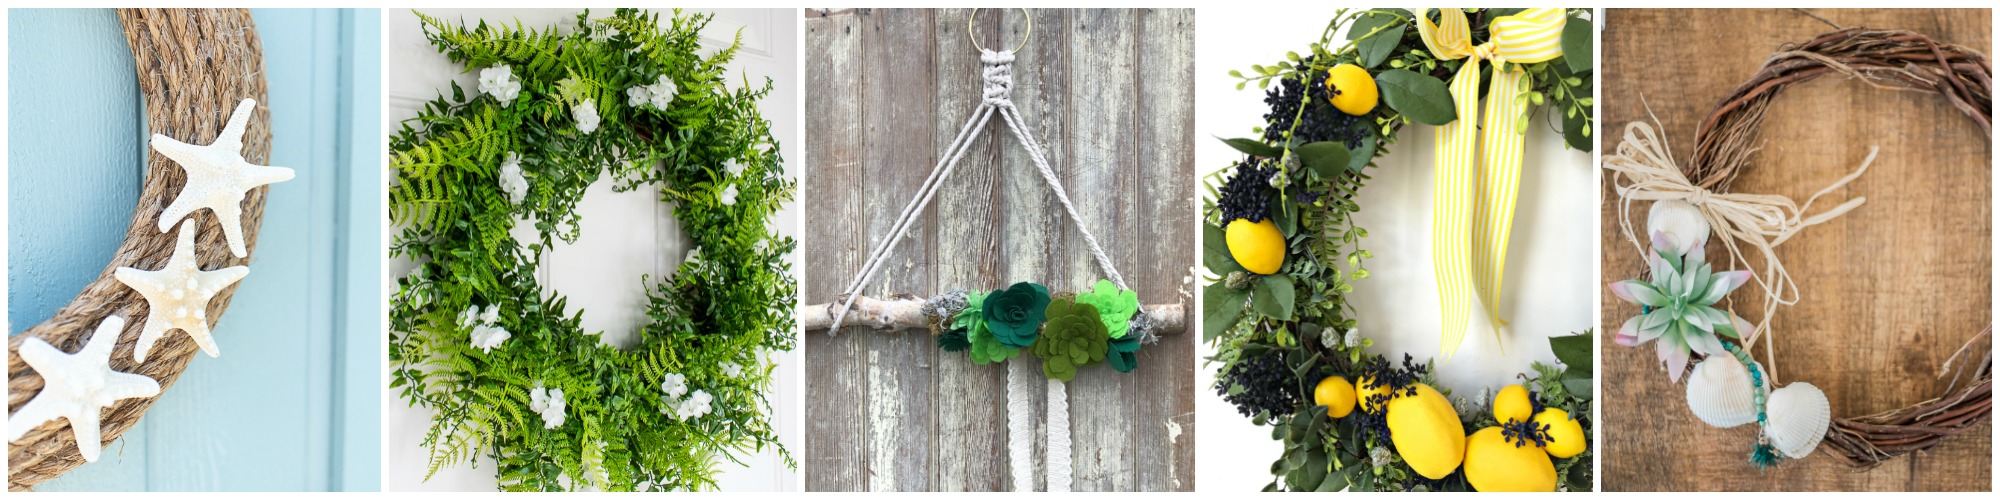
Finding Silver Pennies // Inspiration for Moms // Life is a Party // Tauni Everett // The DIY Mommy
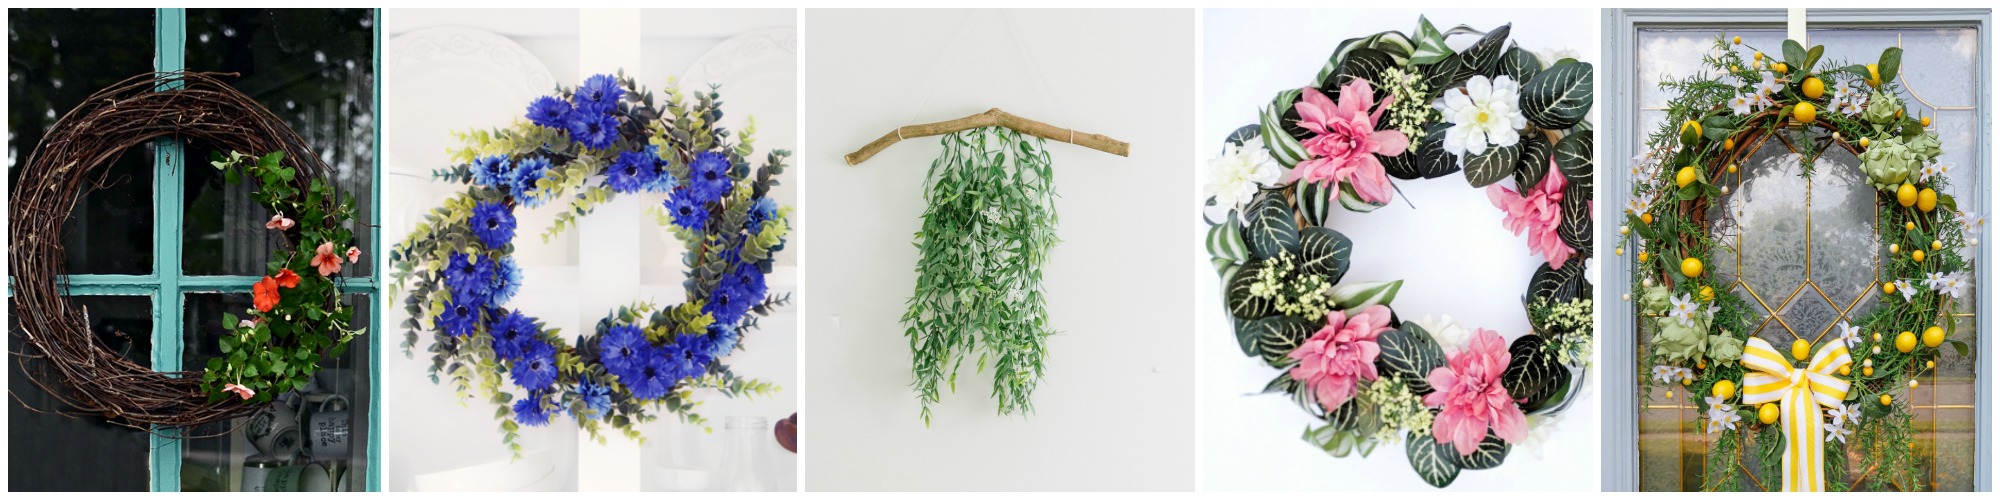
Town and Country Living // Paint Me Pink // Jenna Kate at Home
All Things With Purpose // Sand & Sisal
My 100 Year Old Home // The Handmade Home // Lemon Thistle // This is Our Bliss
Janet’s this is cute. You are right about ideas. I have gotten good ideas from this to use for something that isn’t a wreath.
This is what I enjoy about blogging and these hops.
Enjoy your day
Cindy
Thank you Cindy! The way my mind works is to just think outside the box I suppose. xo
Janet, what a pretty vintage-style wreath! I am pinning it to my wreaths board now. xo Tauni
Thank you so much Tauni…I’m pinning from everyone as well! xo
Janet, this is truly beautiful! I love the sweet flower details and vintage trim. xoxo
What a unique idea for a wreath. You are so creative. Thank you for sharing and being a part of the blog hop.
LOVE this! Adorable
Thank you Ashley! xo
This wreath is so beautiful. I love all of the paper elements!
I pinned it to my Summer Board.
xoxo
Thanks Jennifer…it was such fun to make!
So pretty and whimsical!
Thank you so much Danielle!
So beautiful Janet!! I love that you used a paper streamer for this – you are so clever and talented my friend! Pinned 🙂 xo Heather
Thank you Heather! It was a fun project and I will get around to pinning everyone from the tour as well. xoxo