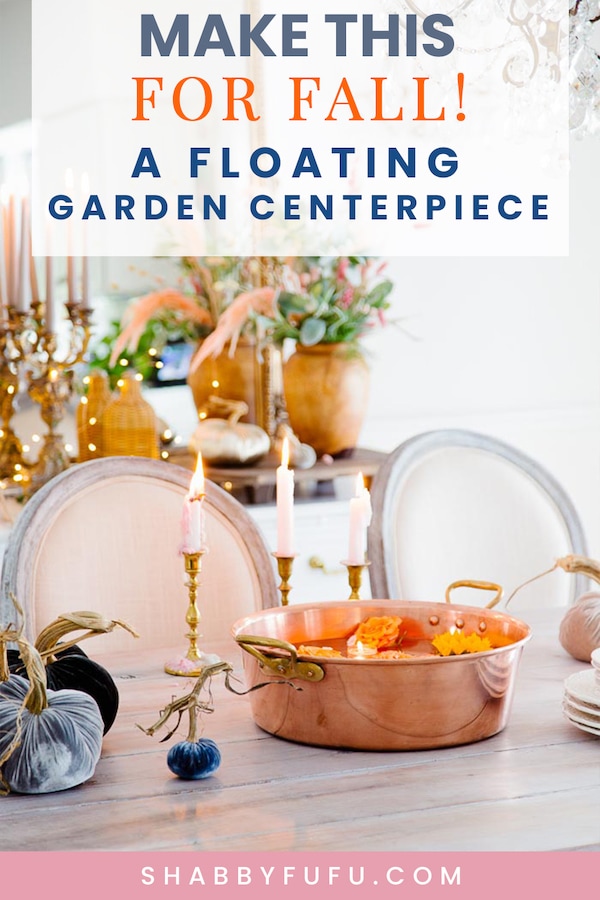
Floating Garden Centerpiece For Fall
This post may contain affiliate links. For more information, please see our disclosure policy.
This beautiful floating garden centerpiece is quite simple and easy to make. Perfect for any season and a great way to use up flowers that may be past their prime!
If you’re like me then you prefer simple ideas that are lovely enough to take your decor to the next level. Therefore this centerpiece fits the bill and you can grab an extra day or two for worn out flowers. Obviously if you’re entertaining it makes for inexpensive table decorating, but you could put a floating garden centerpiece on any flat surface to enjoy every day!
How To Make A Floating Garden Centerpiece
CLICK ON ANY IMAGE BELOW TO SHOP THE LOOK

Floating Garden Centerpiece Tips
- Choose flowers that are wide and not too small or fussy. For example; garden roses, daisies and sunflowers work well while baby’s breath does not.
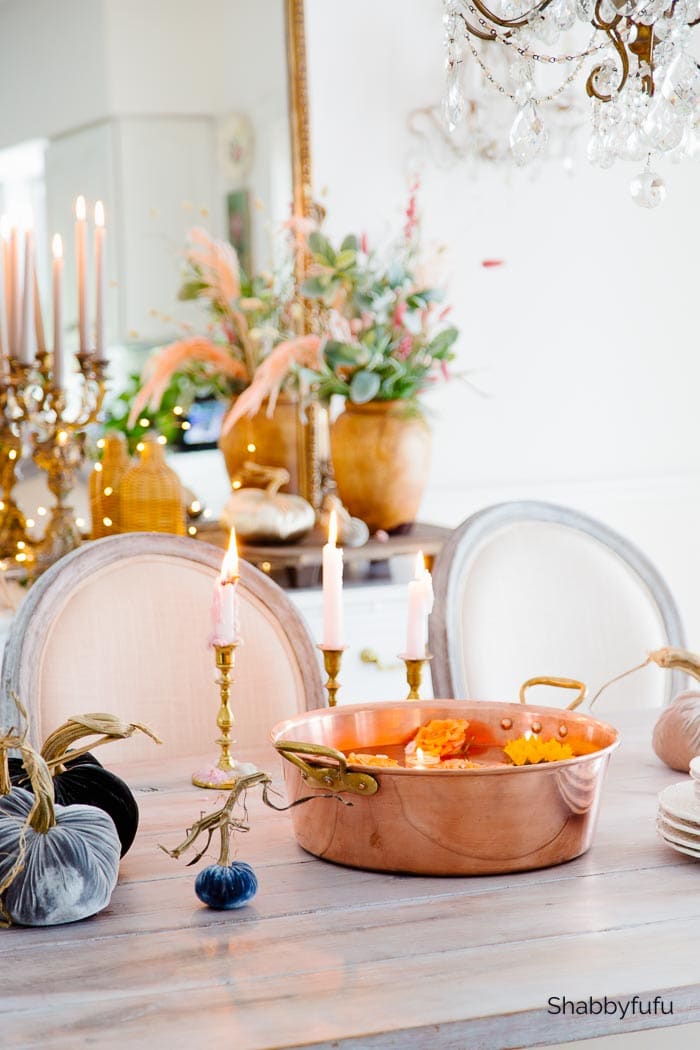
- Color theme your flowers to the season or tablescape idea that you have in mind. For instance, in fall design use rust, mauve or burgundy and coordinate with copper and/or gold tableware and candles.
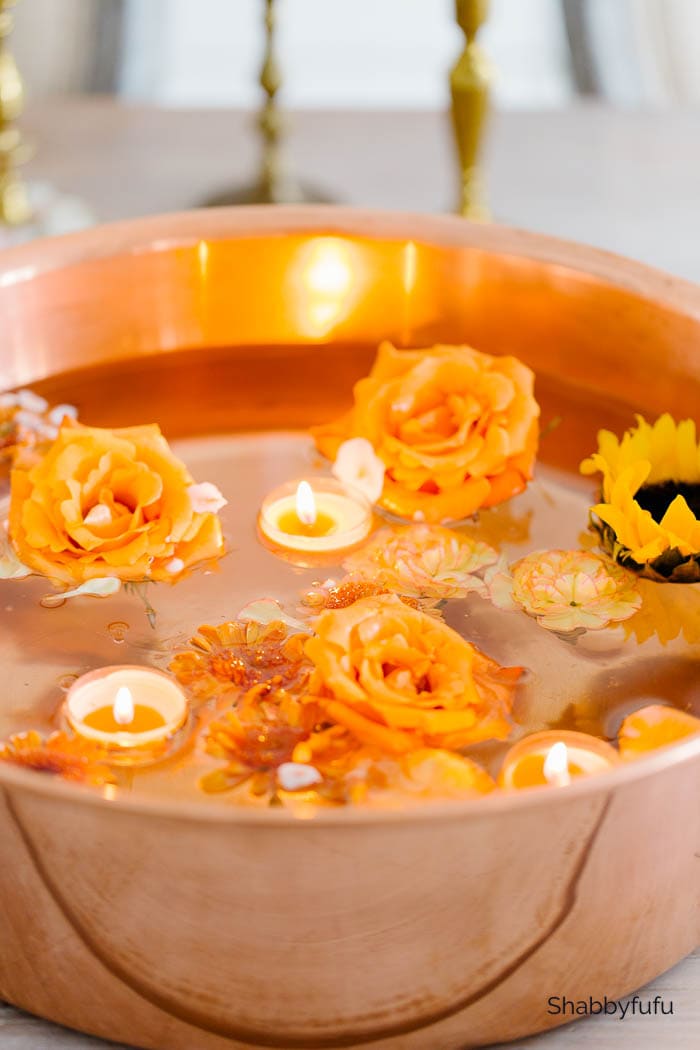
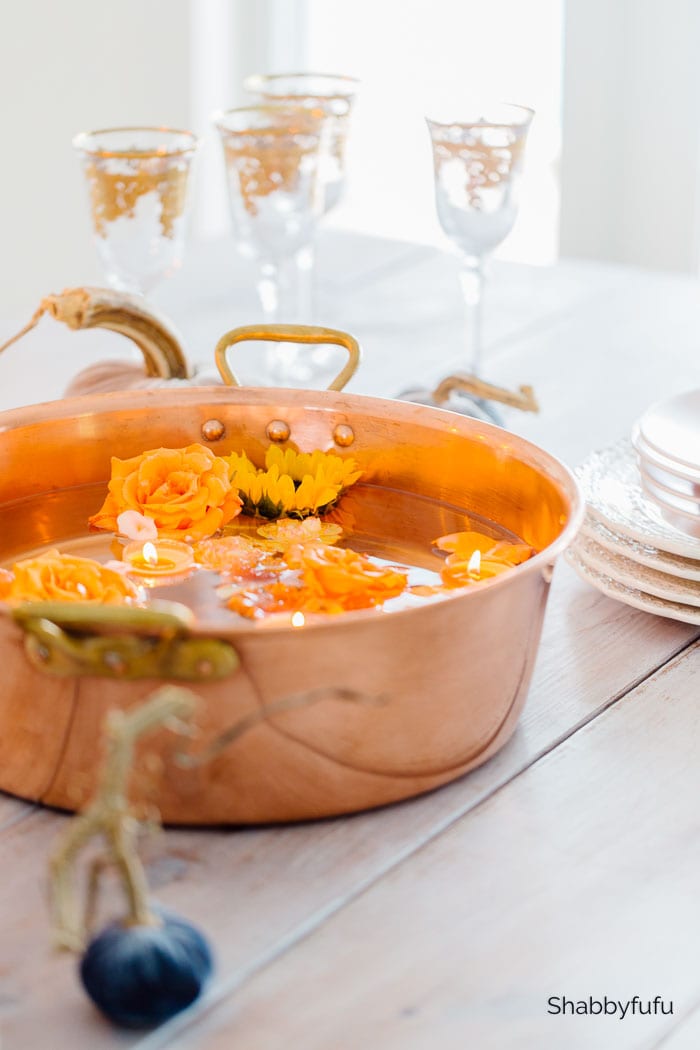
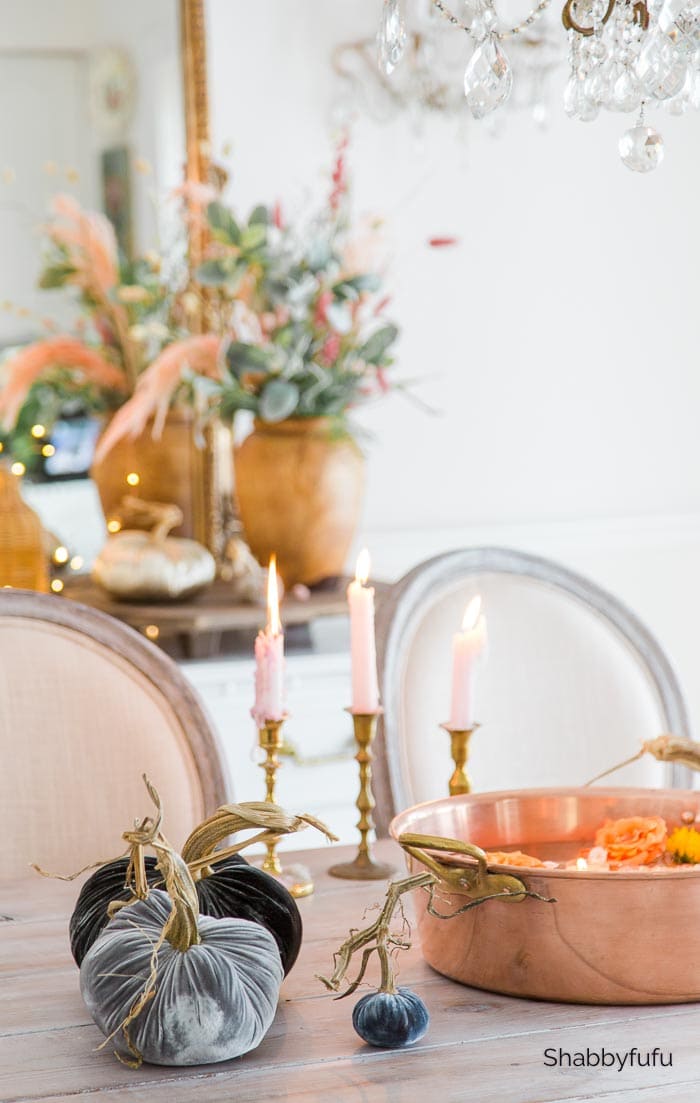
- You’ll want to use a shallow bowl or vessel for your floating garden centerpiece so you have more room for flowers. I used my vintage French copper confiture bowl, but you could use a stoneware bowl or anything watertight.
- Tealight candles are perfect to add to your floating garden and make a big impact at night.
How To Create This Look
First you will need flowers (of course!) and they can just be your average run of the mill grocery store variety. My husband brought this seasonal autumn bouquet home from Trader Joes for me. While they aren’t my normal preferred colorway, they do look fabulous for autumn! In my autumn bouquet were mums, peach roses, carnations and sunflowers.

You’ll also need wax to melt and coat the bottoms of the flower with. I prefer soy wax that I use for candle making and purchase in bags of pellets. It’s easier to use, but if you do any canning then you probably have household paraffin wax around.
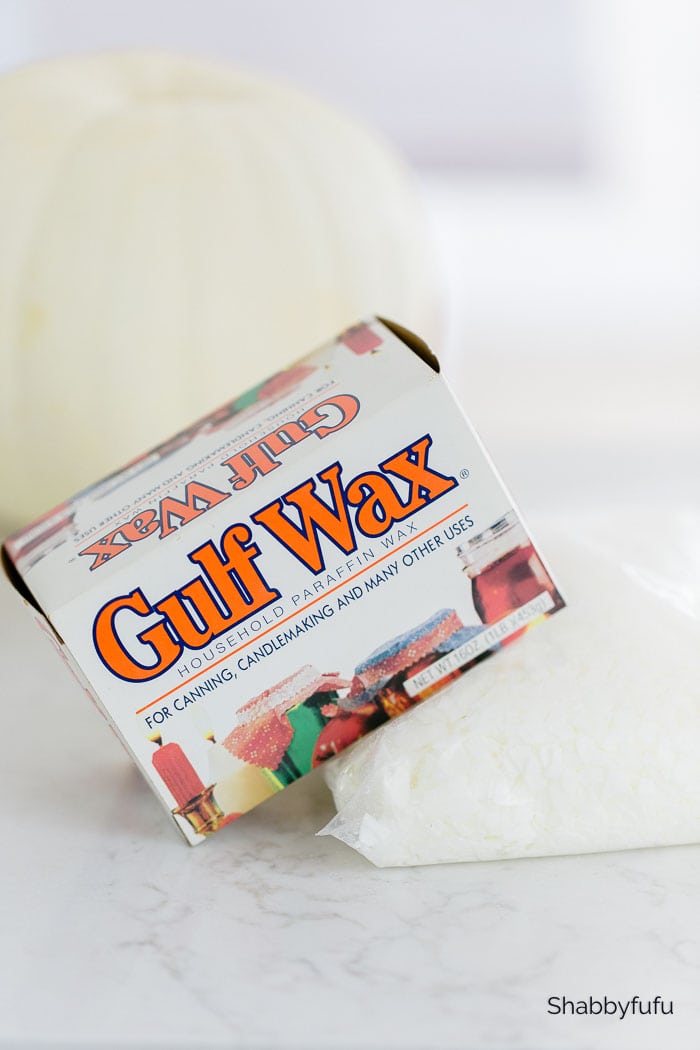
Can you see how it would be easier to work with soy wax pellets for this floating garden centerpiece project?

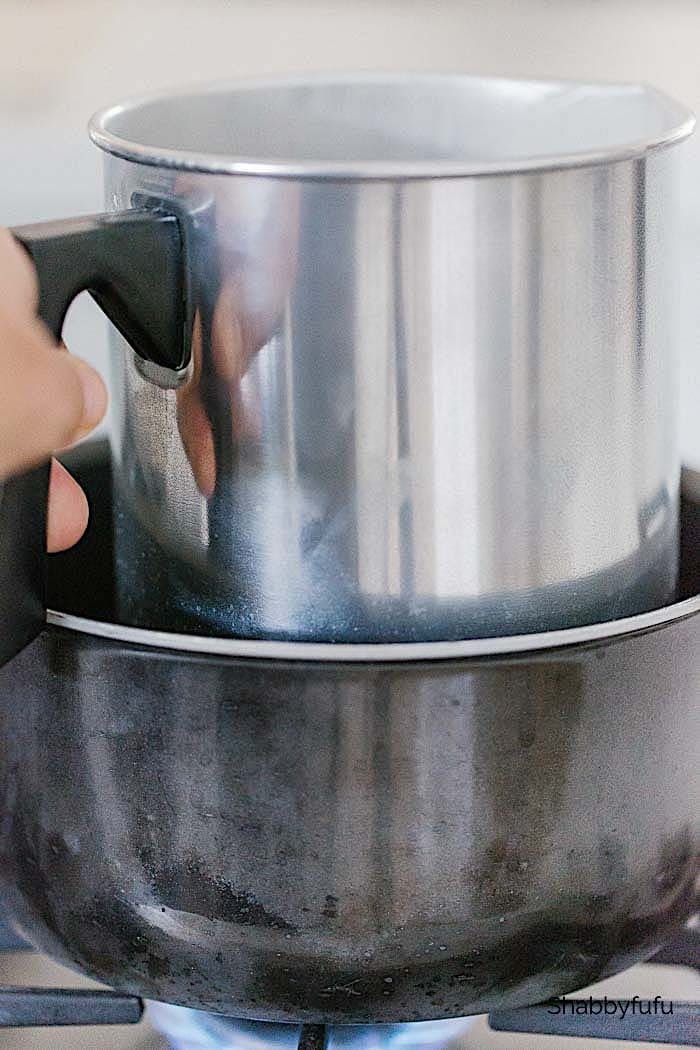
To melt the wax you’ll need to use a double boiler of some sort. I talked a little bit more about melting wax in this post on making SEASHELL CANDLES. Be sure to use a pot that you don’t care about for melting the wax and then keep it in your craft supplies!
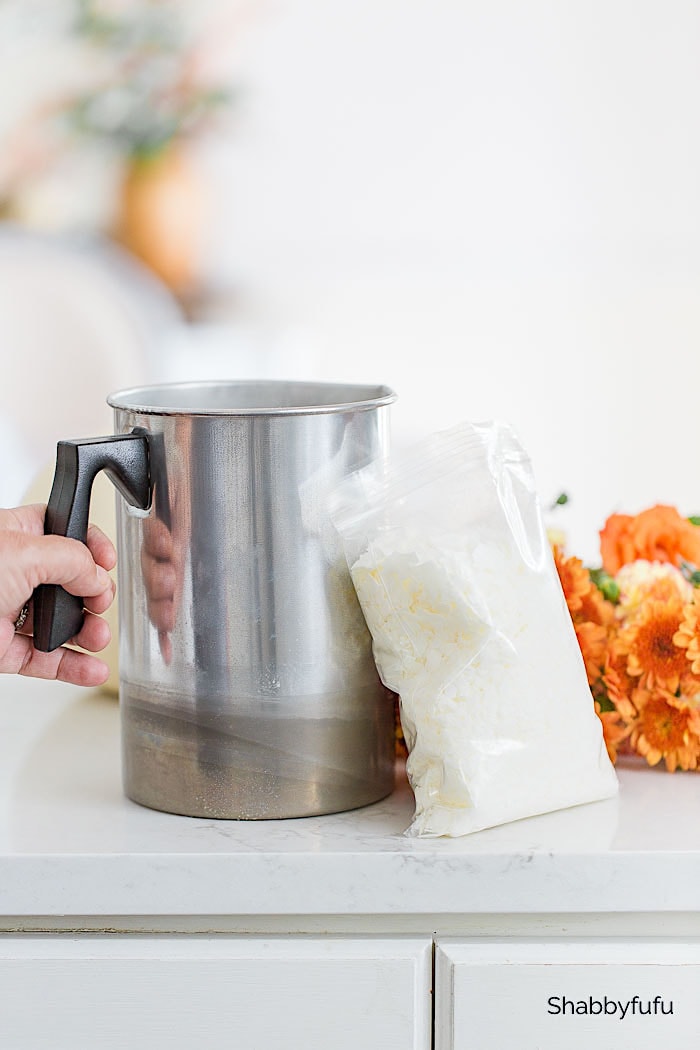
Pour a small amount of wax pellets (about 1/4 cup) into the top pot and heat it up just until it melts. Turn off the burner and let the wax pot sit in the hot water until you use it. From my experience soy wax is much easier to work with and is less likely to burn you. Plus…did you know that warm soy wax is a great moisturizer for your hands, elbows and knees? YES!! Use what’s left from this floating garden centerpiece project and moisturize!
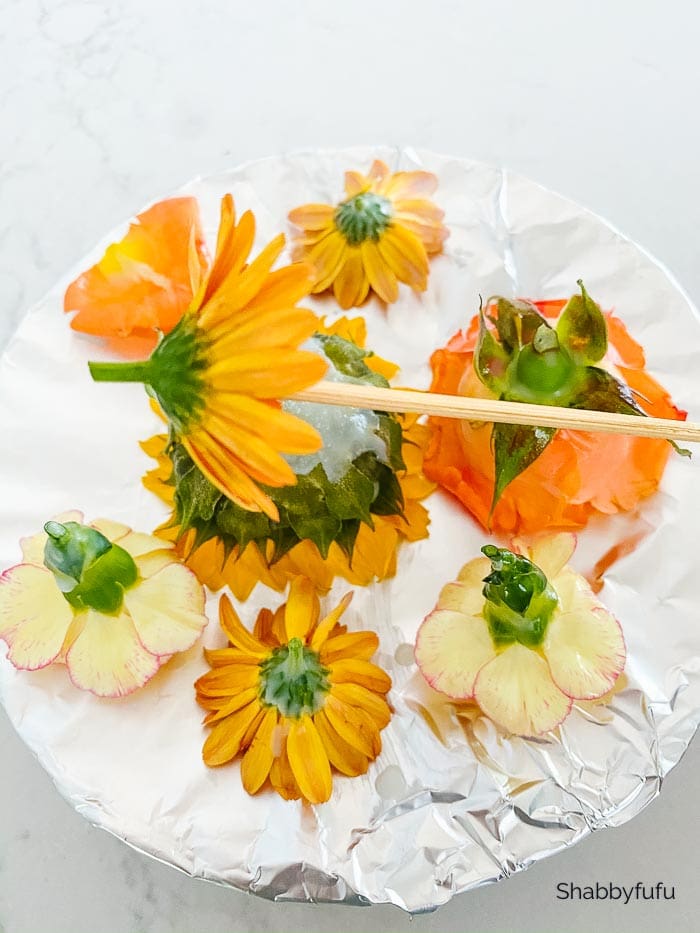
While the wax is melting, choose your flowers. I clipped a handful of the flowers below, right under the flower itself. You will also need a long skewer and a piece of tin foil to set the flowers on while the wax is drying.
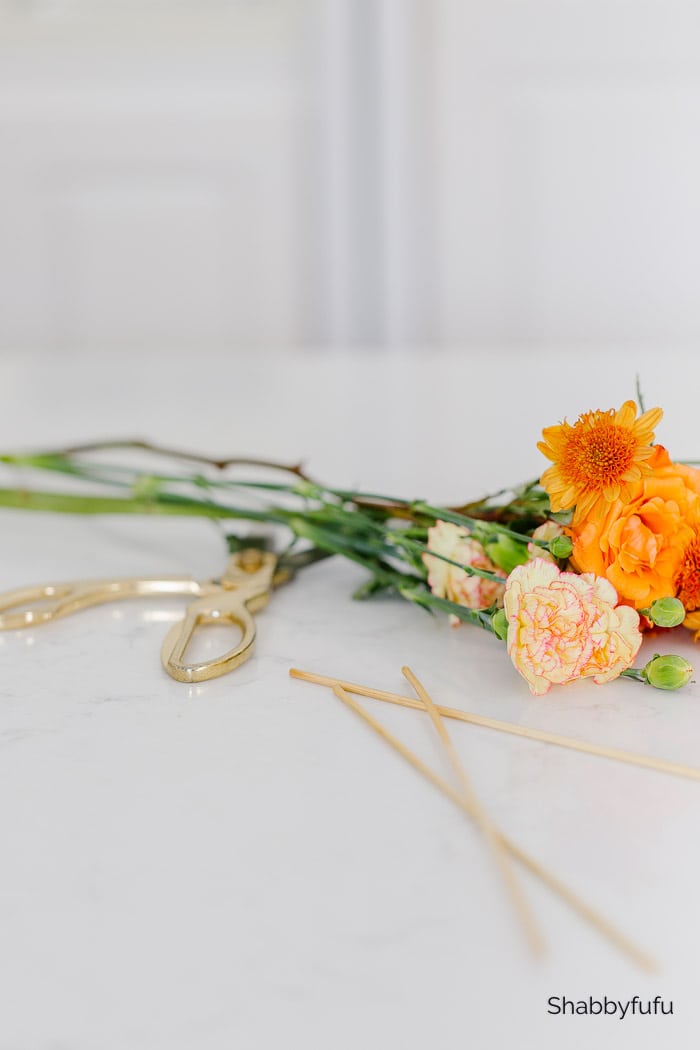
Take your skewer and poke it through THE TOP of the flower gently. This is just to hold the flower while you dip it into the wax.
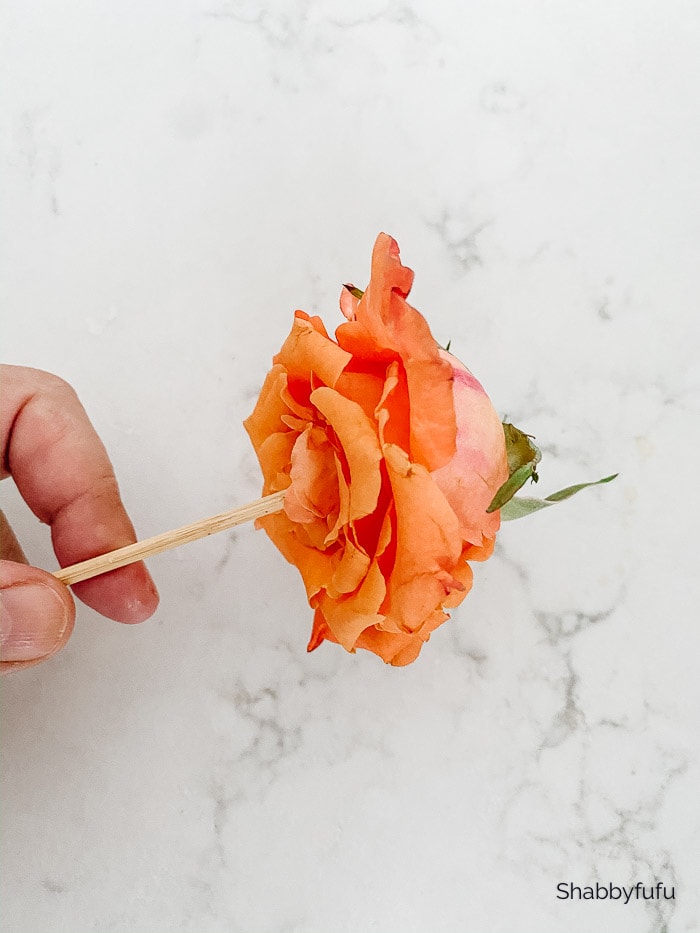
I didn’t get a shot of me dipping, but dip the skewer (as shown below) with the flower into the wax…coating the bottom of the flower only. Gently lay the flower face down on the foil to dry…it only takes a few minutes. Repeat with all of your flowers until you feel that you have enough to fill your floating garden centerpiece. The wax will allow the flowers to float…but you have one more step!
Fill your vessel about 3/4 of the way with water then top off with about an inch of vegetable oil. Then scatter your wax dipped flowers in the bowl and add a few tealight candles. You could also use some floating wicks instead of tea lights as I talked about in this post – How To Make Oil Lantern Candles.
Do you think that this floating garden centerpiece is something you’ll be making? Let me know if you have any questions!
No Time to Make This Now? Pin it for Later
SHOP SUPPLIES BELOW
Please visit my friends below who are sharing ideas today for our 20 MINUTE DECORATING SERIES!
![]()

In My Own Style | On Sutton Place | Shabbyfufu

Wow – super gorgeous!! I didn’t know about the wax – that’s brilliant! And the candles floating too is beautiful! I’m going to try this right away! Thanks and Happy Tuesday!
So glad that you liked it and hope you do something similar Barb!
Great tips! I’ve tried floating greenery (holly, in particular) and other flowers, but the wax dipping sounds like the secret to successful floating. Your copper vessel is gorgeous, too.
What a great idea, Janet! And so pretty!!
Thanks so much Lory!
Just wondering what the point of the oil is?
Cheers
Heather
Hi Heather. Because oil is less dense than water it floats on top of it and allows the flowers to float better.
What a great idea! I usually just dry my past-their-prime flowers and add them to “store-bought” potpourri with some more essential oil! Loved your “arrangement.”
Good morning! Two of the copper bowls are not showing up on Etsy. $380 for the other one is beautiful and quality but sadly not within my reach😊💛Love your photo, is that new?