How To Make A Ruffle Clay Bowl DIY
This post may contain affiliate links. For more information, please see our disclosure policy.
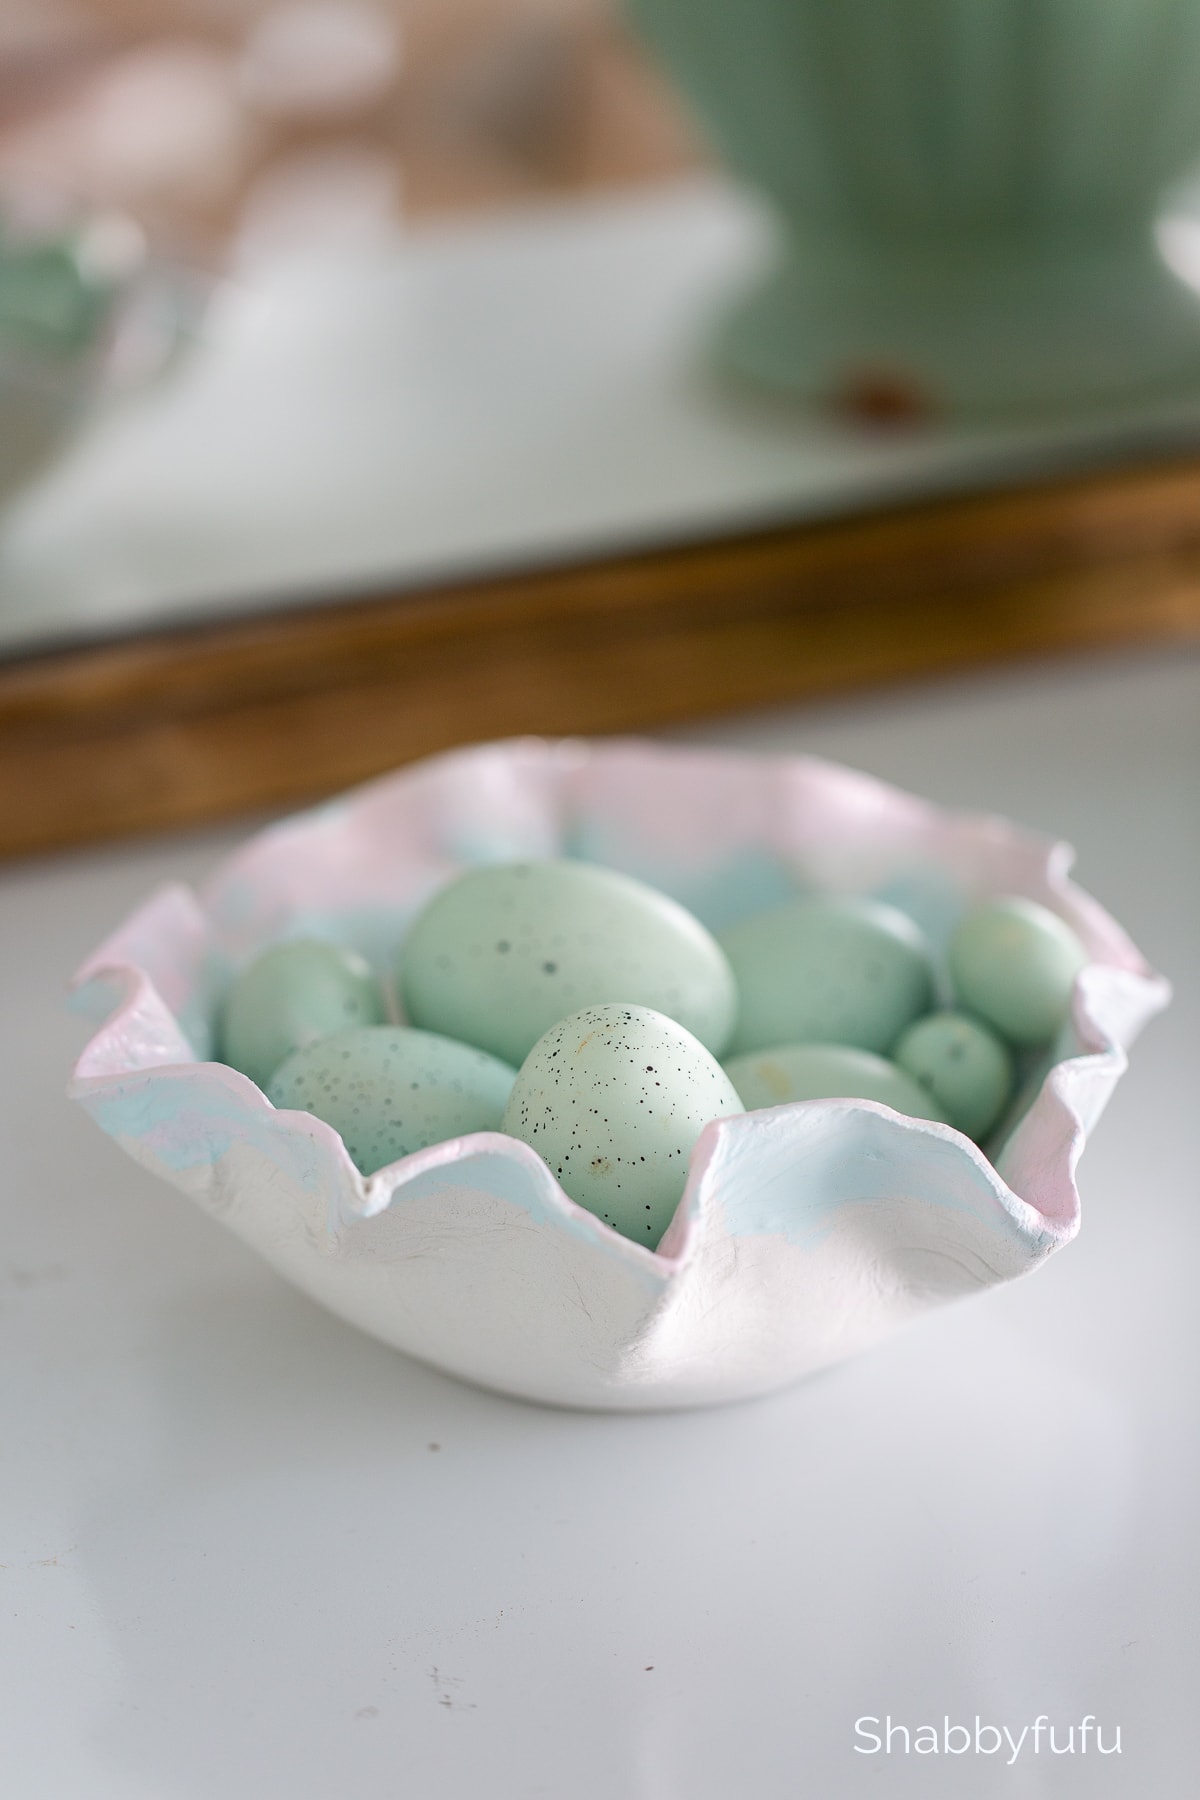
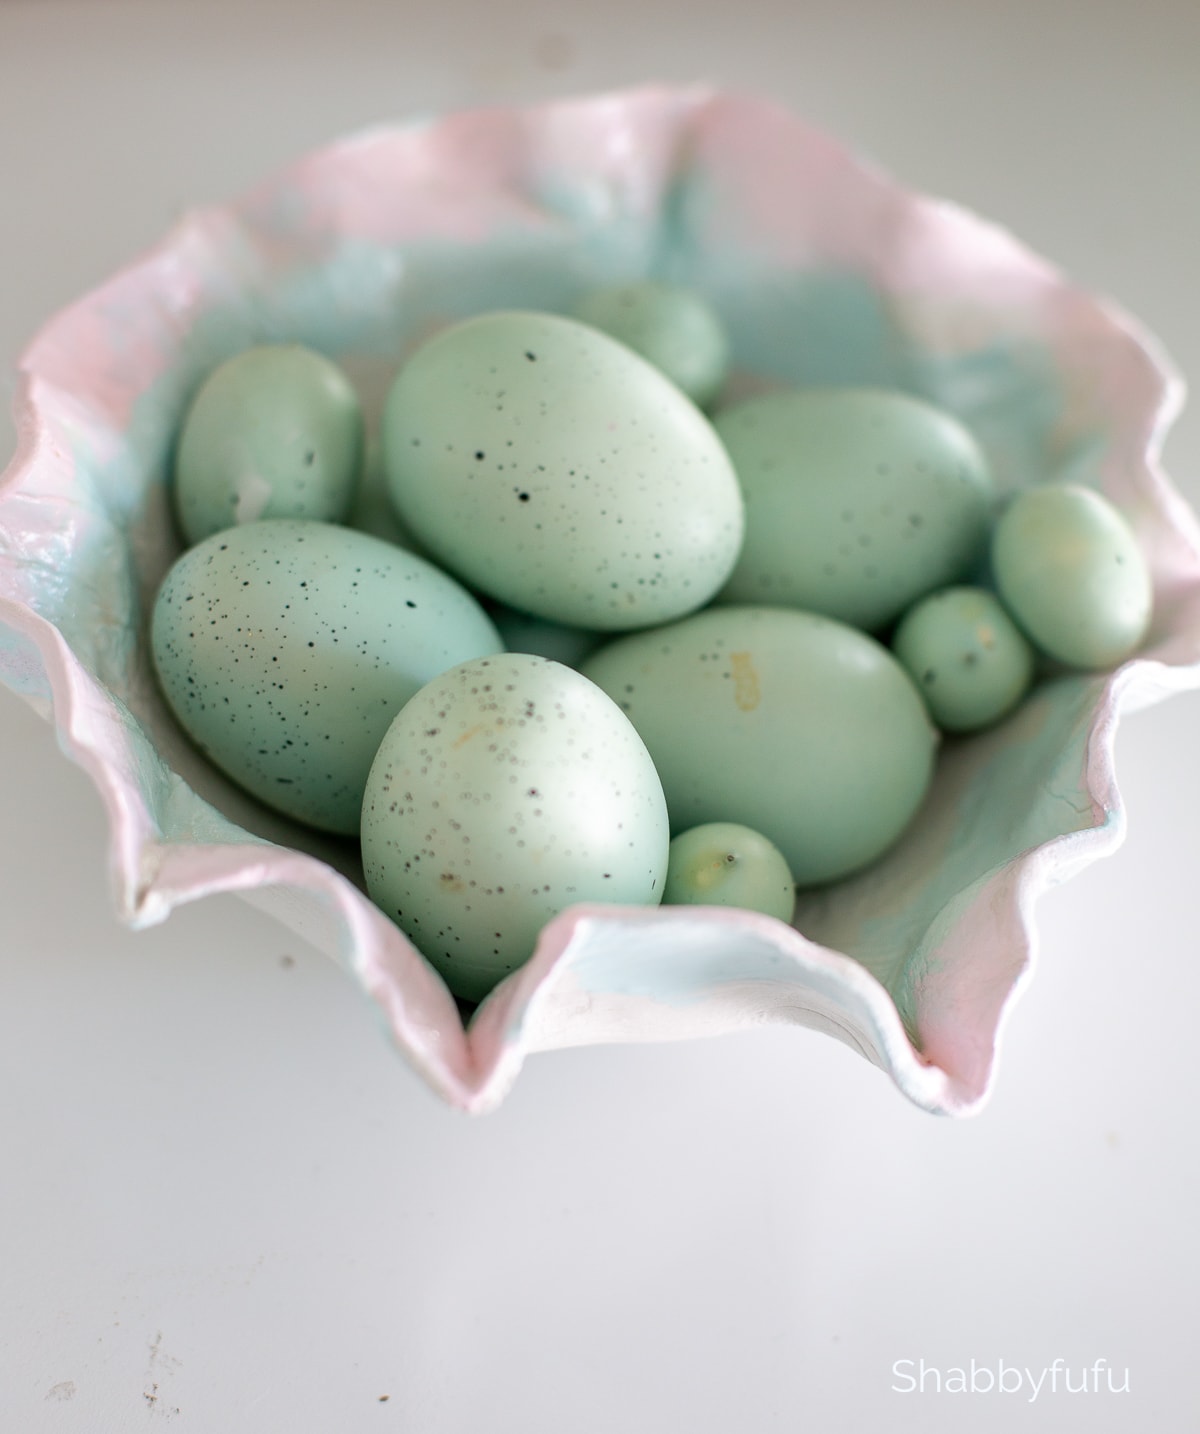
This ruffle clay bowl diy is so easy to make as well as only taking literally only a few minutes of your time. Make one and color it to match your decor or create one as a gift. Let’s get into it and please let me know if you decide to try this craft yourself!
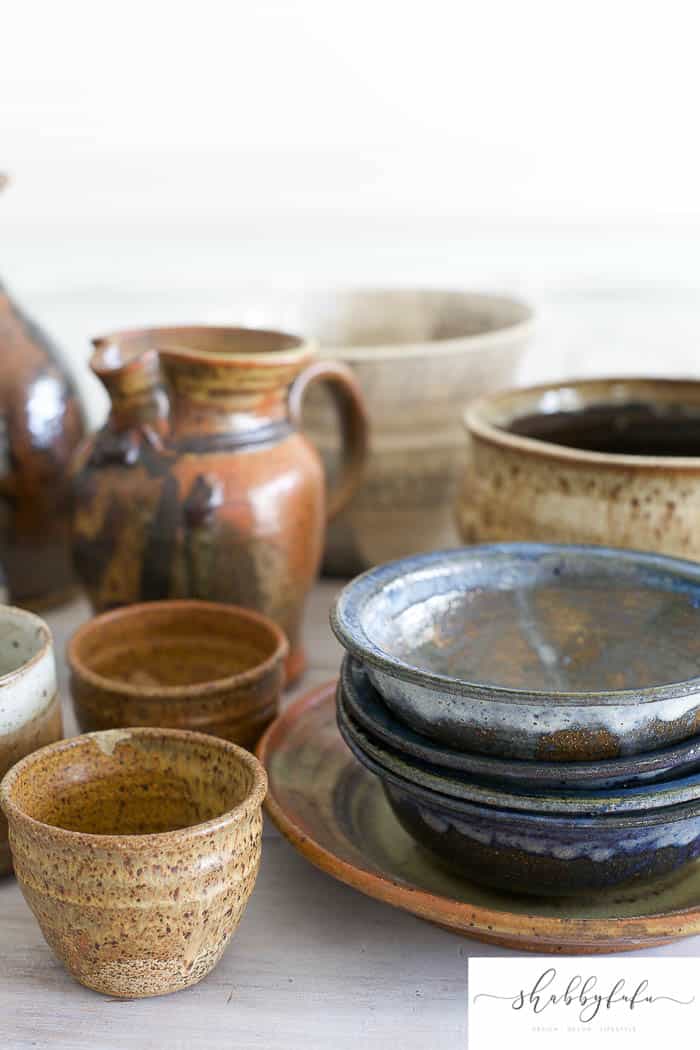
First I want to say that I LOVE getting my hands in clay! In college I was an art major and became hooked in throwing on the wheel. As my proficiency grew I started making extra money by selling my wares. Lots of fond memories! To see a few of the pieces that I still have, head to THIS POST.
But I digress and am going to show you how easy it is to make a ruffle bowl. Did you know that ruffle bowls are trending right now and you’ll find them made of clay and glass. If you don’t feel like making your own ruffle bowl, this one that I saw at Crate & Barrel is a pretty one at a great price.

If you want to try your own hand though, let’s make one. Besides, giving a handmade gift is always best and you can make several at a time to have on hand.
Ruffle Clay Bowl DIY
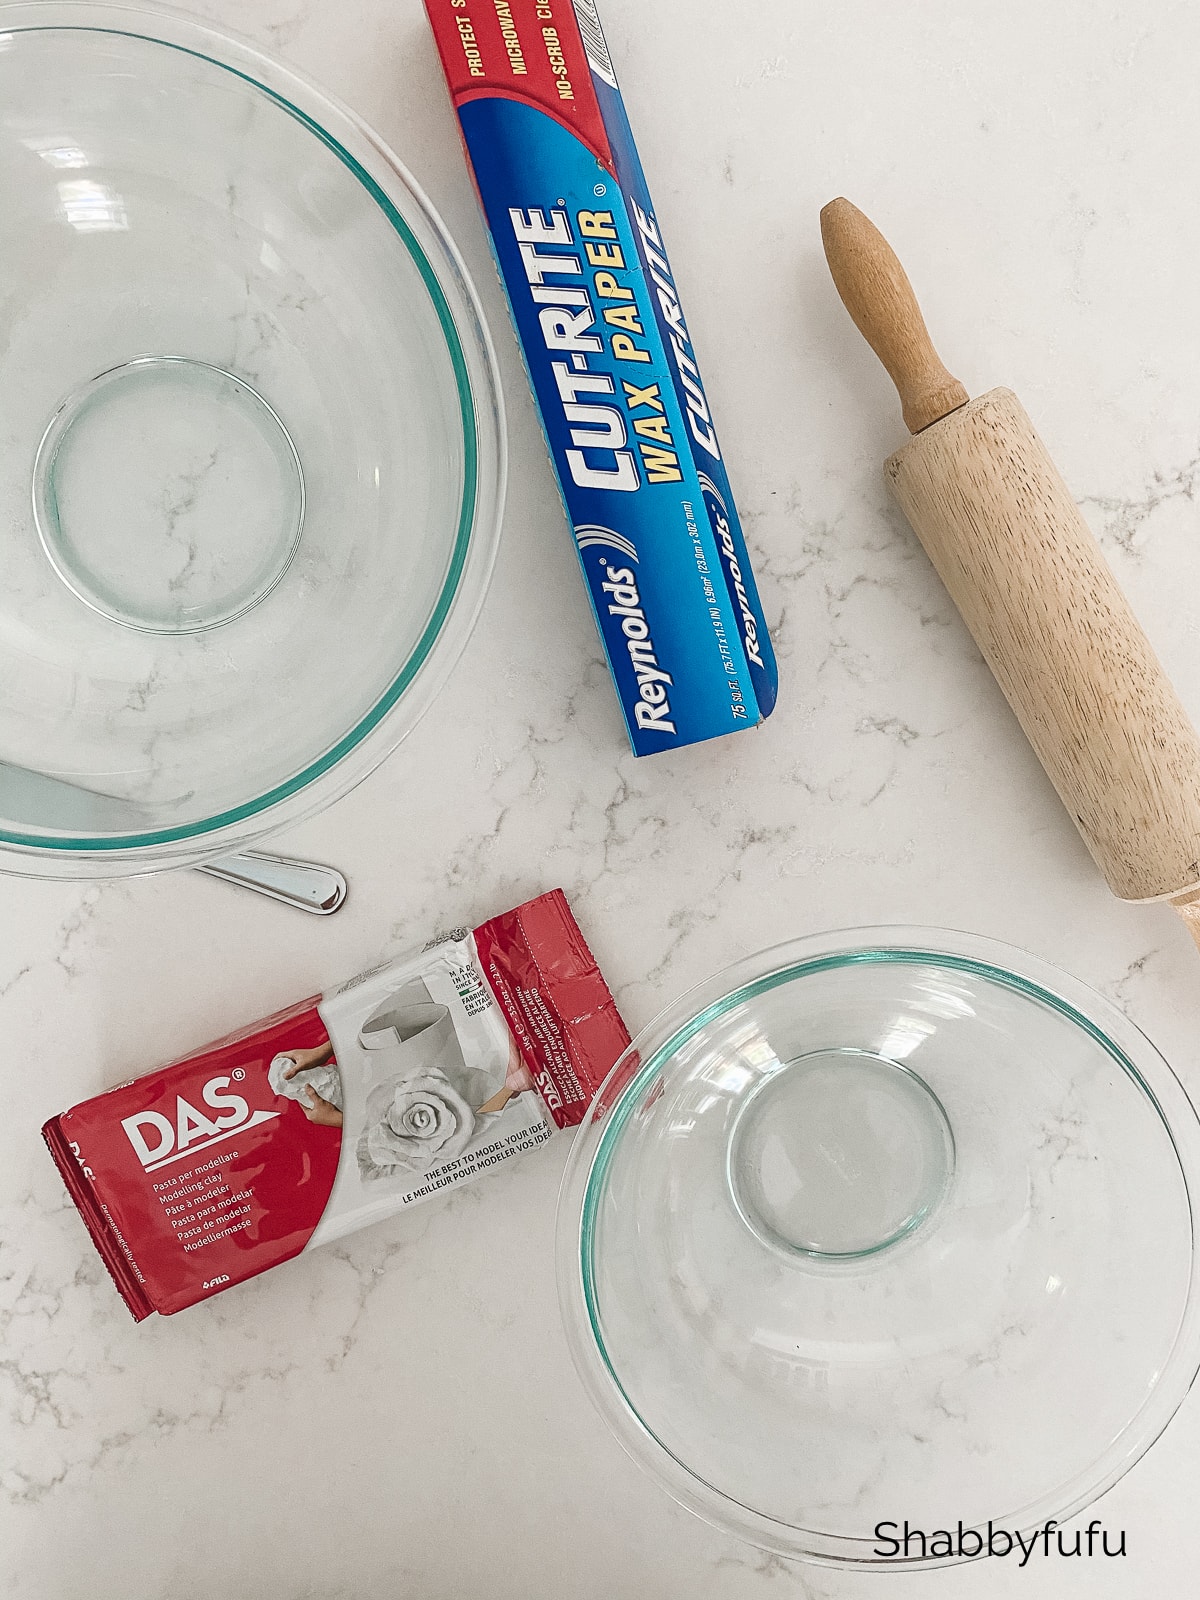
Supplies Needed
- 1 lb. air dry clay (oven bake clay is another option if preferred) – WHAT I USED
- Rolling pin
- Wax paper
- 2 glass bowls – one larger than the other
- Tall glass
- Clay cutting tool or butter knife
- 220 Grit sandpaper
- Acrylic craft paints in your choice of colors – WHAT I USED
- Water based brush on semi-gloss sealer – WHAT I USED
- Foam brush
Directions To Make A Ruffle Clay Bowl
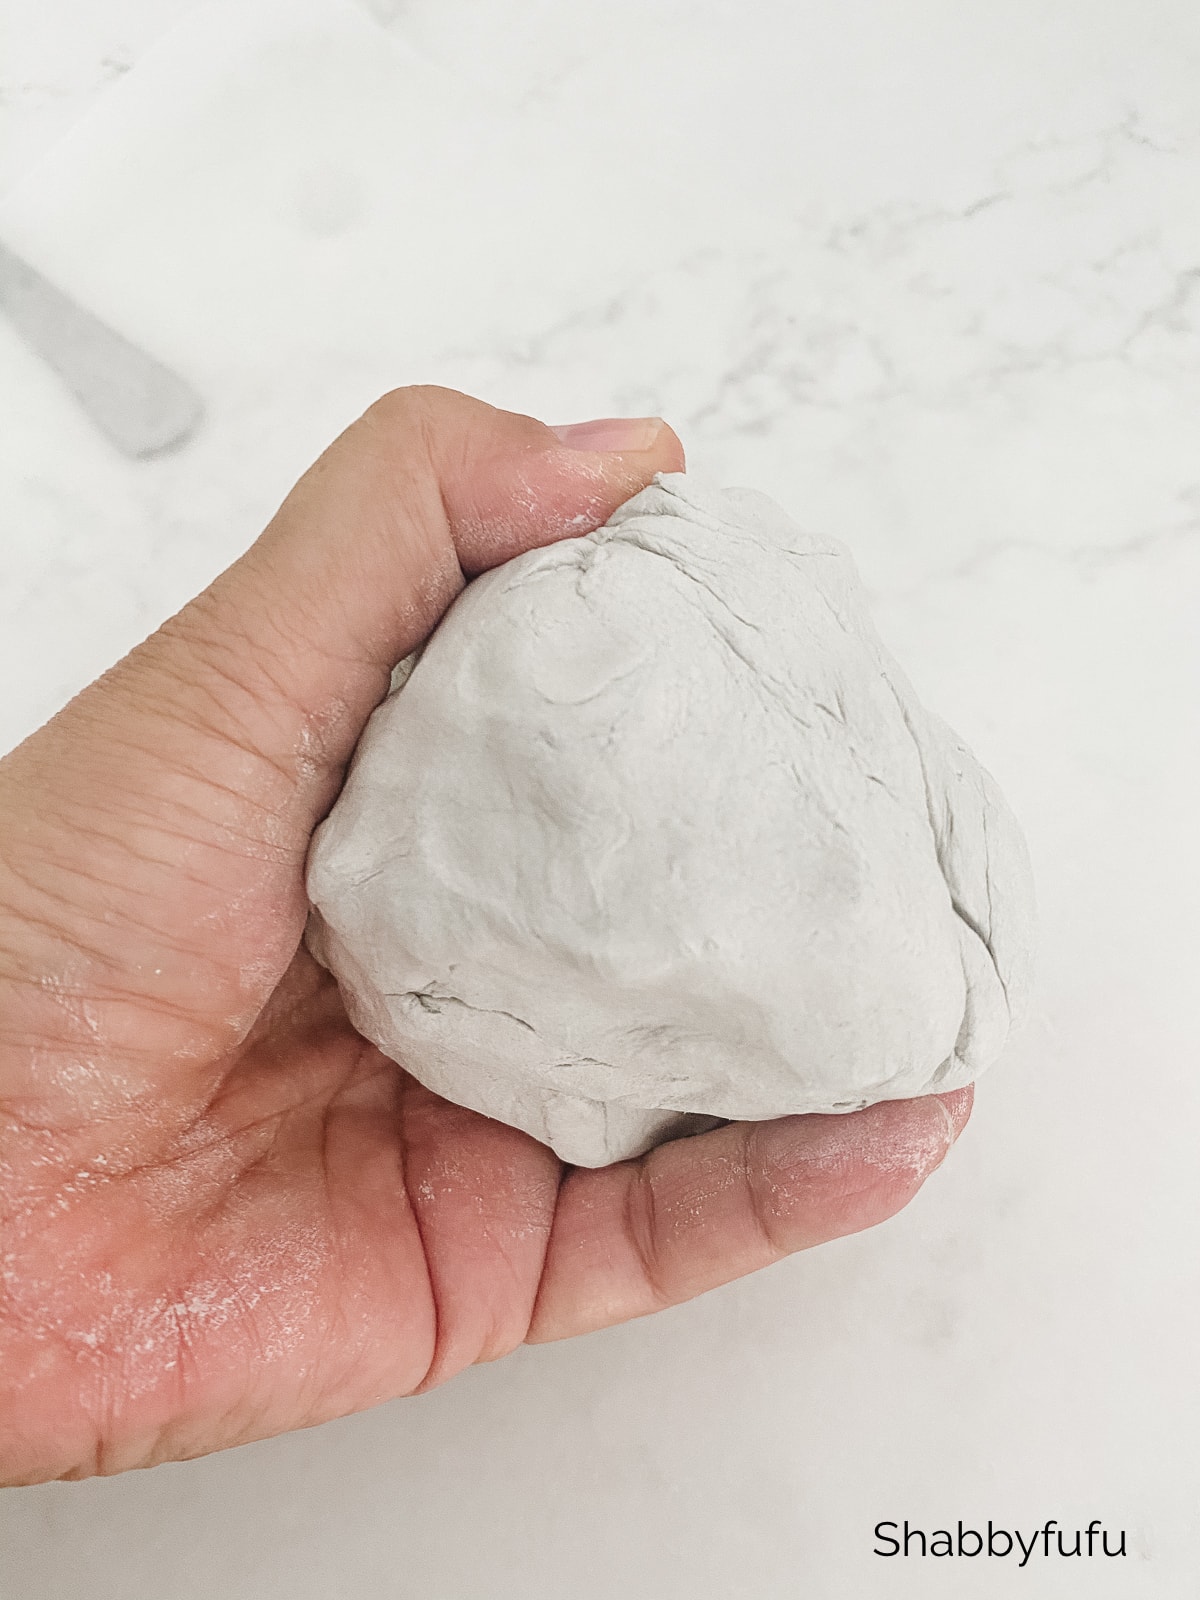
1. Warm the clay in your hands to soften it up. Once it’s softened you’ll want to knead it for a few minutes like kneading for baking bread. This will get out any air bubbles and make it easier to work with.
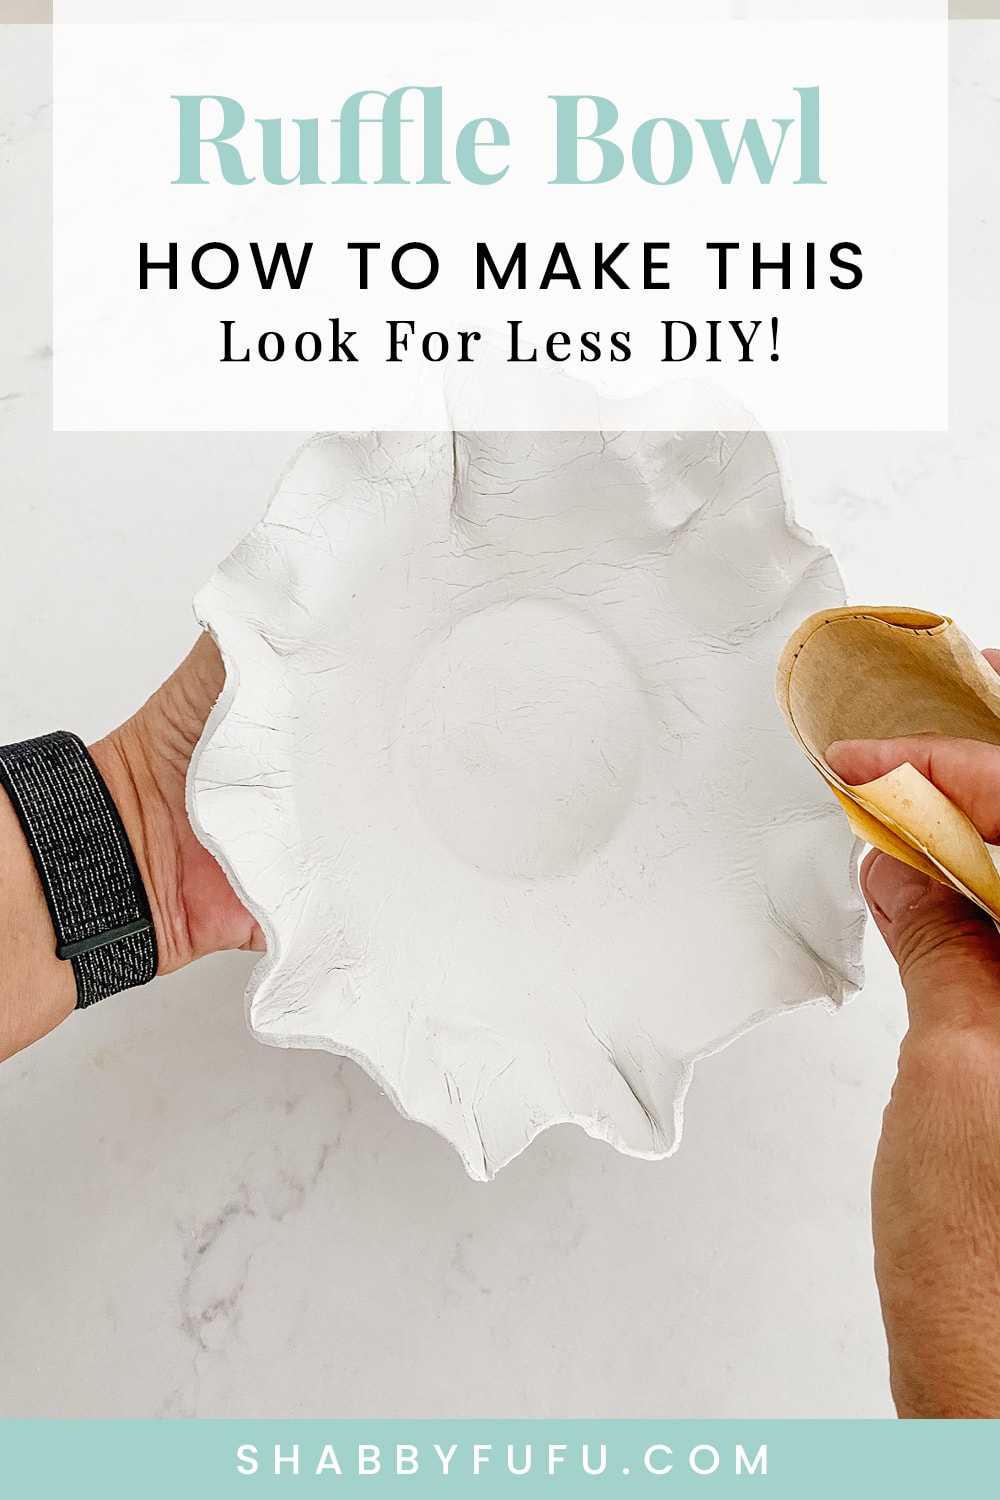
2. Next, place the clay between 2 sheets of wax paper and flatten it out with your hands. Then roll the clay into a circle that’s about 1/8″ thick.
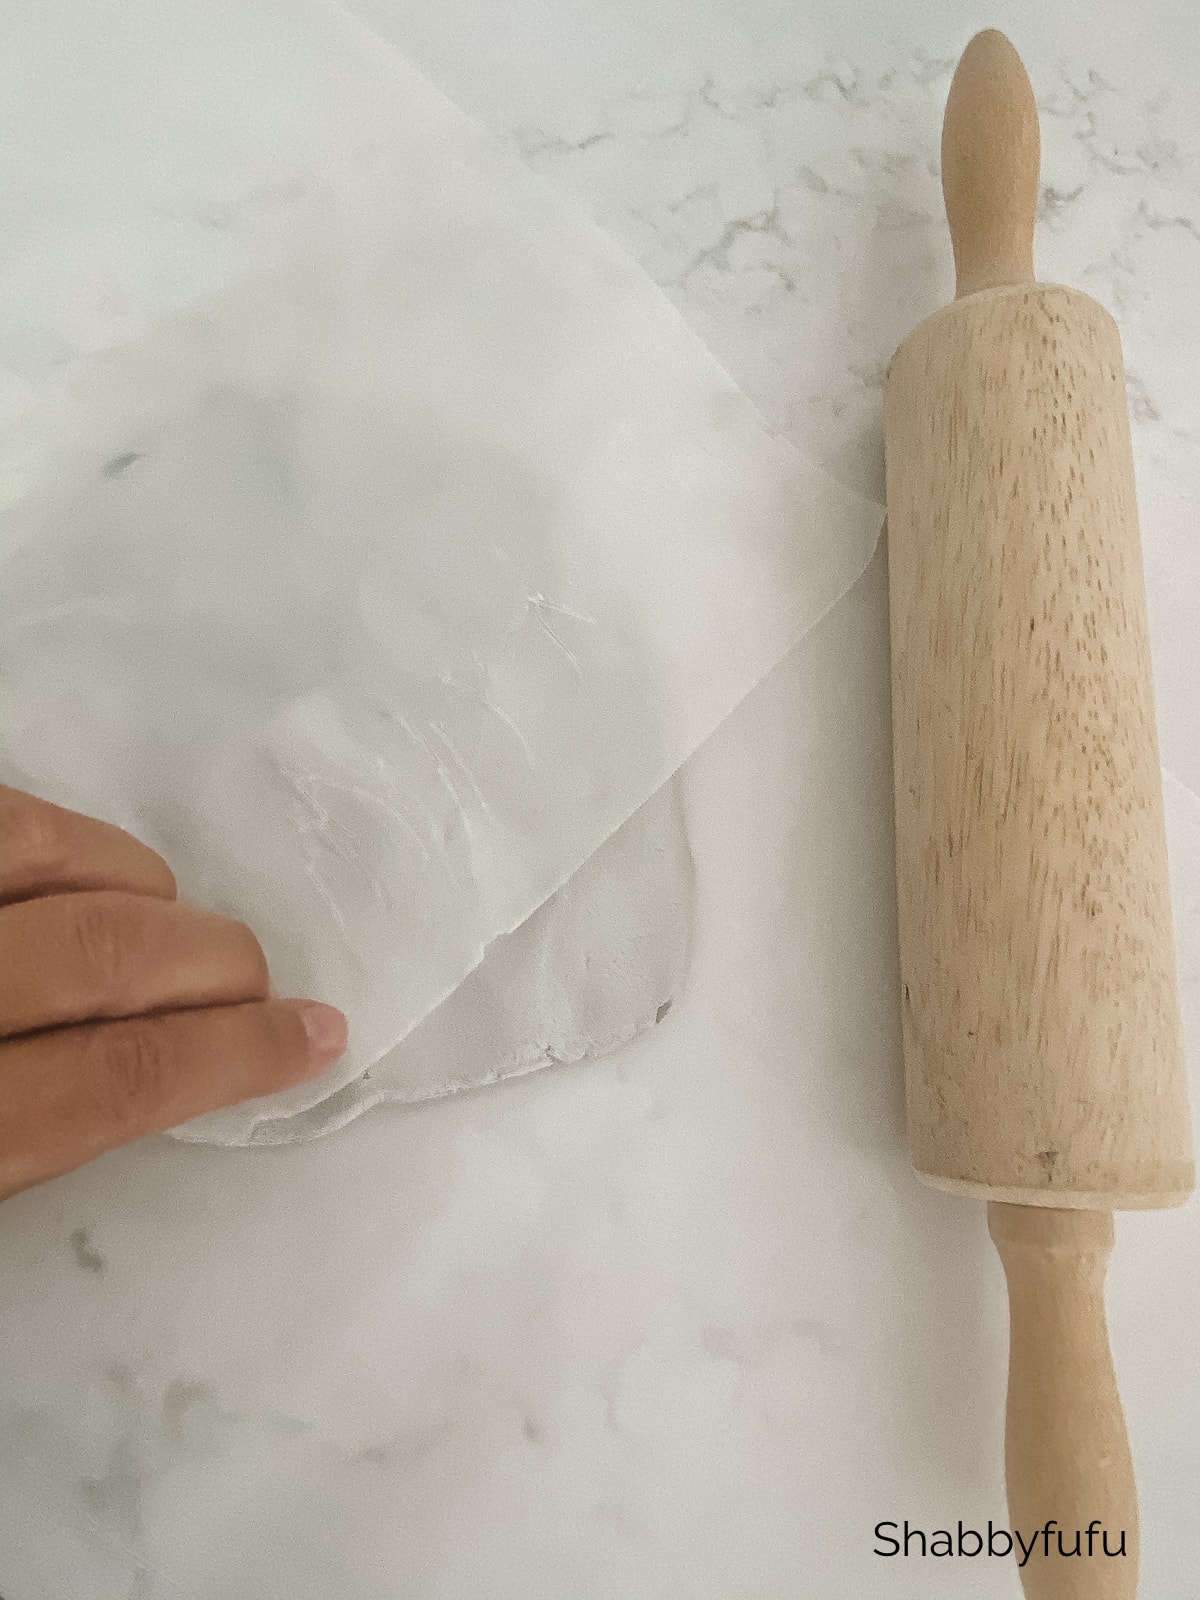
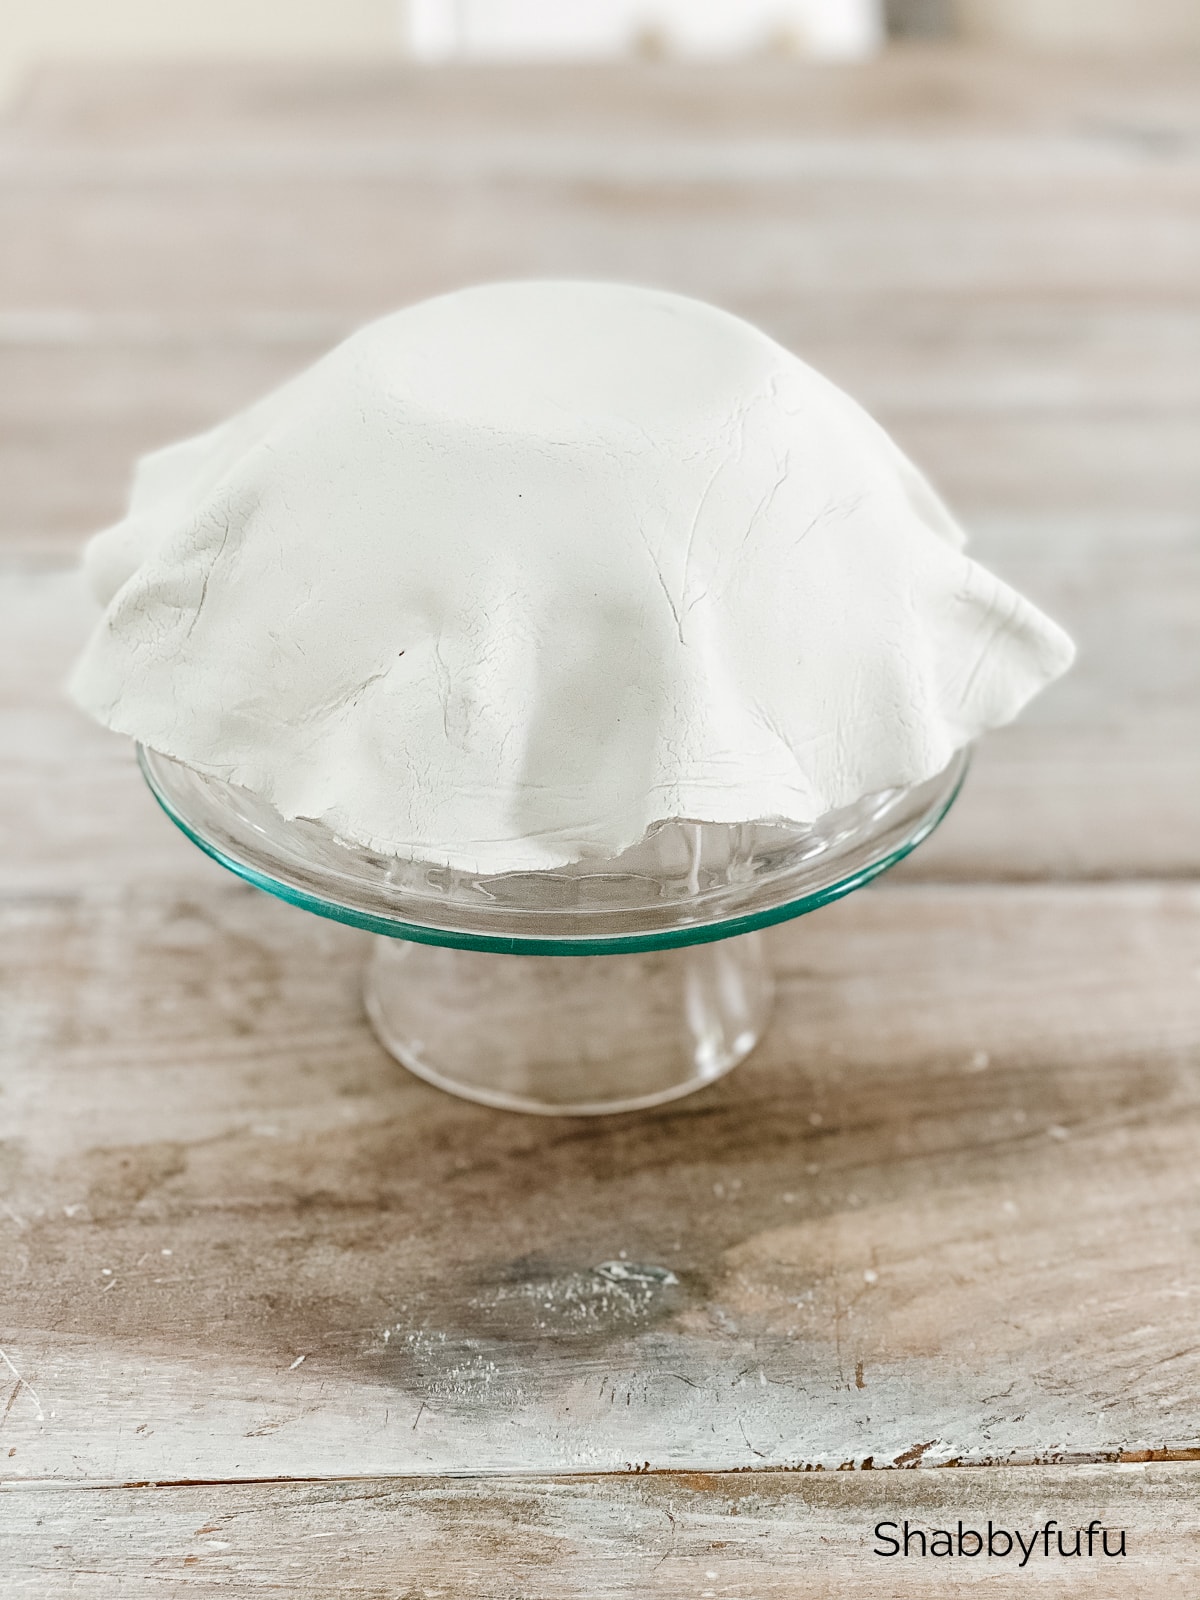
3. Then you’ll want to position the larger glass bowl face down on clay and cut around the edges. I used two Pyrex glass stacking bowls for the this project. This was the larger of the two bowls.
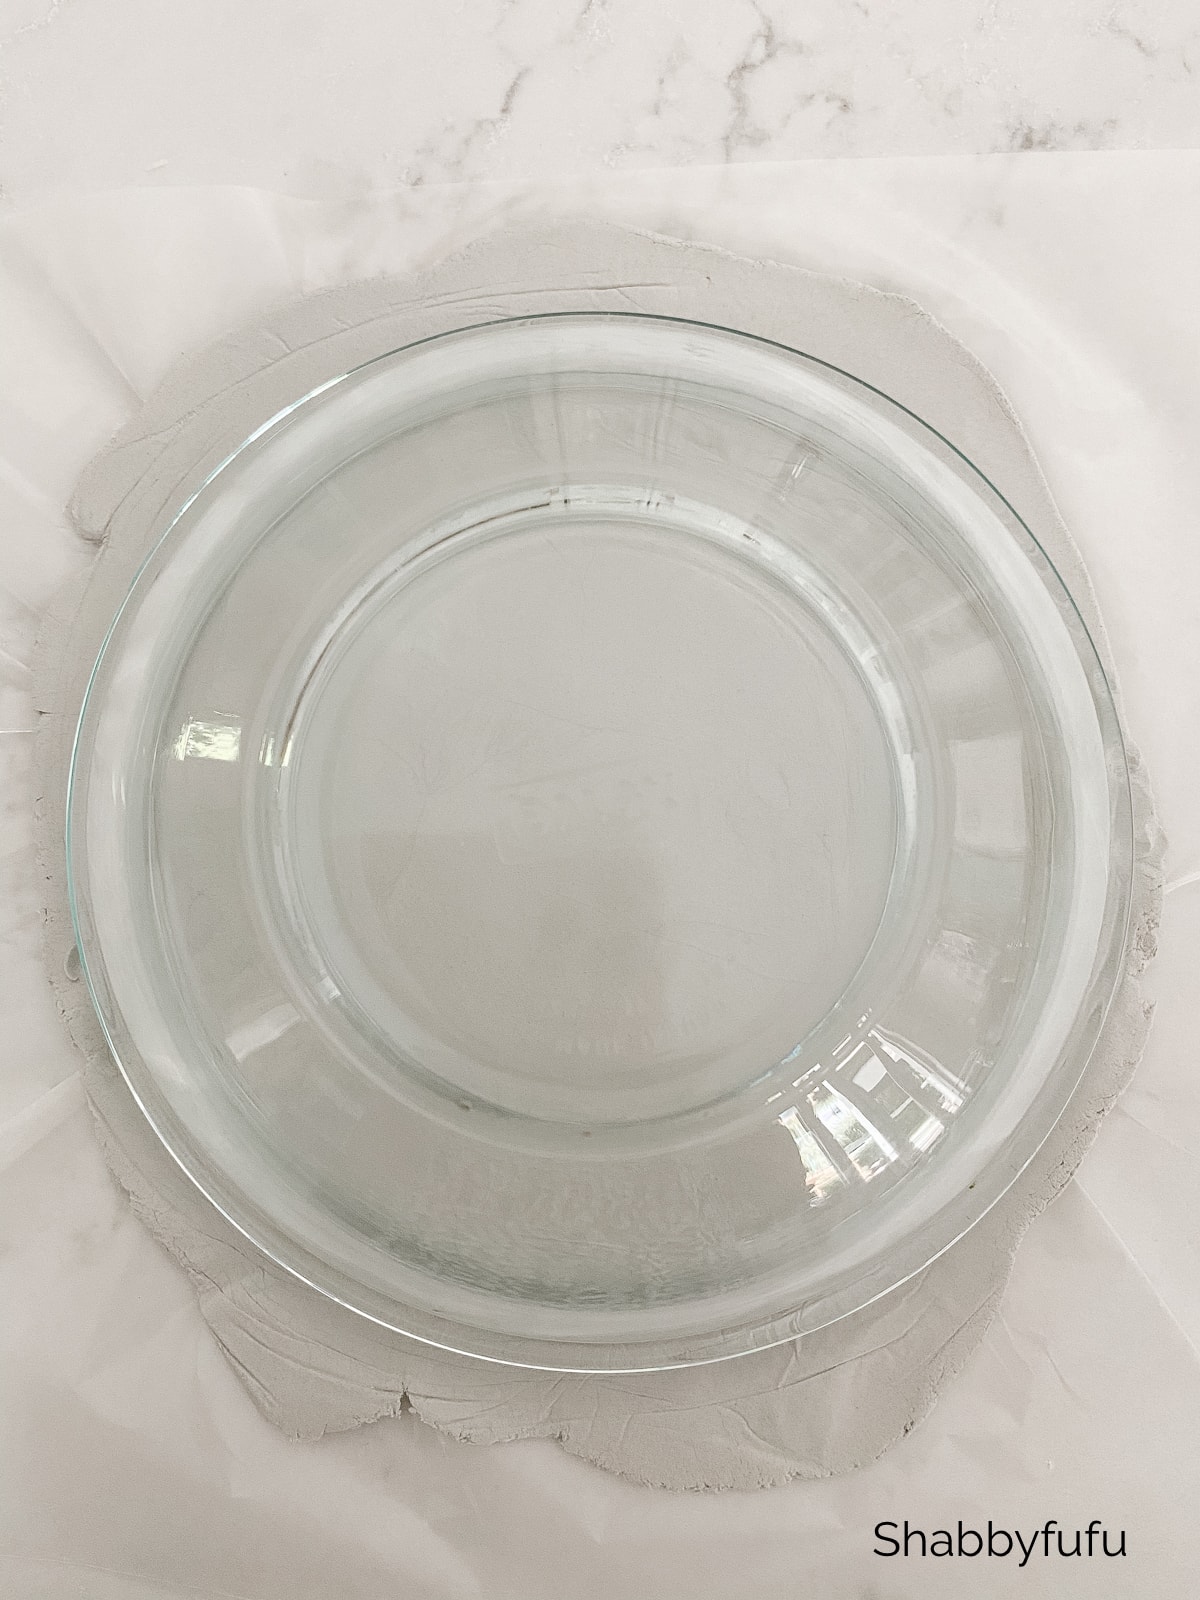
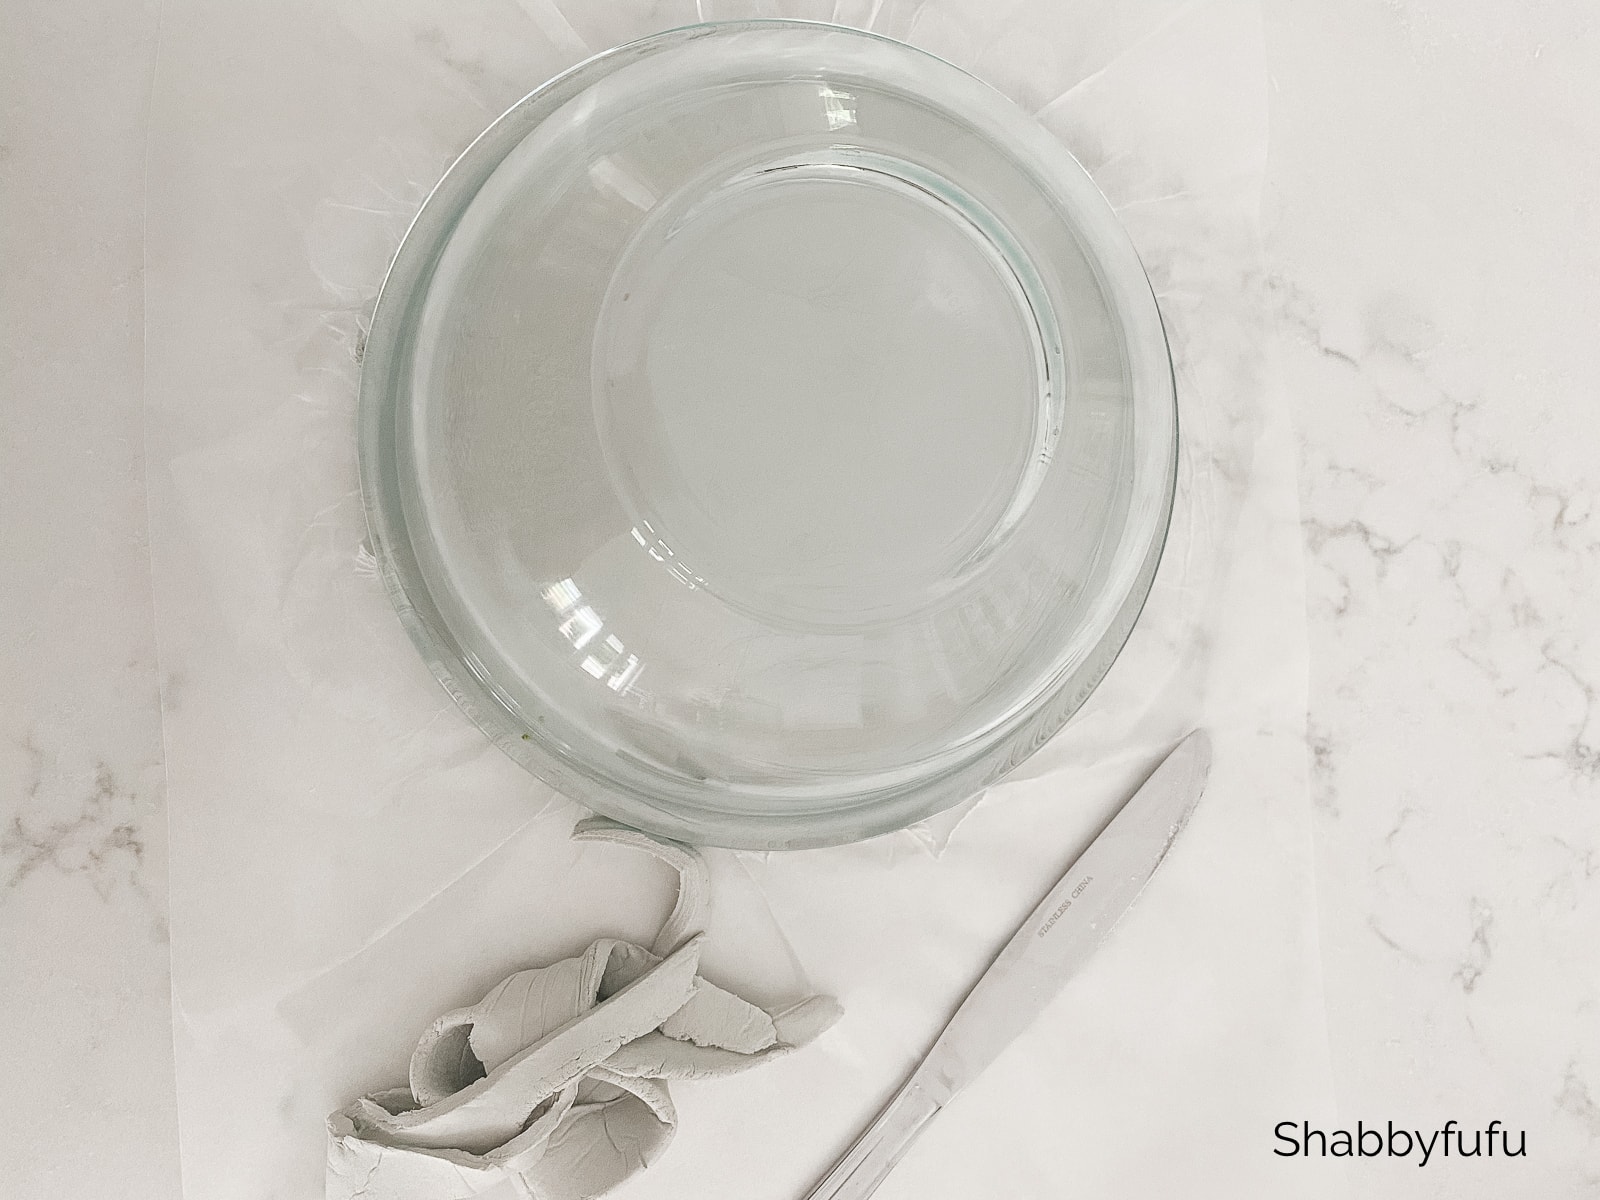
4. Place the smaller bowl face down on the glass to prop it up.

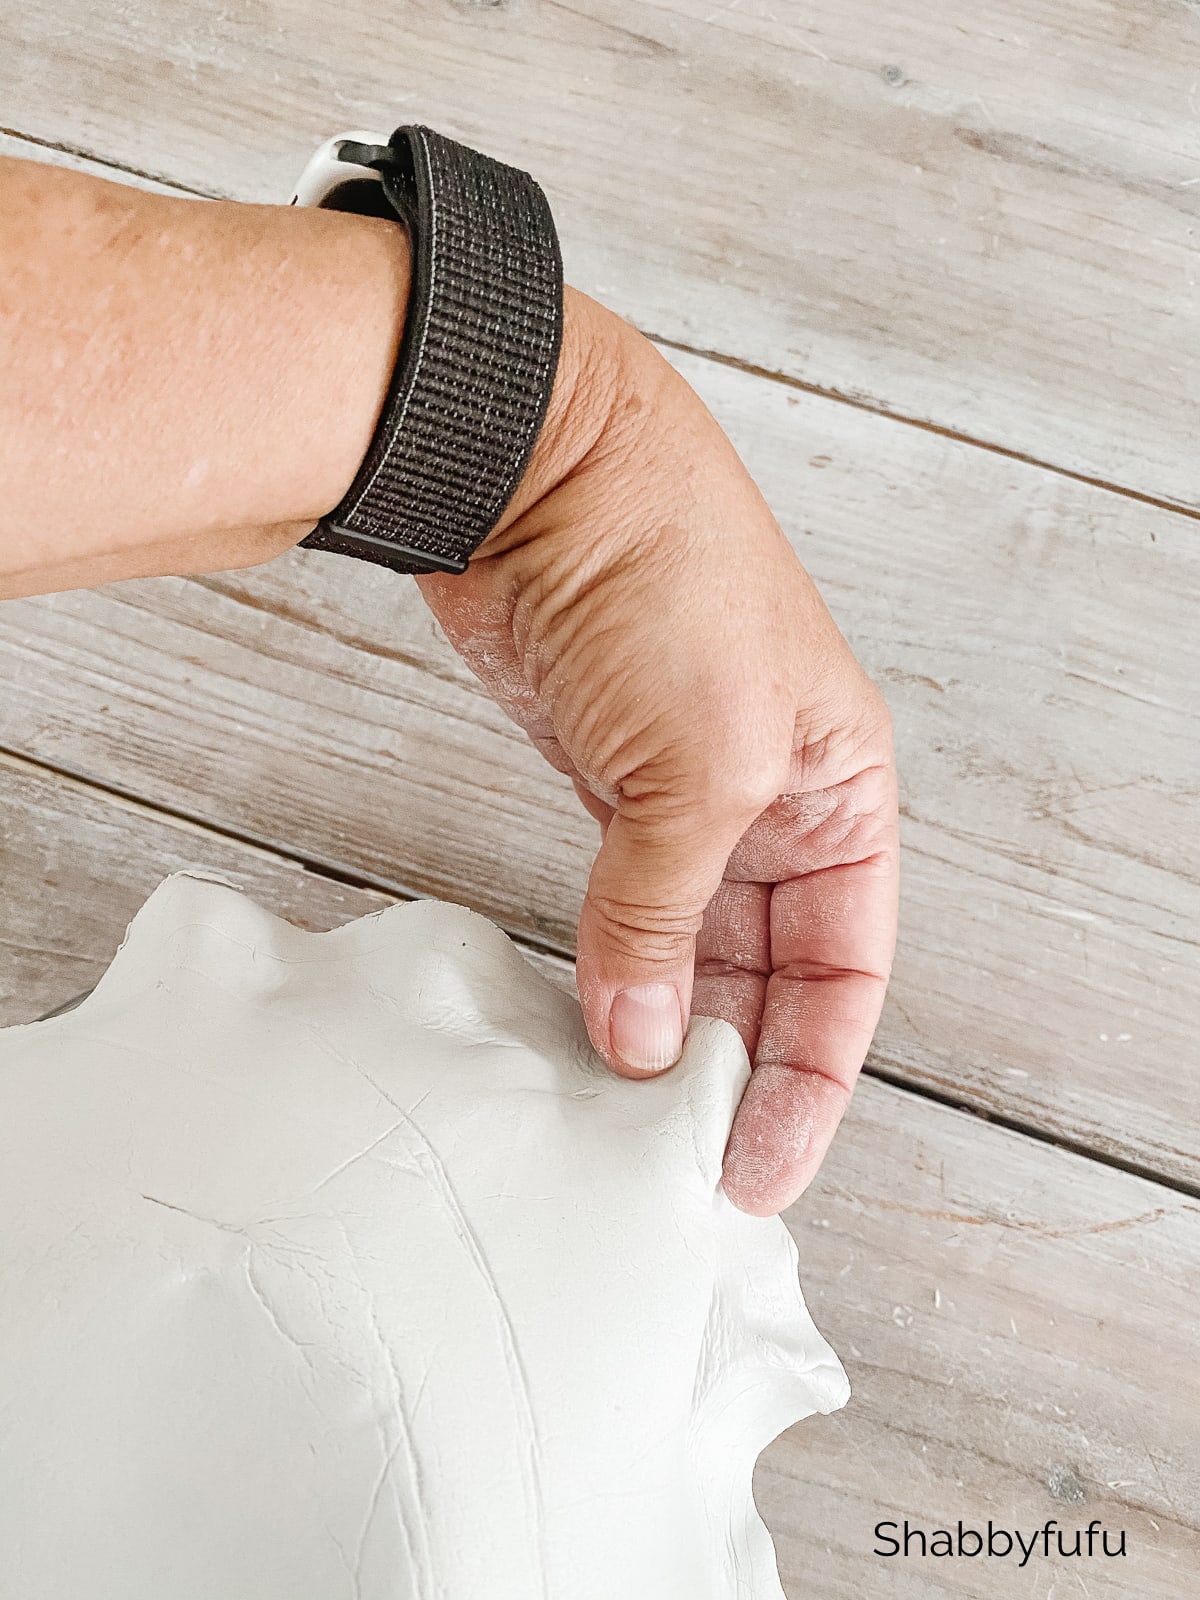
5. Drape your clay slab on the small bowl and form wavy edges with your fingers. Make a combination of smaller and larger ruffles. If you have any lines or dents on the clay you can smooth them out by wetting and using your fingers carefully.
6. Allow to dry for at least 24 hours, out of the sun and away from drafts. Since this is air dry clay, it may take longer depending on environmental conditions and the thickness of your slab. I left mine alone for a couple of days before attempting to paint it.
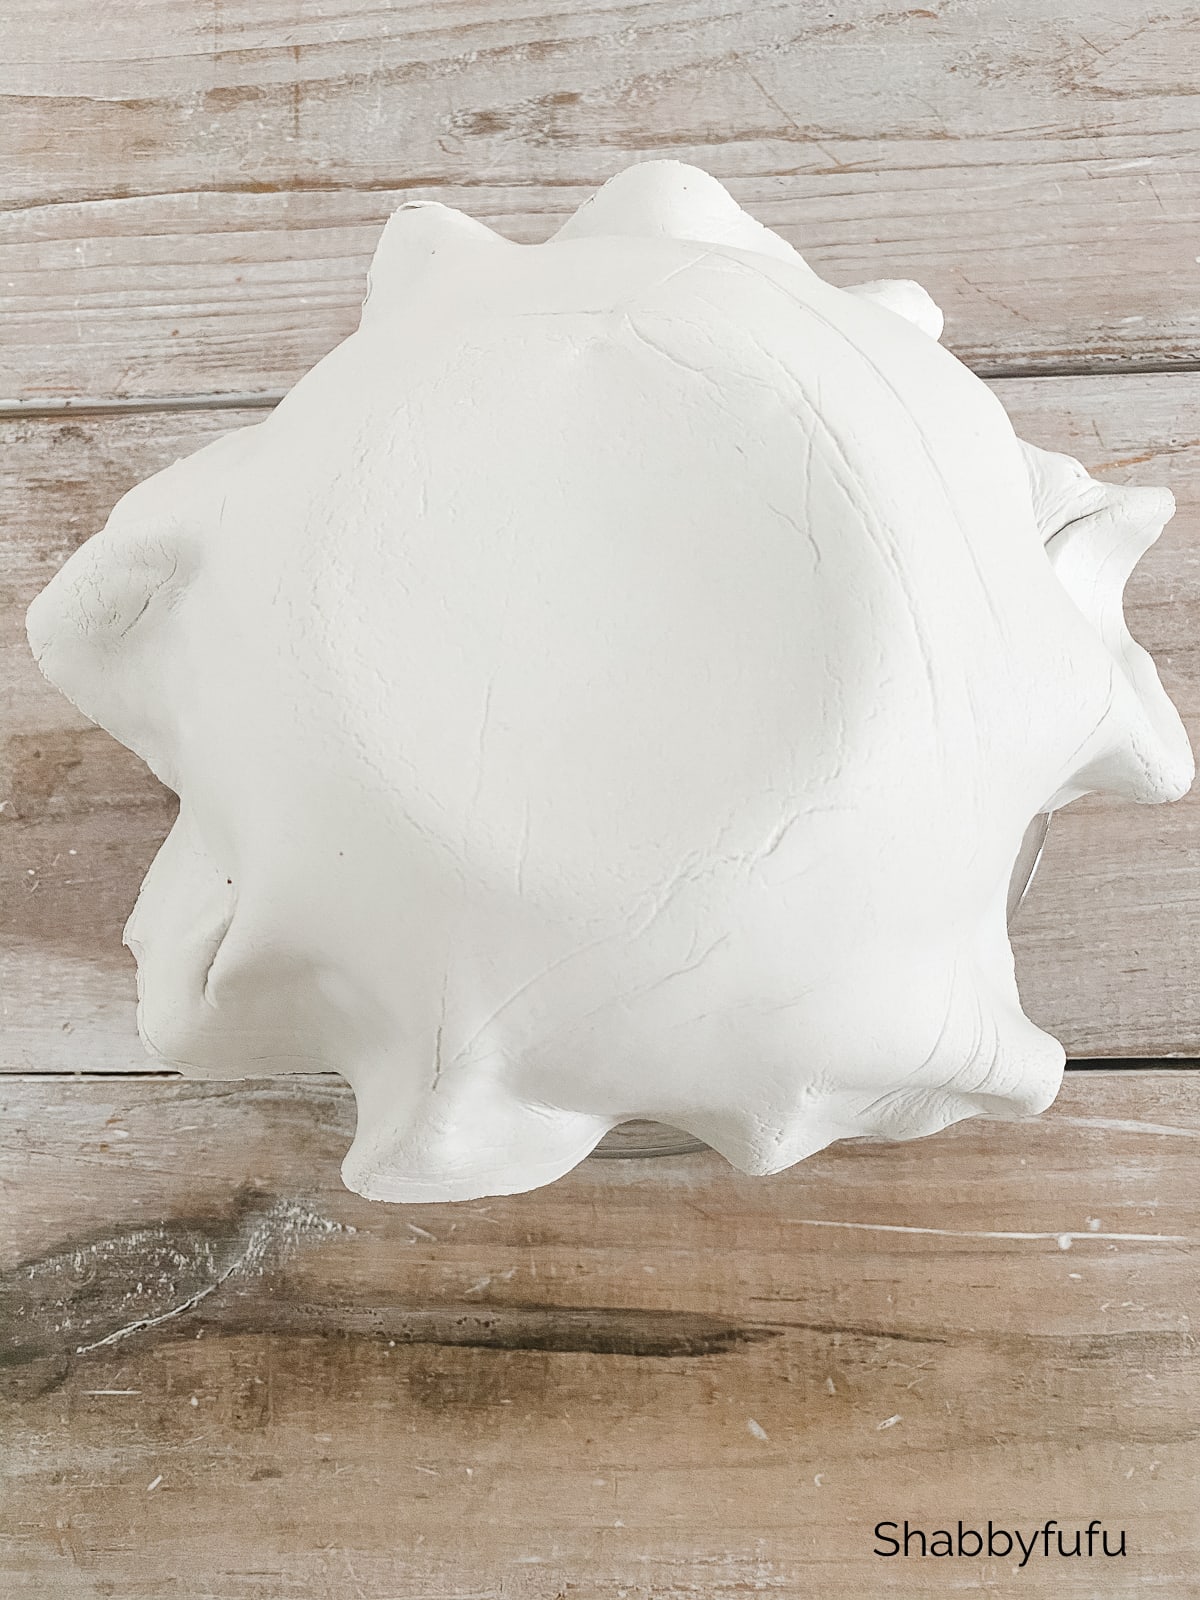
7. Sand the tops of the ruffles carefully using 220 Grit sandpaper and buff away any imperfections.
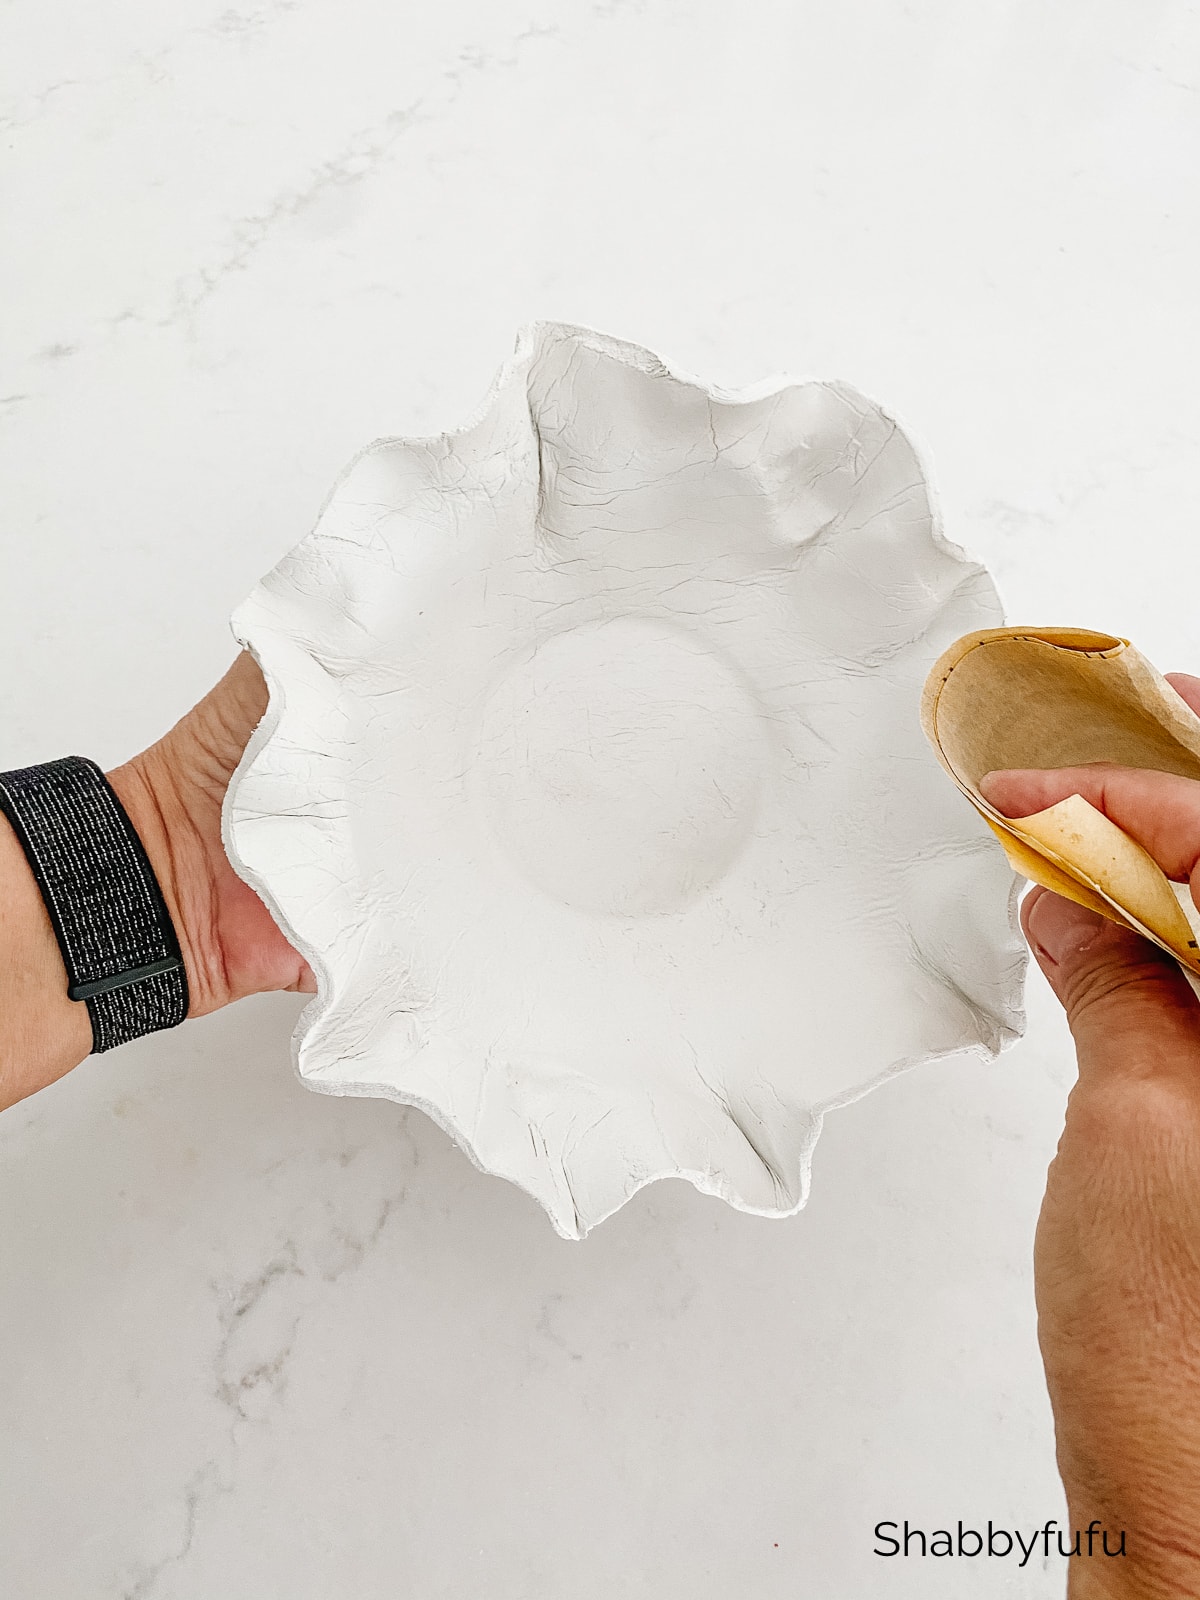
8. Dust off any sanding residue and then paint your bowl with any designs that you like. Using acrylic craft paint with a foam brush works best on air dry clay.
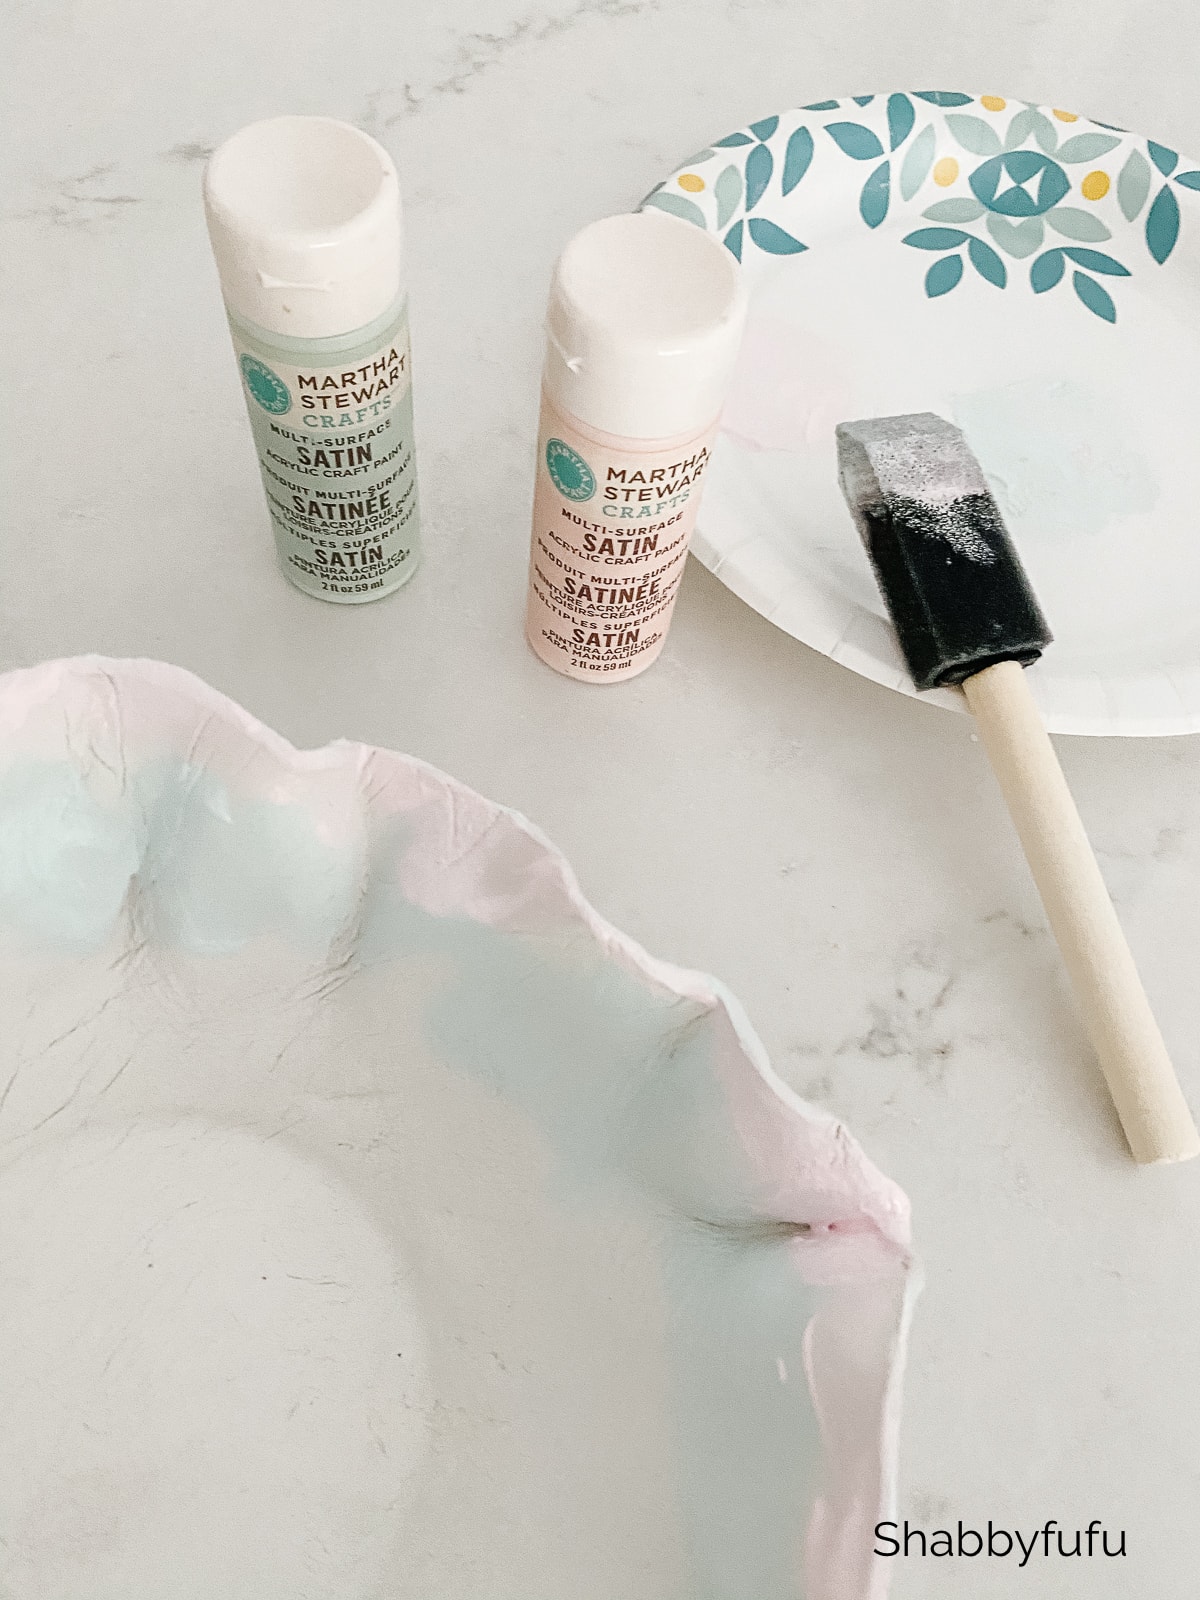
9. Finally, give your ruffle clay bowl diy project several coats of sealer. I used clear polyurethane and allowed to dry between coats.
PIN THIS POST
I can not wait to get my hands in the clay and create! Like you, I was an art major, loved throwing on a wheel, and even bought one for myself after college. That was SO long ago. Your bowl is just what my soul needs. Thank you.
Beautiful and Pinned! Thanks, Janet.
OMGosh…I am in love with this bowl! Heading to Amazon next to buy some air dry clay. Your paint choices match my
Home decor perfectly. Copying…thanks for sharing!
Your ruffle ball reminds me a lot of my vintage Fenton glass hobnail bowl! Did the air dry clay stick to your Pyrex bowls? I’m tempted to try this myself, but maybe drape I could it over the Fenton glass bowl to get the perfect hobnail texture. I just love the colours you chose to paint your bowl!
Since the clay is just draped over the bowl and not form fit, I had no problem with it sticking. If your bowl doesn’t have ruffled edges you could give it a try Danielle. Just don’t press too hard or the clay might crack or stick.
If you put plastic wrap over the bowl ( before the clay) it will insure it will not stick.
The glass is only used as a loose form, so I’ve never had the clay stick to it.
When I was very young, we made ruffled bowls out of vinyl records. Your bowl brings back those memories.
Beautiful. Can you use mod podge as a sealer
love this bowl!
Can food be served in it?
You have some great pieces to show. Also great memories. Your new bowl is very pretty. Thanks for the tutorial.