Repurpose A Dry Sink Into A Modern Bar Cabinet!
This post may contain affiliate links. For more information, please see our disclosure policy.
In this post you’ll learn how to repurpose a dry sink into a modern bar cabinet on a budget! This was an outdated family piece that my husband remembered from his youth. It was well worn and honestly somewhat of an eyesore in it’s former state. I decided to give this piece a coastal vibe to coordinate with our home decor.
You can often find dry sinks in thrift shops. I have seen them for very little money, so if this DIY interests you then keep your eyes open for one! True antique dry sinks were used for washing up in victorian times before there was indoor plumbing. Ours was a piece that my mother-in-law had for storage and probably dates to the 60’s. If you have a true antique dry sink then you probably aren’t interested in repurposing it. They can be pricey (like the one pictured below) so knowing what you have is a good idea.
DIY- Repurpose A Dry Sink Into A Modern Bar Cabinet!
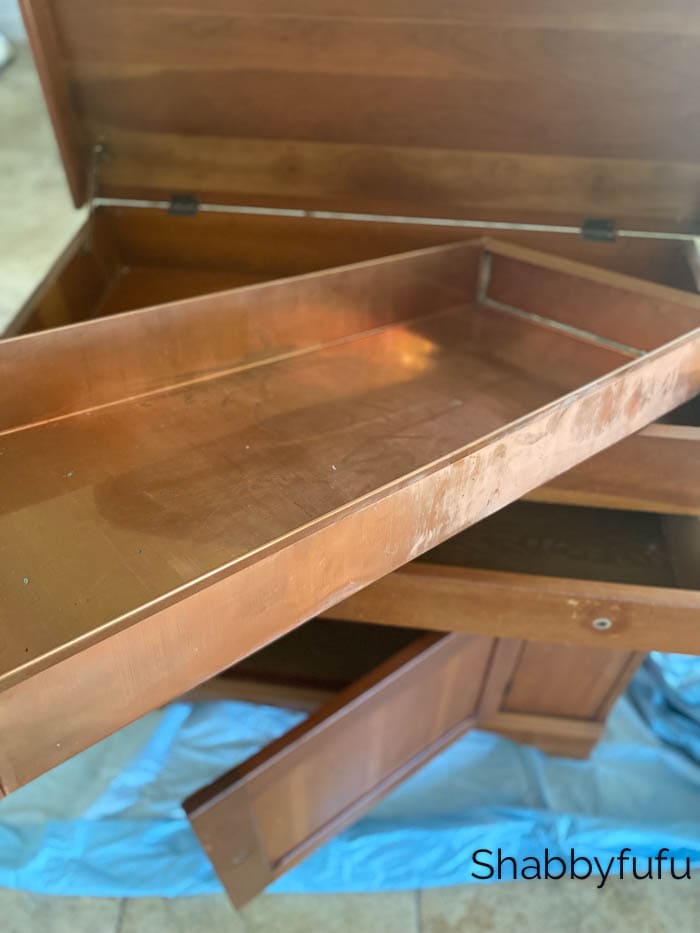
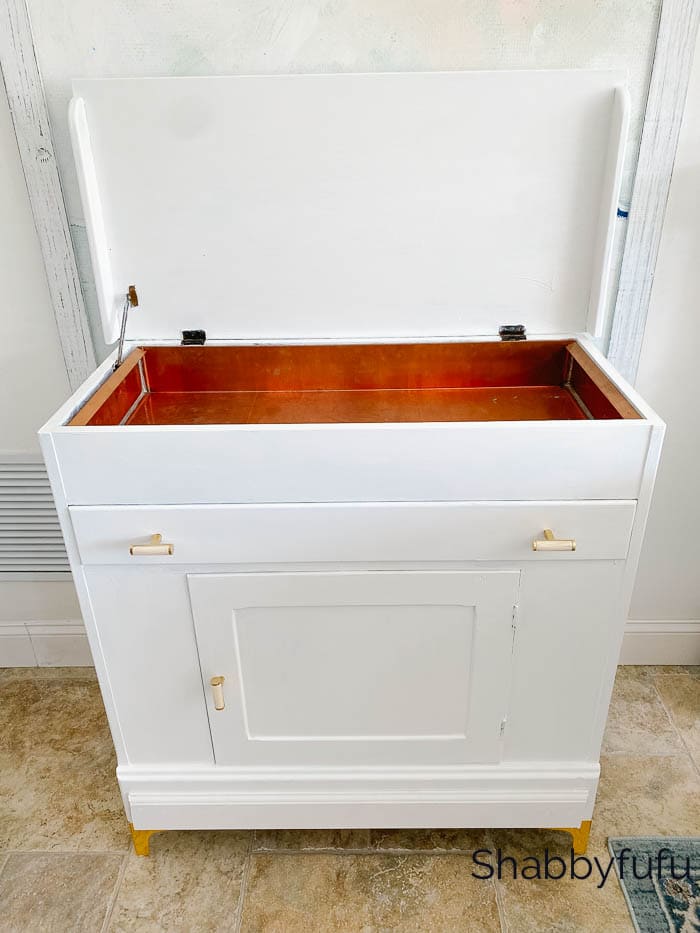
Seriously this took only some imagination and a small amount of my time, so let’s see how it’s done! Below is the before and as the one shown above, it has a copper liner. My husband had this in his office for years and no longer wanted it. He’s been redecorating that room (with my help 😁).
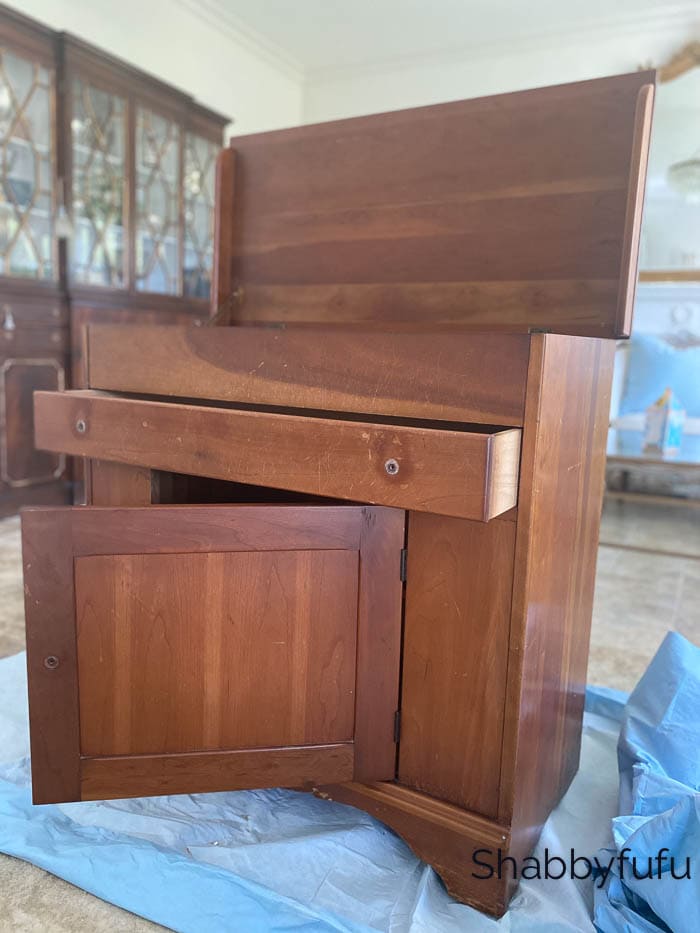
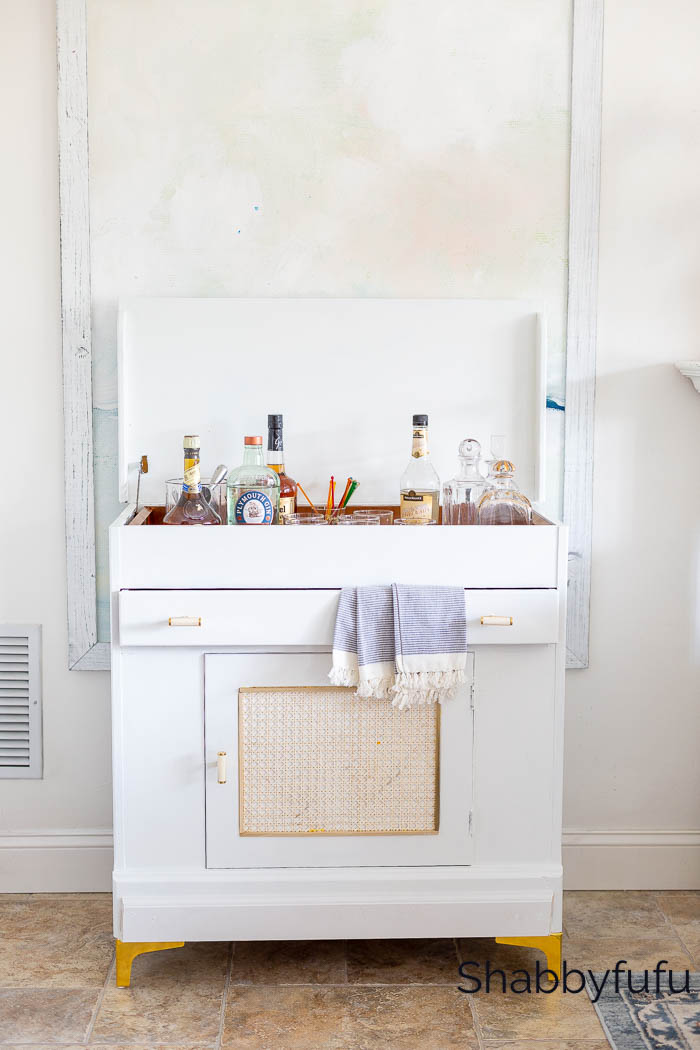
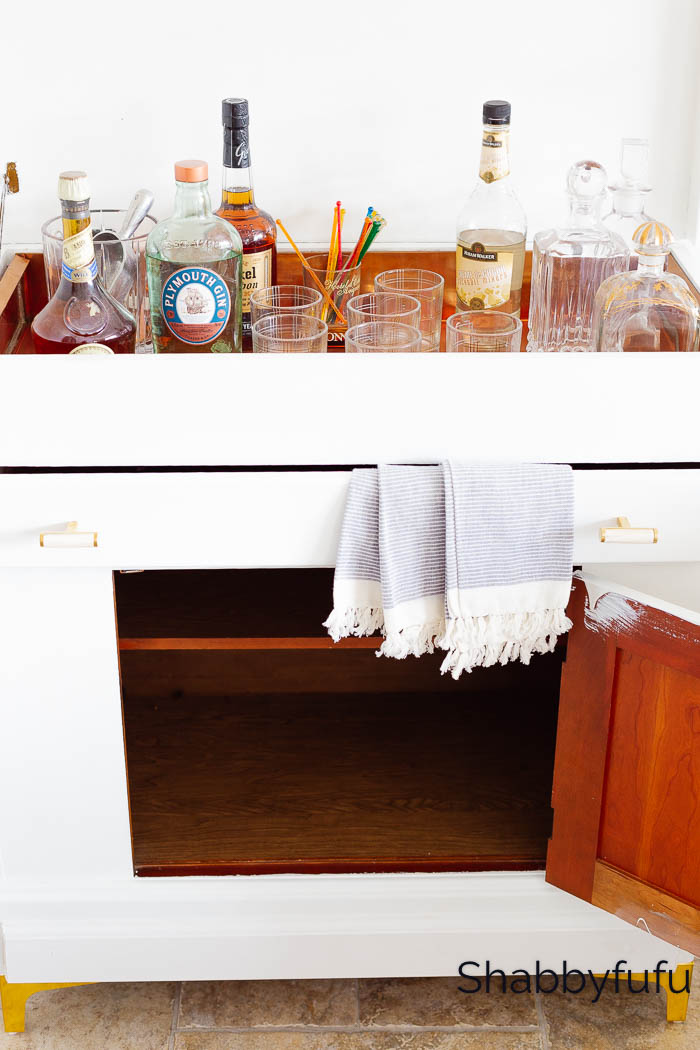
The copper liner is in excellent condition and can be removed for cleaning and/or draining!
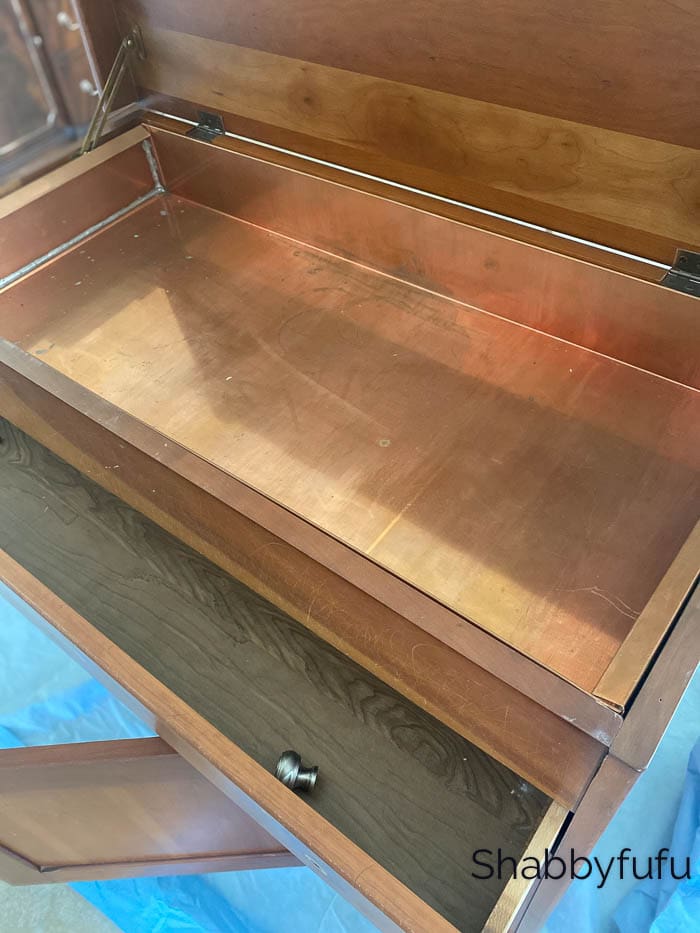
I gave the copper lining a quick clean…see how in this post.
Repurpose A Dry Sink With Paint
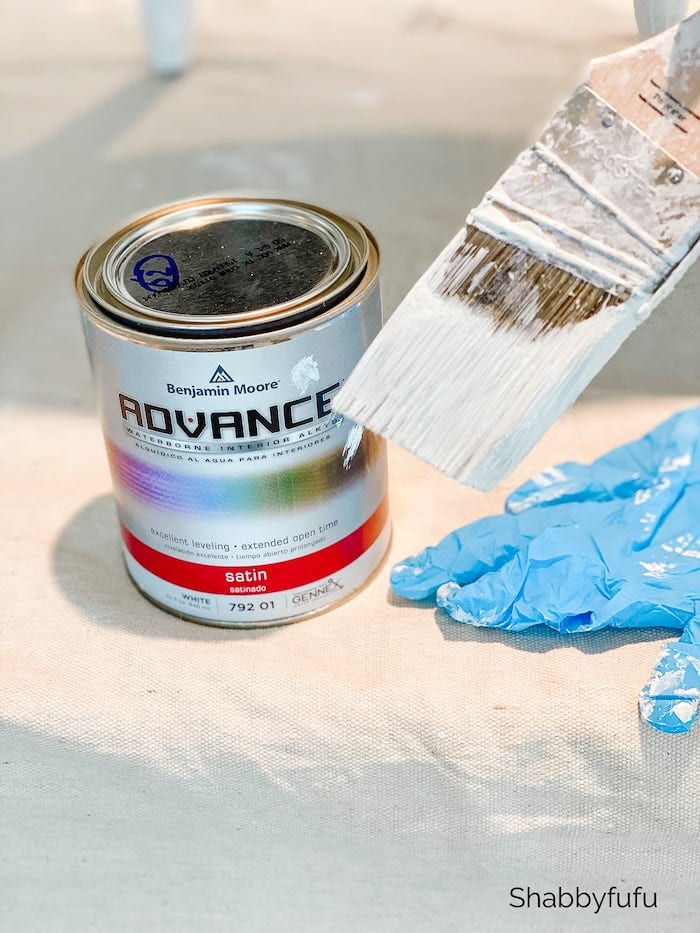
Even if you do nothing else, the easiest way to repurpose old furniture is with paint. I have many articles on painting techniques that I prefer, and this one is my tried and true! As a decades old DIYer, I have been painting furniture since before the big chalk paint craze and still prefer regular wall paint. Plus, the paints have all become so high quality now and self leveling. It’s easy with my 2 step system!
- PRIME IT
I did not sand this, but wiped it down and then gave it a coat of this primer. It is oil based, but does not smell and dries quickly. It can be used over any surface (oil or latex) and you can use either latex or oil over it. Just be sure to dispose of it properly in preferably a paint recycling center. Let the primer dry overnight for best results.
- PAINT IT
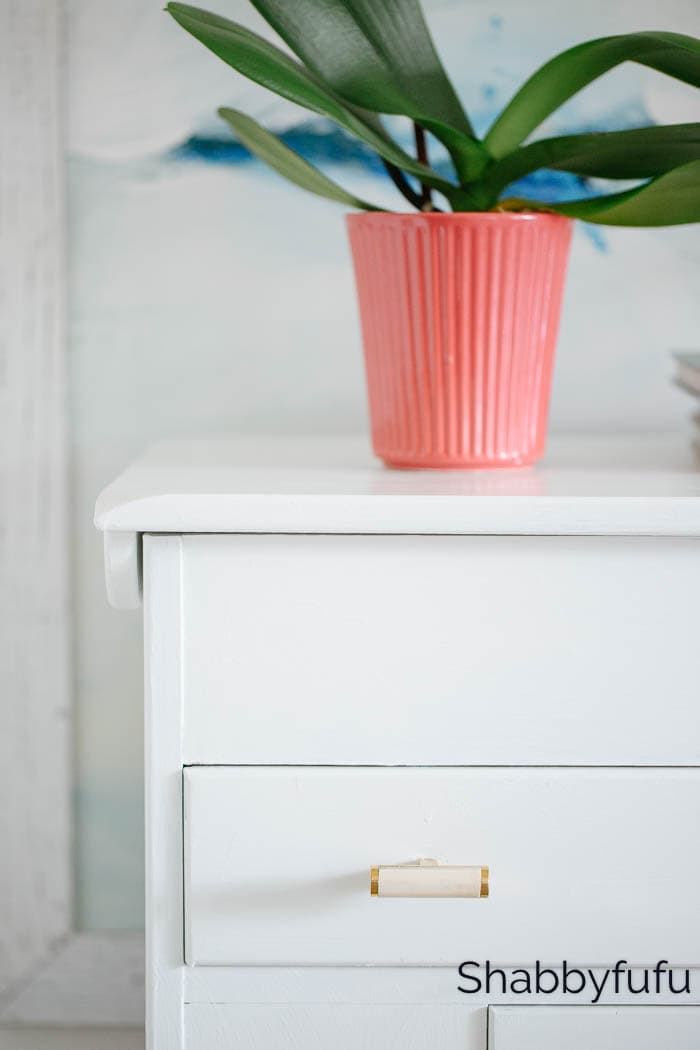
Hands down, the BEST paint is Benjamin Moore Advance! We use it daily in our construction business and I love it for painting furniture. I used 2 coats in a white satin finish, allowing 2 hours of drying time between each coat. It couldn’t be any easier than that!
Updating The Look
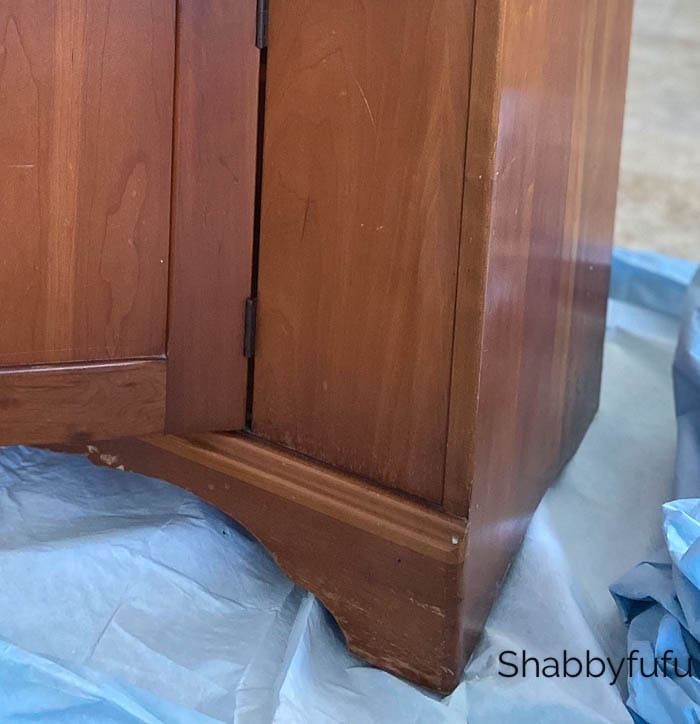
After painting the cabinet I just couldn’t live with the scrolled bottom that was typical of 60’s reproduction furniture. I cut a piece of floor baseboard that was pre-painted white and stored in our garage and attached it to the bottom with a nail gun.
BEFORE:
AFTER:
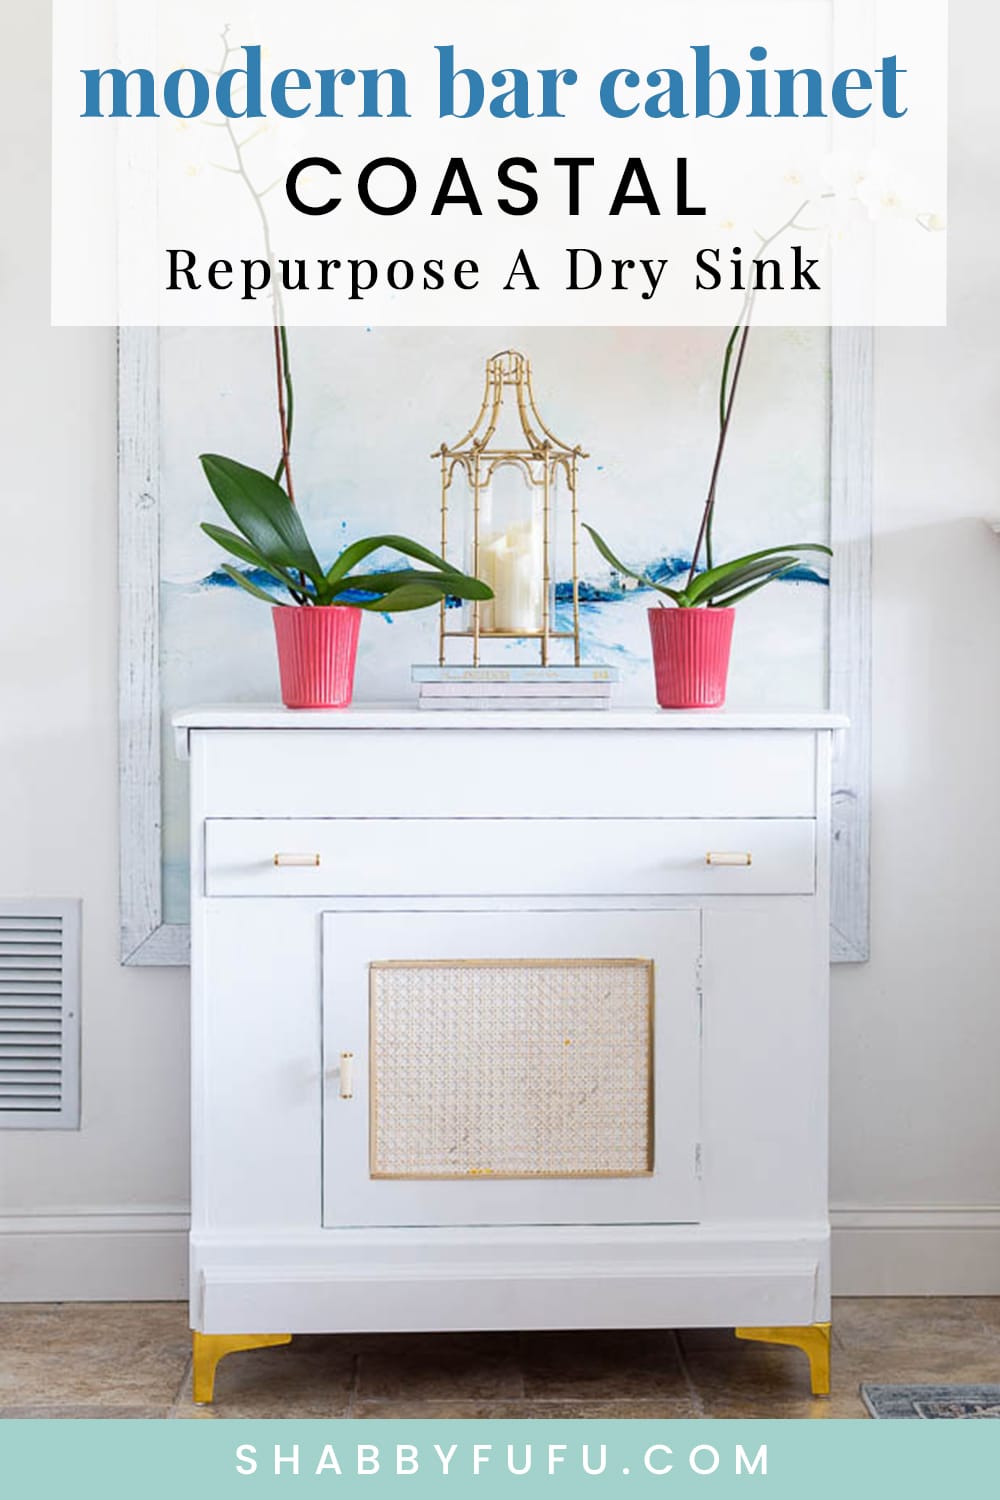
Update The Hardware
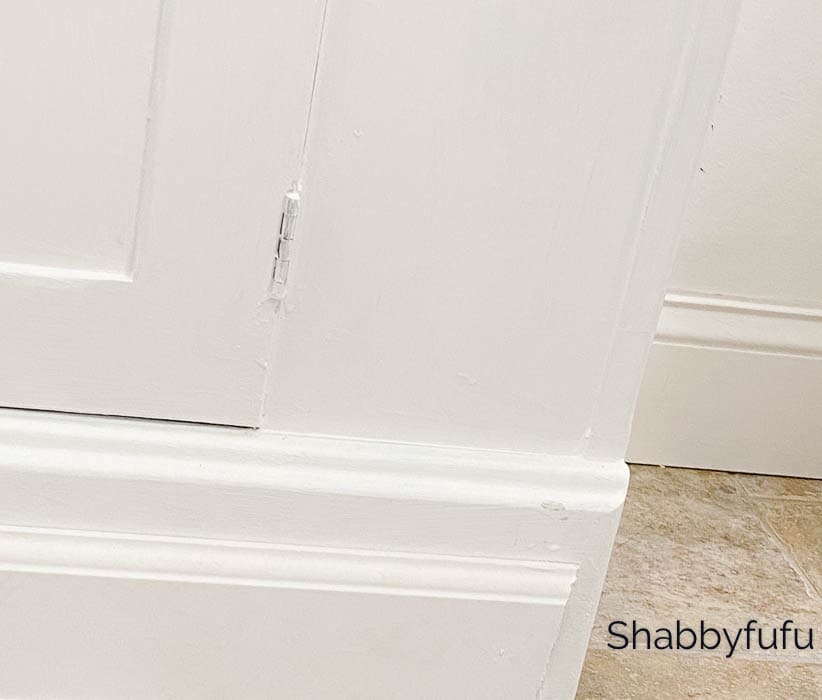
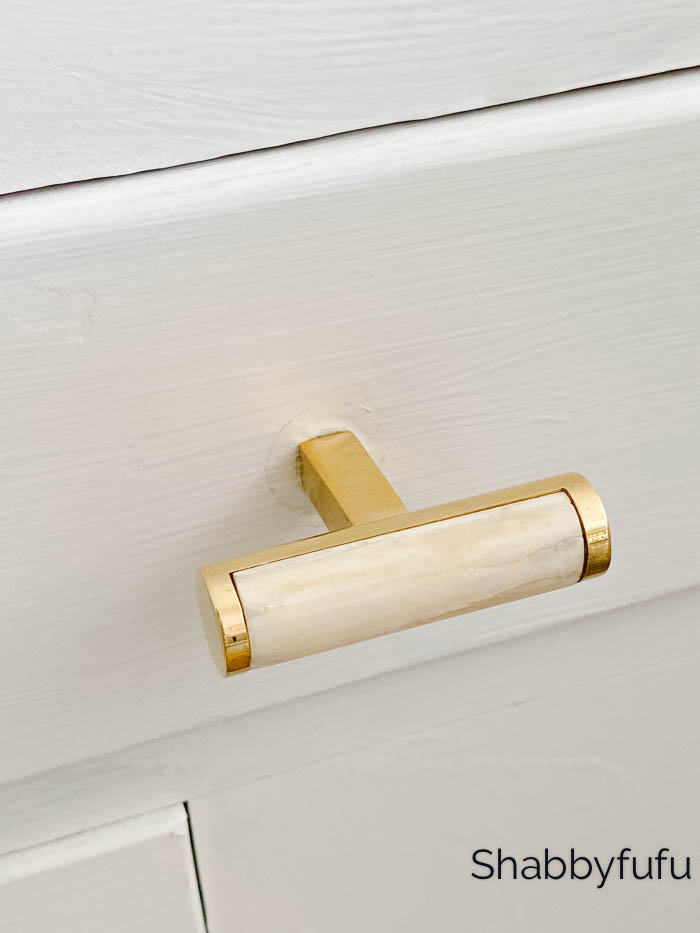
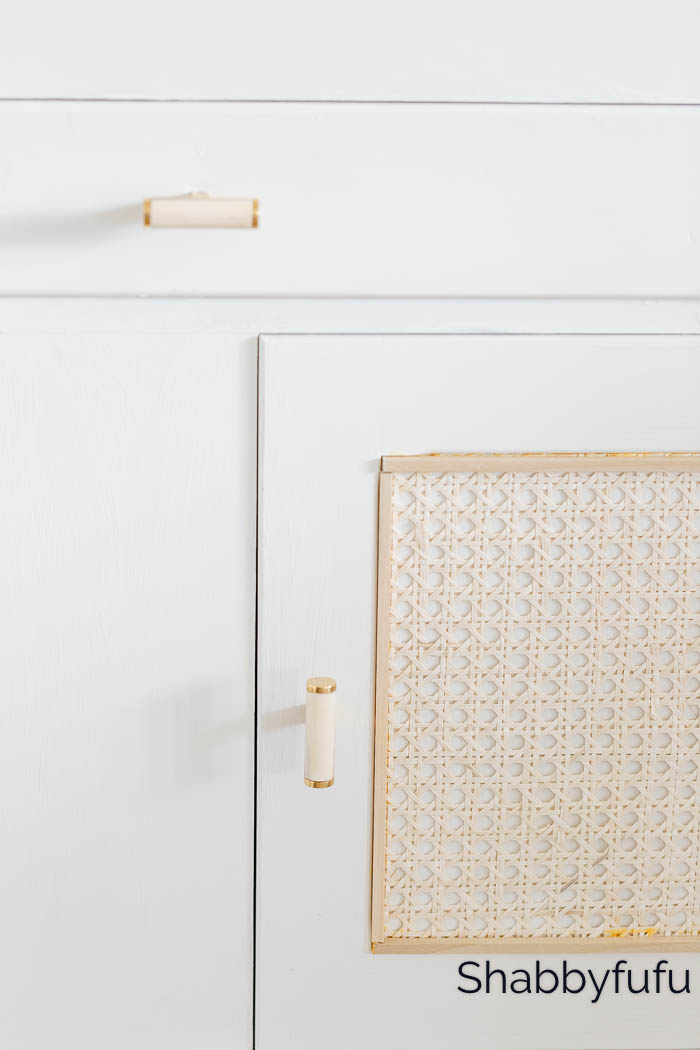
The best way to change the look of furniture is with paint and to really update it think about new hardware! Since I only needed 3 new knobs or handles, the cost wasn’t a factor but the look of it was. I found these modern handles at CB2 and knew that they would be just the thing for the modern coastal look I was going for. Keep in mind that this is a super close up shot and in real life you don’t notice the shadow of the former knobs on the wood.
Raise It Up
Have you ever noticed that much of the modern furniture you see is raised up and does not sit directly on the ground? It gives the piece not only a more up to date look but allows for cleaning underneath. To coordinate with the gold knobs I ordered these legs from Amazon.

I took a photo before adding the caning and as you can see it looks a bit plain. Not bad, but it needed that pop of coastal!
Add A Unique Element – Crazy For Cane!
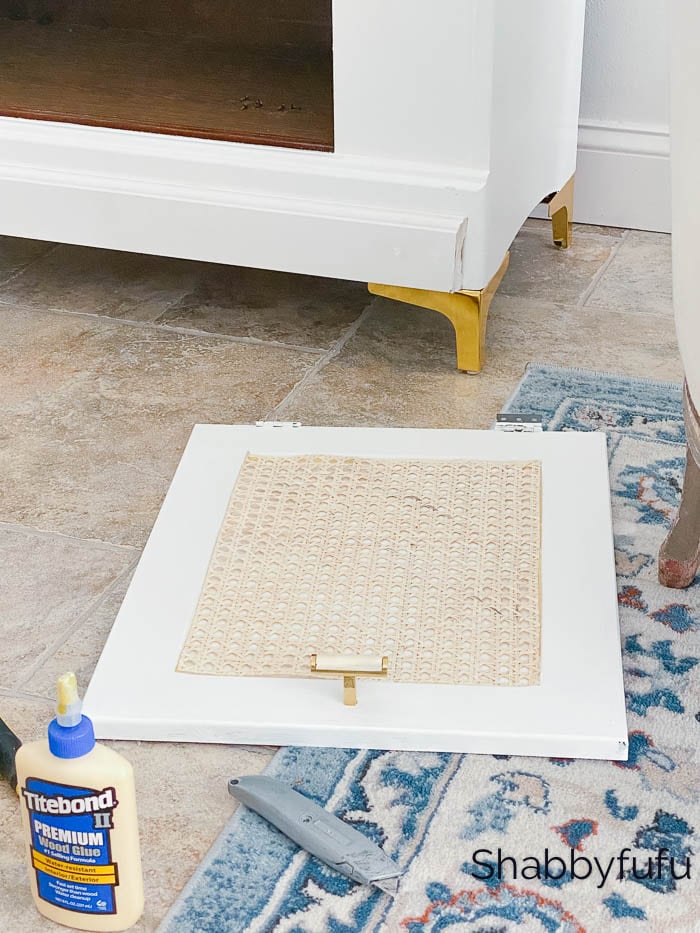
Make it yours with a unique element or feature when you repurpose a dry sink or any piece of furniture. I don’t know about you, but I don’t like my home to look like everyone else’s and it’s one of the reasons for my love of DIY! I measured the area and then ordered 1 foot of cane webbing from Amazon that comes in a roll.
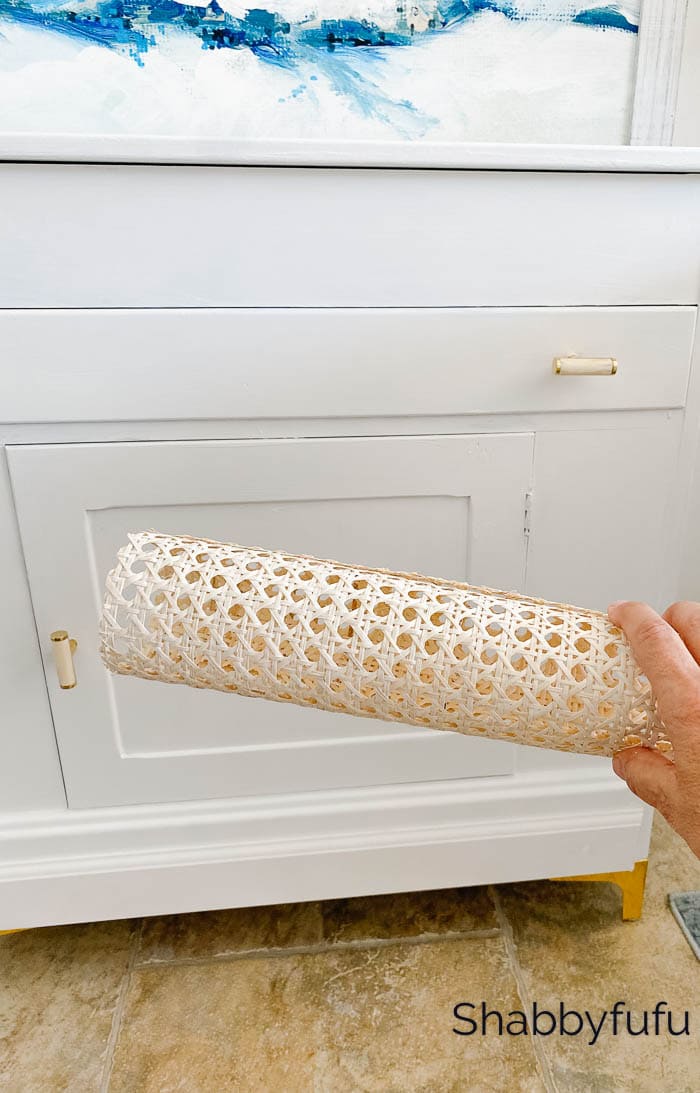
It was just enough and you soak it in warm water for about an hour for it to straighten out. Next lightly dry it on a towel and trim to exact size.
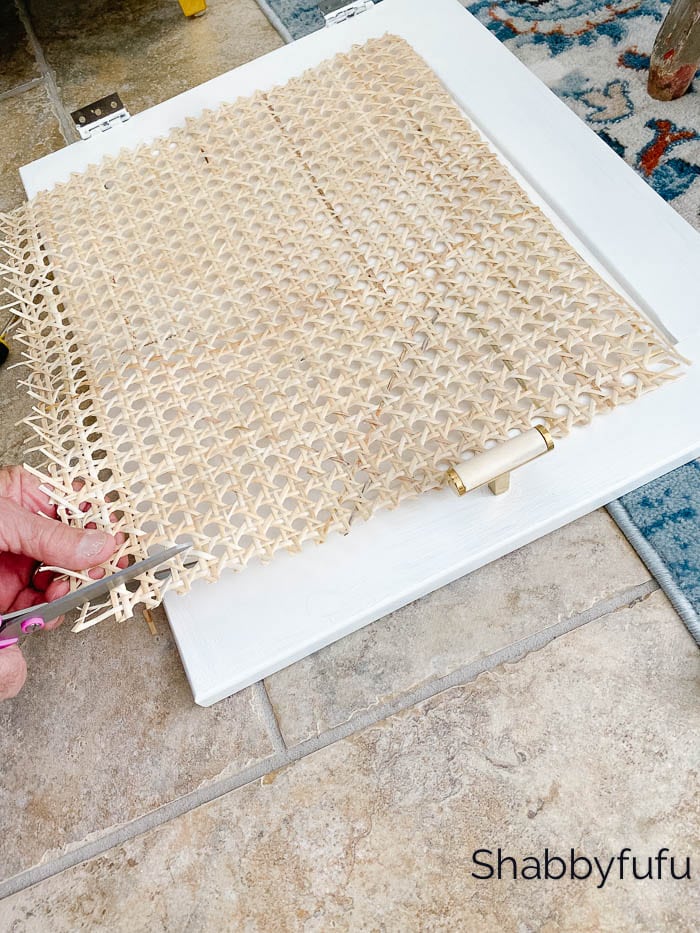
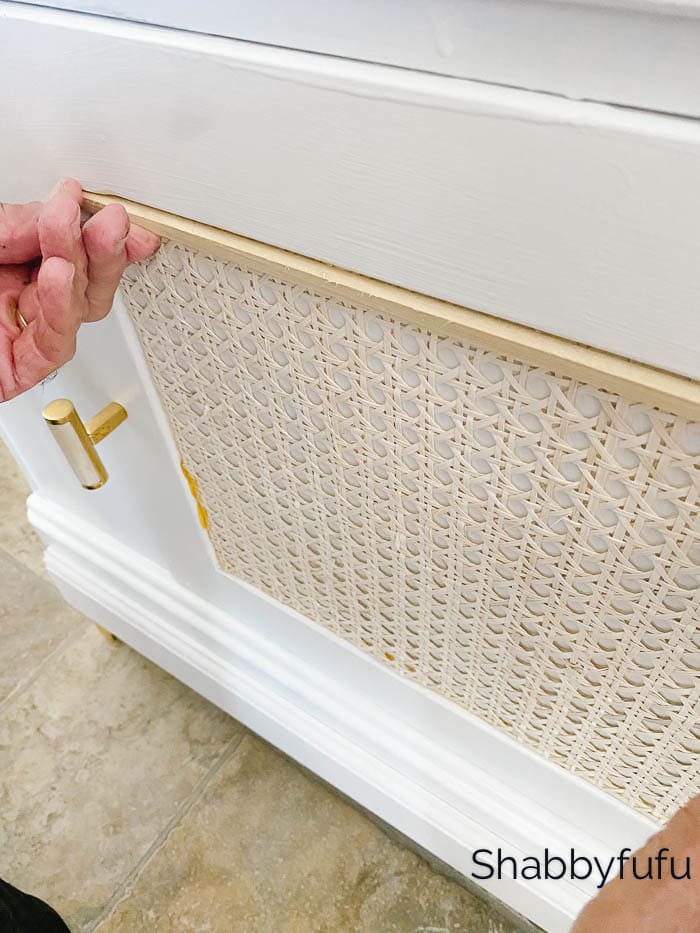
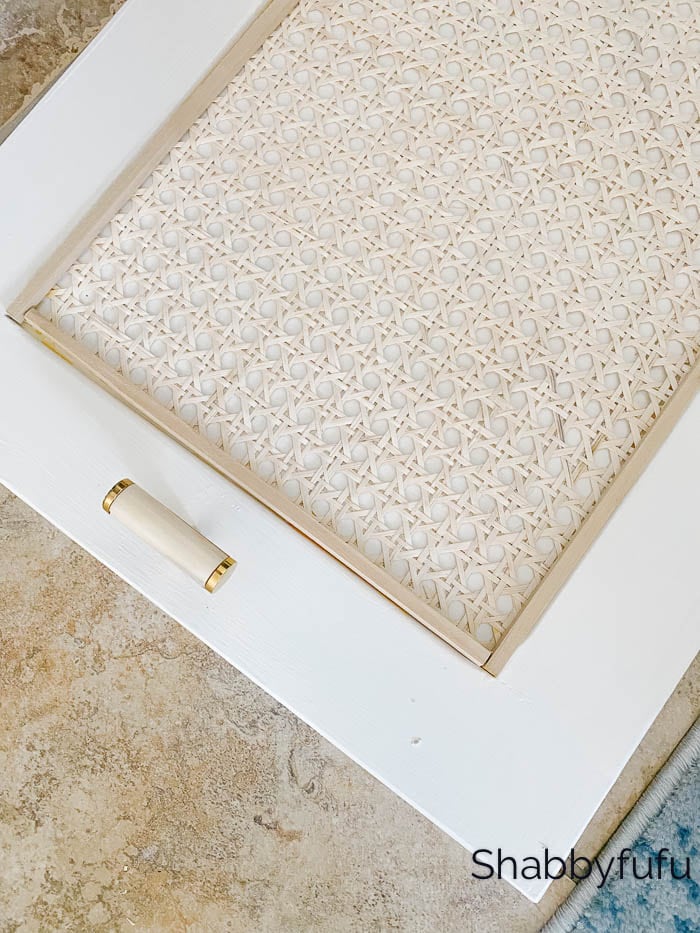
Then glue all of the ends with carpenter’s glue and weight it down, giving time to allow the glue to dry. As you can see we removed the door for this process to make it easier to work flat.
We added a trim strip of poplar that we had in our stash all the way around the inside edge. Alternately you could use a strip of this spline reed that you would use with caning a chair.
Such a great look and it’s ready to go back, as we are finished with the repurpose a dry sink project! 😃
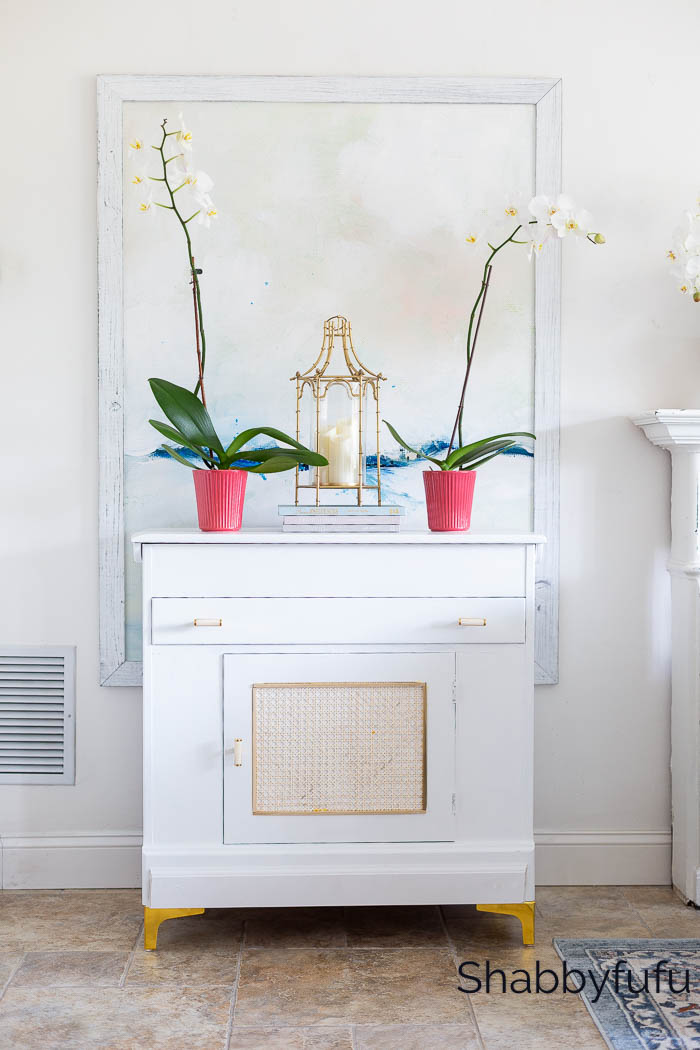
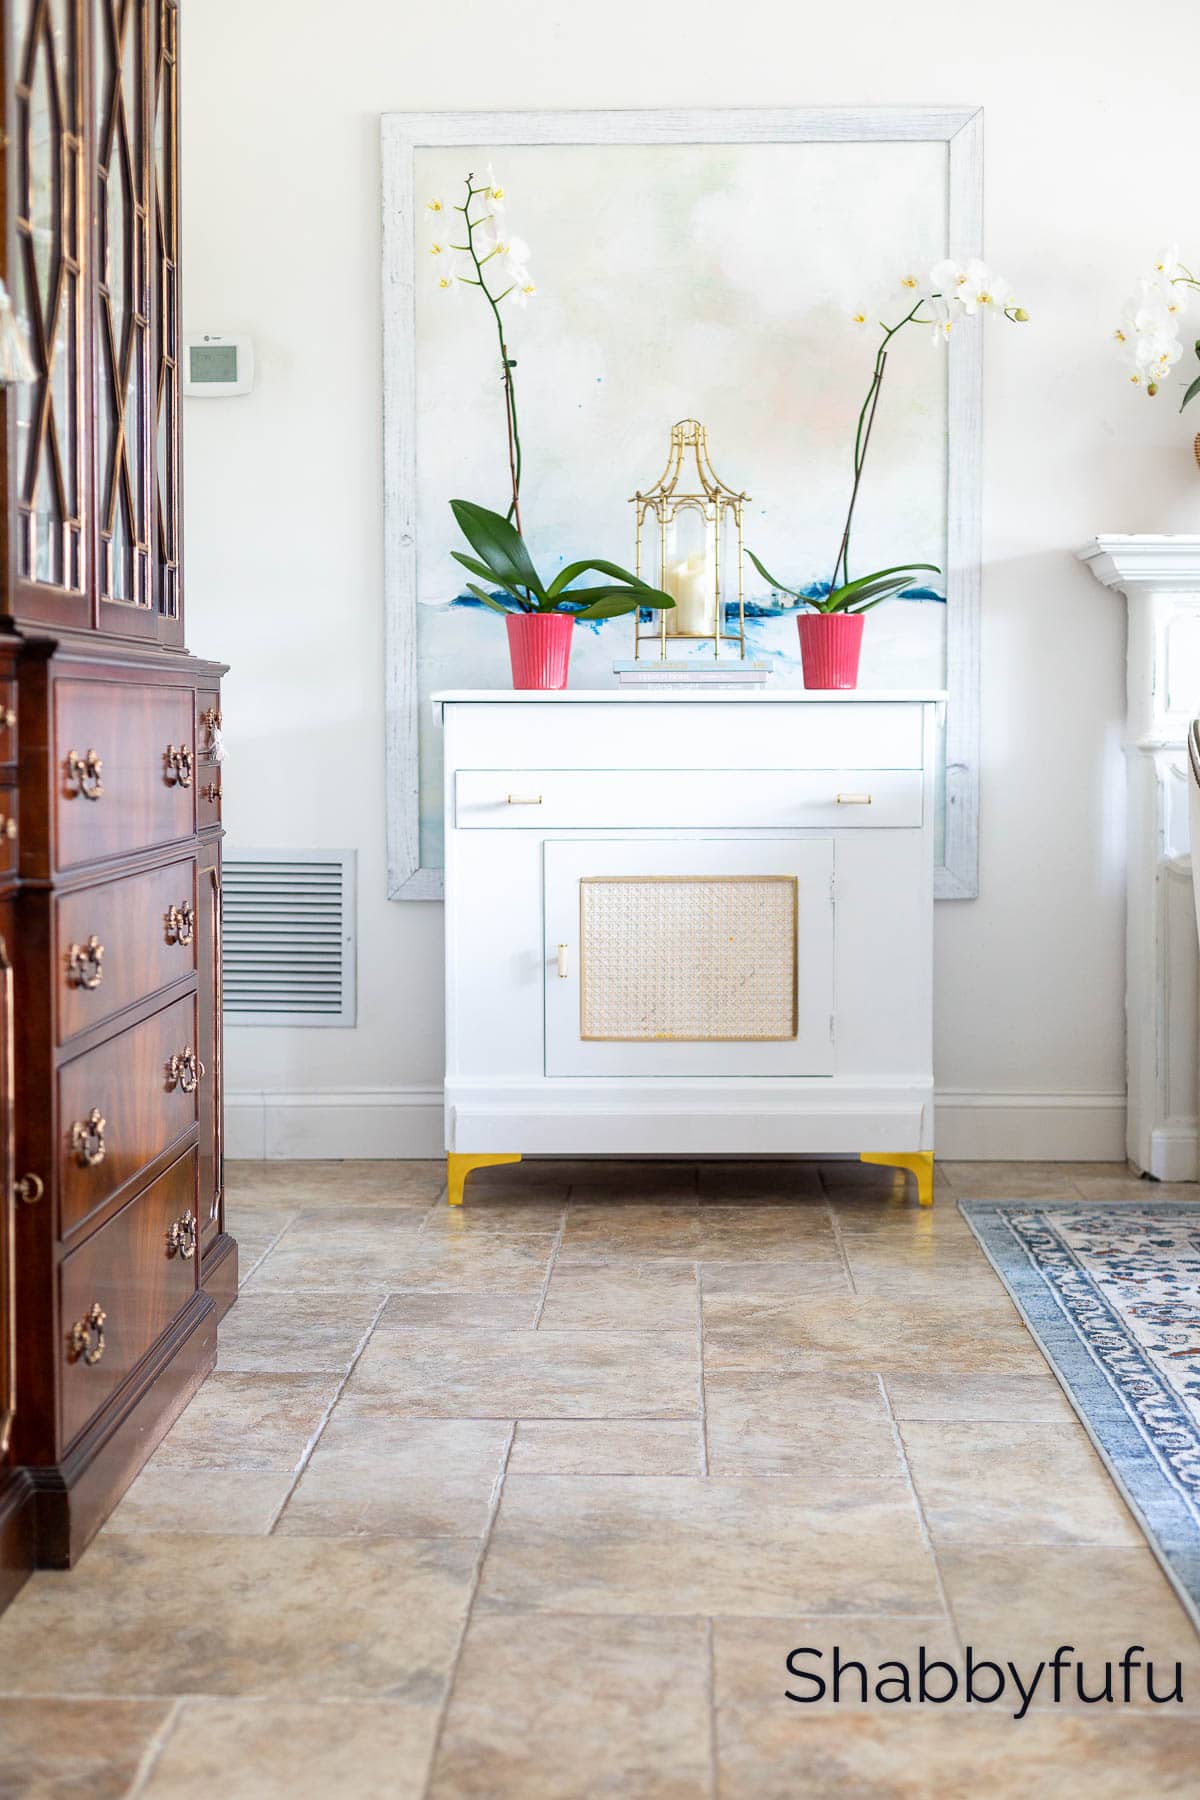
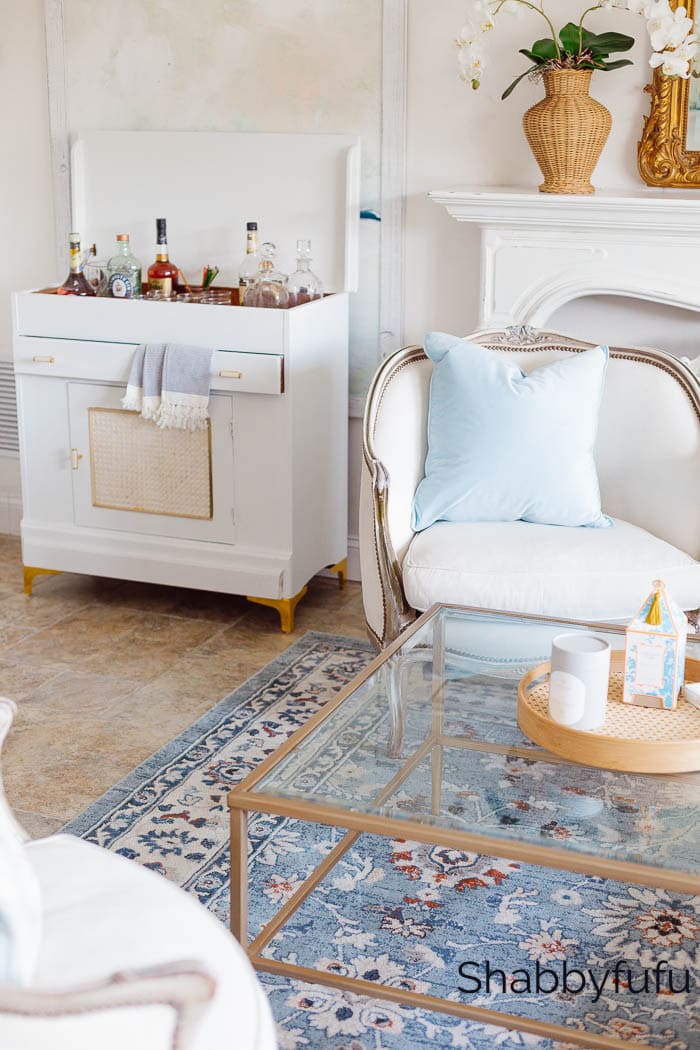
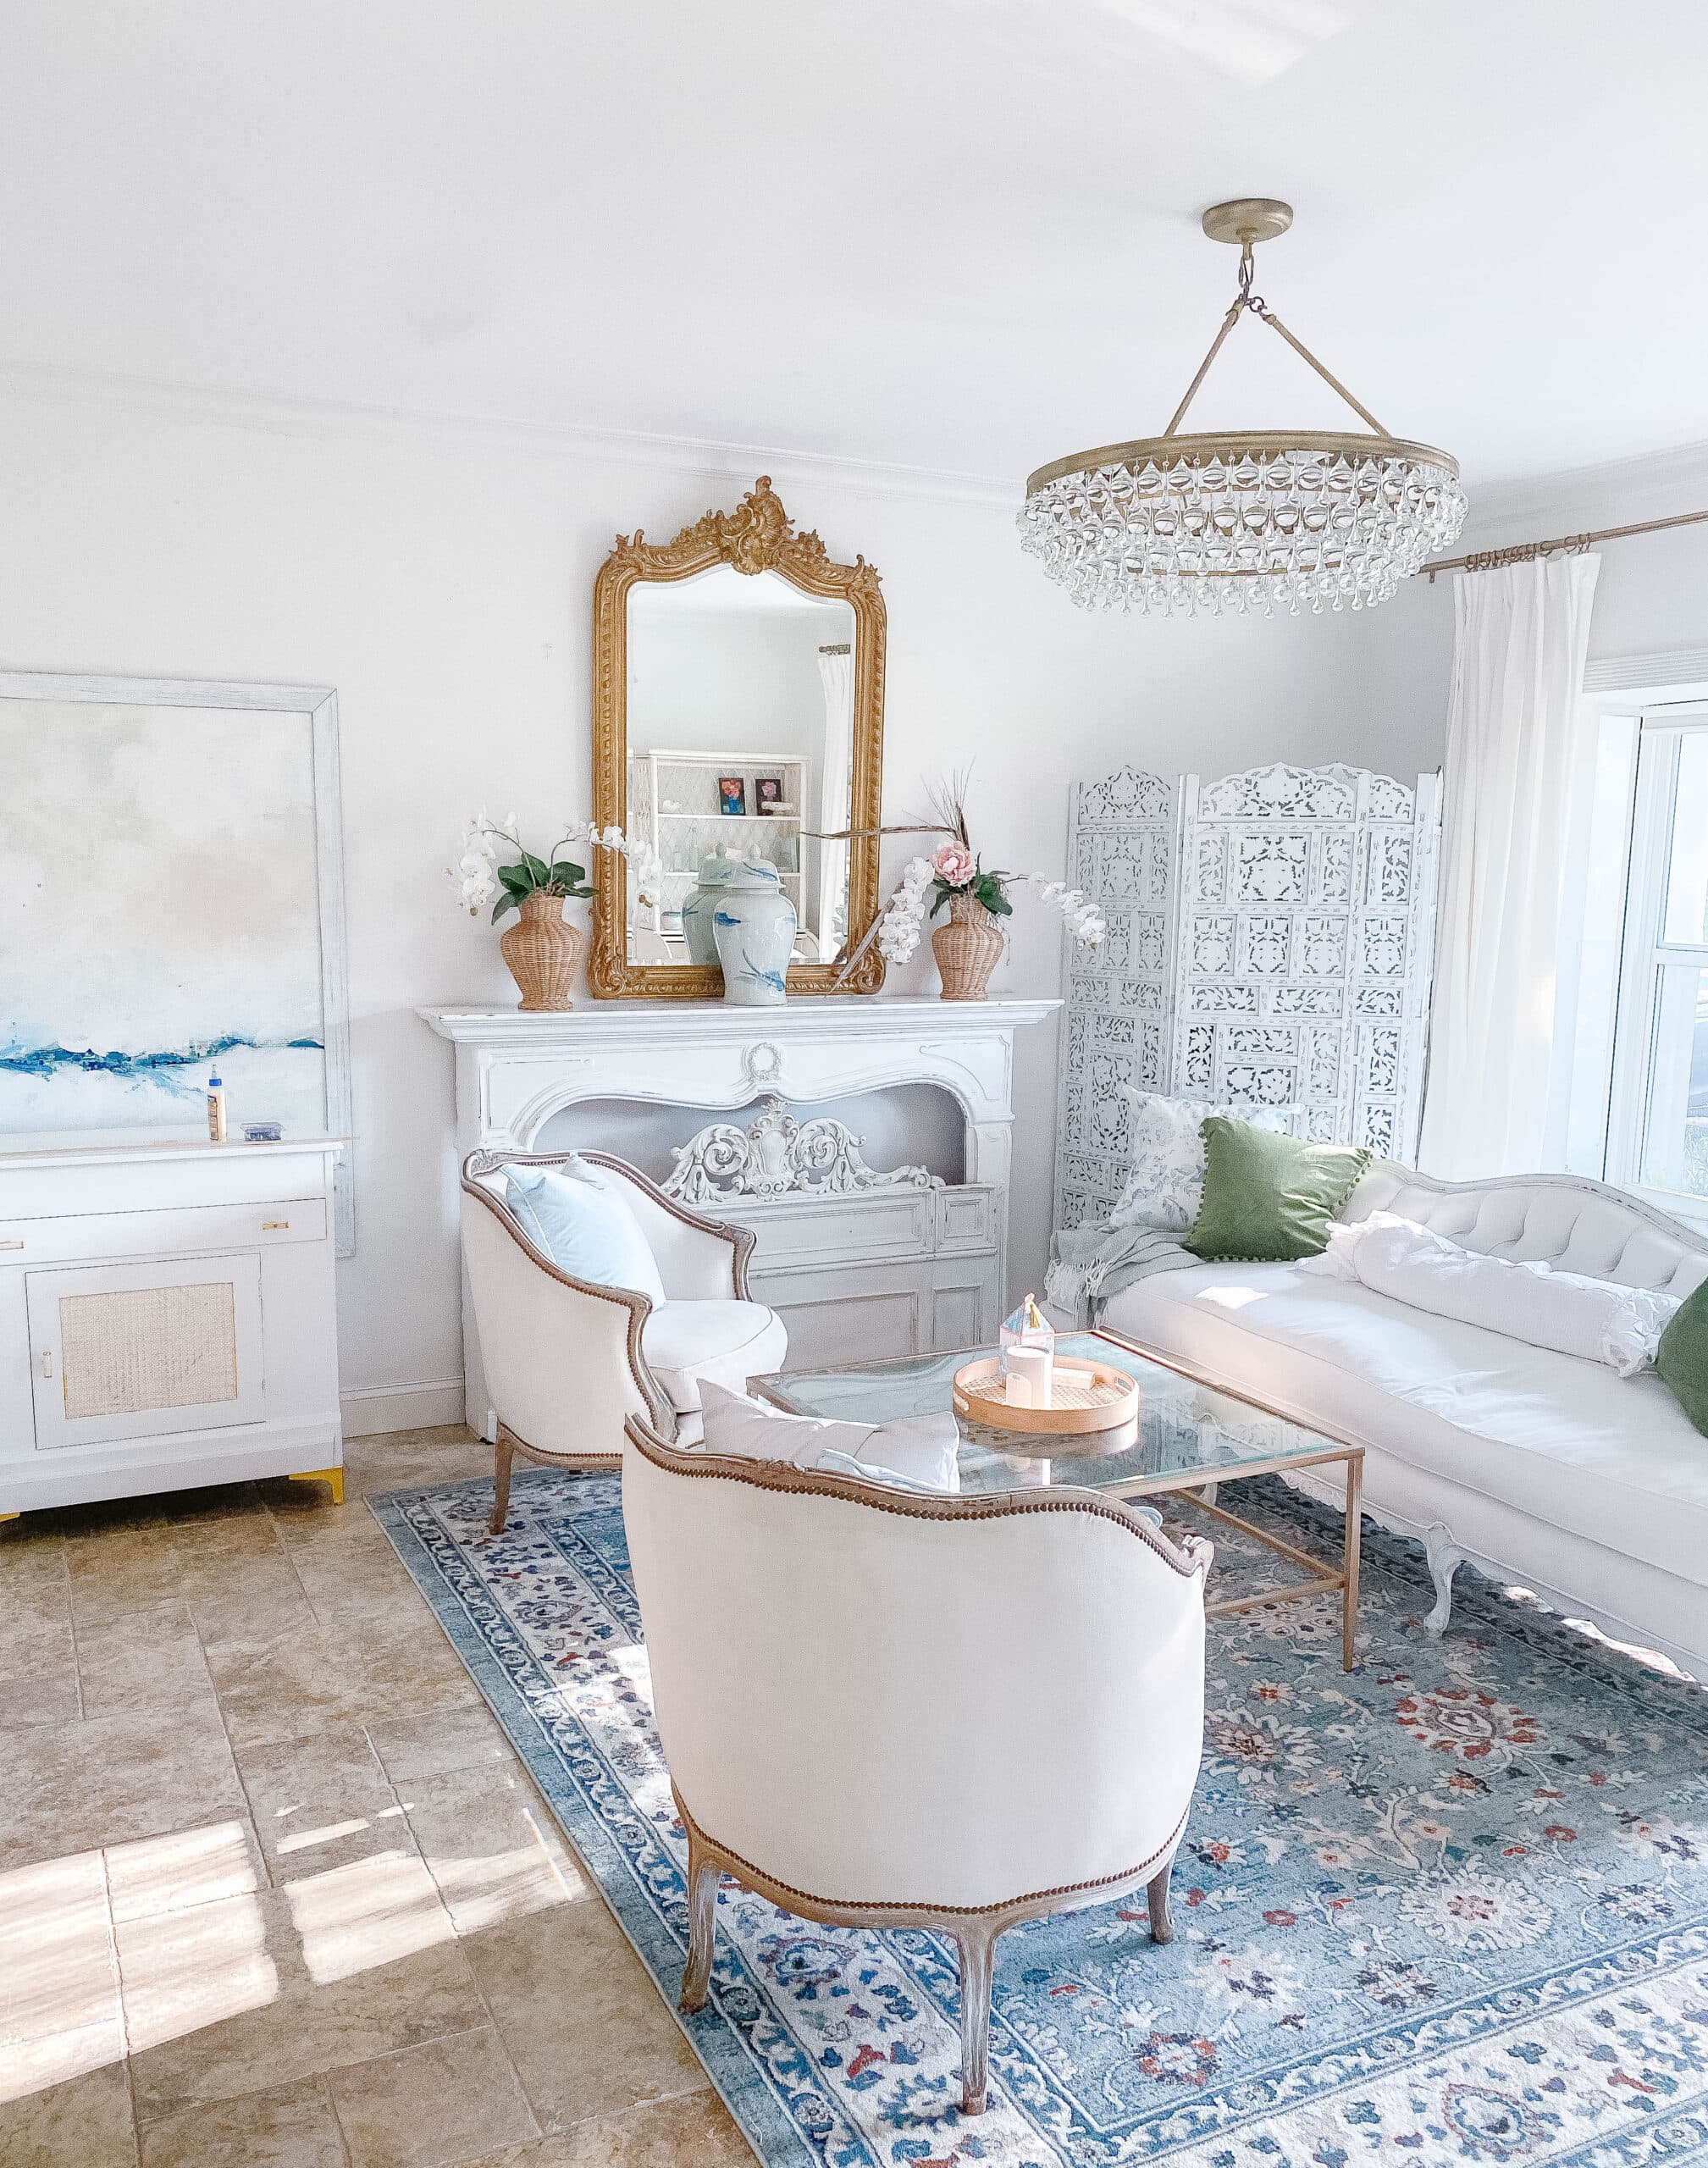
The Finished Look Of This Modern Coastal Bar Cabinet!
Meet Betty – The Repurpose A Dry Sink Bar Cabinet!
We are affectionately calling her Betty, after my husband’s mother, who I mentioned used this as an every day piece.
I will be keeping the top closed in our every day use and should the occasion arise, will use her as a bar!


I chose not to paint the inside, as the door will only be opened by me when I need to retrieve something. There’s lots of storage in the cabinet for my extra glassware, dishes and some entertaining accessory pieces! I plan on storing some of my fancy textiles in the drawer.
Betty’s Bar fits quietly into this corner of the living room. I’m sure that you’ll be seeing more of her in the months to come!
Before you go…if you too love COASTAL DECOR, I recently did THIS post on the trending COASTAL GRANDMOTHER LOOK! Posts tend to get lost after a few days so I wanted to let you know about that one.
Plus…did you know that I have a CURATED AMAZON SHOP with lots of COASTAL DECOR? There are currently over 40+ affordable pieces in the shop to see!
PIN THIS POST PLEASE TO REFER TO LATER & SHARE WITH YOUR FRIENDS!
Love your DIY ideas.. way more than your recipes… I think that’s ” your wheelhouse”… Pkease do more! Thanks!
Good to know Debbie! I’m about to embark on another DIY this weekend!
Janet, I love this new piece and I love the changes you made. Congratulations on the find. Jean
Jean…I appreciate that and your visit here always means a lot!
Love this transformation! It has really got my creative juices flowing and I am thinking of how I can repurpose a piece of mine! Thanks!
Great job! I love the legs
It turned out nice Janet. Another inspiration!
I didn’t realize that Amazon sold cane webbing. So much they offer now and often good deals.
I’m impressed by the dry bar re-do and the legs…a creative add!
I’ve used chalk paint as it was so easy to use but now you have me wondering about the new updates they’ve made with regular paint. I’ll keep this for when my next DIY comes around.