Pink Food Coloring – A Simple Fabric Painting Project
This post may contain affiliate links. For more information, please see our disclosure policy.
Pink food coloring is not just for frosting those cakes and cookies! Did you know that food coloring can also be used to paint or dye fabric? In this post you’ll learn a simple fabric painting technique that’s beginner level and you’re limited only by your imagination!
I’ve done a TON of fabric painting in my day. Fun fact that you might not know about me is that I had a fabric painting business way back before internet days. It was called Pour It On Productions and I hand painted designs on clothing. The line sold in stores all across South Florida, in cruise shop gift shops and home parties. Fun times, but I digress to talk about today’s topic of painting on fabric and making bunny napkins.
PIN ME NOW!

This project is budget friendly and in fact it’s probably FREE with materials on hand! You could definitely make these with the kids (or grands) and it takes just a few minutes. Get out an old white sheet and your pink food coloring and let’s get started!
Pink Food Coloring – Bunny Napkins

Pink Food Coloring – Materials:
- An old white cotton or linen sheet
- Bunny template (given below)
- Pinking Shears
- Scissors
- Sponge
- Pink food coloring
- White glue
- Sponge brush
- Detail brush
- Small bowl
- Skewer or popsicle stick for mixing
Pink Food Coloring – Instructions:
Cut out however many napkins that you’ll need out of a clean white cotton or linen sheet. I used a sheet that I had with damage, but you could find easily at a yard sale or thrift shop. Make sure that the fibre is natural, or the dye might not work. Pinking shears are best for this no sew simple napkin tutorial to prevent loose threads from unraveling. Lightly press with your iron, but do not use starch.

Right click and save this template to your computer and print it out on cardstock. It’s important to use the cardstock so that you can trace the pattern onto your fabric. *NOTE* The size works fine for me, but you may have to play around and resize this yourself on your own printer settings.
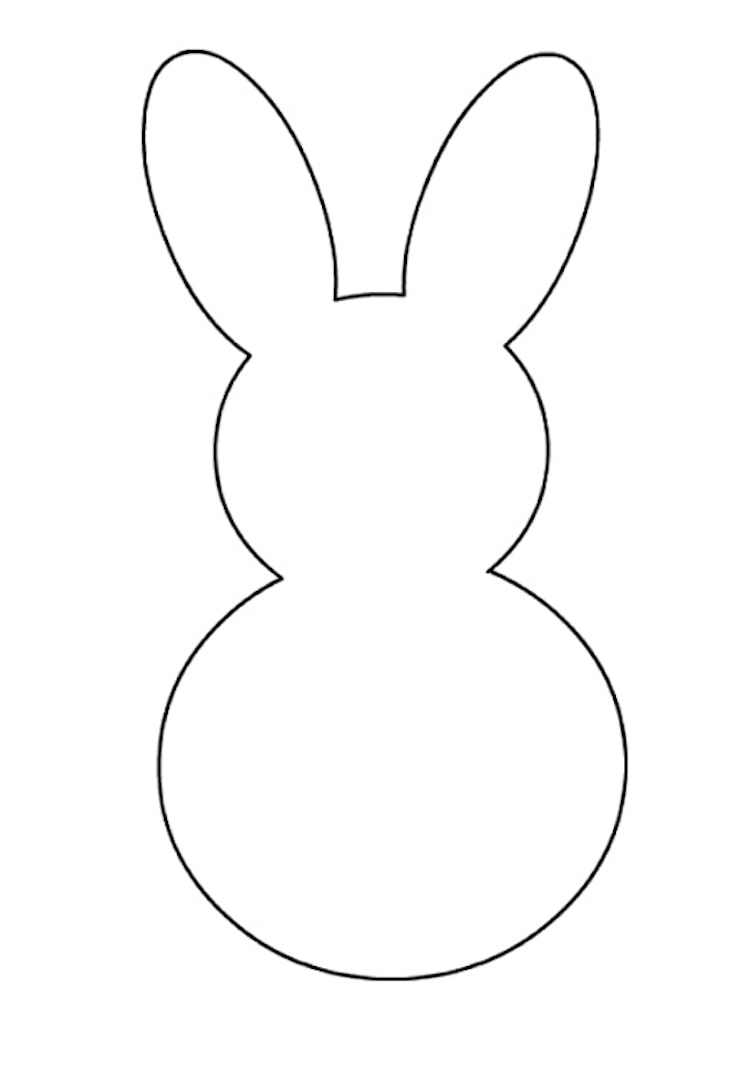
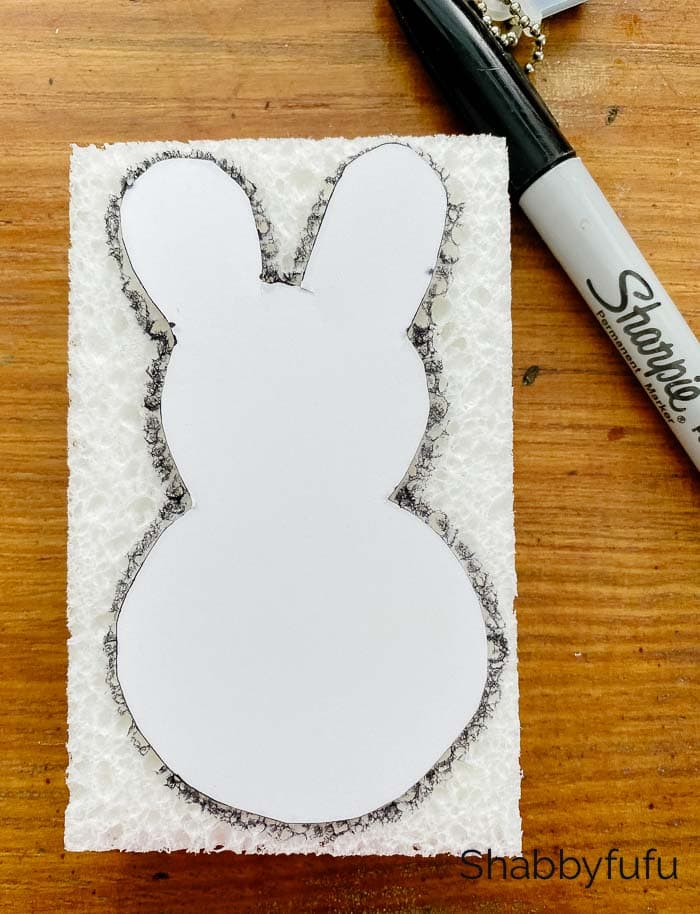
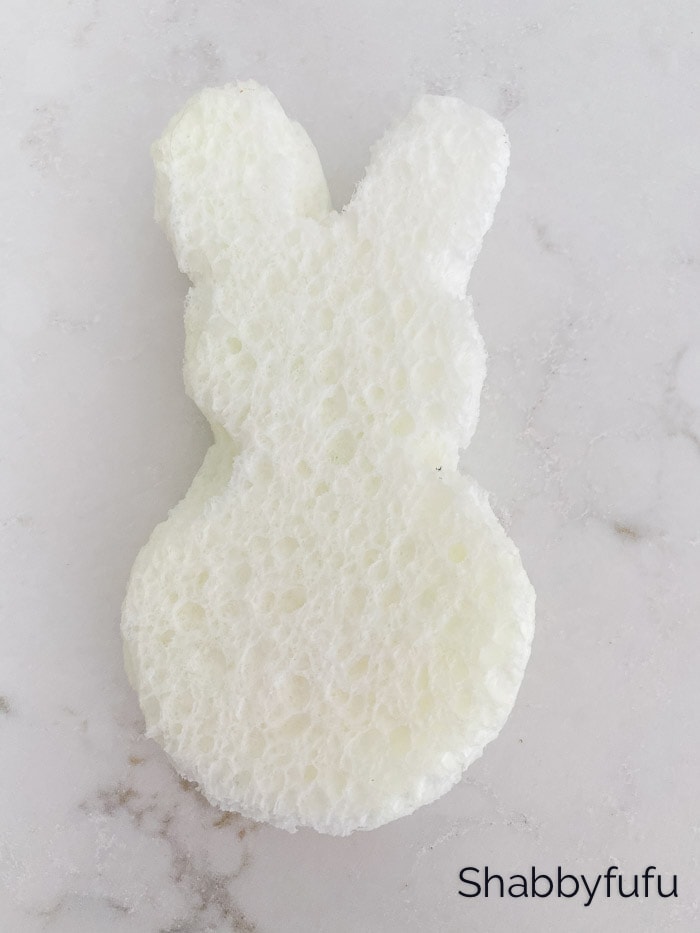
Cut the bunny shape out and trace it onto your sponge with a Sharpie. It’s helpful to wet the sponge and ring it out first, so don’t dry trace.

Friends…we aren’t looking for perfection here. This should be a fun and easy project…a definite stress reliever!
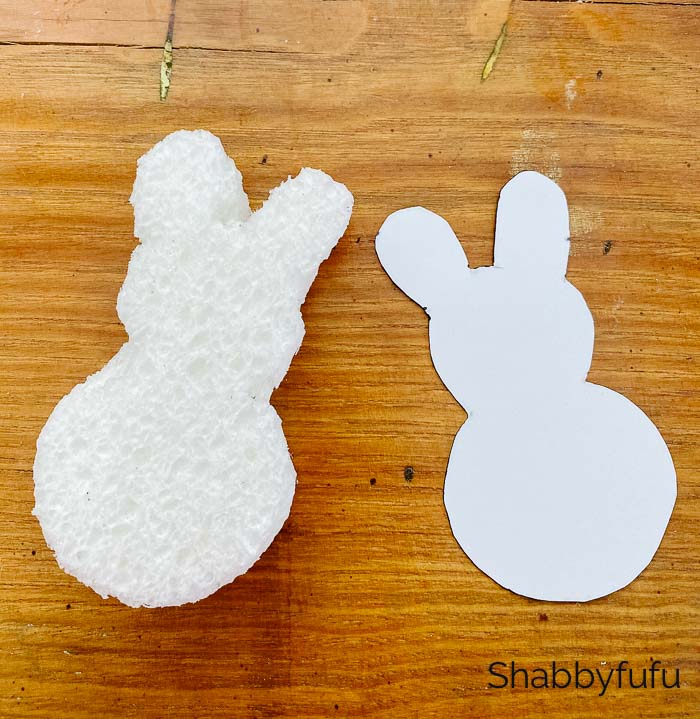
Once the bunny is cut out you’re ready to paint.
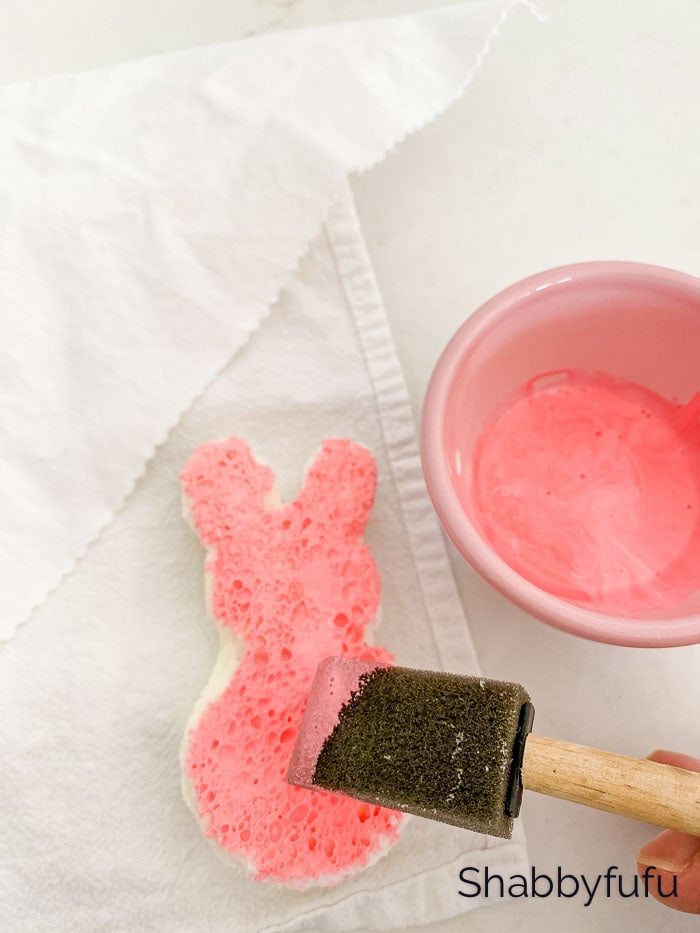
Take a small bowl and add a few teaspoons of white glue (like Elmers), just enough to dab your sponge onto. Add one or two drops of pink food coloring to the glue. When doing any dyeing or fabric painting, always start with the smallest amount of pigment. You can always add more drops but you can’t take them away.
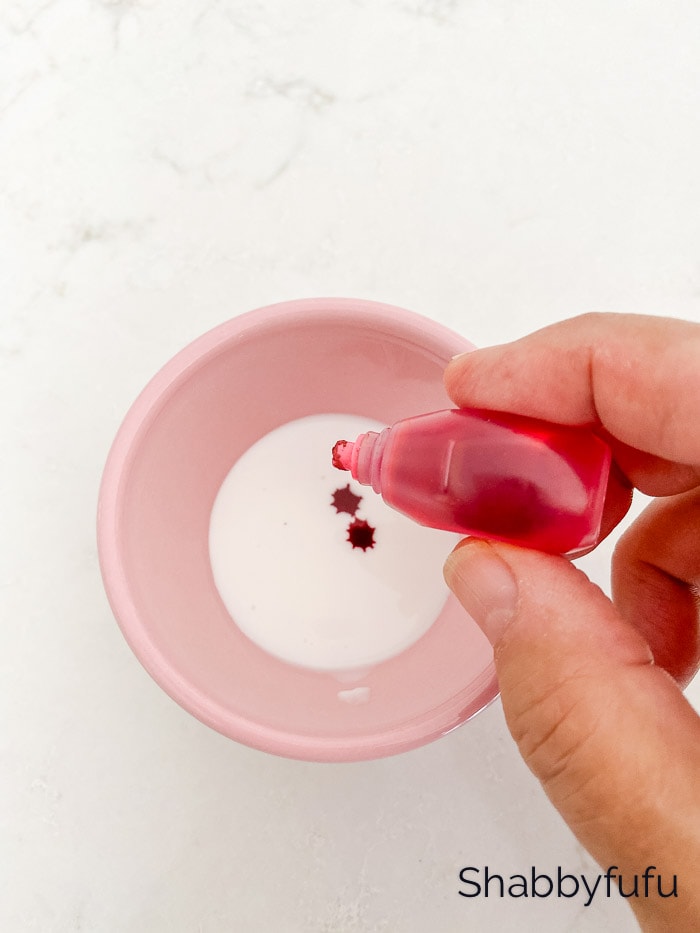
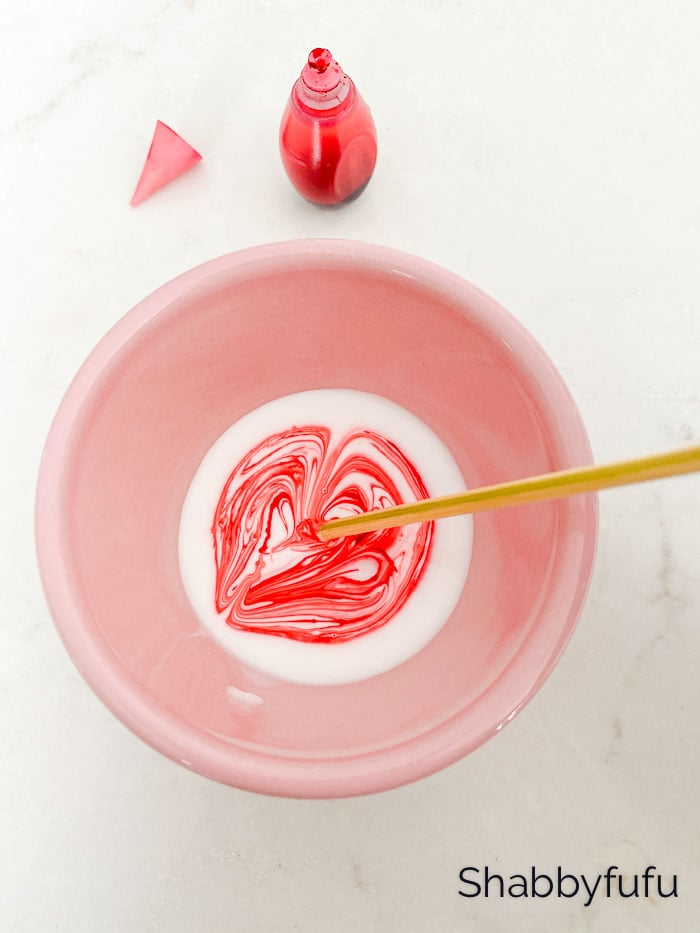
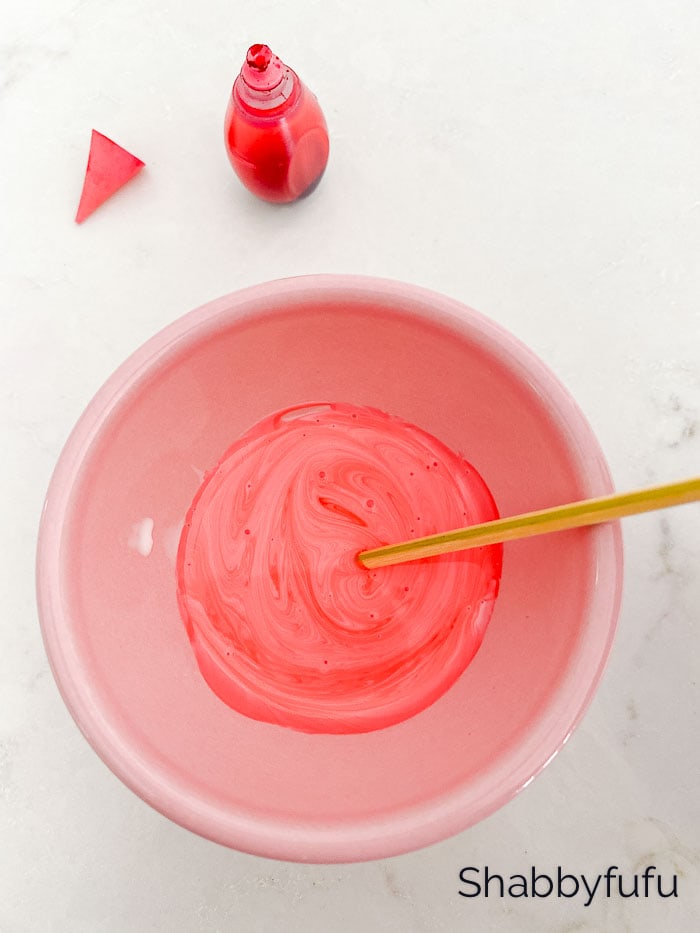
Stir it well with a wooden toss away skewer or popsicle stick.
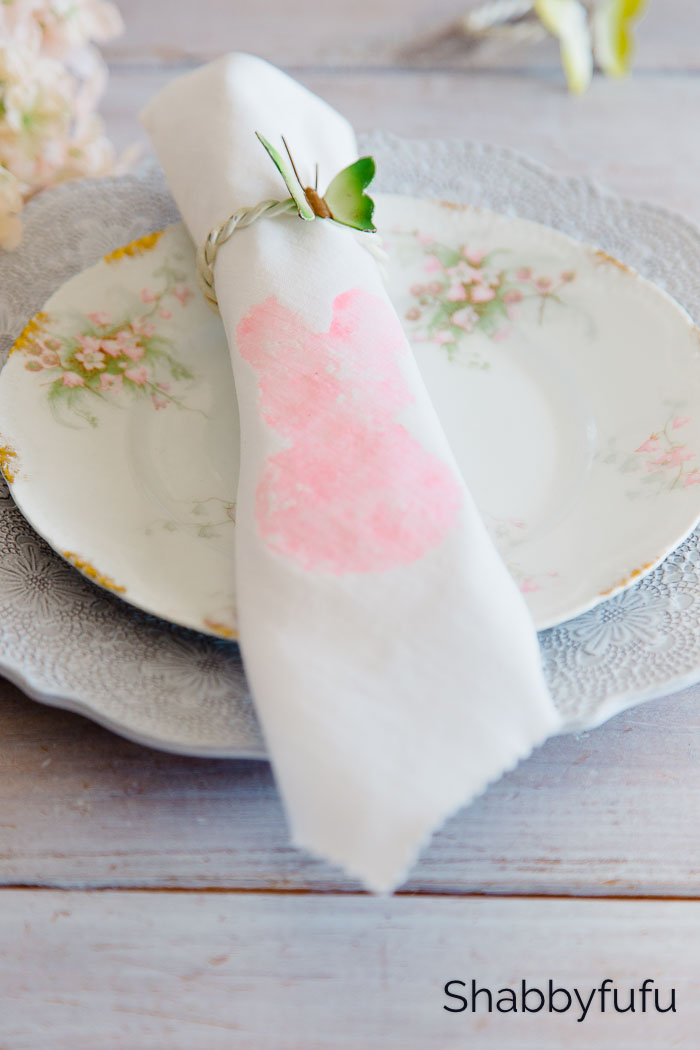
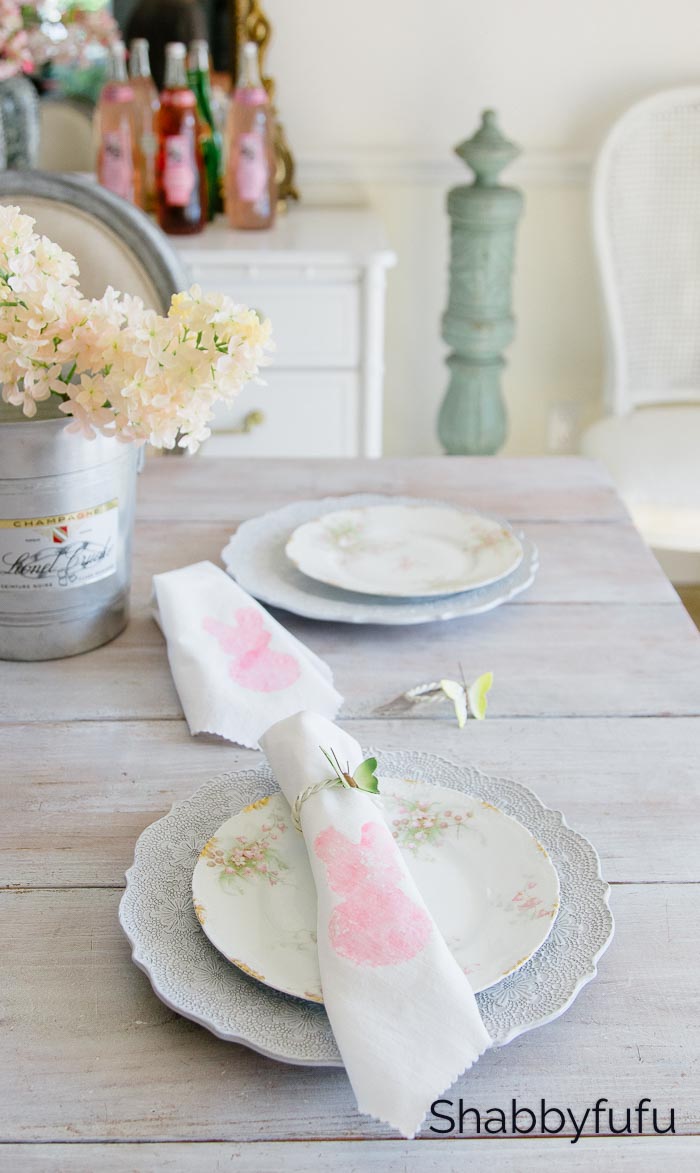
Take your napkin and decide where you’ll want to place the bunny stamp. I’m going with a corner here, far up enough to be seen when the napkin is gathered and placed into a napkin ring. Take an old dish towel and place your napkin on top to protect your surface!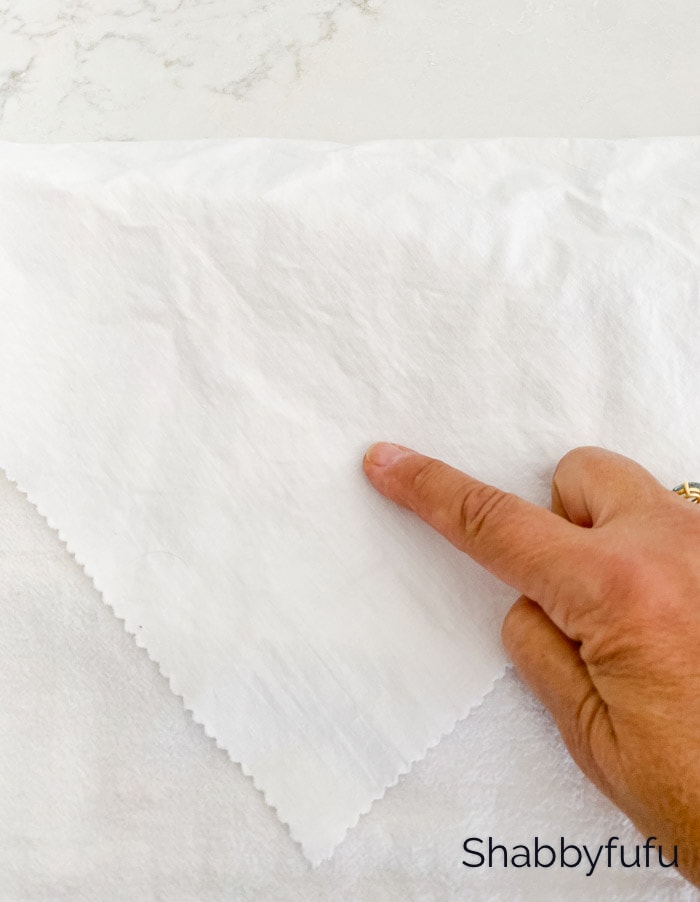
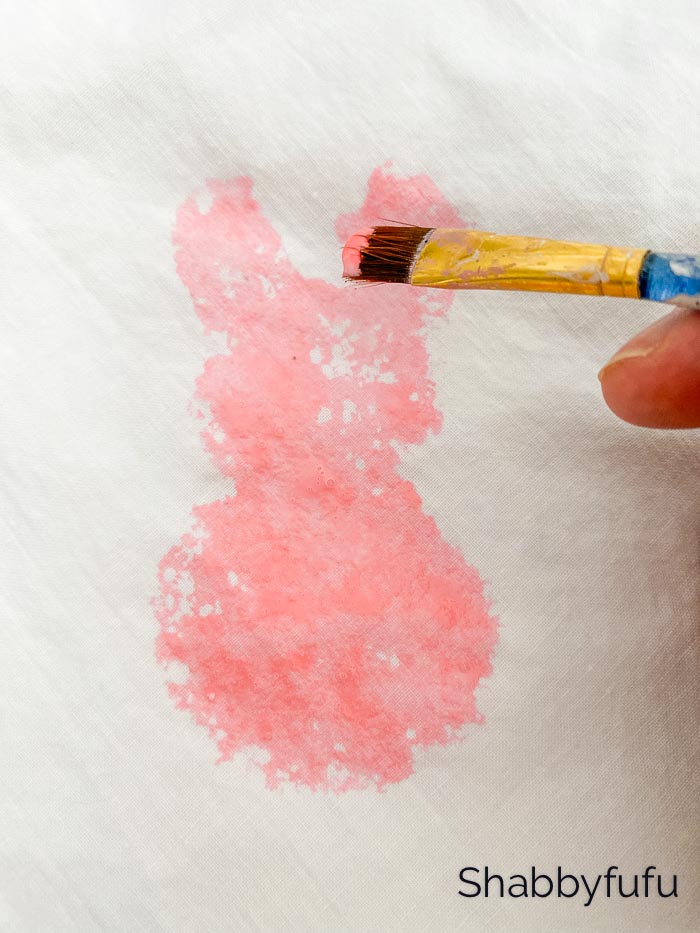
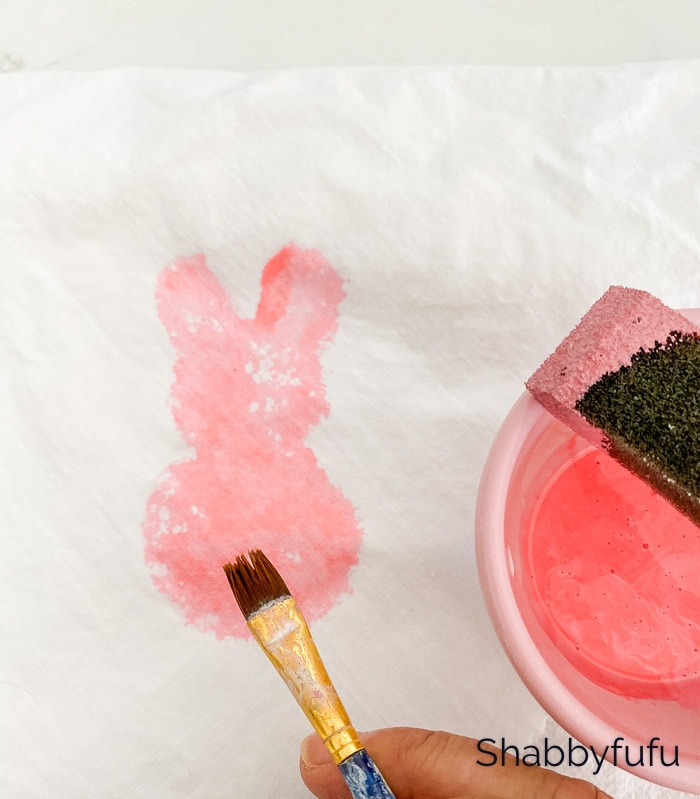
Once well mixed, dip a disposable sponge brush into the pink food coloring mixture and begin painting the bunny. You’re creating a sponge stamp, so keep the paint layer light. Besides, I like to show some of the texture that a sponge naturally has!
If you have any areas that you want to touch up, use a smaller brush. In addition to this technique, you can add glitter or outline the bunny impression with a Sharpie. Clearly use your imagination and do these in other colors as well. Above all, have fun and be creative!
Let the napkin fully dry and finally use a dry iron to heat set by pressing for a minute or two with a firm hand. The glue keeps well in washing…nevertheless use a gentle cycle in your machine.

In contrast to the fancy dinnerware, why not have something fun that YOU’VE CREATED! Mixing in the elegant and homespun is my favorite way to decorate, never taking hard and fast rules. I hope that you enjoy this fun stay at home project that’s FAST, FREE AND EASY!
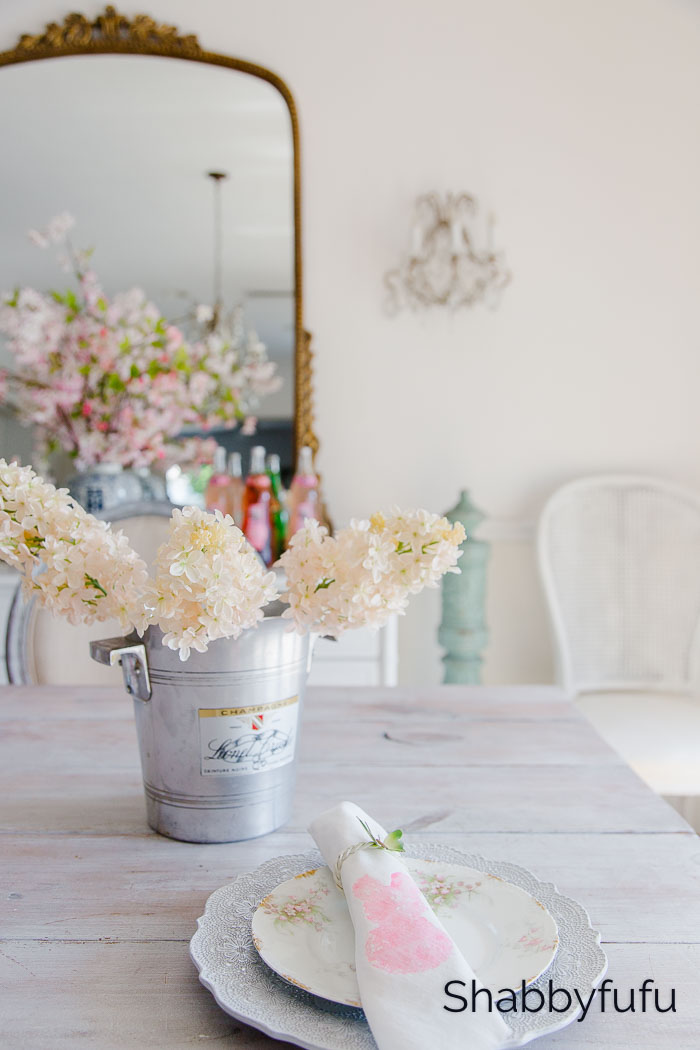
If you’re looking for a mirror similar to mine above, you’ll love this Anthro dupe that is a fraction of the price and will sell out quickly! Find it HERE > ANTIQUE STYLE MIRROR
Please visit my friends below for more 20 MINUTE DECORATING in our monthly series…
![]()


What a great idea. Never thought of adding glue to the pigment to help set it.
Thank you for the tutorial – a simple, fun craft for kids.
And, I have the same dinner plates!
Stay safe!
I was an art teacher back in the day, so it’s one of those little tricks in my bag 😉
That centerpiece is so simple and so beautiful. Thanks for showing us just how a couple of items can become a beautiful centerpiece.
I love this idea! I’ve been cleaning out and piling up for Goodwill and had put a set of white napkins in the pile. I dug them out and can’t wait to sponge paint them! Pin I did! Thanks and take care.
So glad that this an idea you’ll be using Cecelia!
So cute Janet- love sweet bunnies!
I don’t always comment but I love your blog. I look at just about every time.
Thank you so much Linda…I appreciate you!