Alternative Christmas Tree DIY Idea – For Tight Spaces
This post may contain affiliate links. For more information, please see our disclosure policy.
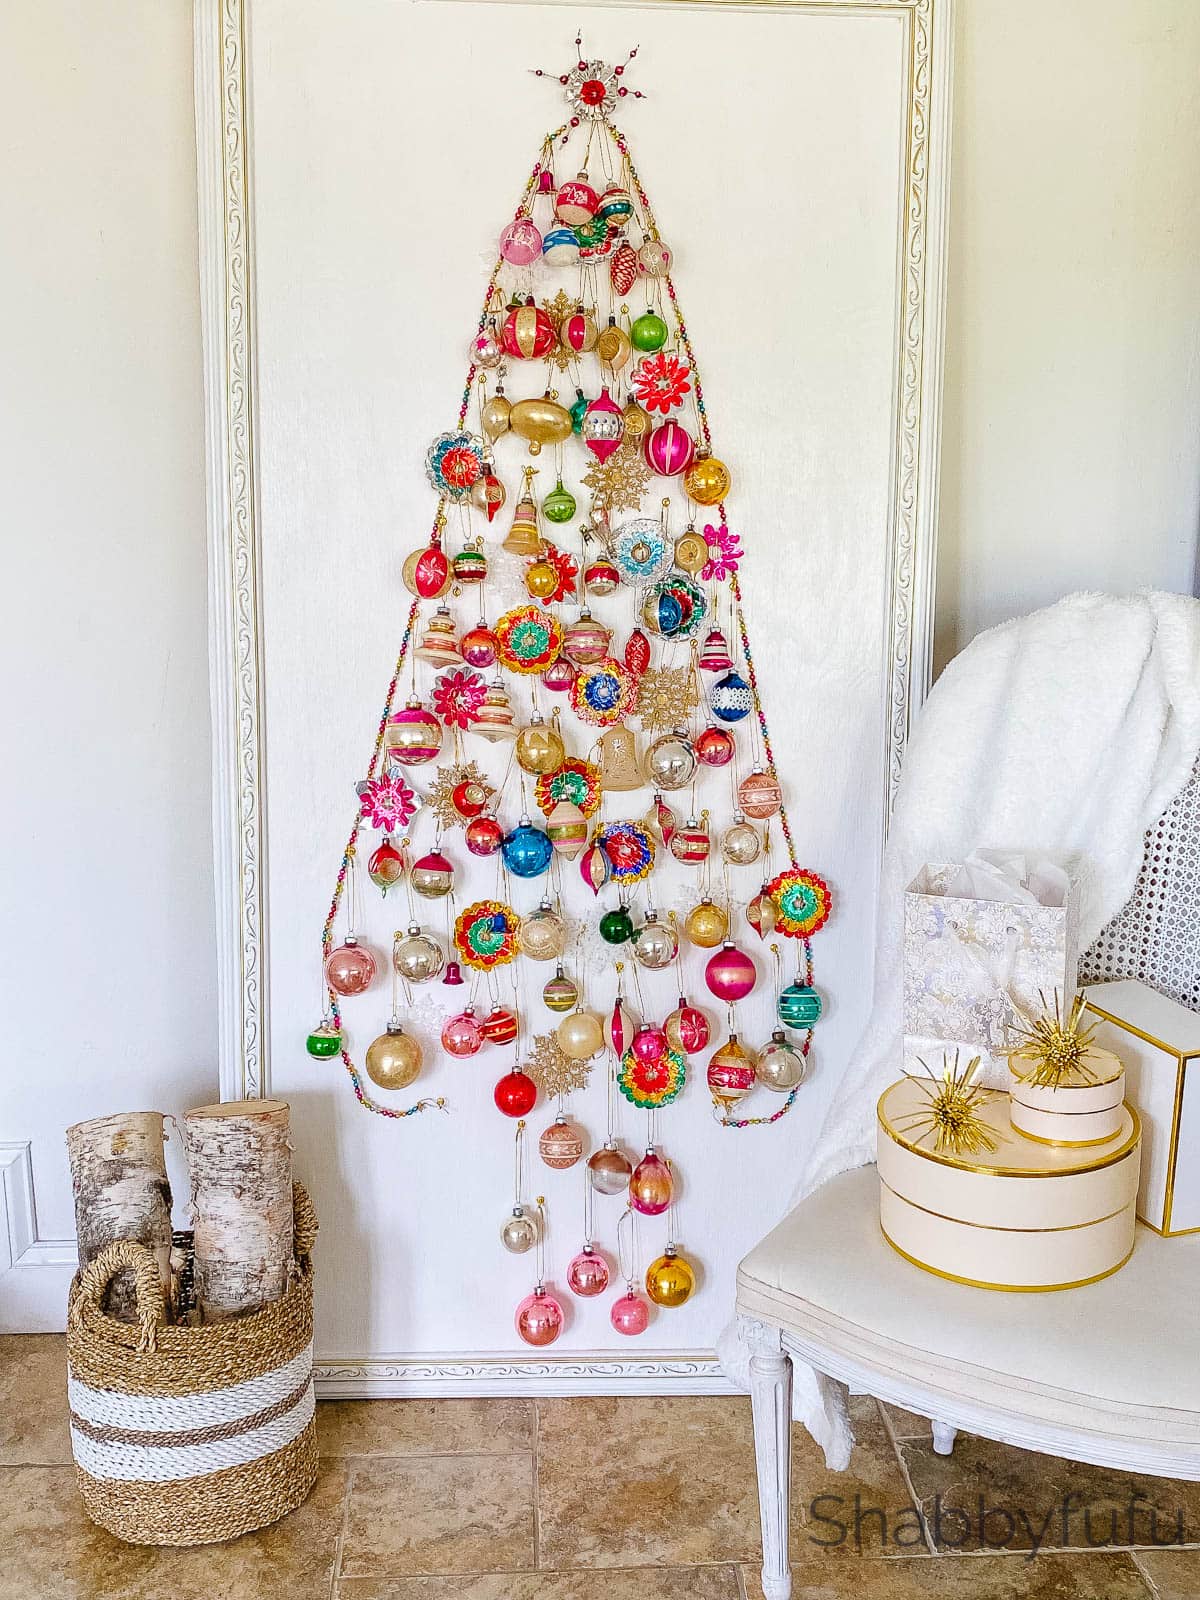
This alternative Christmas tree DIY idea is perfect for small spaces where a real tree just won’t do. Add personality to your place with this unique twist on tradition!
Alternative Christmas Tree DIY Idea
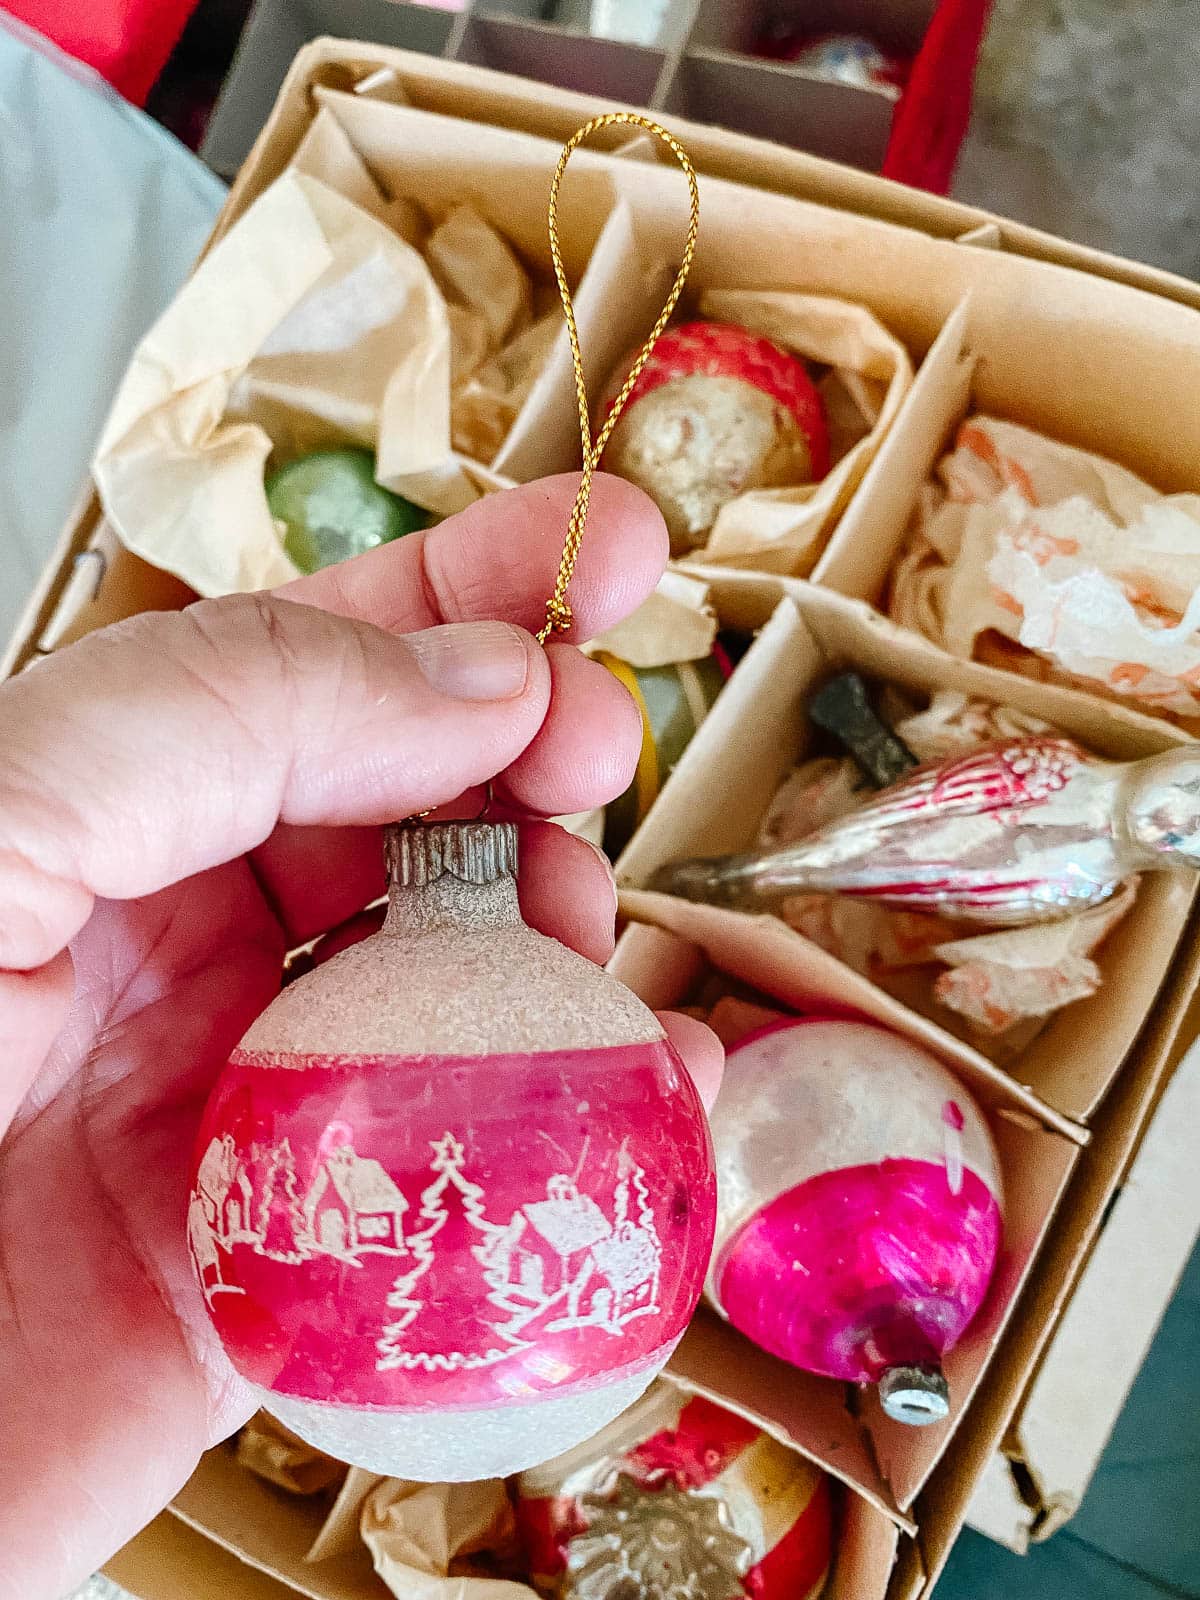
You may be asking yourself…what can I use instead of a Christmas tree? There are lots of ideas and last year I shared this Scandinavian Style Christmas Tree DIY…so have a look! This year I have been inspired by all things nostalgic and vintage. With a hankering to display my collection of old glass ornaments we built the suggestion of a tree on a simple piece of plywood. This project was simple to create and beginner DIY level. If you know how to use a circular saw or a jig saw you’re good to go.
This is a paid post in behalf of Spectrum Brands but the work and opinions expressed here are my own.
Step 1: Get Your Supplies:
- National Hardware 3/4″ Classic Solid Brass Cup Hooks (comes in 50 piece packets)
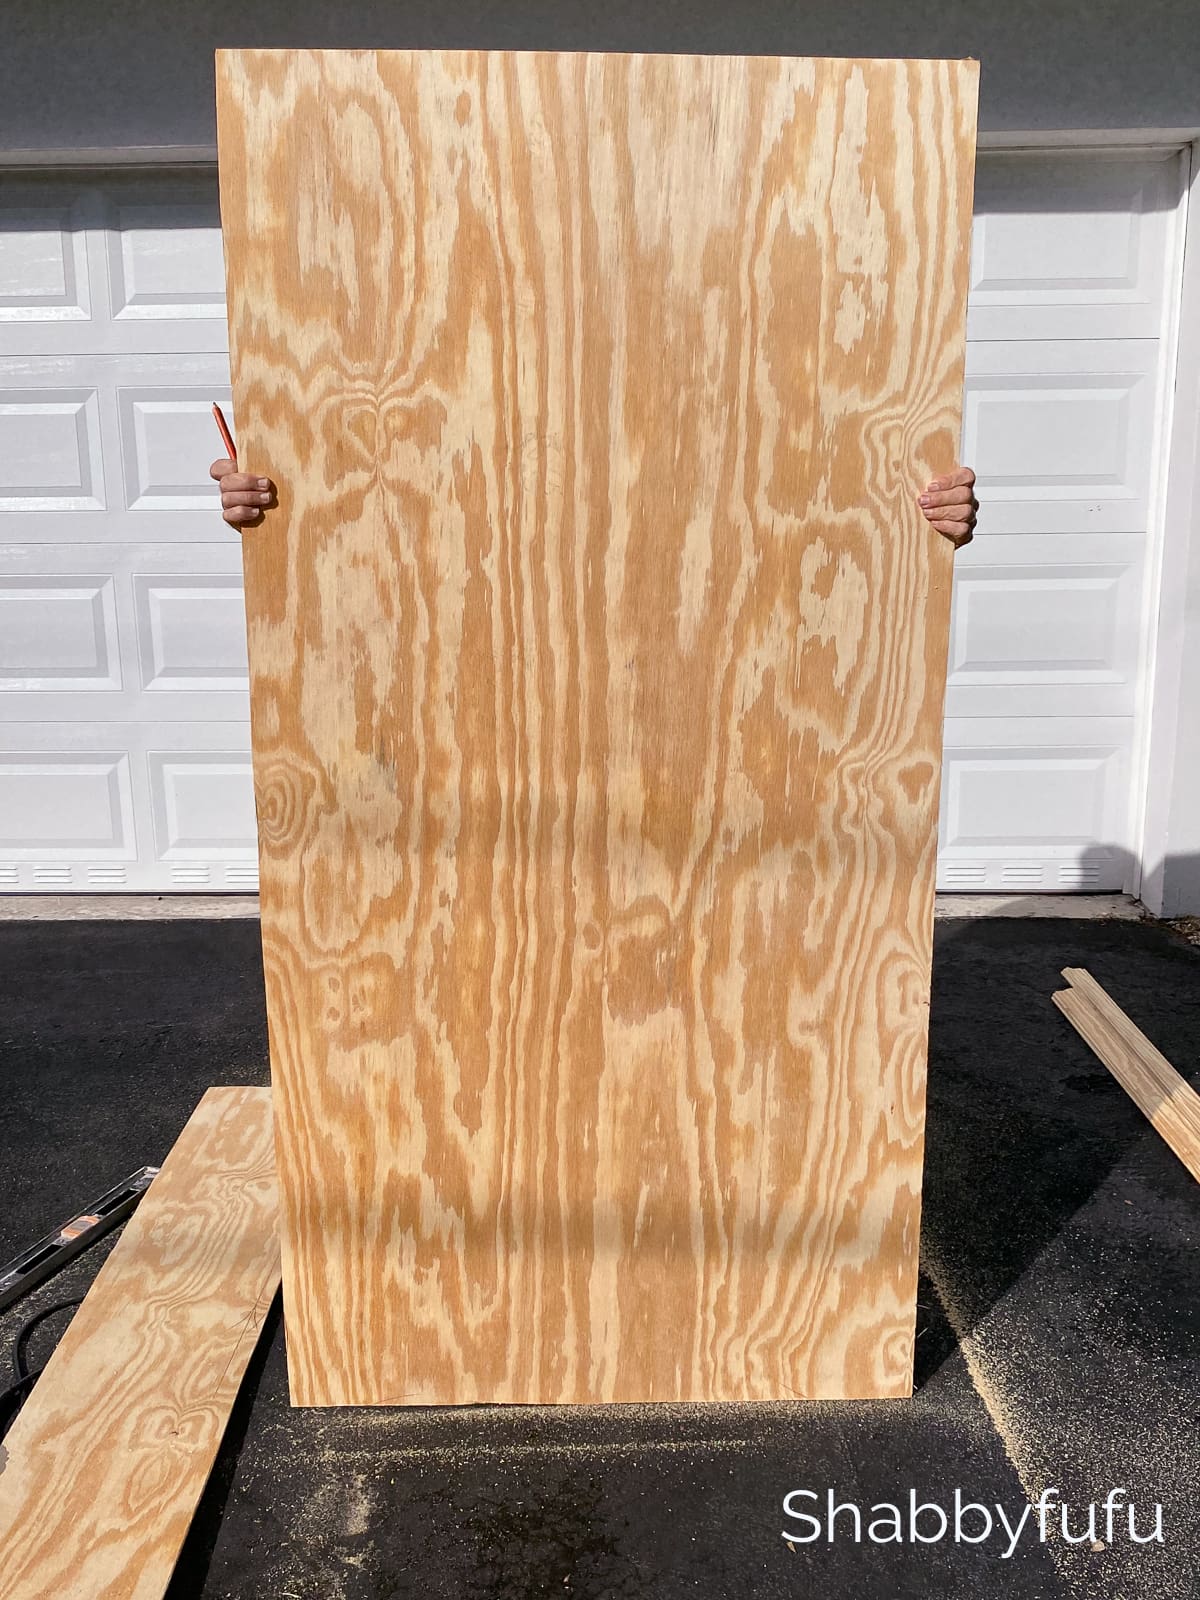
- One sheet of 4′ x 8′ – 3/8″ plywood
- Three pieces of 2″ x 2″ by 8′ long white wood
- Three pieces of 2 1/4″ molding – 8′ long
- One tube of adhesive caulking (and caulk gun)
- One inch self adhesive decorative flexible molding trim – sold by the roll
- Clamps
- Roll of blue painter’s tape
- Christmas tree ornaments in a variety of shapes and sizes
- String to hang ornaments
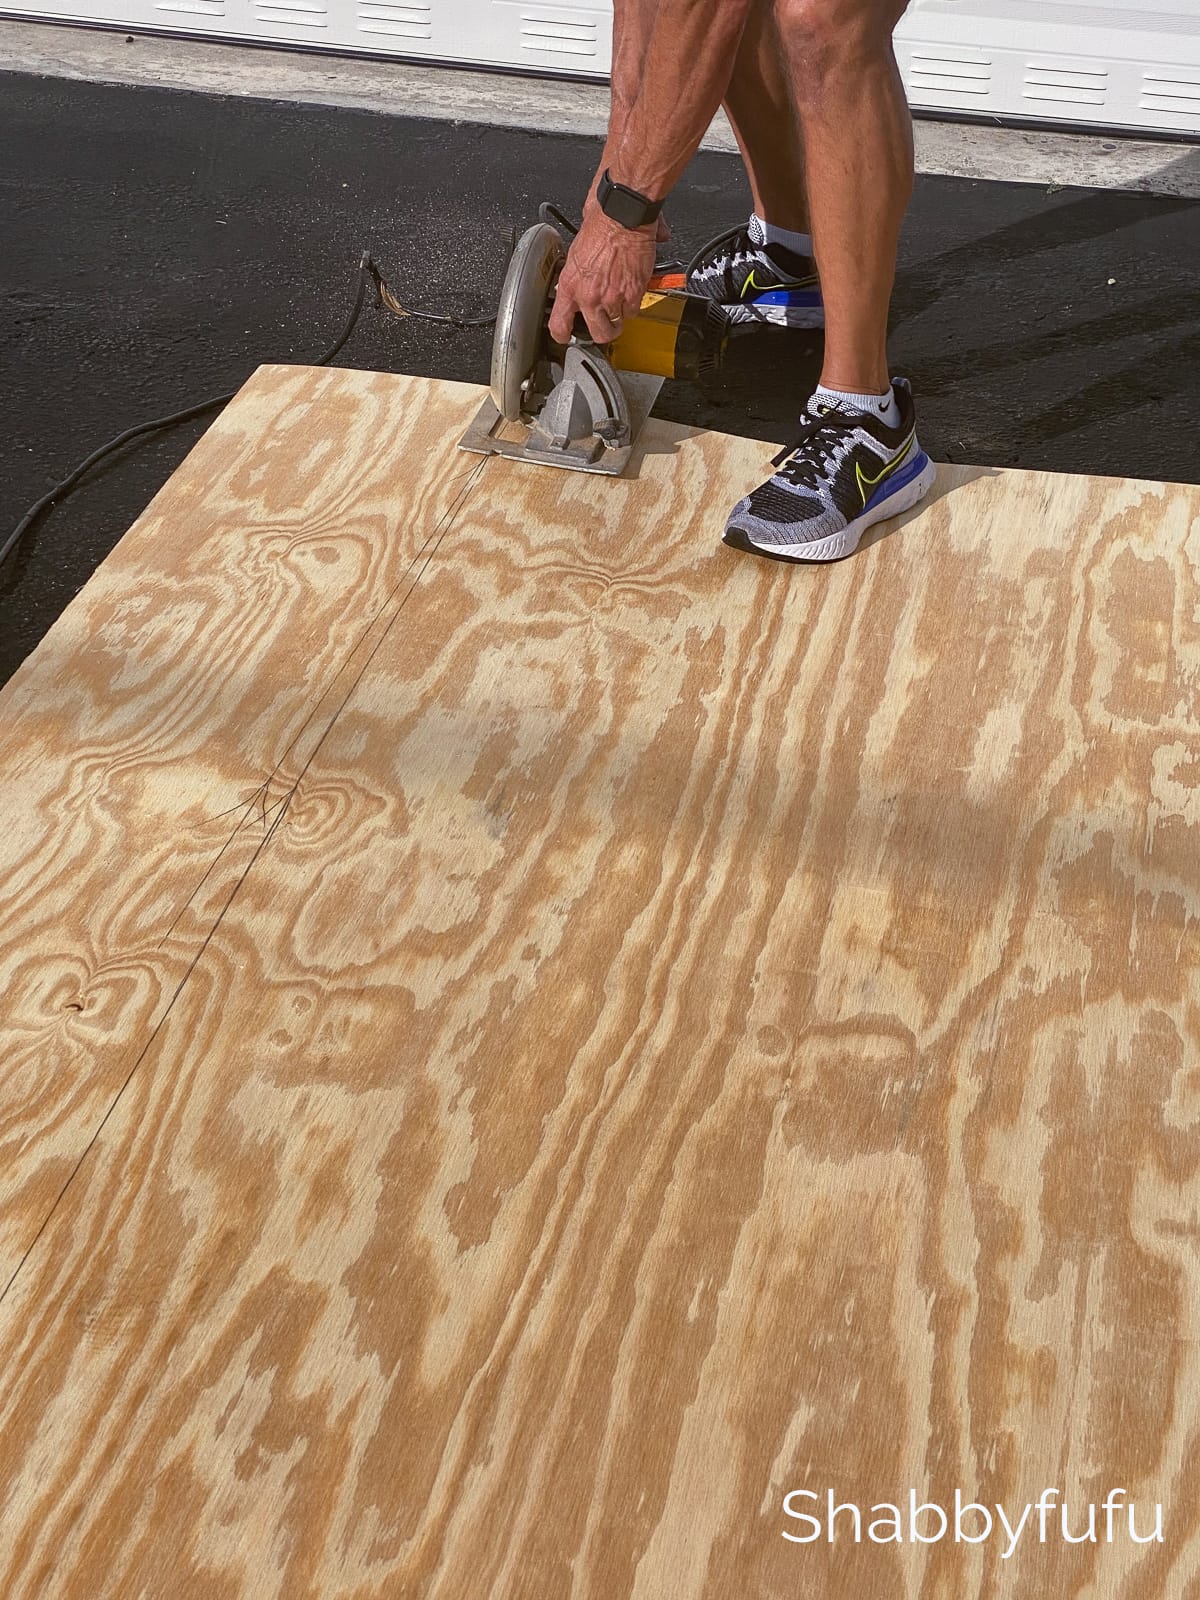
Step 2: The Build
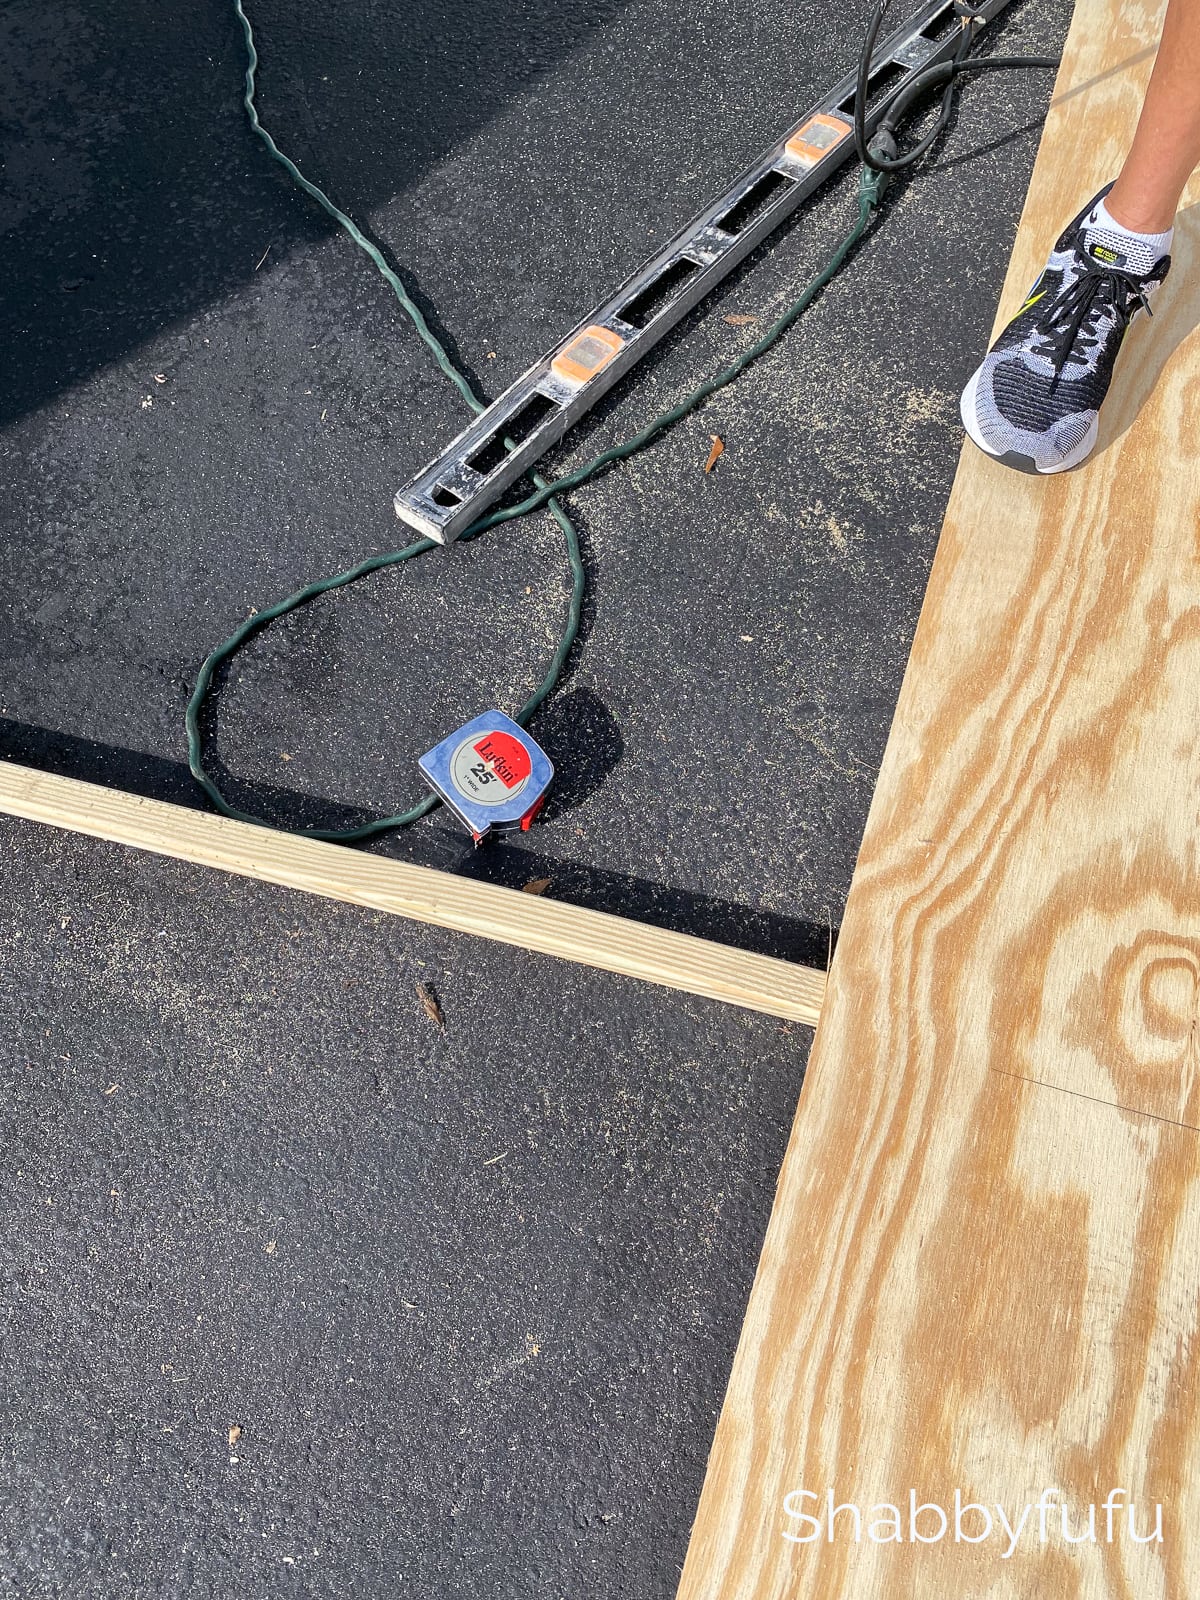
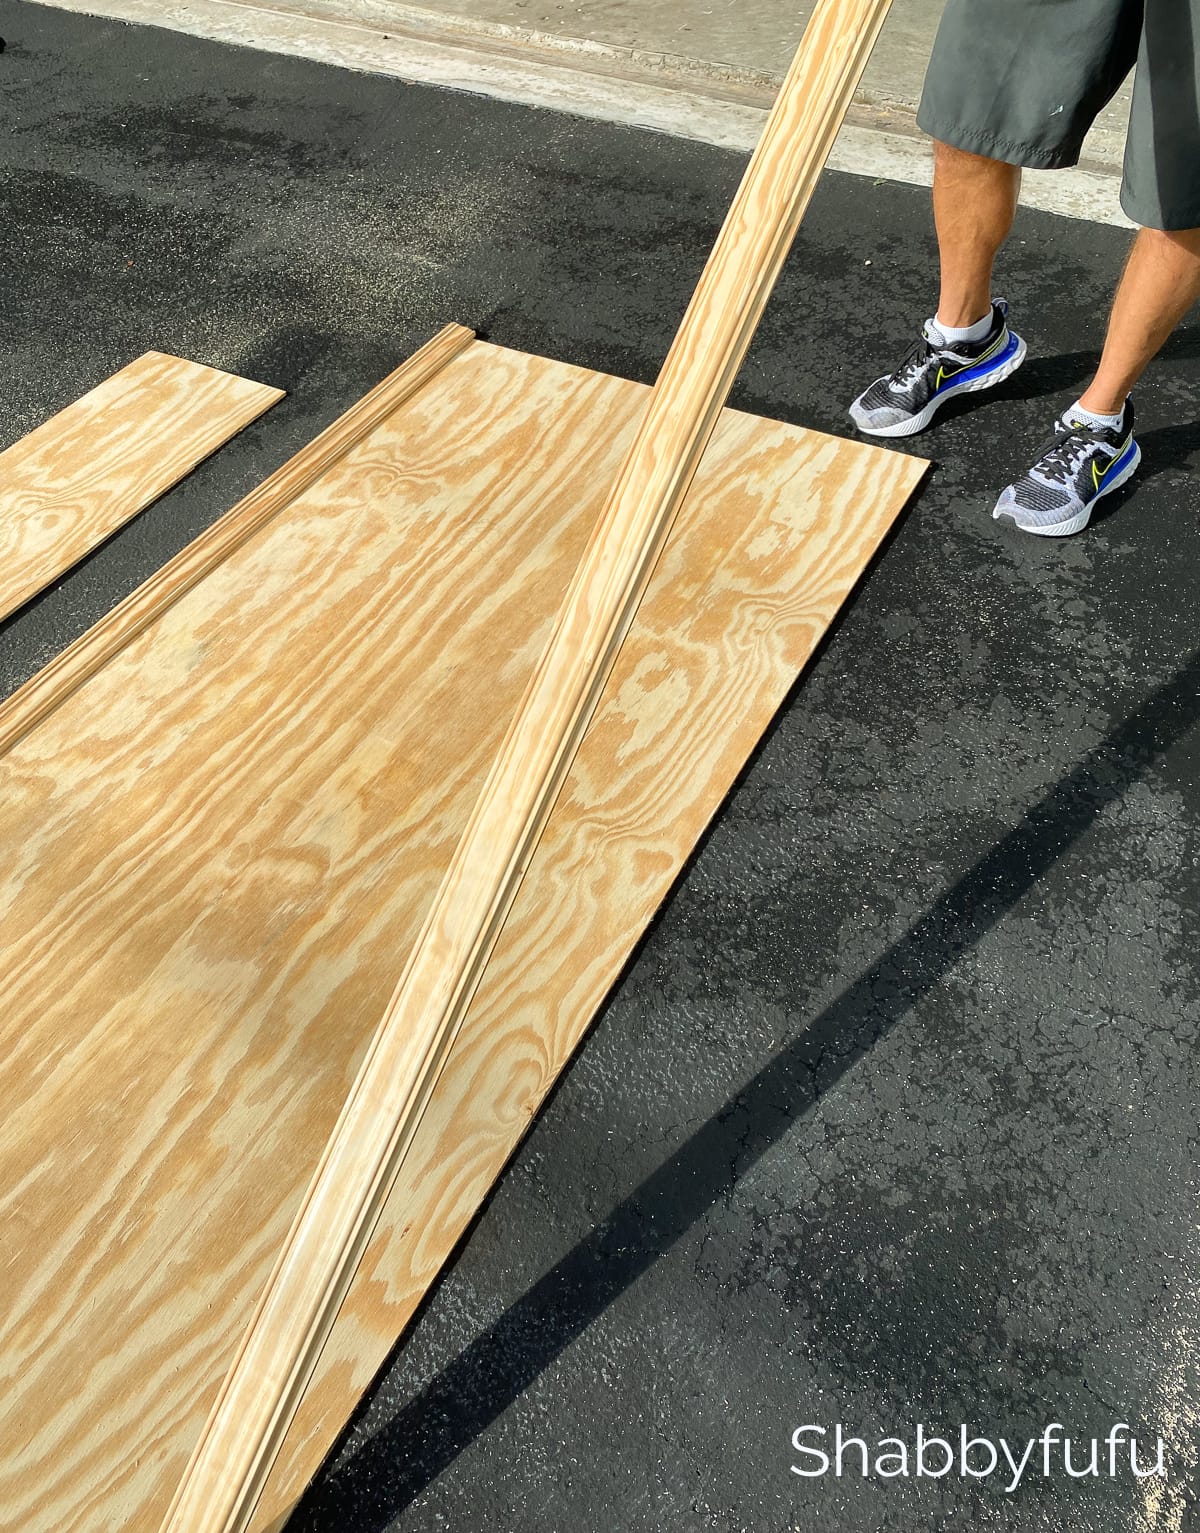
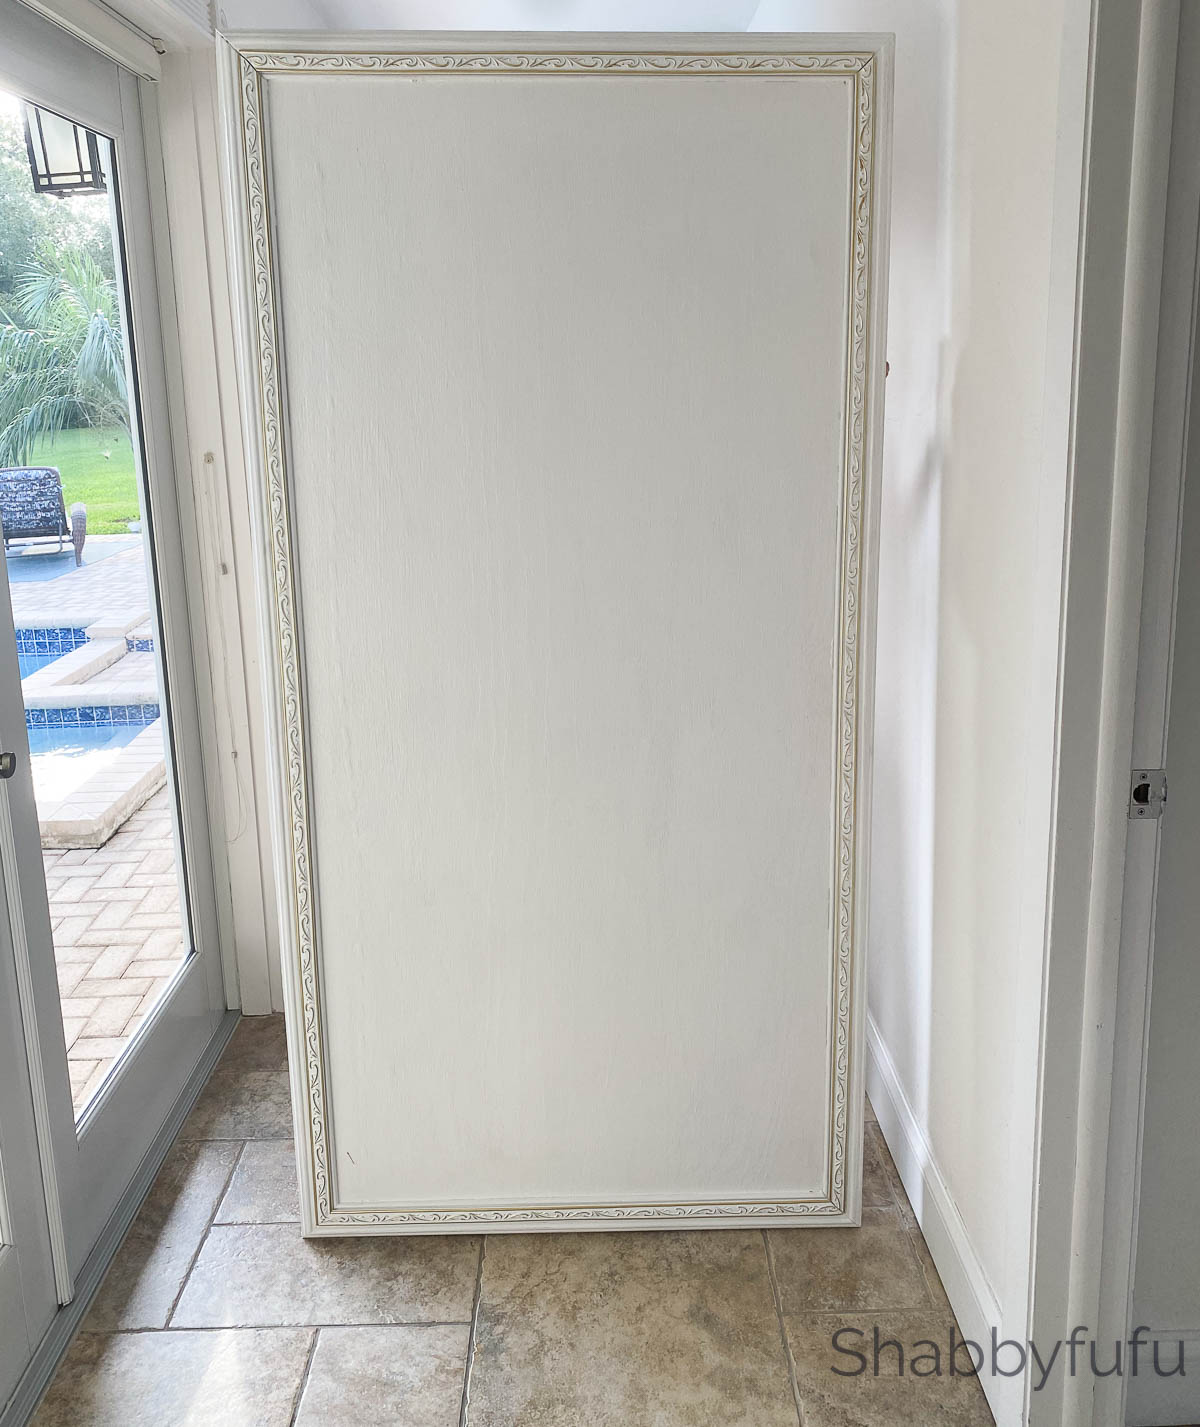
Measure and cut the sheet of plywood to size using a circular saw or a jig saw. We made this one 36″ wide x 72″ tall to create a life size Christmas tree replica!
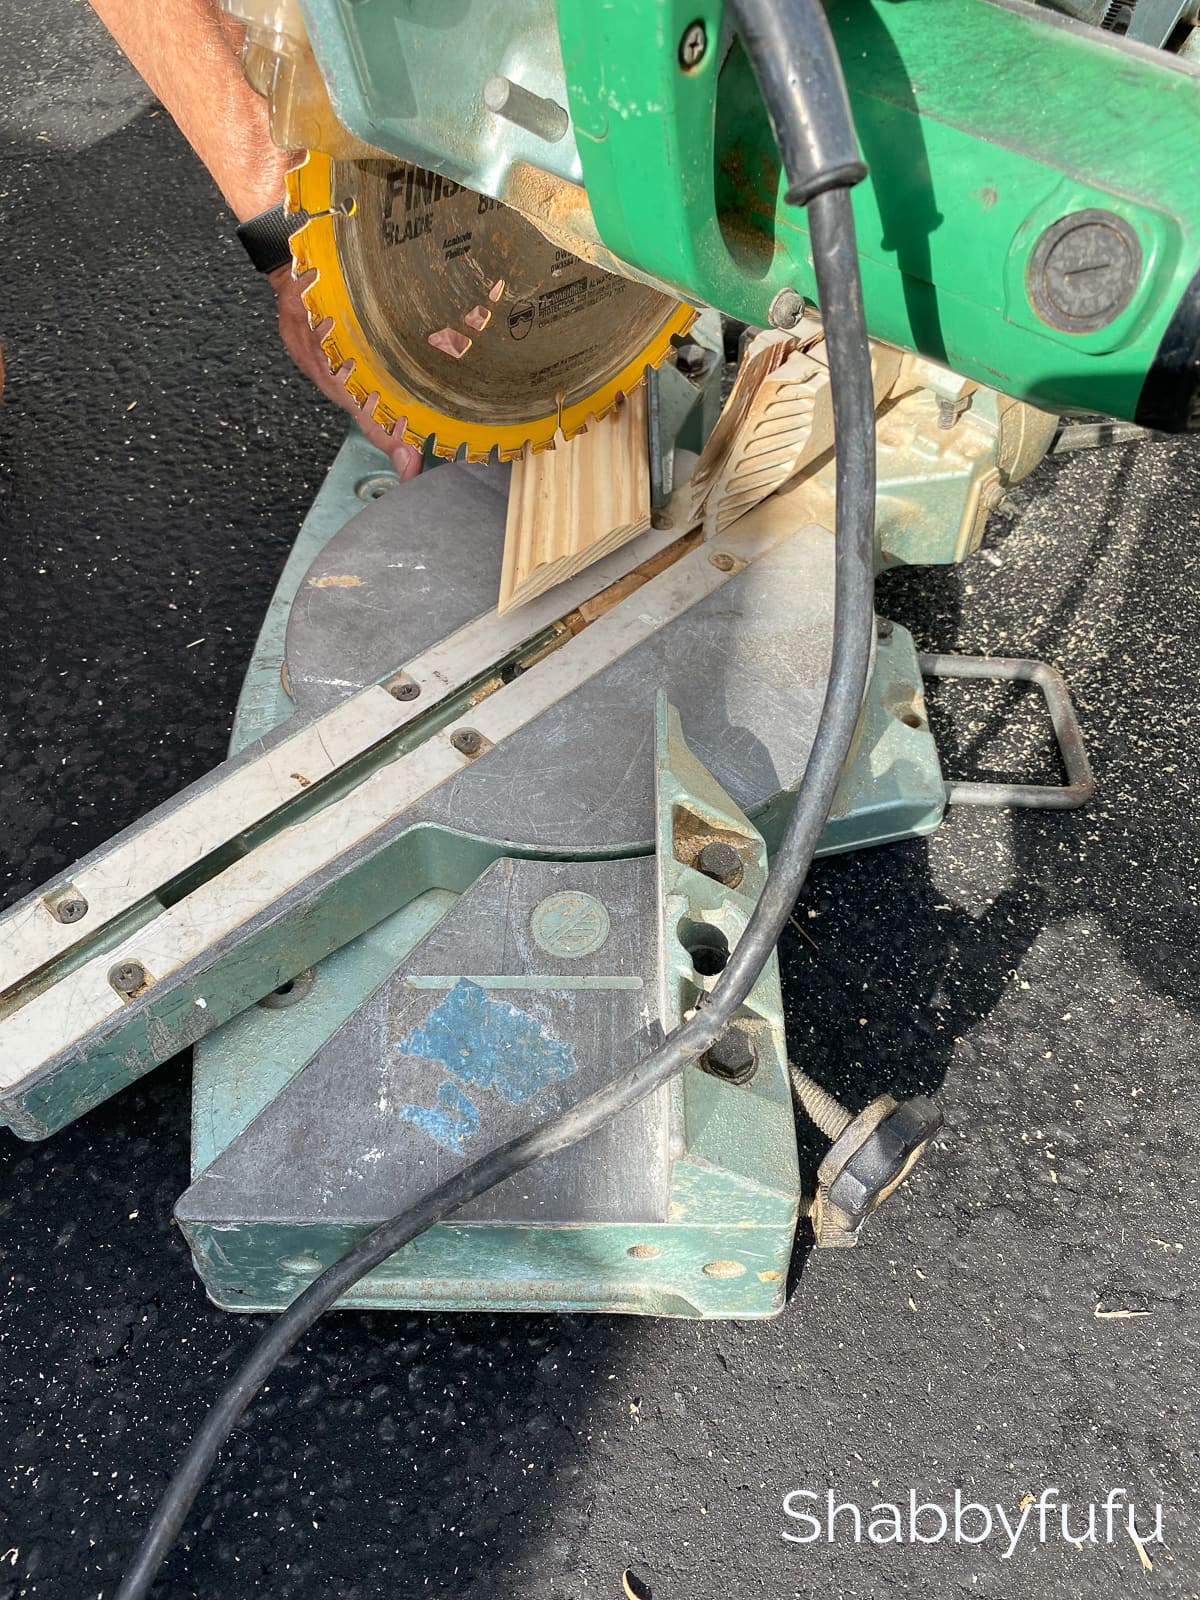
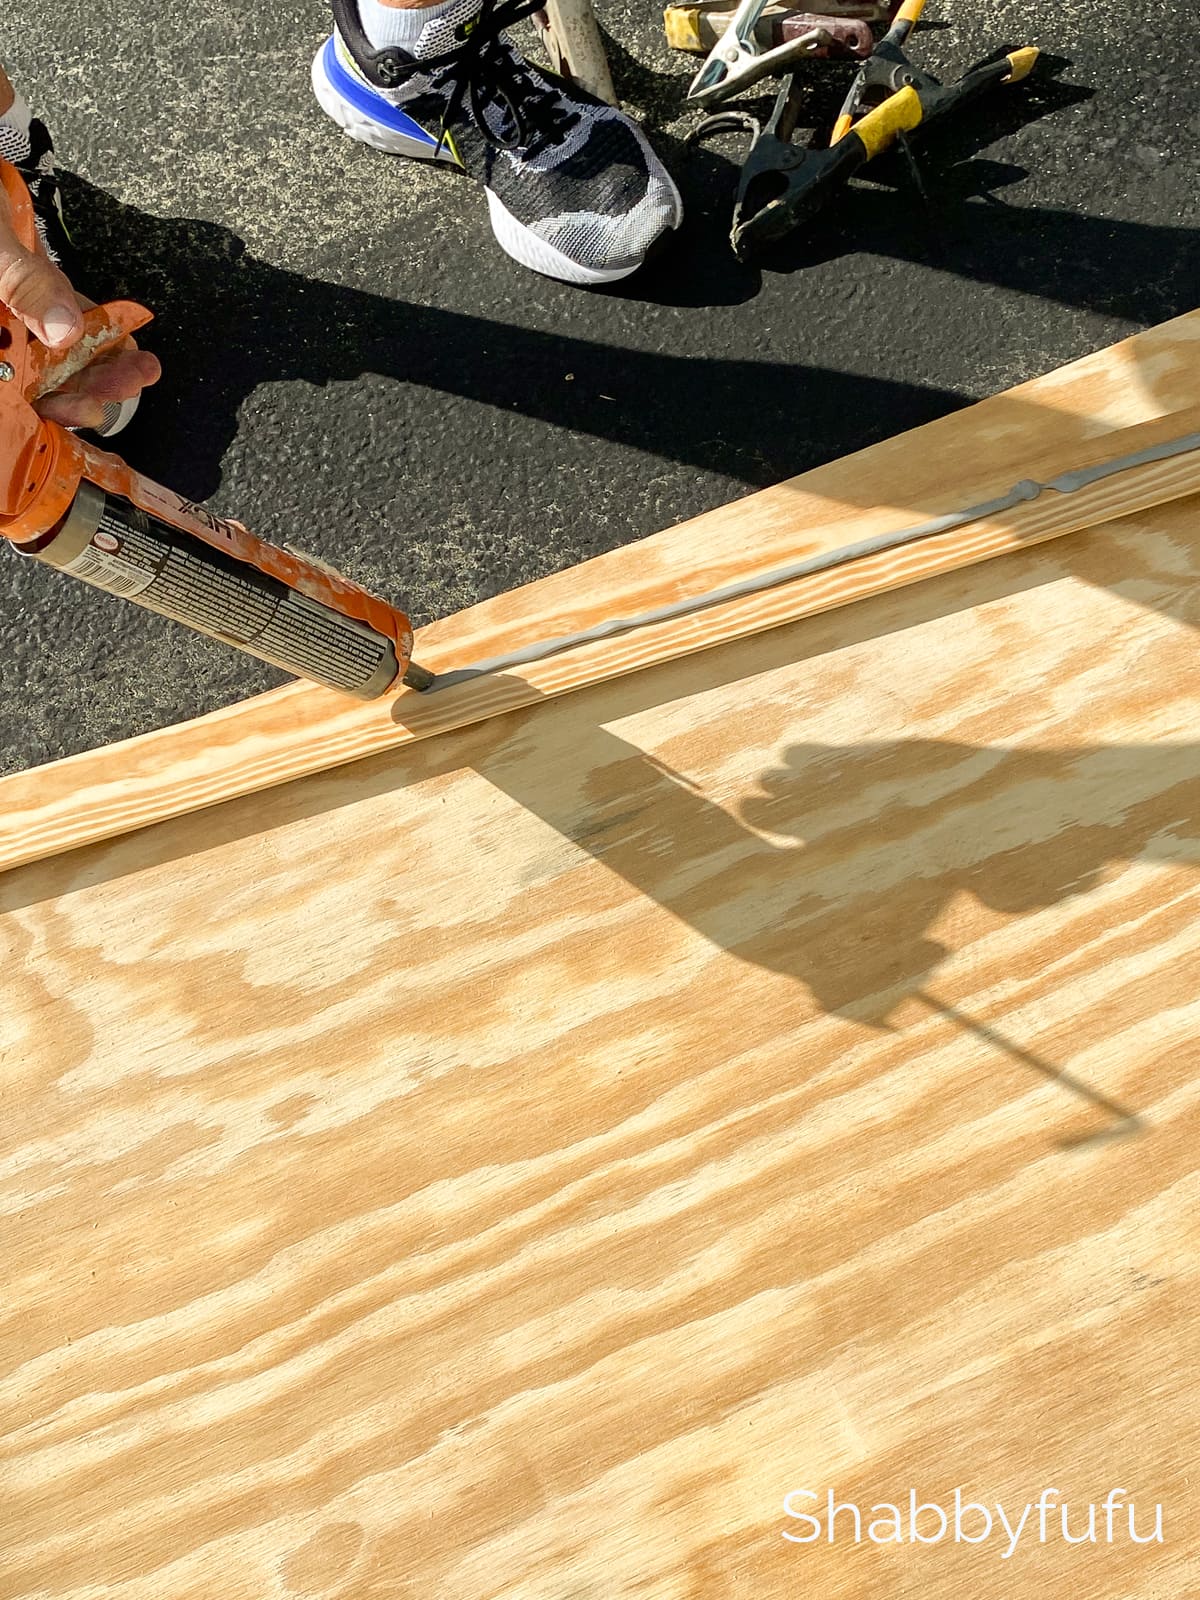
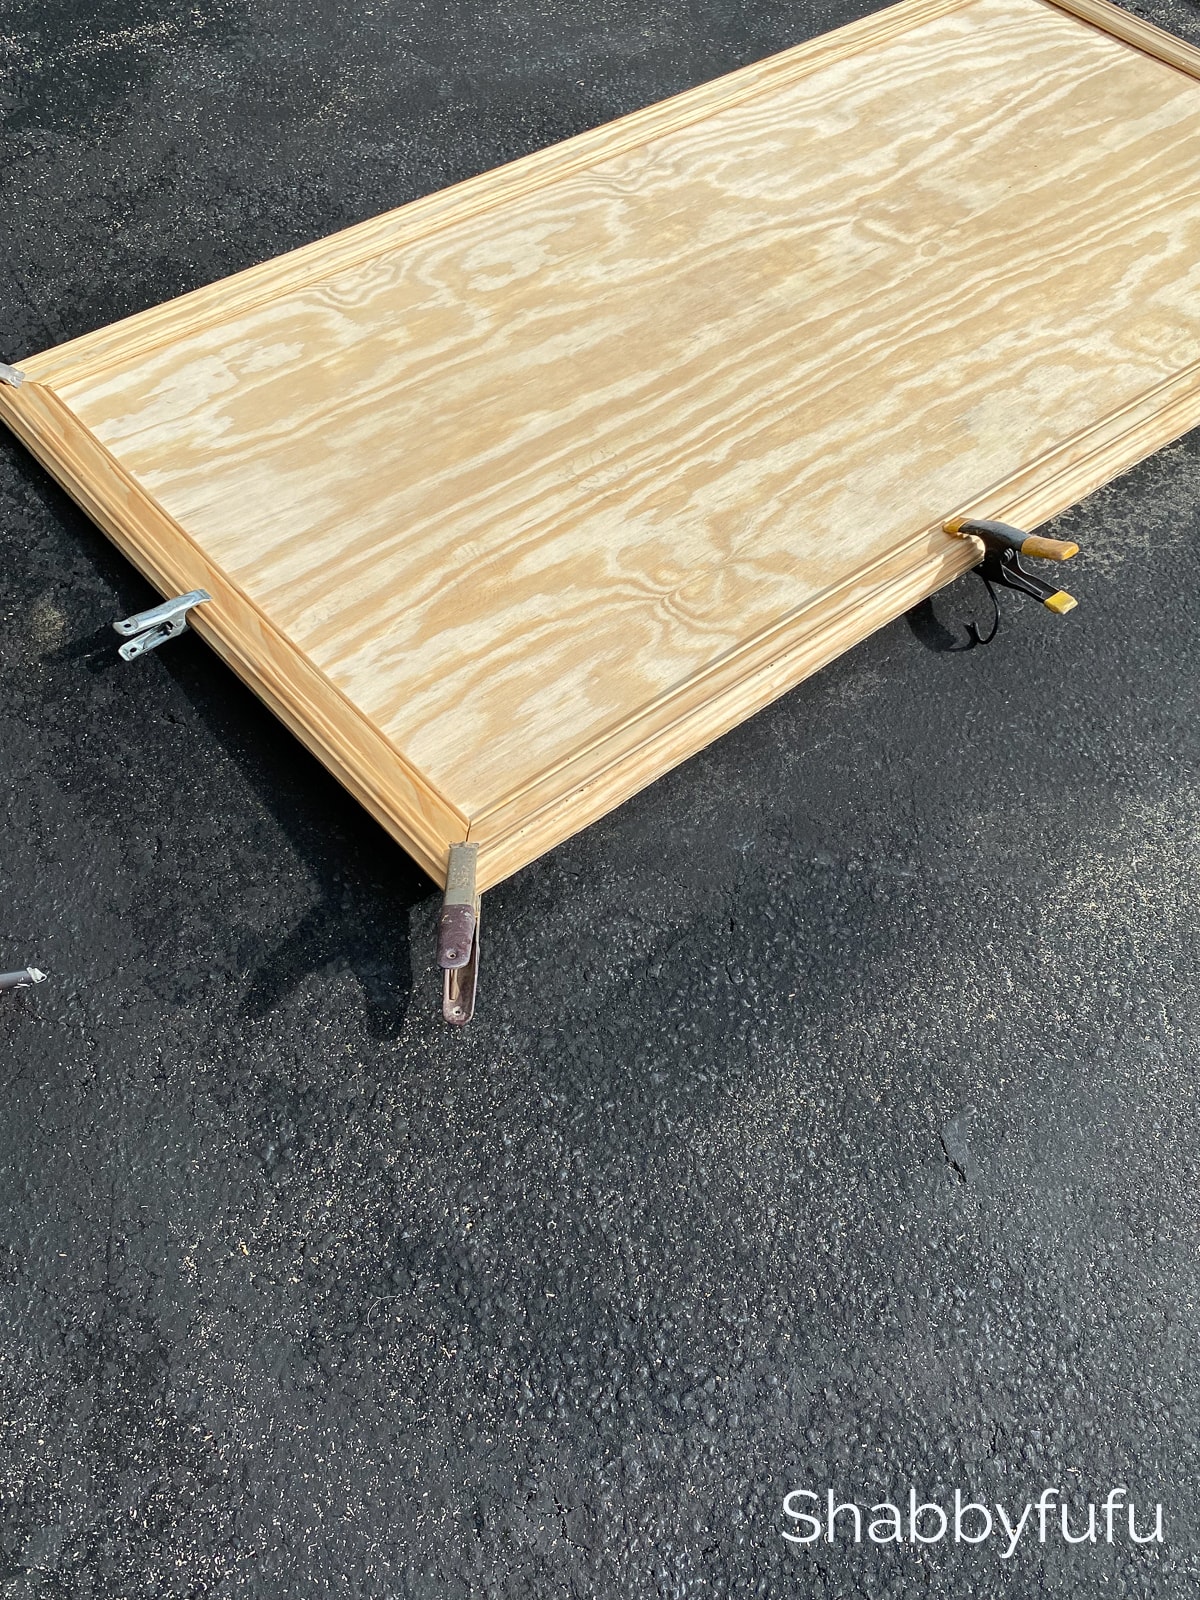
Next cut the 2″ x 2″ white wood to size. These pieces are being used to stabilize the back. No nails are necessary and you will adhere with the adhesive caulk (via a caulk gun) and clamp until dry.
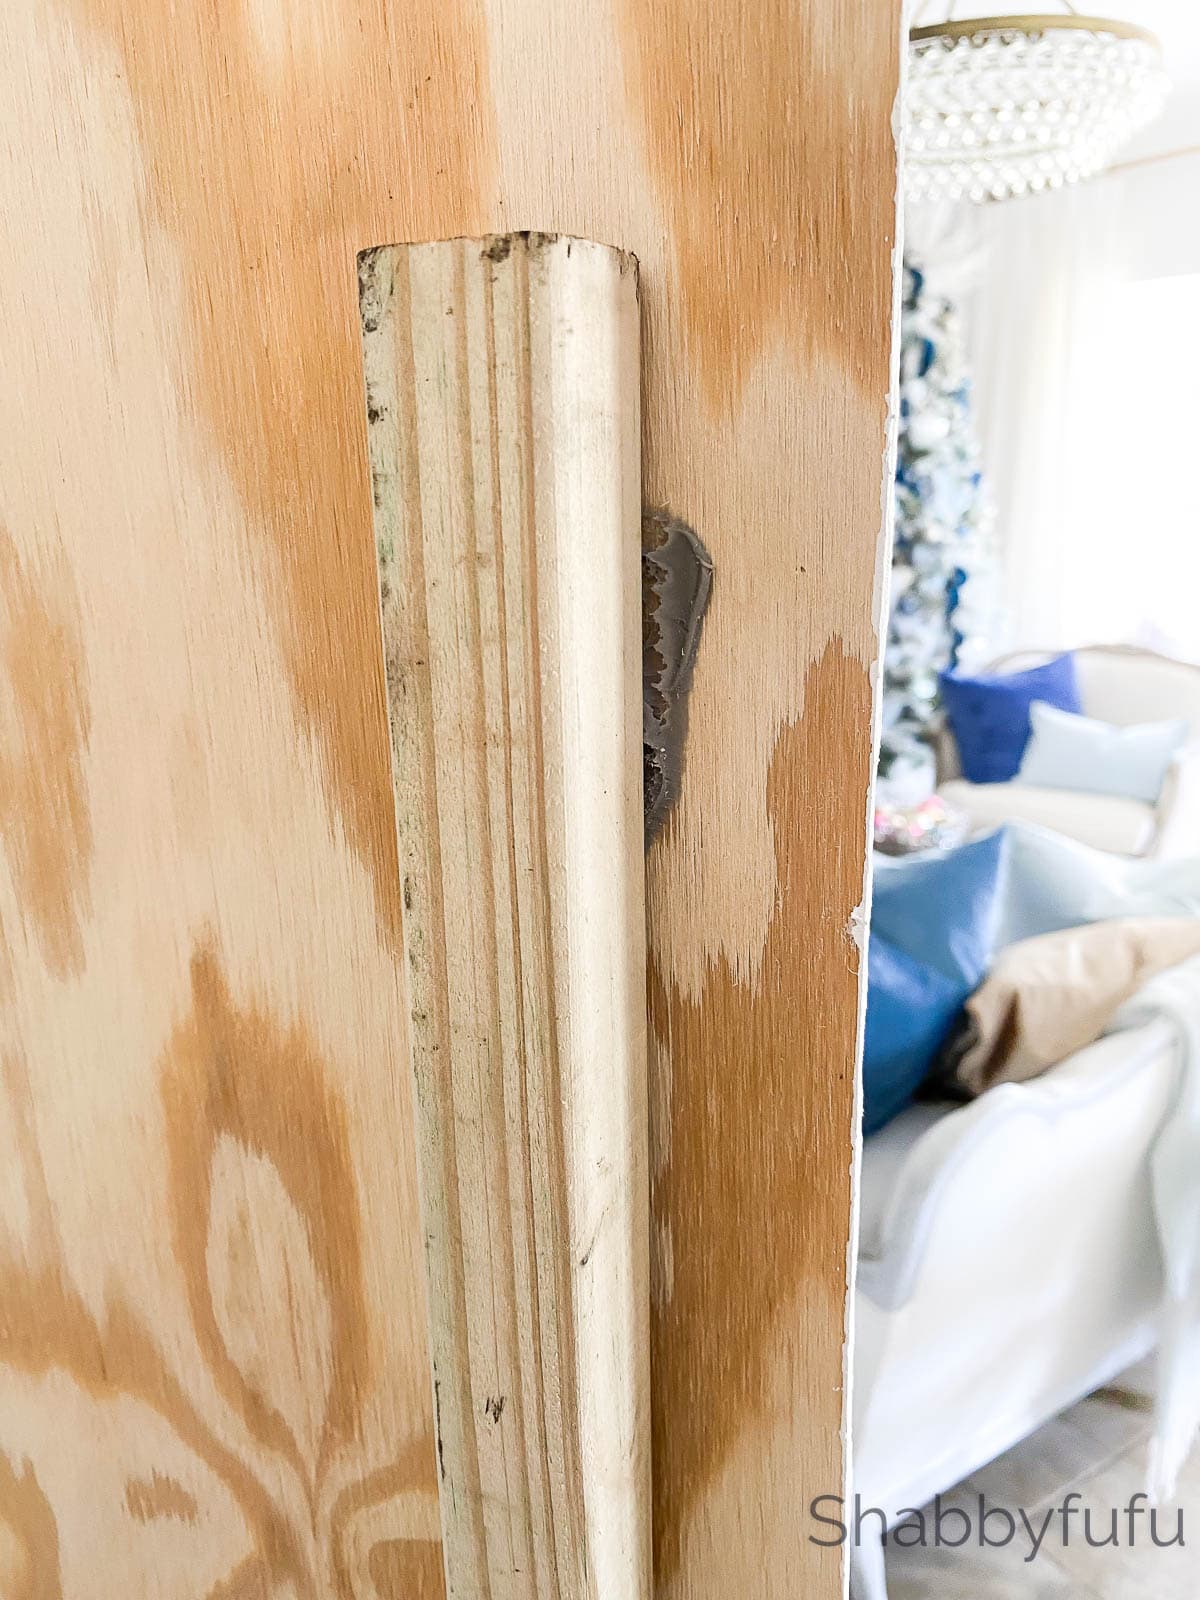
The next step is to attach the wood molding to the front of the plywood. Again, you’ll simply need to adhere with caulking and clamp until dry.

Once the caulking is dry you are ready to paint. Give the front of the wood a coat of primer and then finish with two coats of a high quality semigloss white trim paint.

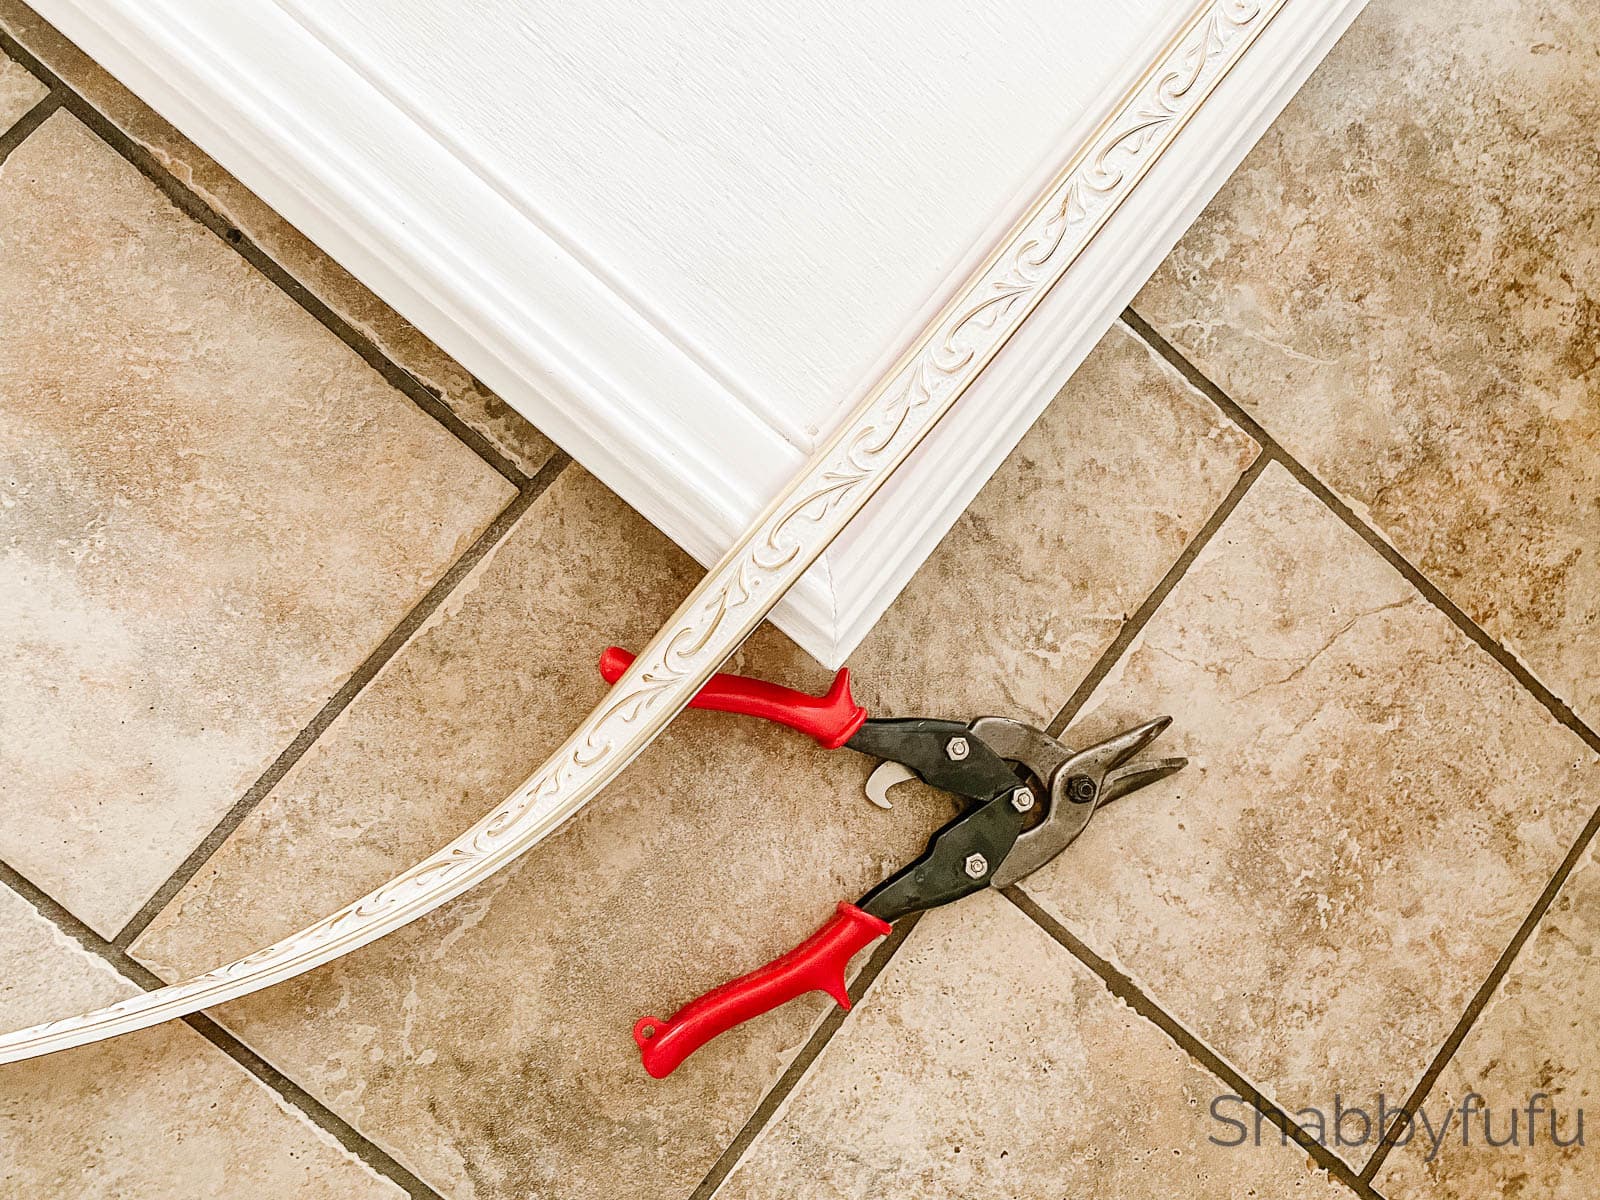
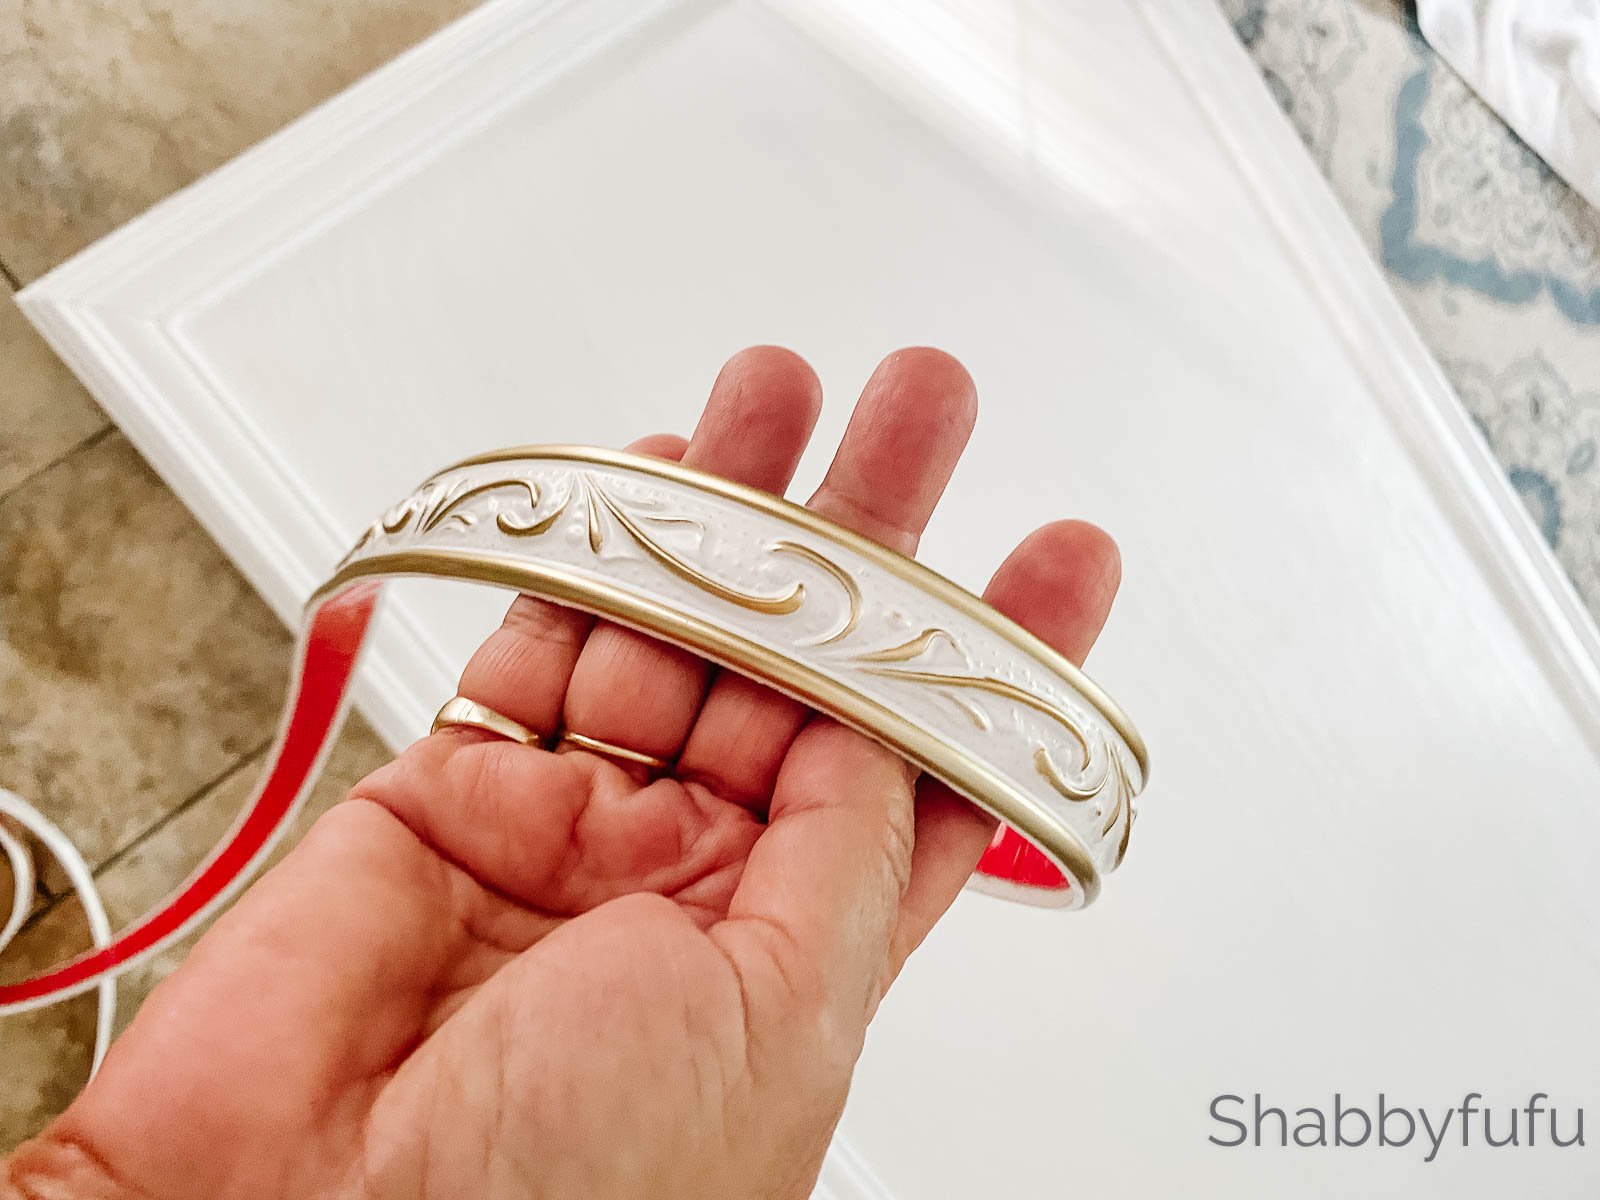
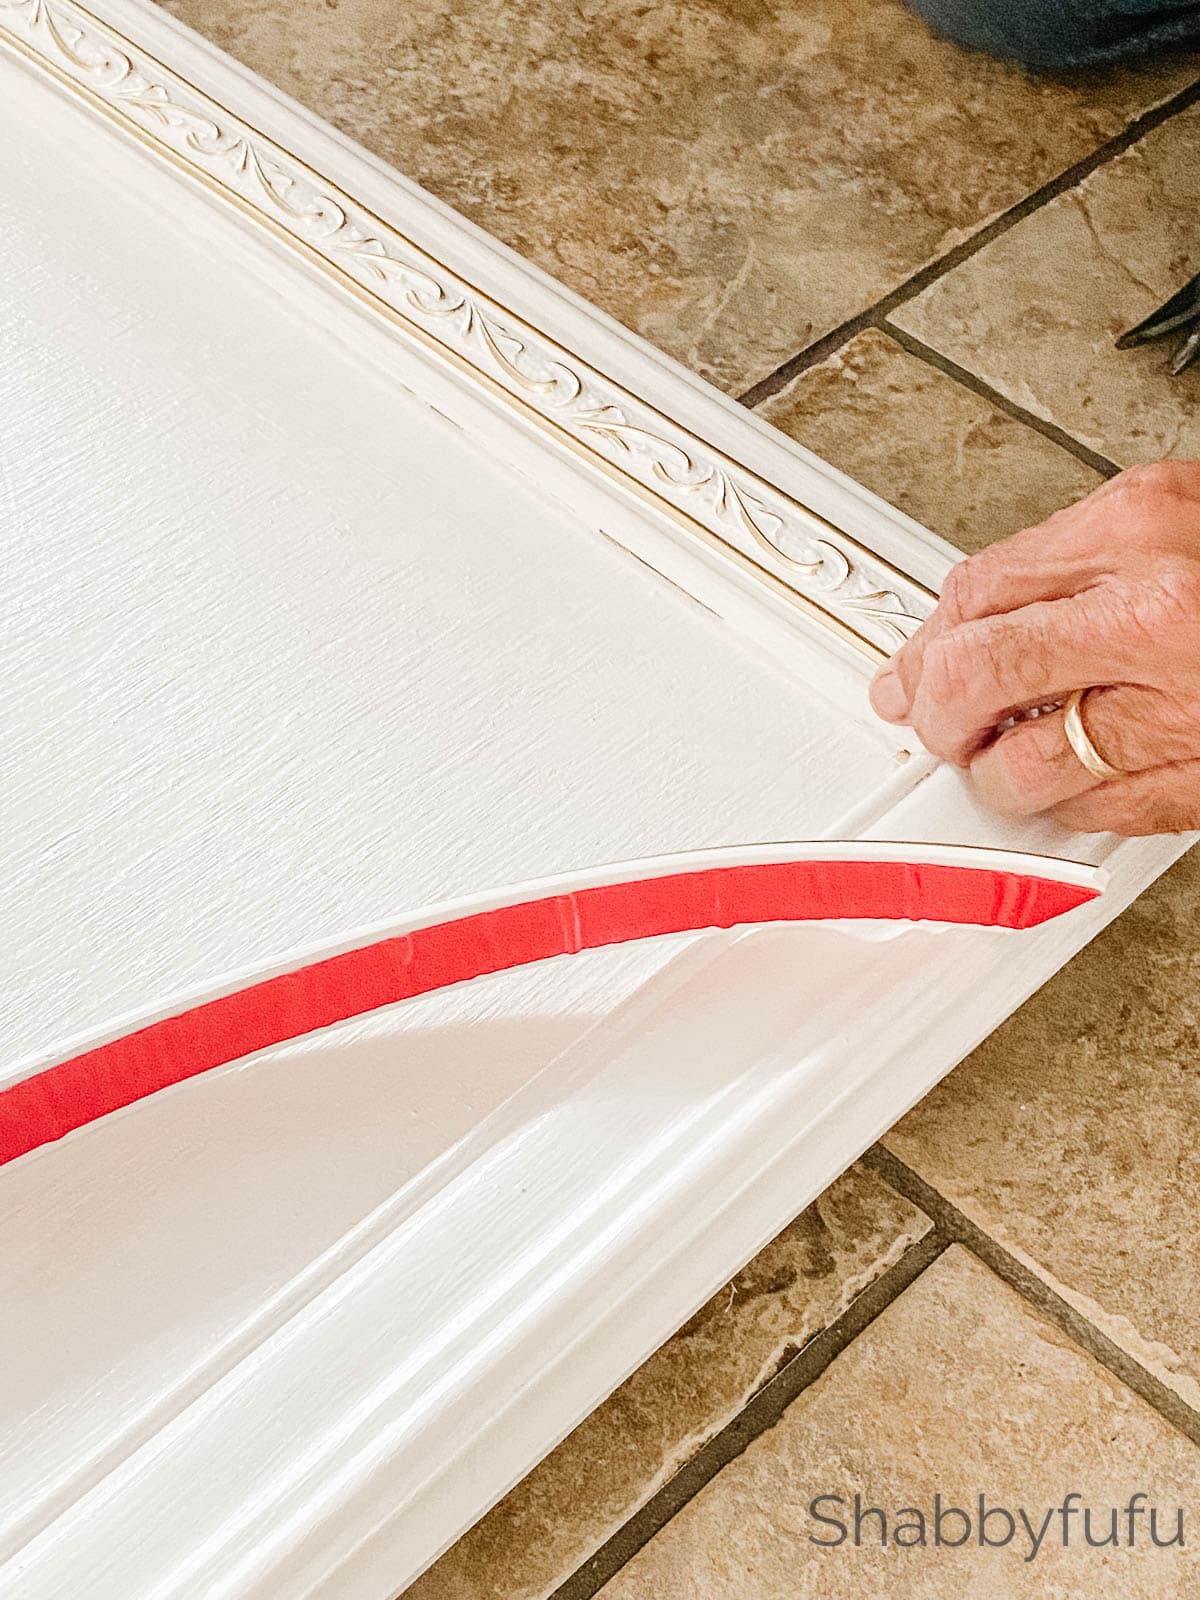
The final step in creating the frame of the alternative Christmas tree DIY idea is to add some decorative molding. Lay the decorative molding directly over the frame molding that you’ve installed. Cut to size and adhere by peeling the backing off. We found THIS self adhesive molding on Amazon that came pre-painted in the perfect white and gold colors for our theme! Customize your choice of trim to your liking, as there are plenty of sources for molding available on-line.

Step 3: The Finishing
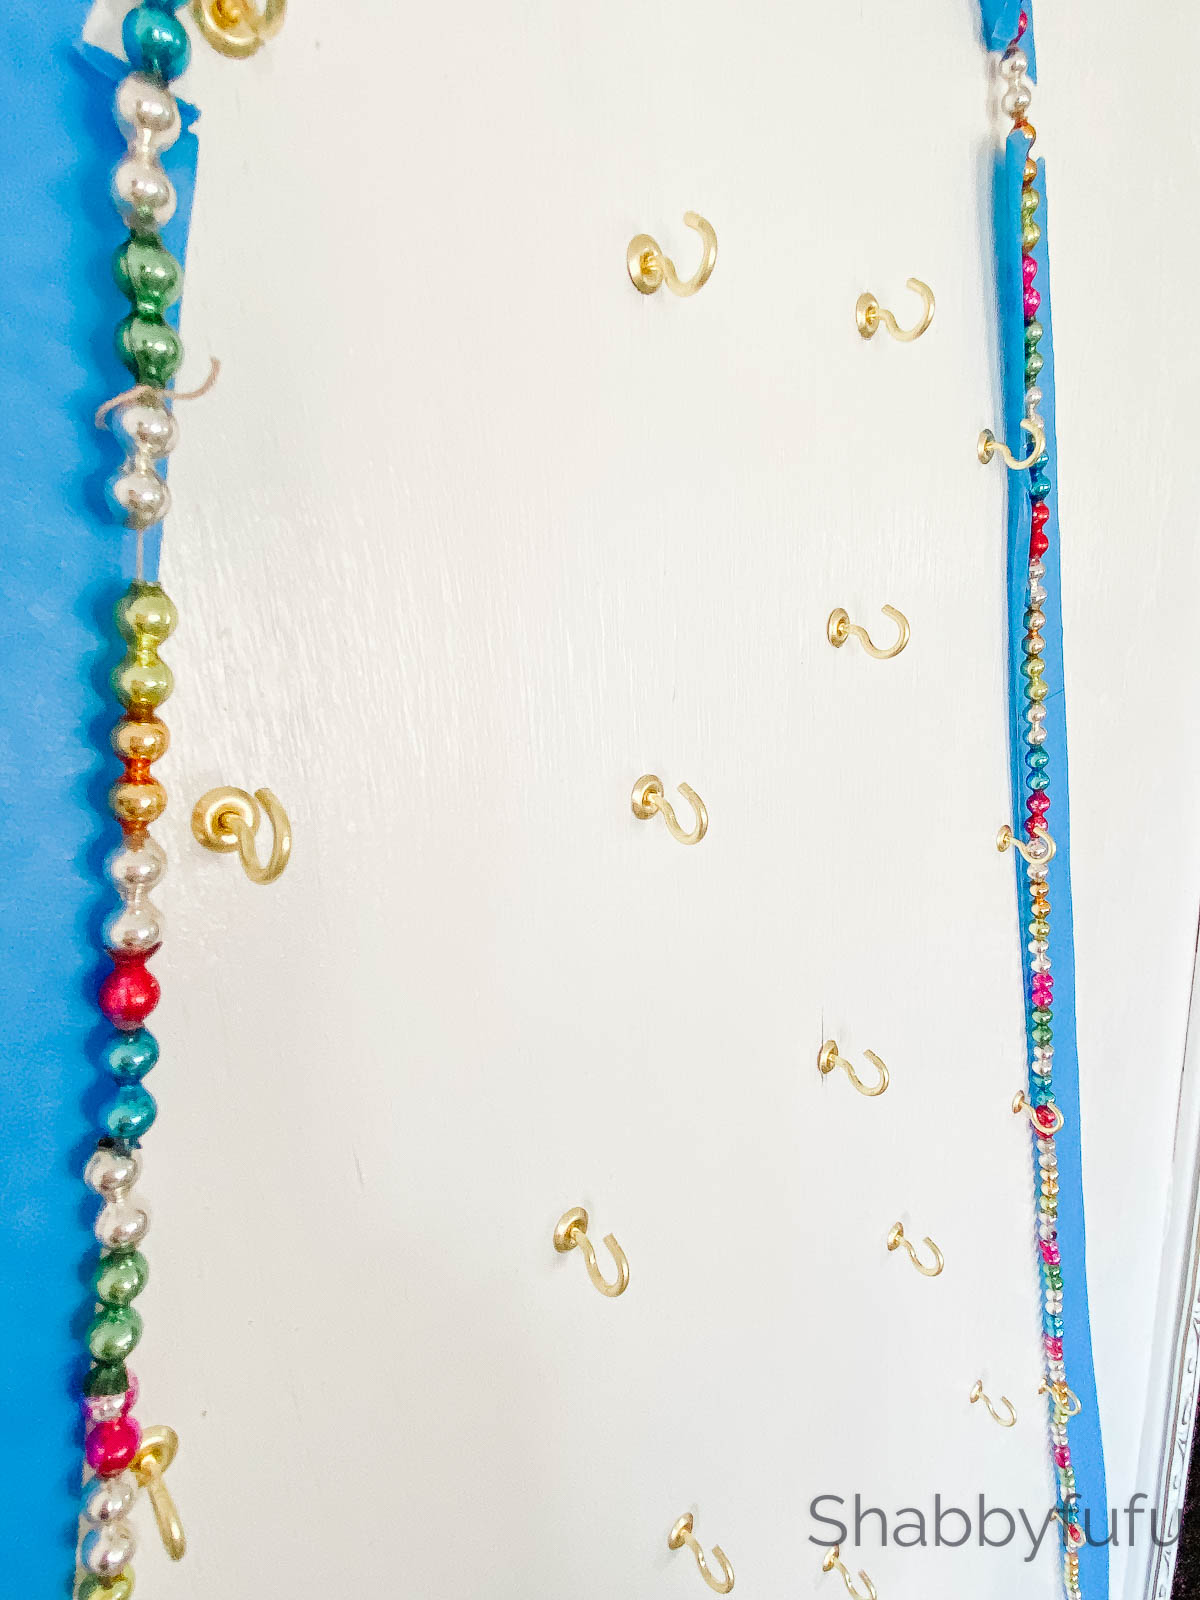
Now you’re ready for the fun part…deciding on where you’d like to add the hooks for hanging your ornaments! We used the National Hardware 3/4″ Classic Sold Brass Cup Hooks laying them out randomly using the blue painters tape as a guide.


We have used these handy cup hooks for lots of projects around our home!

Pre-drill the holes as you go along using either a small drill bit or a screw.
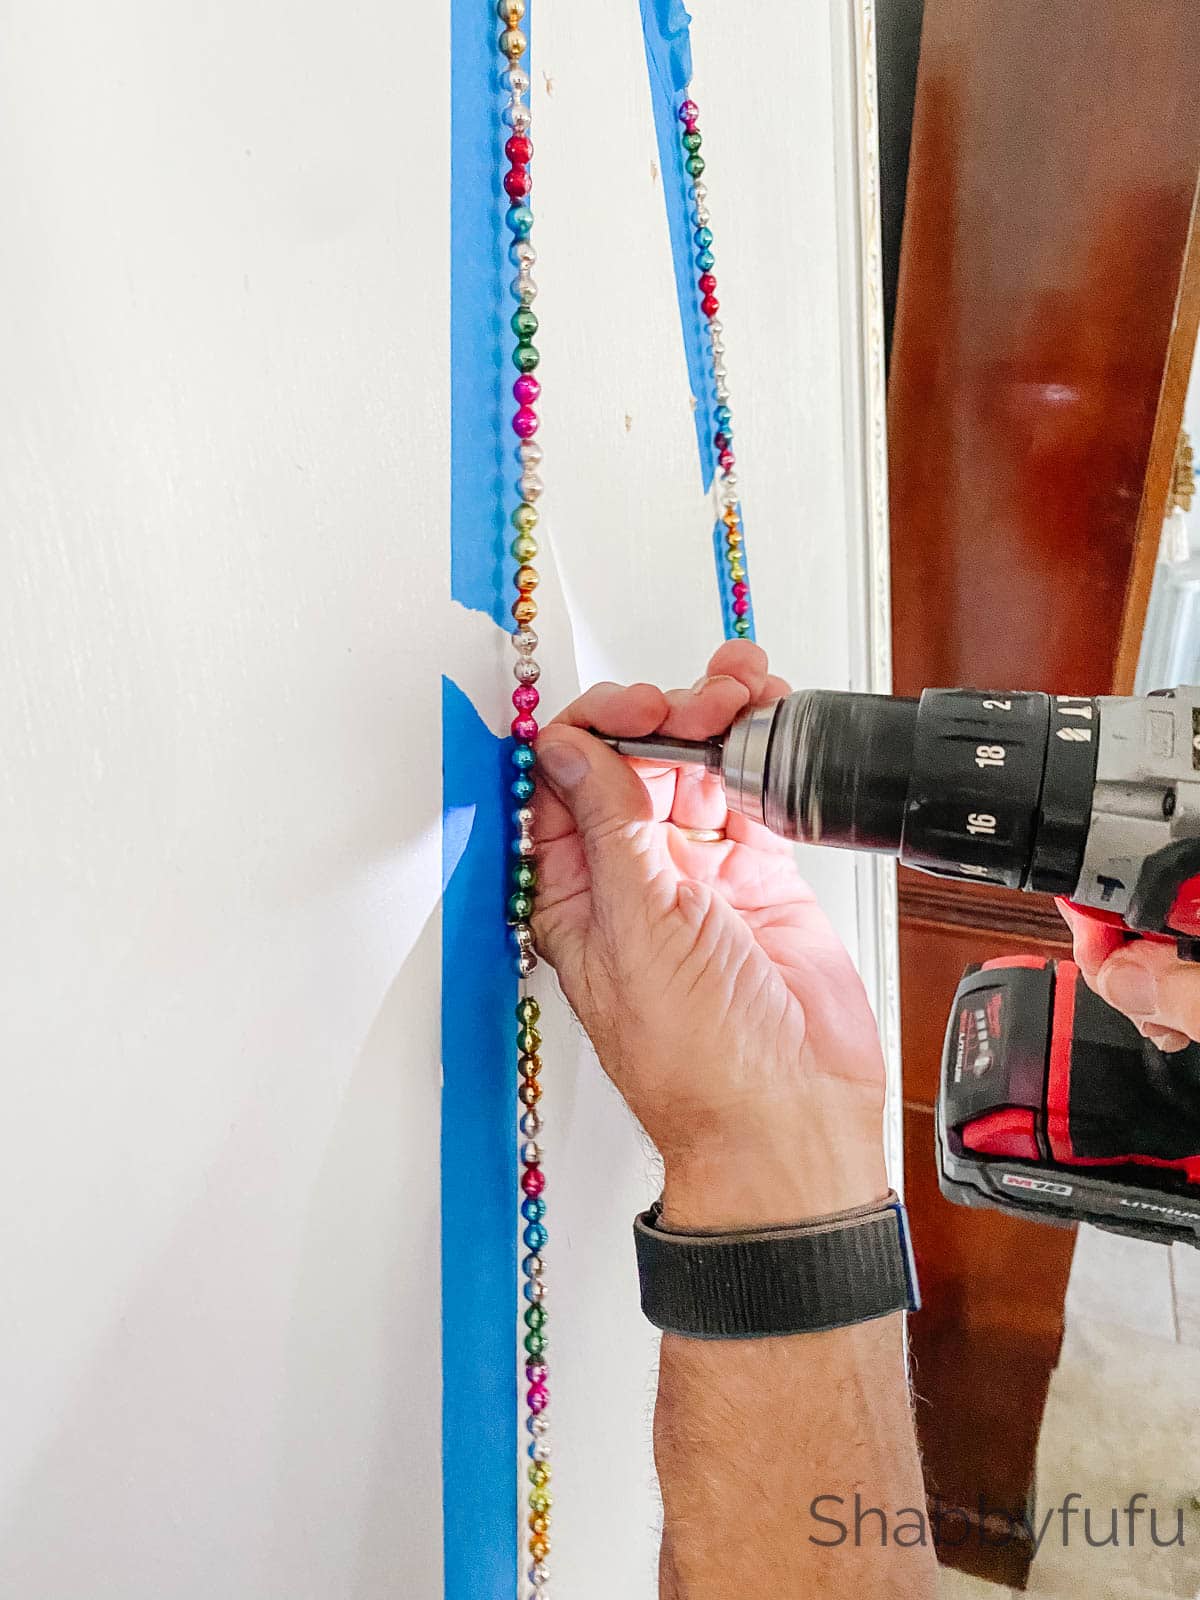
Then screw the National Hardware Cup Hooks cup hooks into place. Utilize the blue tape as your guide!
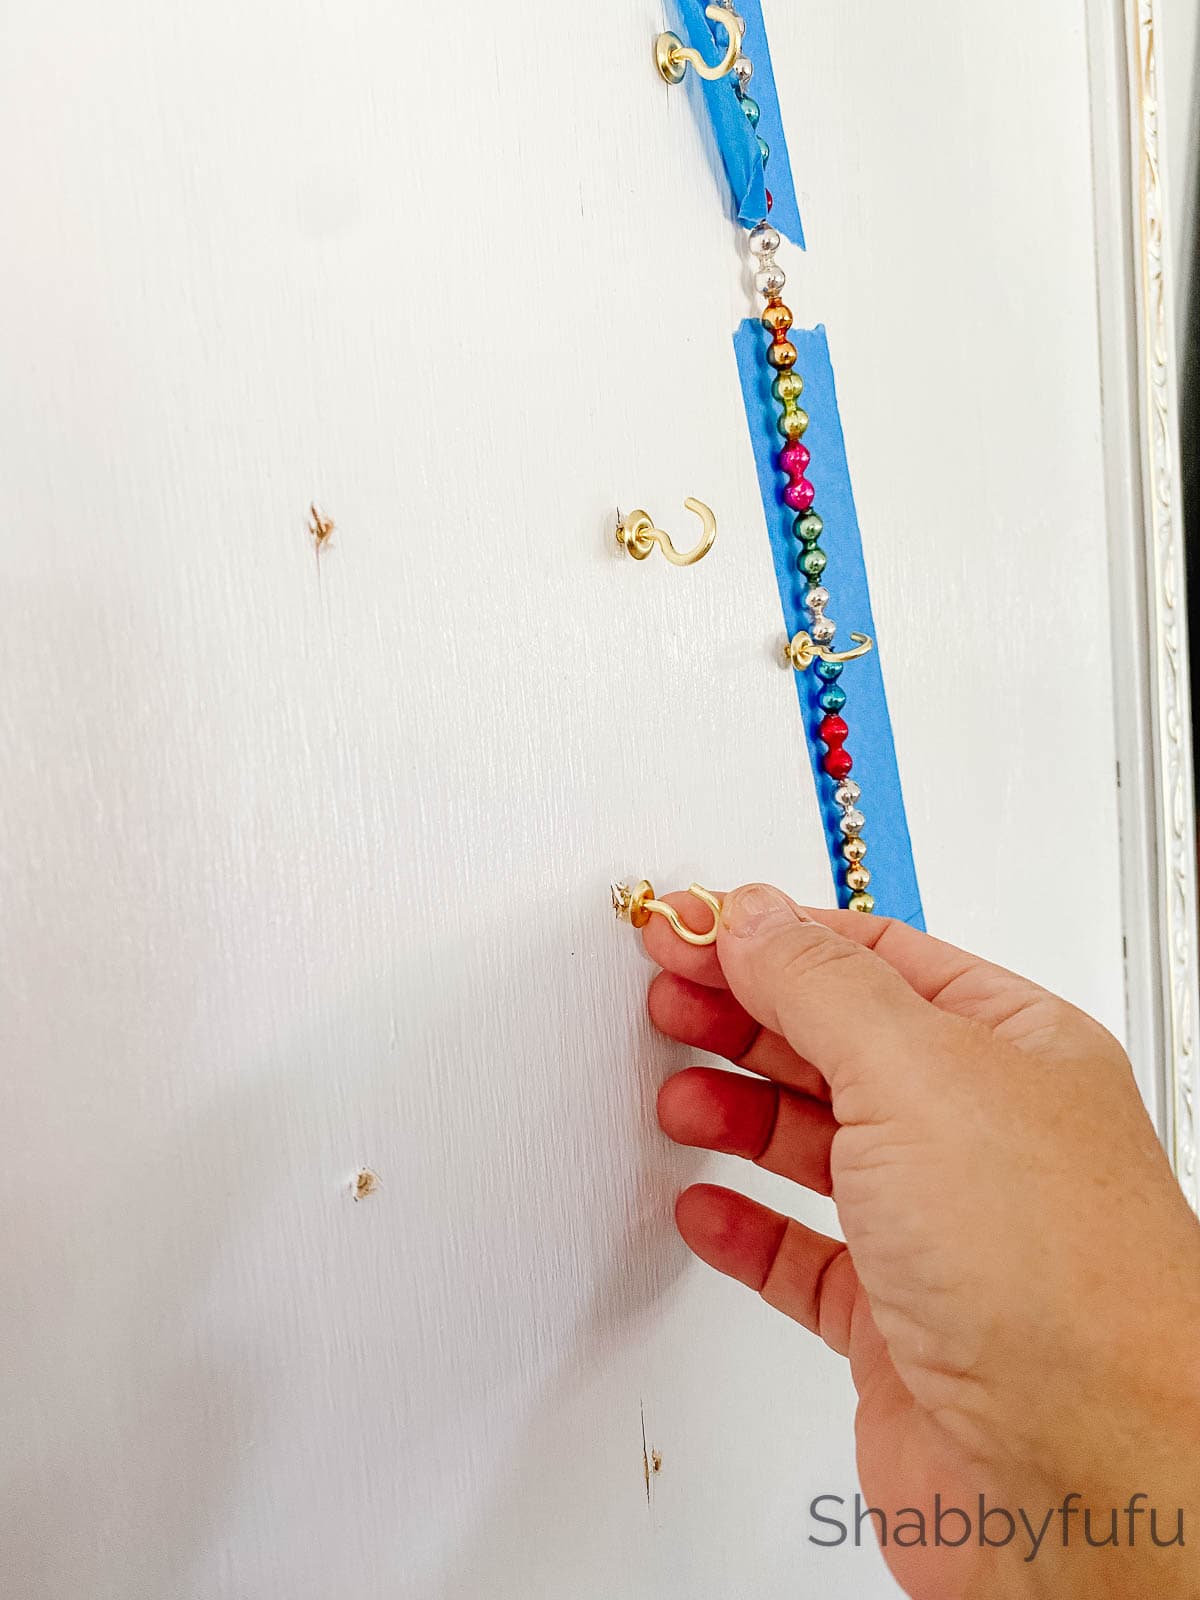
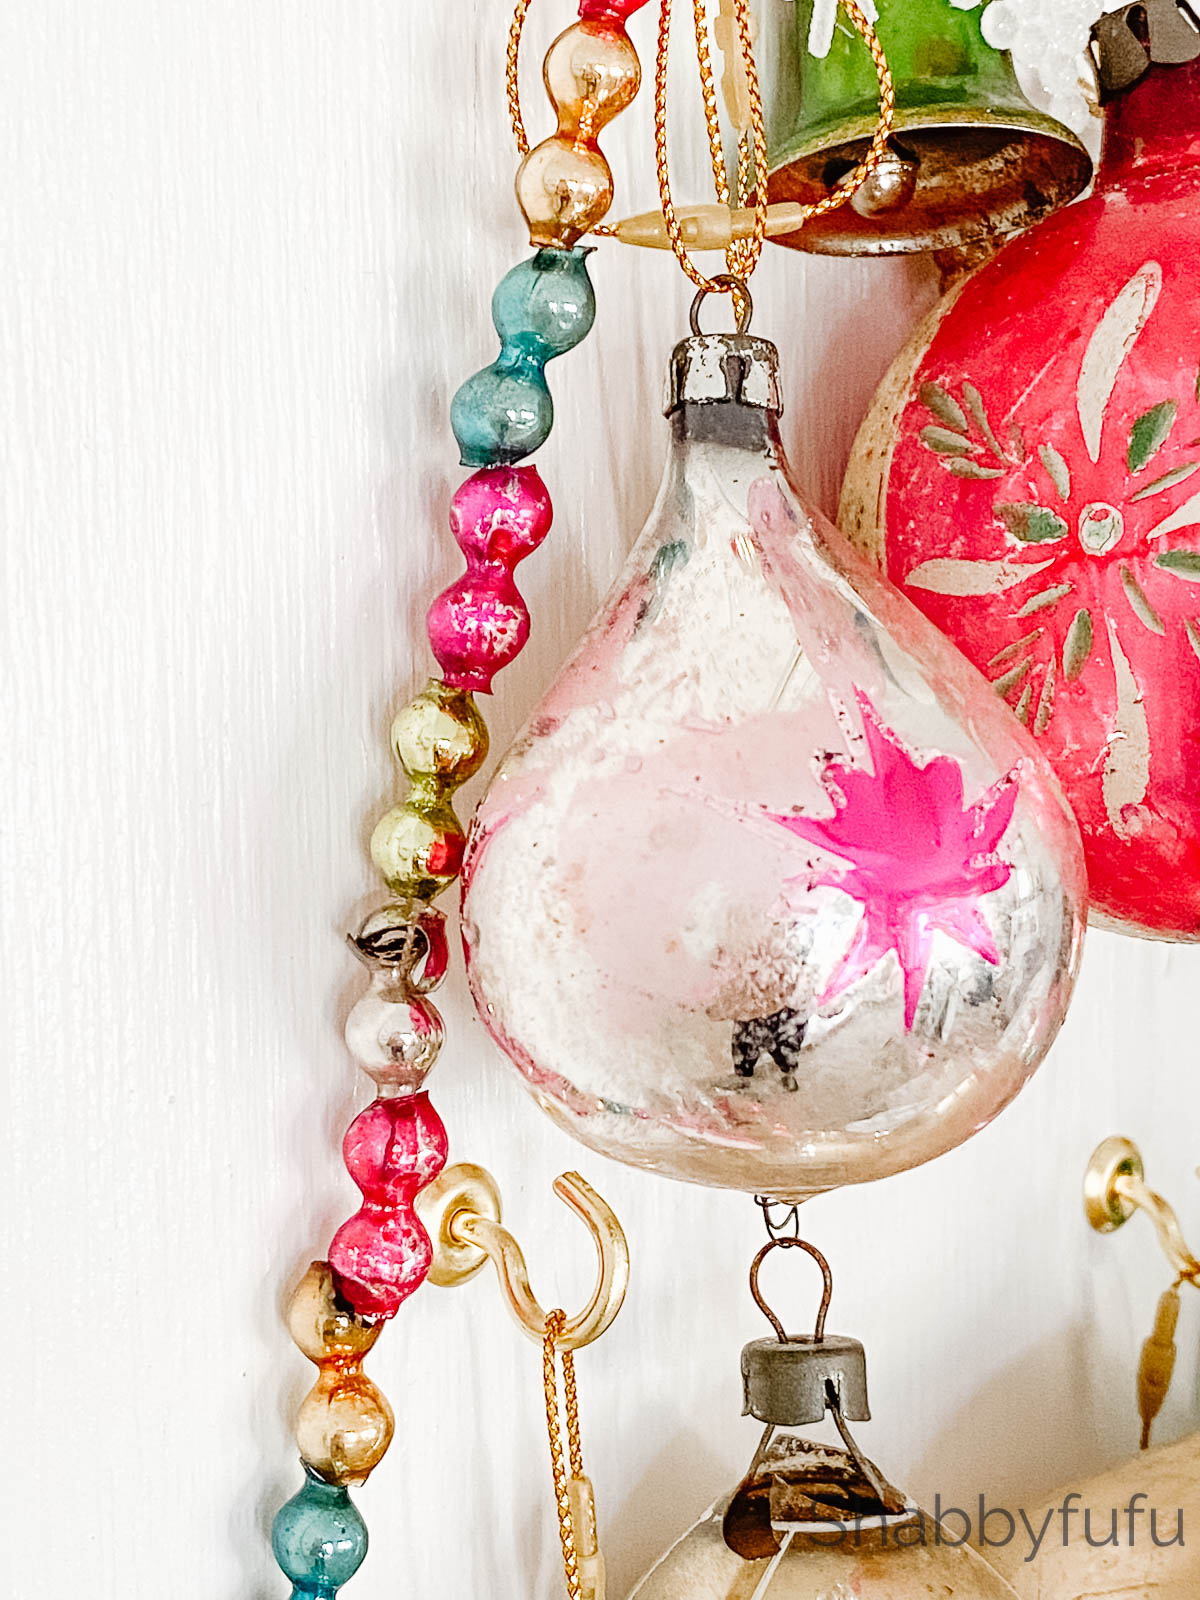
It’s best to use string for hanging the ornaments from the cup hooks and not the traditional metal ornament hangers. These should insure that the ornaments don’t fall off and break! We used THIS gold snap on cording to coordinate with the brass cup hooks in this project. Make sure to add some ornaments towards the bottom of the tree to form the look of a trunk. To outline the tree form, a strand of vintage mercury glass beading adds a finishing touch!

We also added some vintage reflectors and a few new snowflake ornaments for depth.

Layer, layer and layer some more!


*Hint* Step back and check your work from time and keep adding more hooks and ornaments to fill in any gaps!
As always, please use care when using power tools at your own risk and utilize the proper protection.
PIN THIS POST BELOW!

I bought a felt tree with ornaments that clip on. I hang it on my wall ta dum Christmas. I have animals and just don’t like the mess.
Janet, this tree is absolutely drop-dead gorgeous! What a great way to display ornaments so that they don’t compete with all the greenery on the tree. I love vintage ornaments to begin with, this might have to go on my ‘to do’ list. Thanks for sharing it!
Love this idea Janet! I just wish I had saved my moms old ornaments we had growing up.
This way you can enjoy the ornaments rather than setting them in a bowl where they get lost outside of the colors.
Thanks for sharing!