Rolling Potting Bench DIY- Herb Garden
This post may contain affiliate links. For more information, please see our disclosure policy.
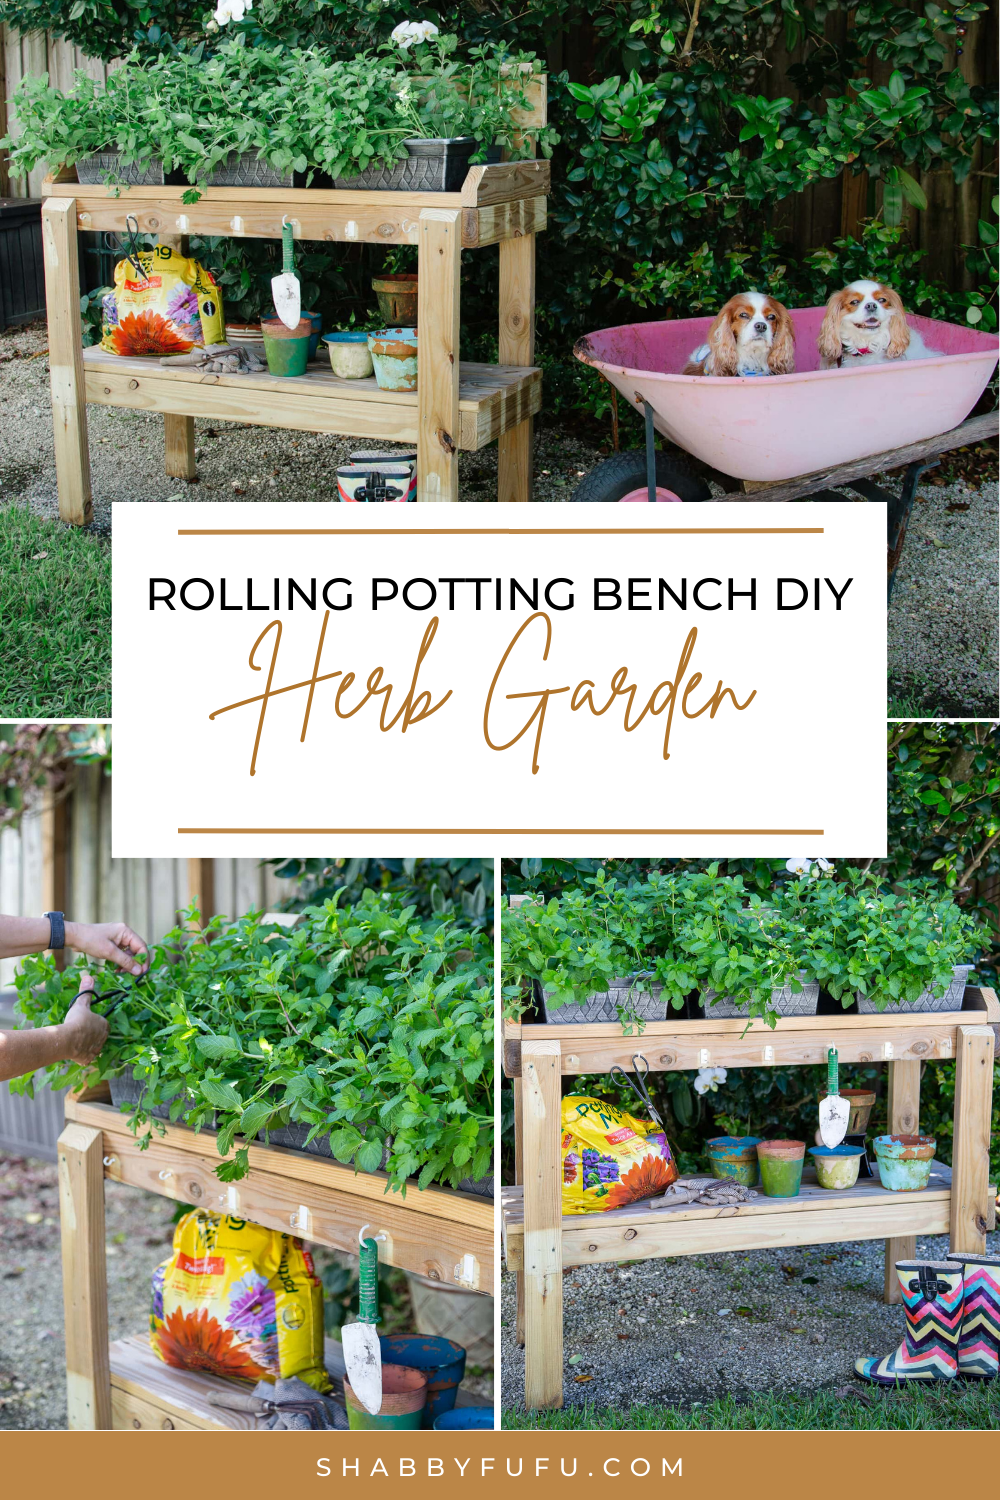
In this post you’ll learn how to build a simple rolling potting bench for your plants and more! Use this one for your herb garden with lots of storage for your gardening tools. This is not a complicated build and you can adjust to any size that you need. We recycled wood that we already had on hand to make this a budget friendly DIY project!
This is a paid post in behalf of Spectrum Brands but the opinions expressed here are my own.
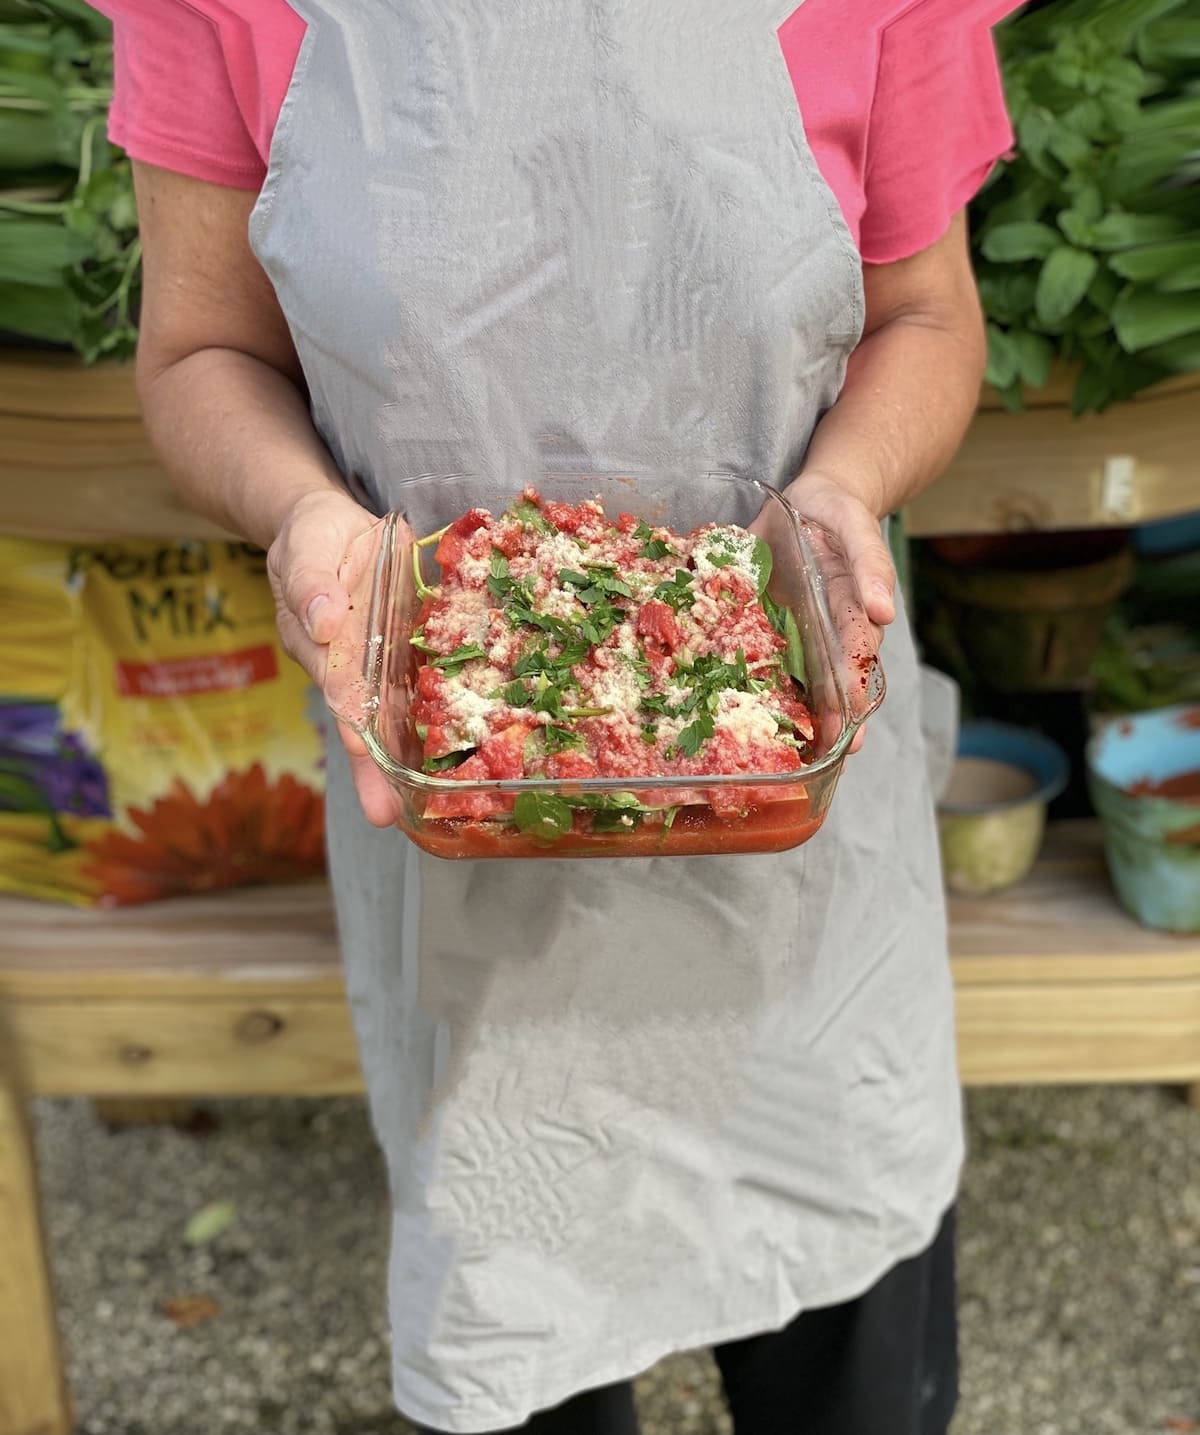
Herbs give food so much flavor and I love growing my own. It’s rewarding to be able to go out to the garden and clip your own herbs for a home cooked meal! This is my delicious and light vegan lasagna, recipe coming soon.
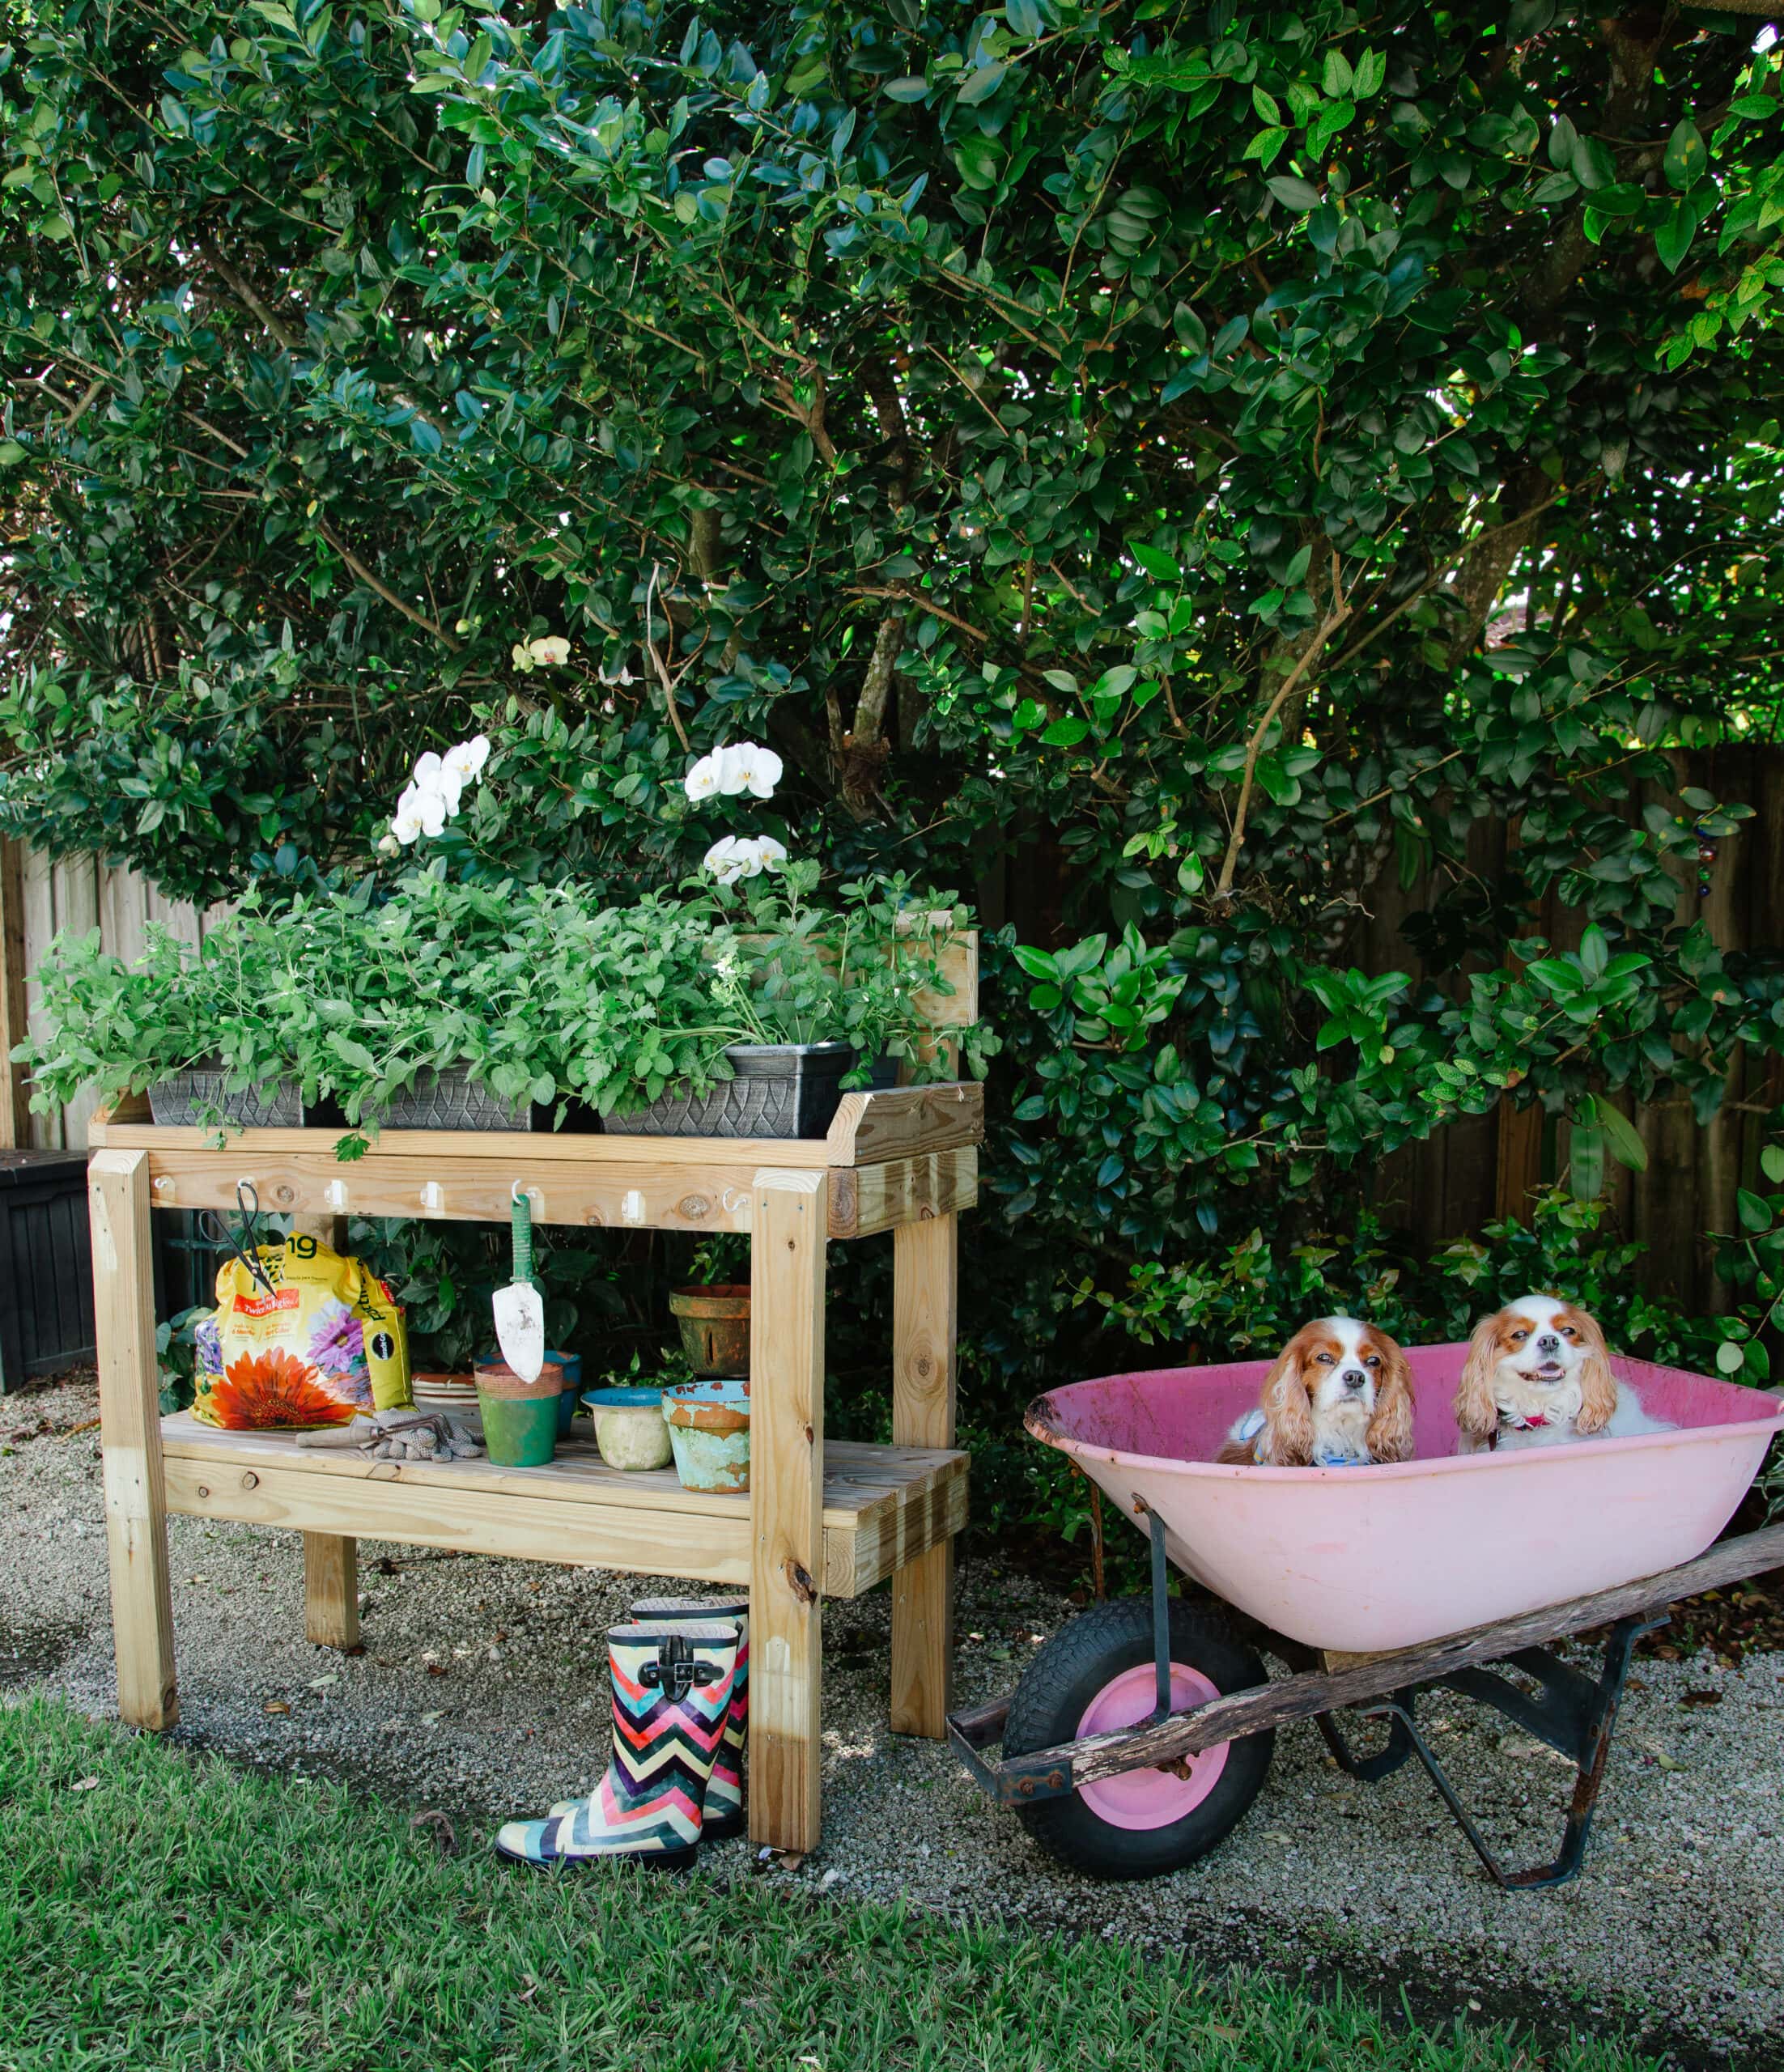
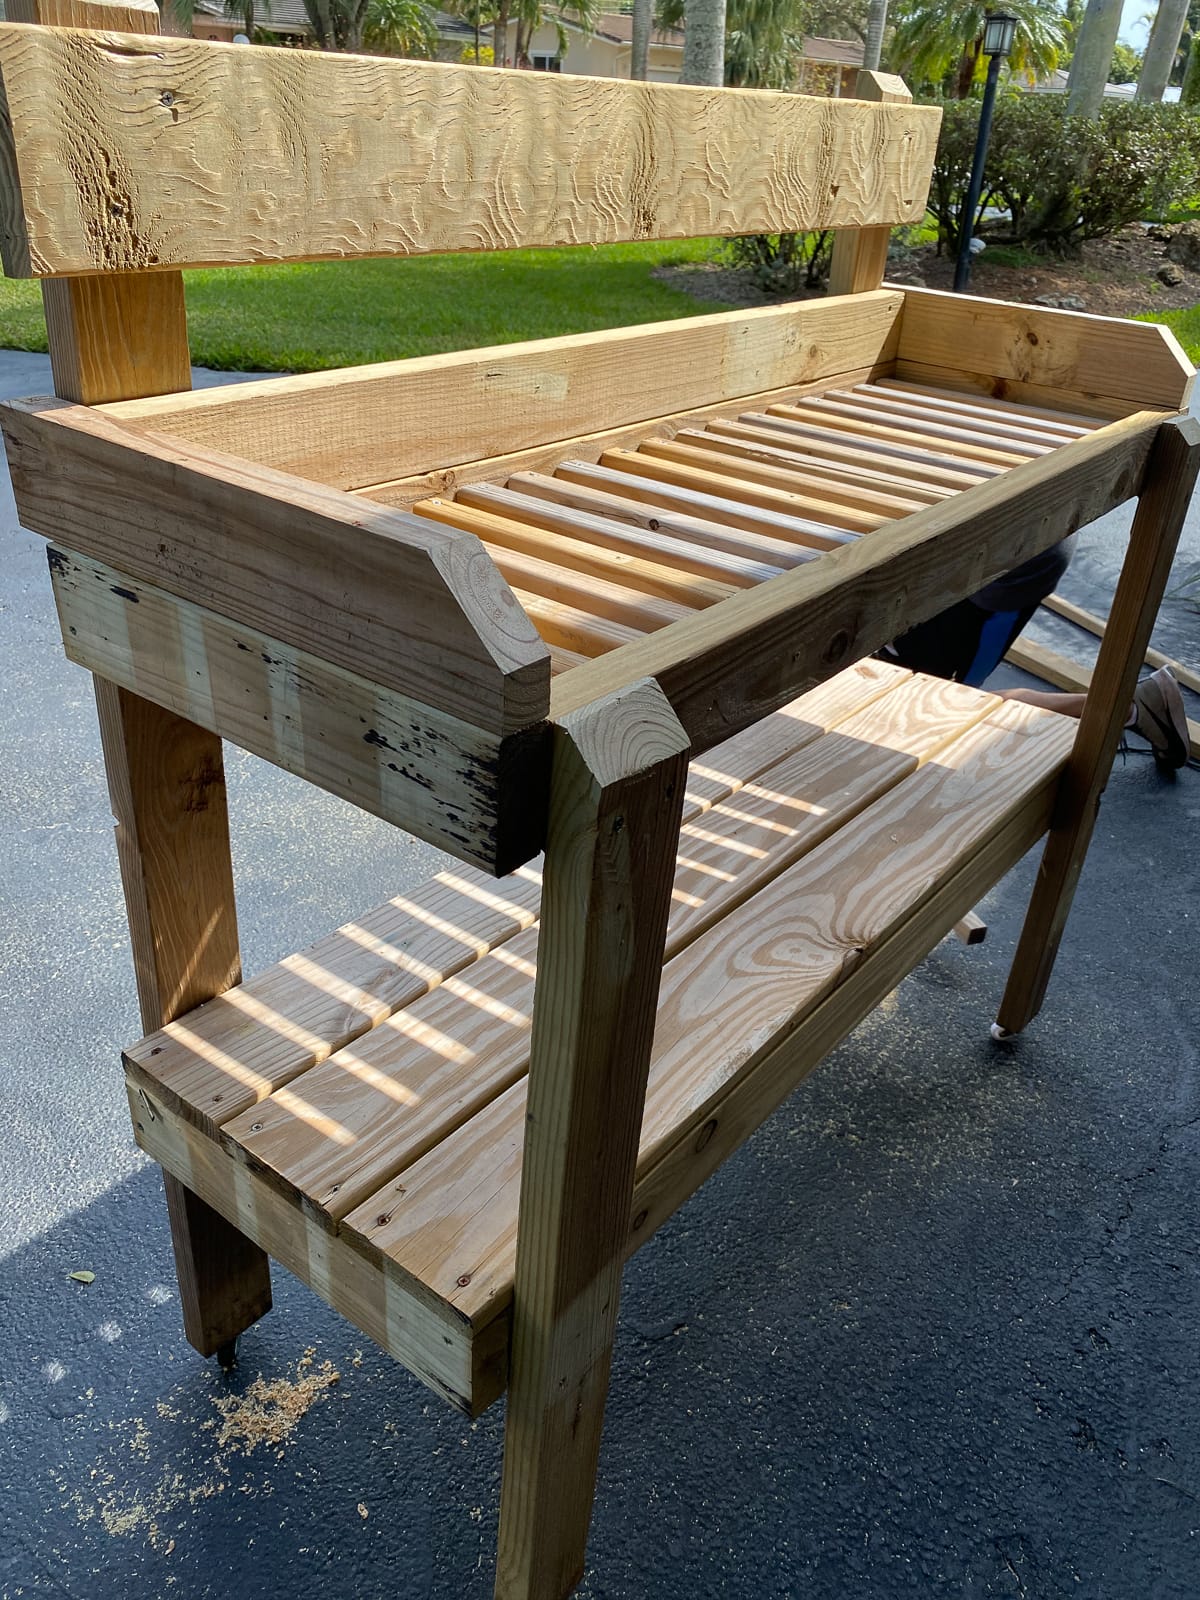
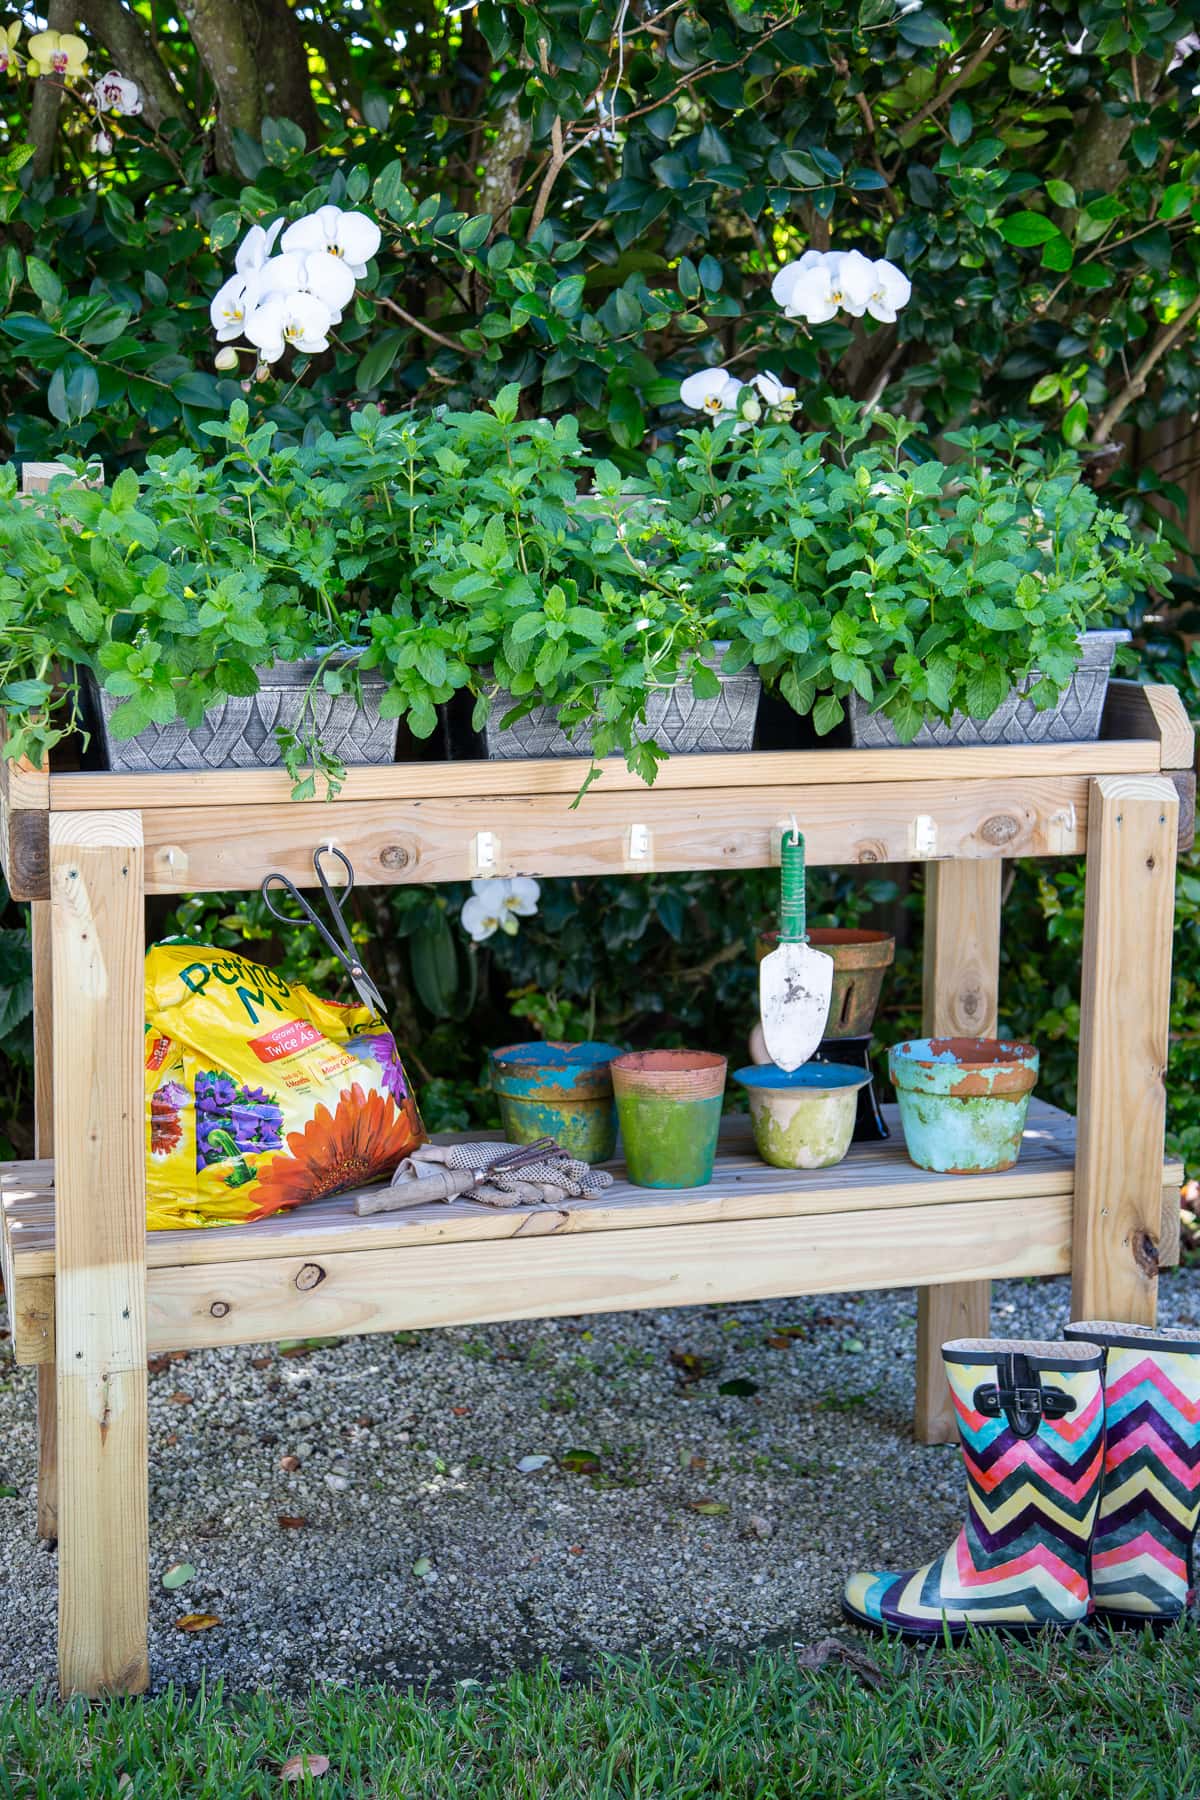
Unfortunately, my windowsill isn’t the best place to grow herbs, as the afternoon sun gets too darn hot! Having always wanted a potting bench to work on outside, I came up with a plan to build one. My simple rolling potting bench would clearly have to be multi-purpose! With two tiers, the top could be used for potted herbs and the bottom for garden supplies. The top tier would have slats for drainage and the bottom would hold pots and bags of soil. Then hooks could be added as needed for hanging hand tools, garden gloves and the like. Such a fun project and it took us only about two hours to build!
How To Build A Simple Rolling Potting Bench – Herb Garden
What You’ll Need – Tools
- Circular saw or chop saw
- Screw gun with a number two tip
- Measuring tape
- Pencil
- Eye and ear and hand protection recommended
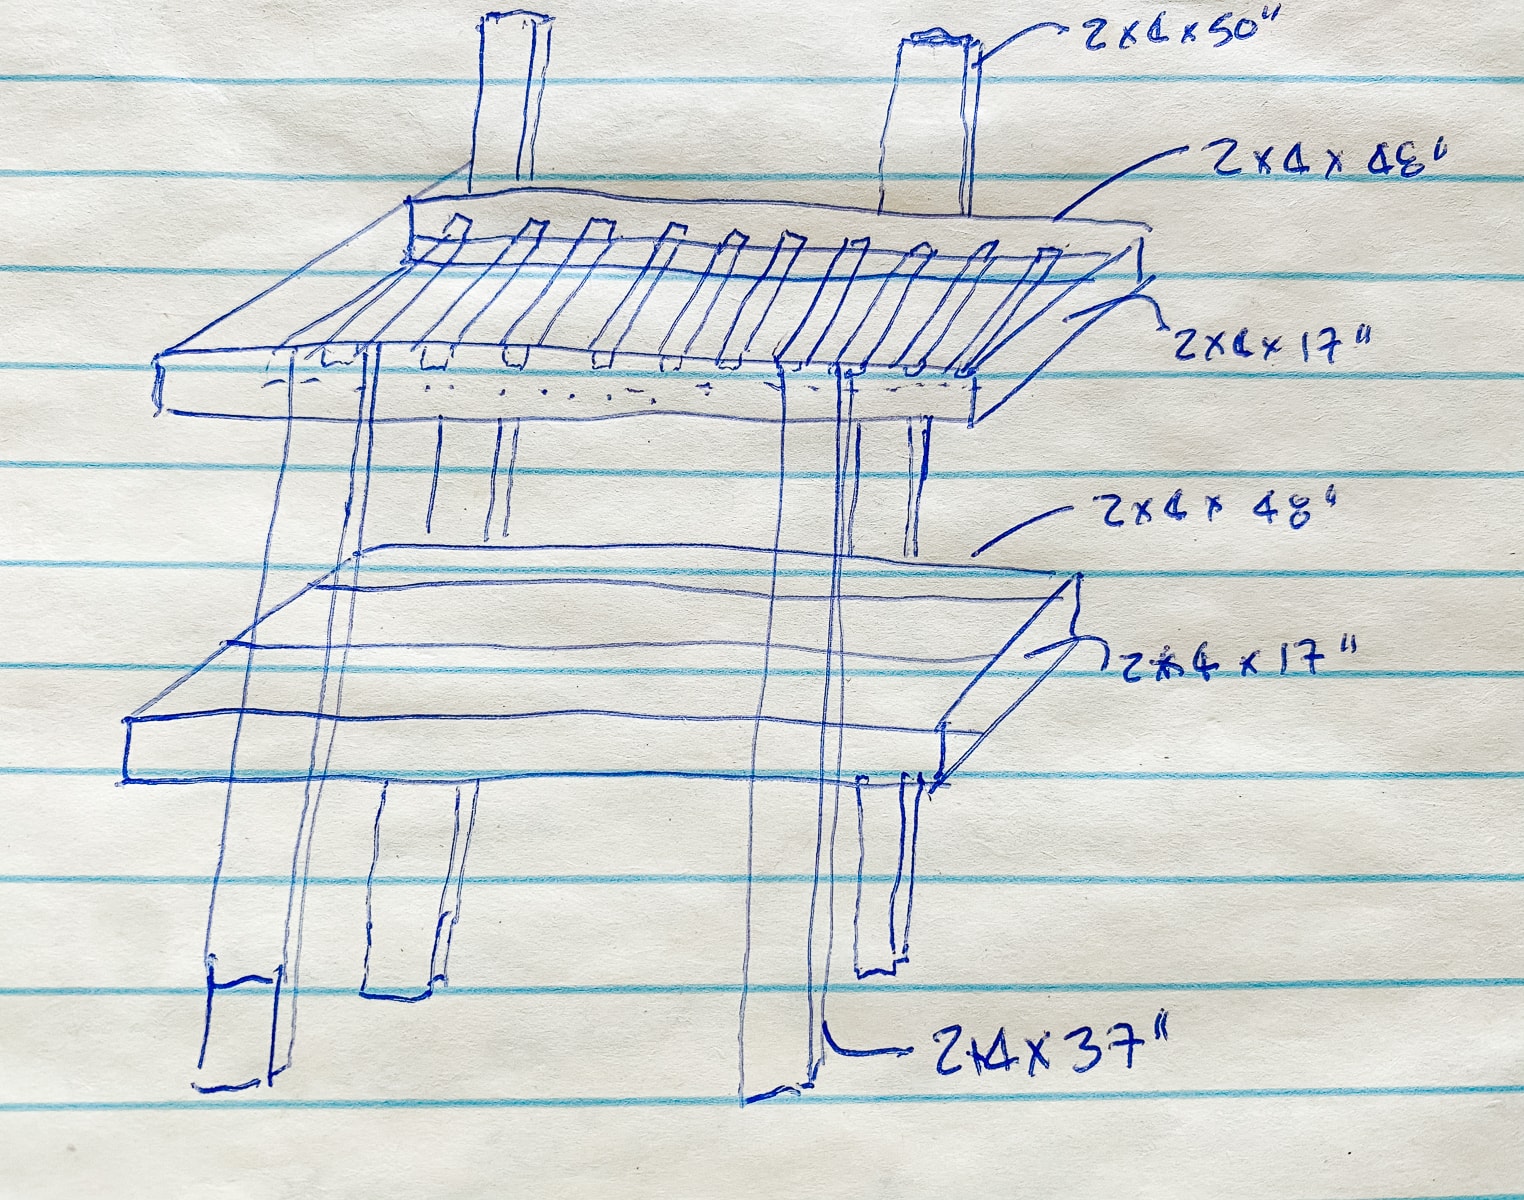
Material Cut Sheet
For Platforms
- 4 – 2 x 4 – 48″
- 4 – 2 x 4 – 17″
- 17 – 2 x 2 – 14″
- 2 – 2 x 2 – 48″
- 3 – 1 x 6 – 48″
- 6 – 8 – National Hardware Wide Corner Braces
For Supports
- 2 – 2 x 4 – 37″
- 2 – 2 x 4 – 50″
For Back Support
- 1 – 1 x 6 – 50″
Here’s a rough sketch of our design and it’s always helpful to have a visual before you being a diy project!
Directions For Building A Simple Rolling Potting Bench
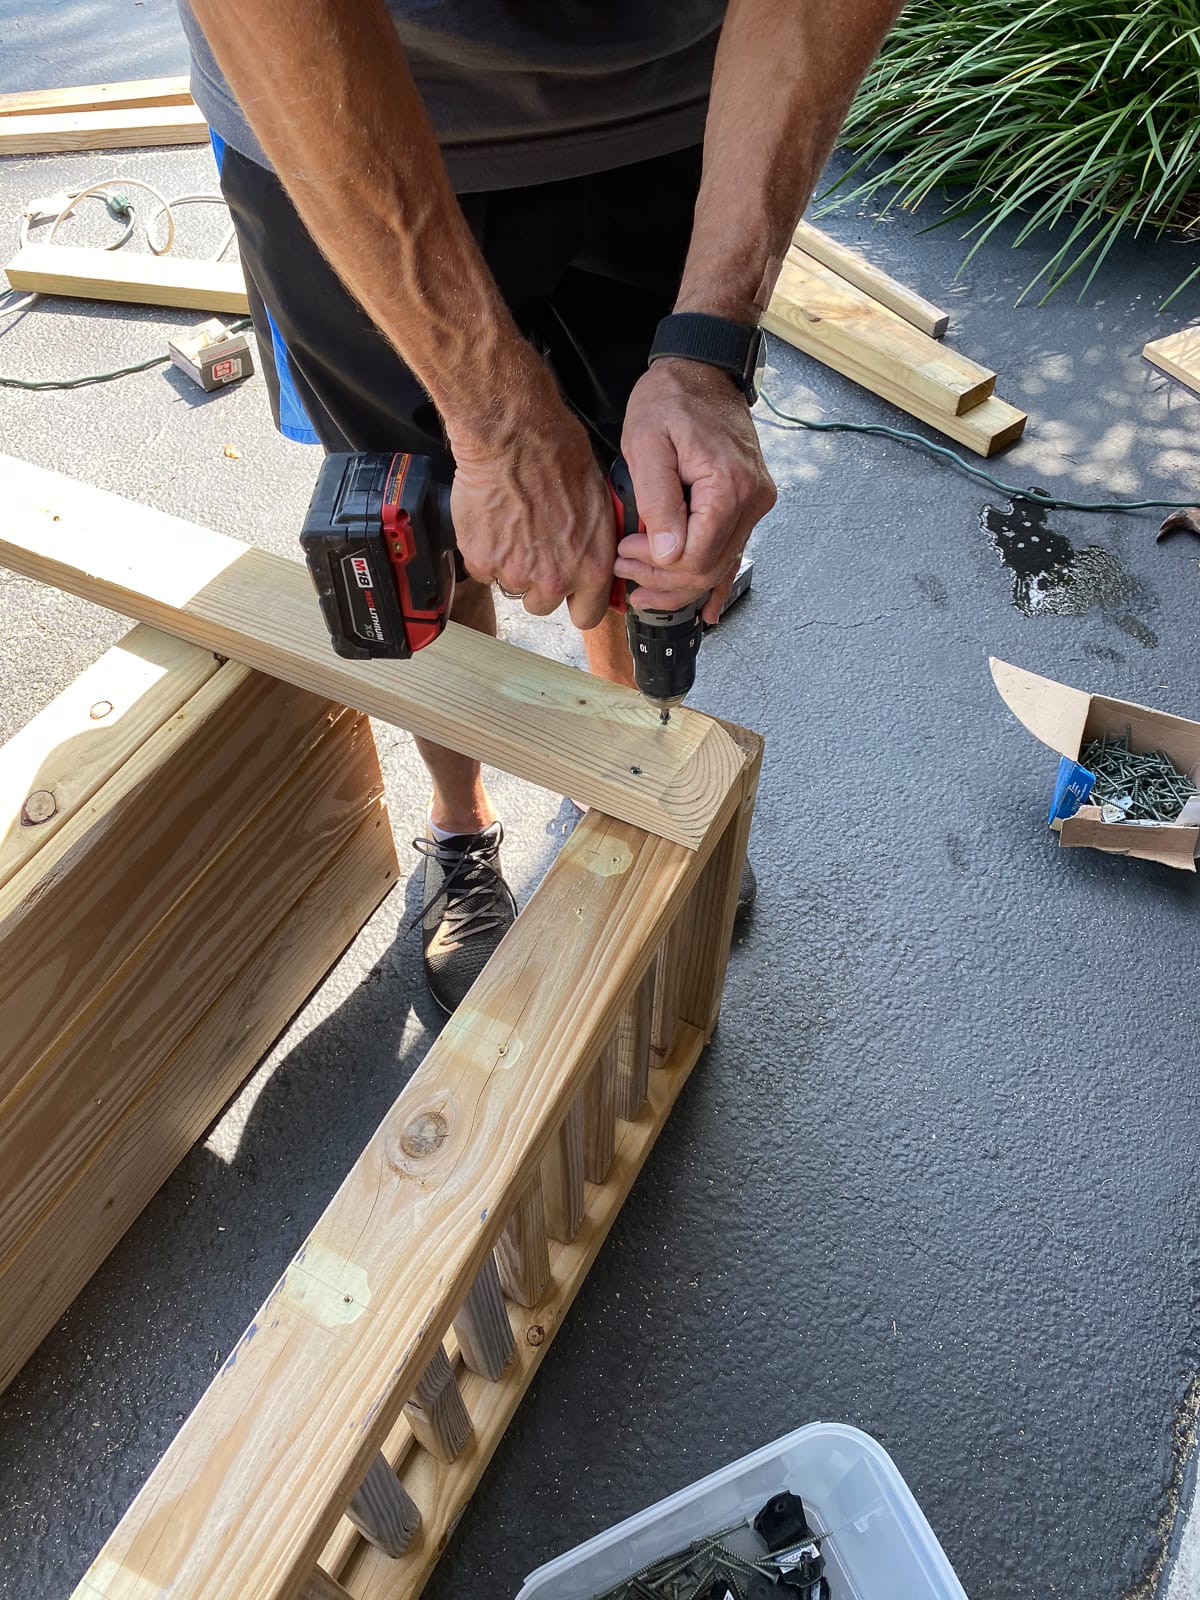
Build the boxes that will hold the platform shelves first.
Take the 4 – 48″ 2 x 4’s and the 4 – 17″ 2 x 4’s and screw them together with 2 1/2″ wood screws (utilizing a screw gun).
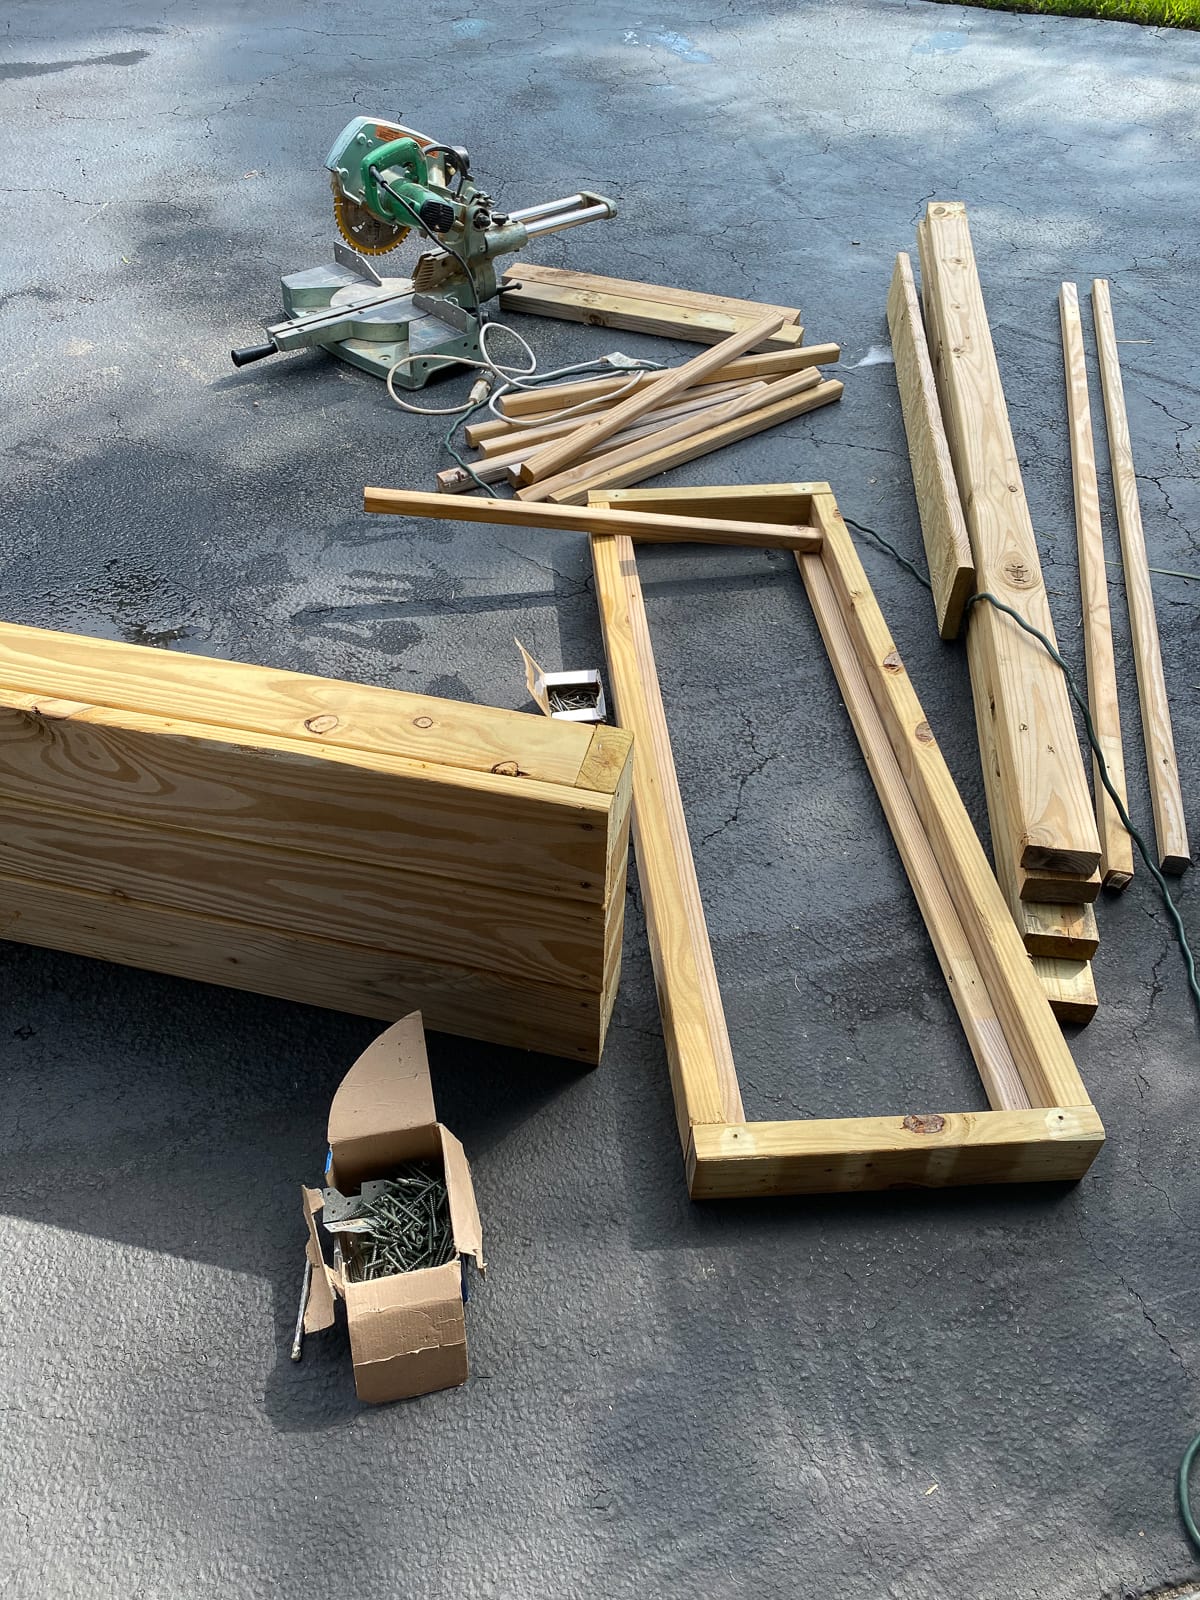
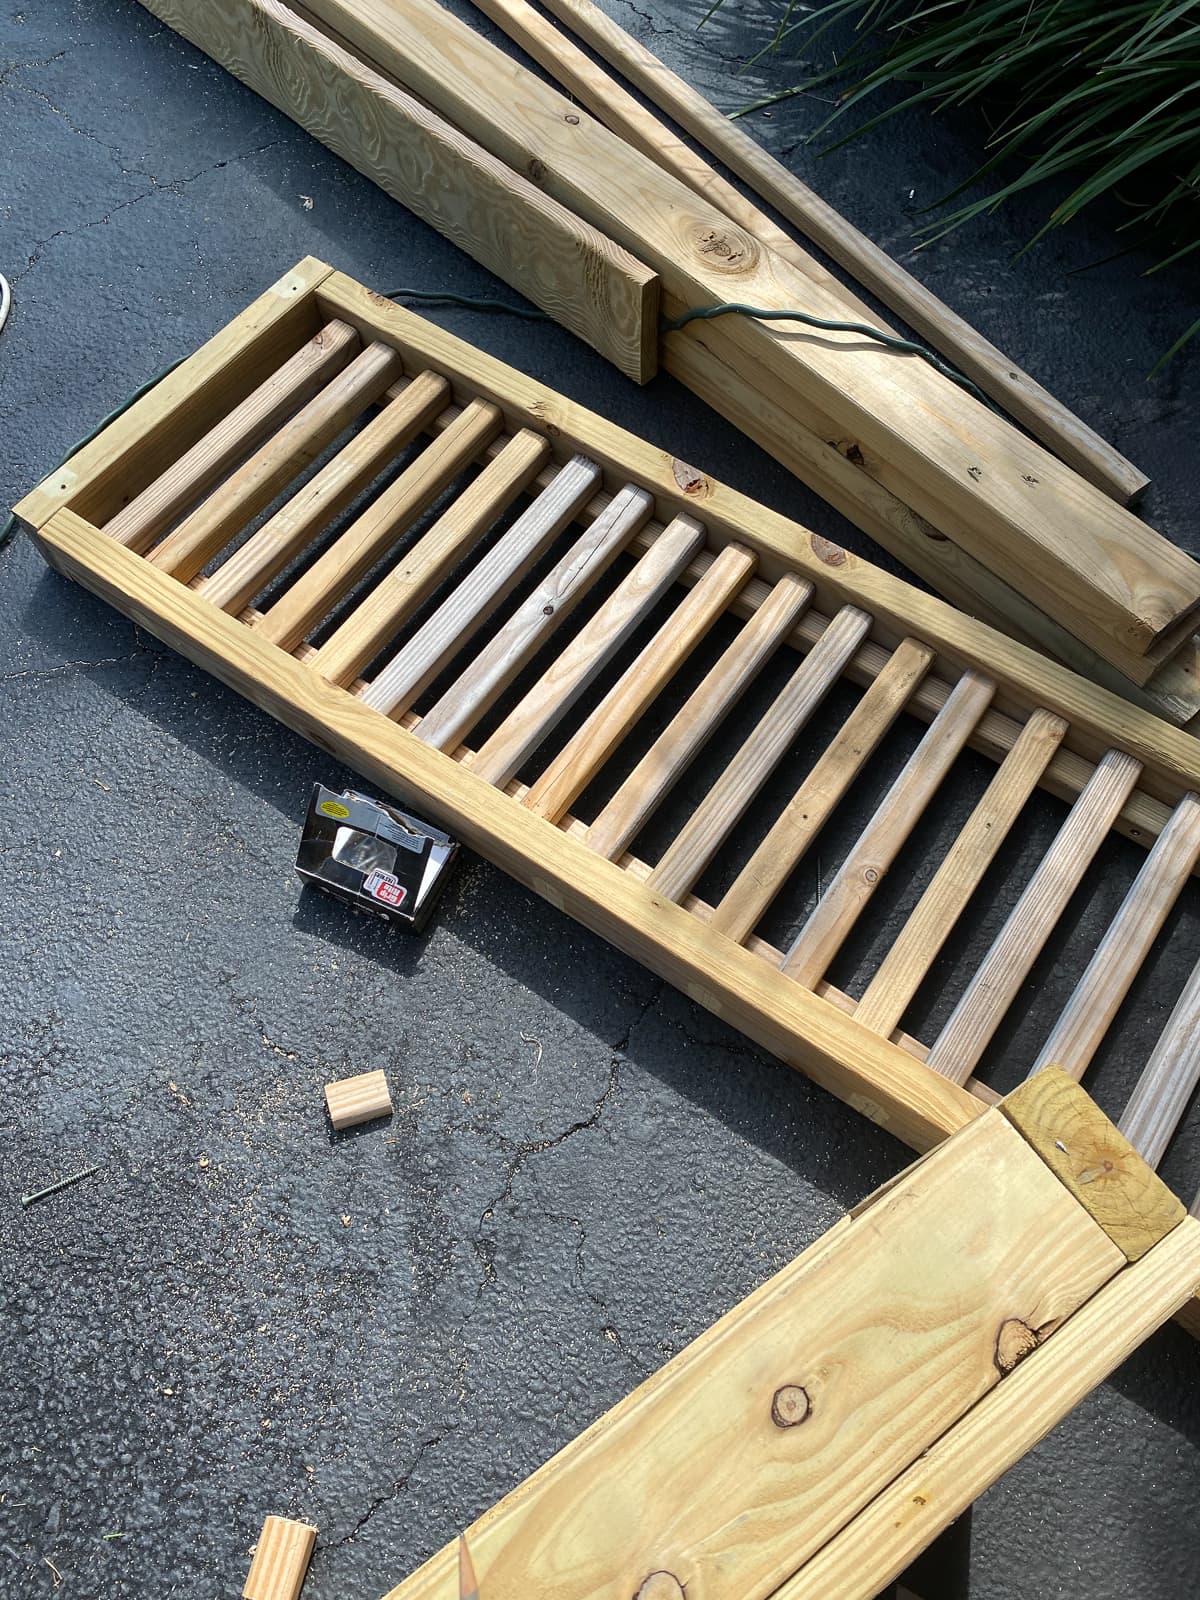
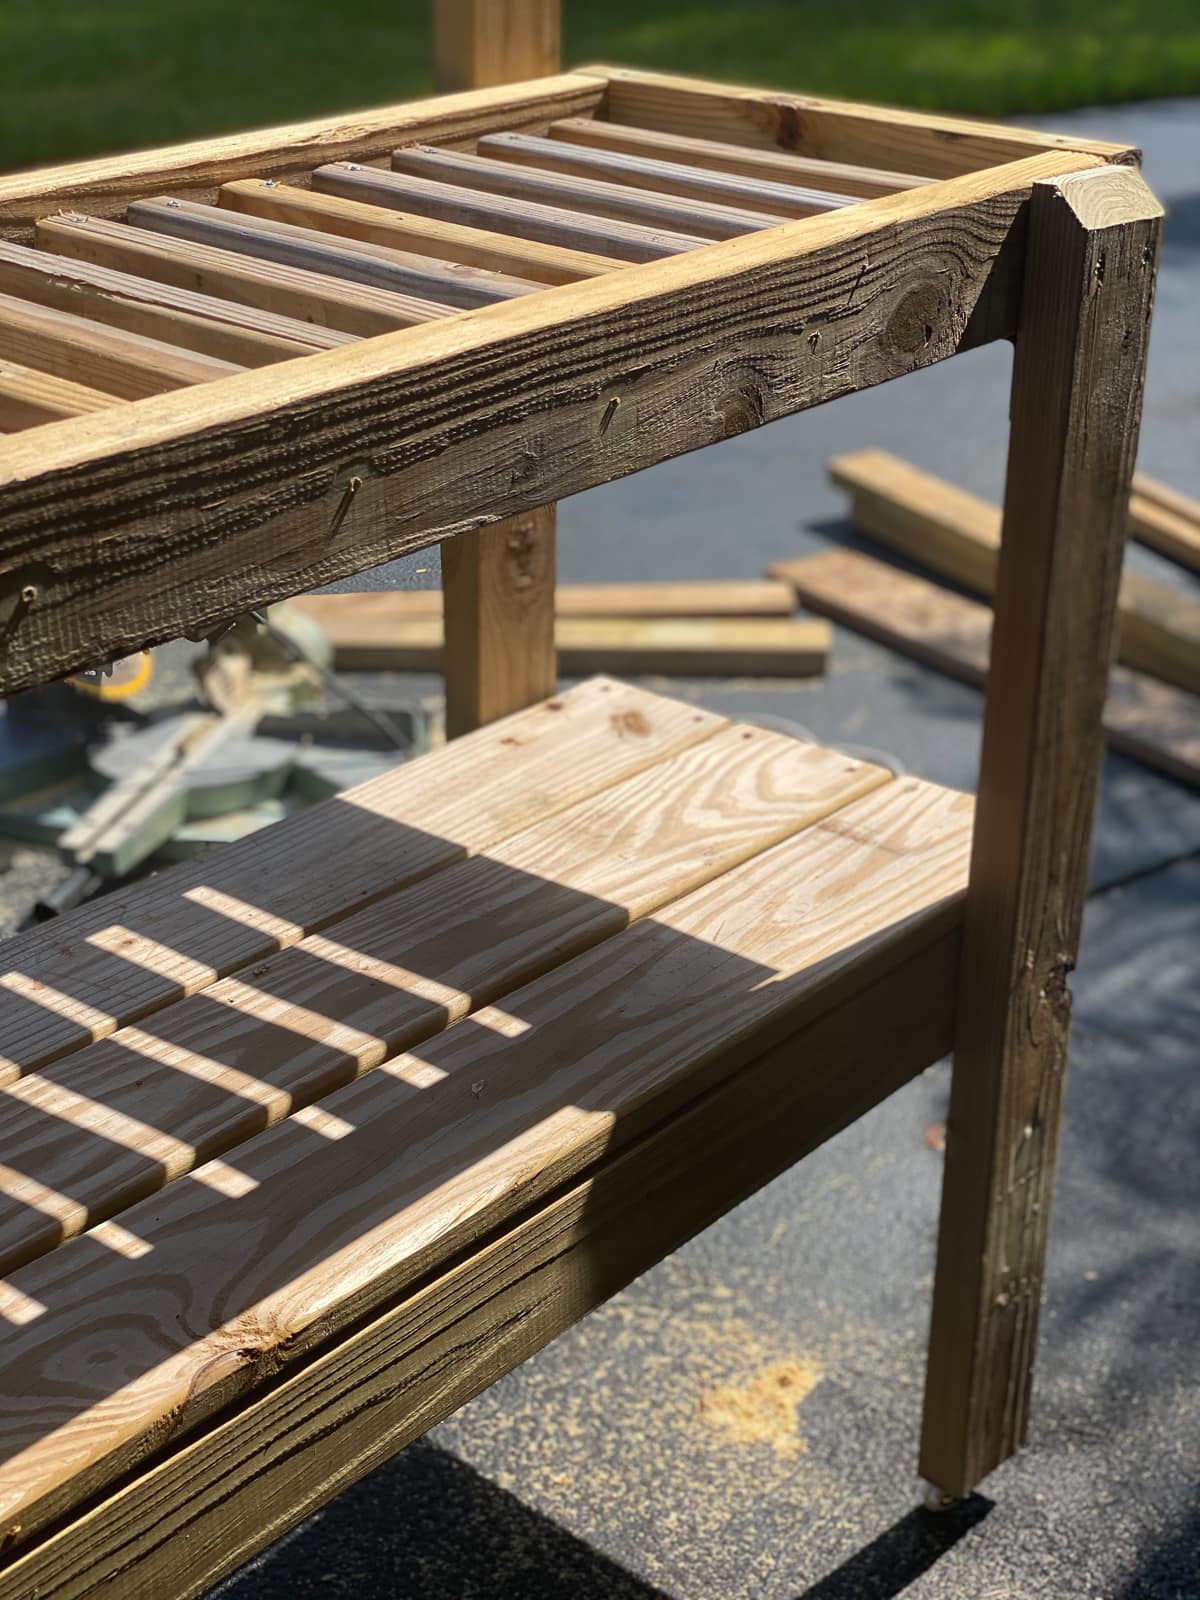
Adding the platforms
To build the lower platform, take the 3 – 1 x 6″ x 48″ pieces and screw them to the top of the frame with 1 1/2″ screws.
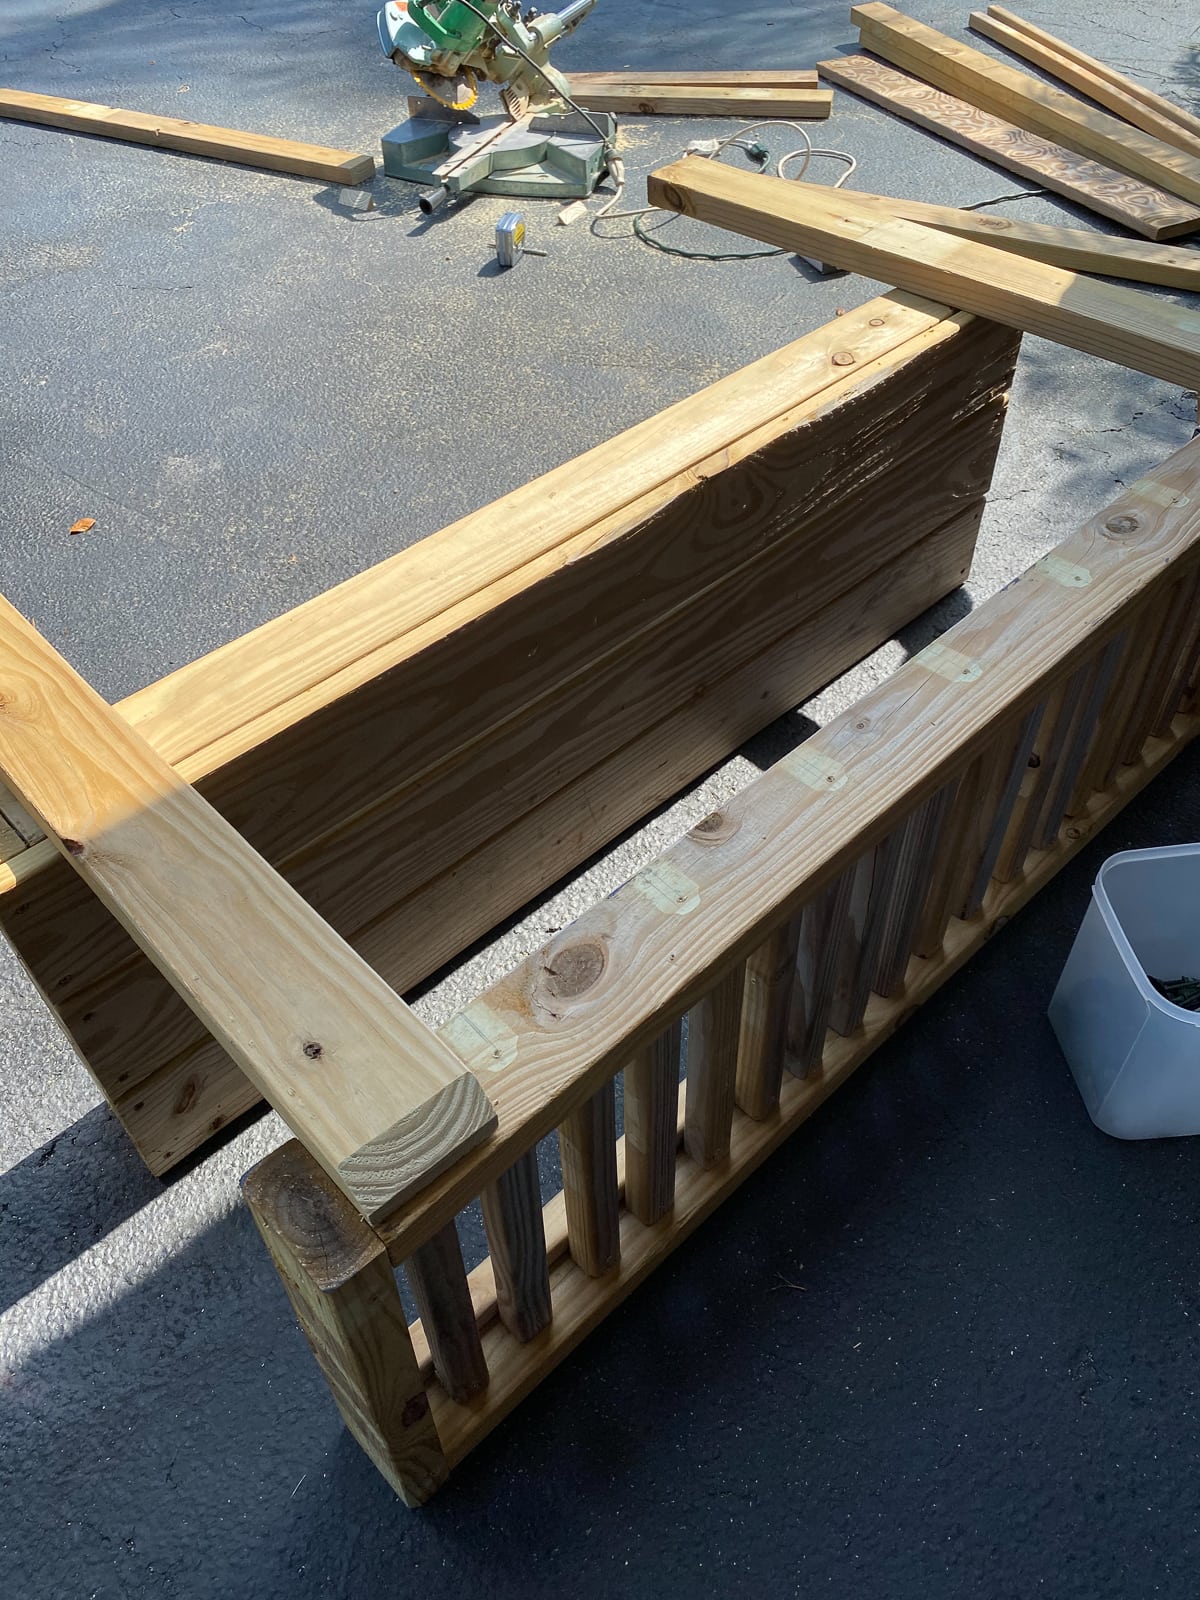
Next you’ll be building the supports that go inside the upper platform that forms the top of the potting table. Screw the 2 x 2″ x 48″ pieces to the 2 x 4″ x 48″ pieces on the inside of the box. This will provide the support for the 2 x 2 cross pieces, which will make the platform.
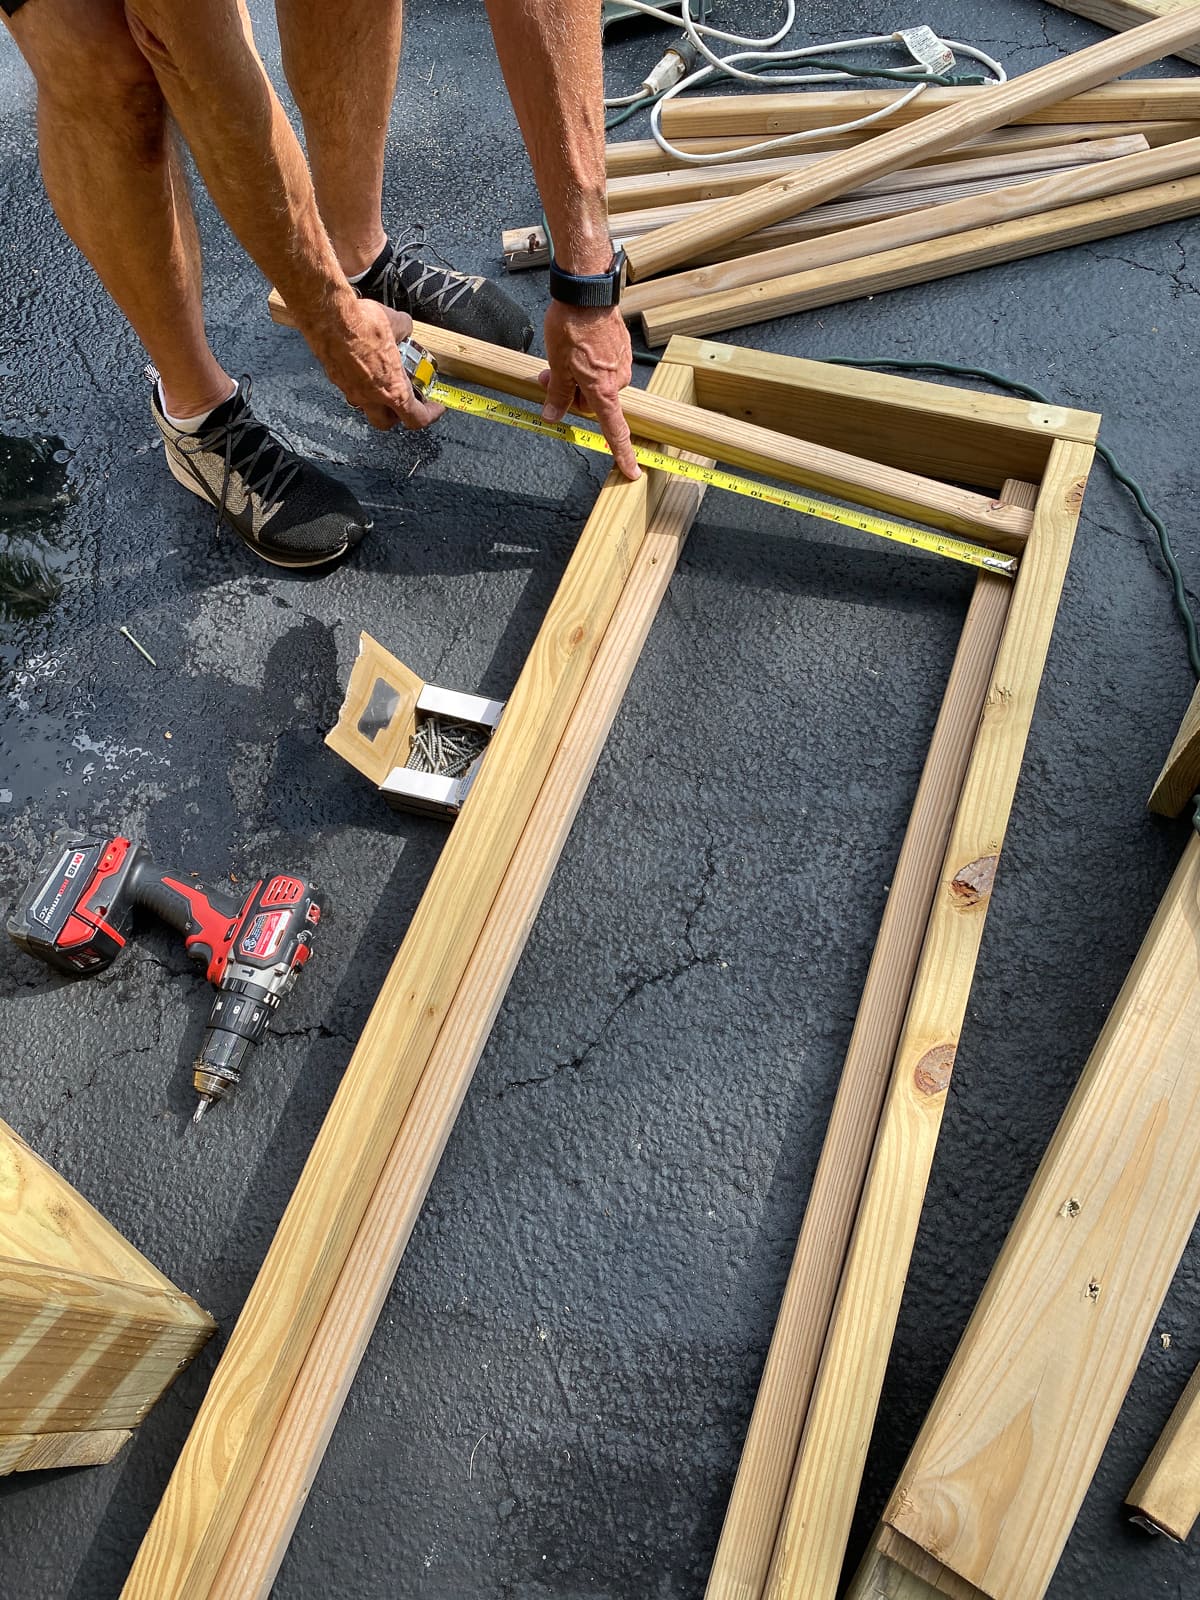
Screw the 17″ 2 x 2 cross pieces to the 2 x 2 supports inside the frame.
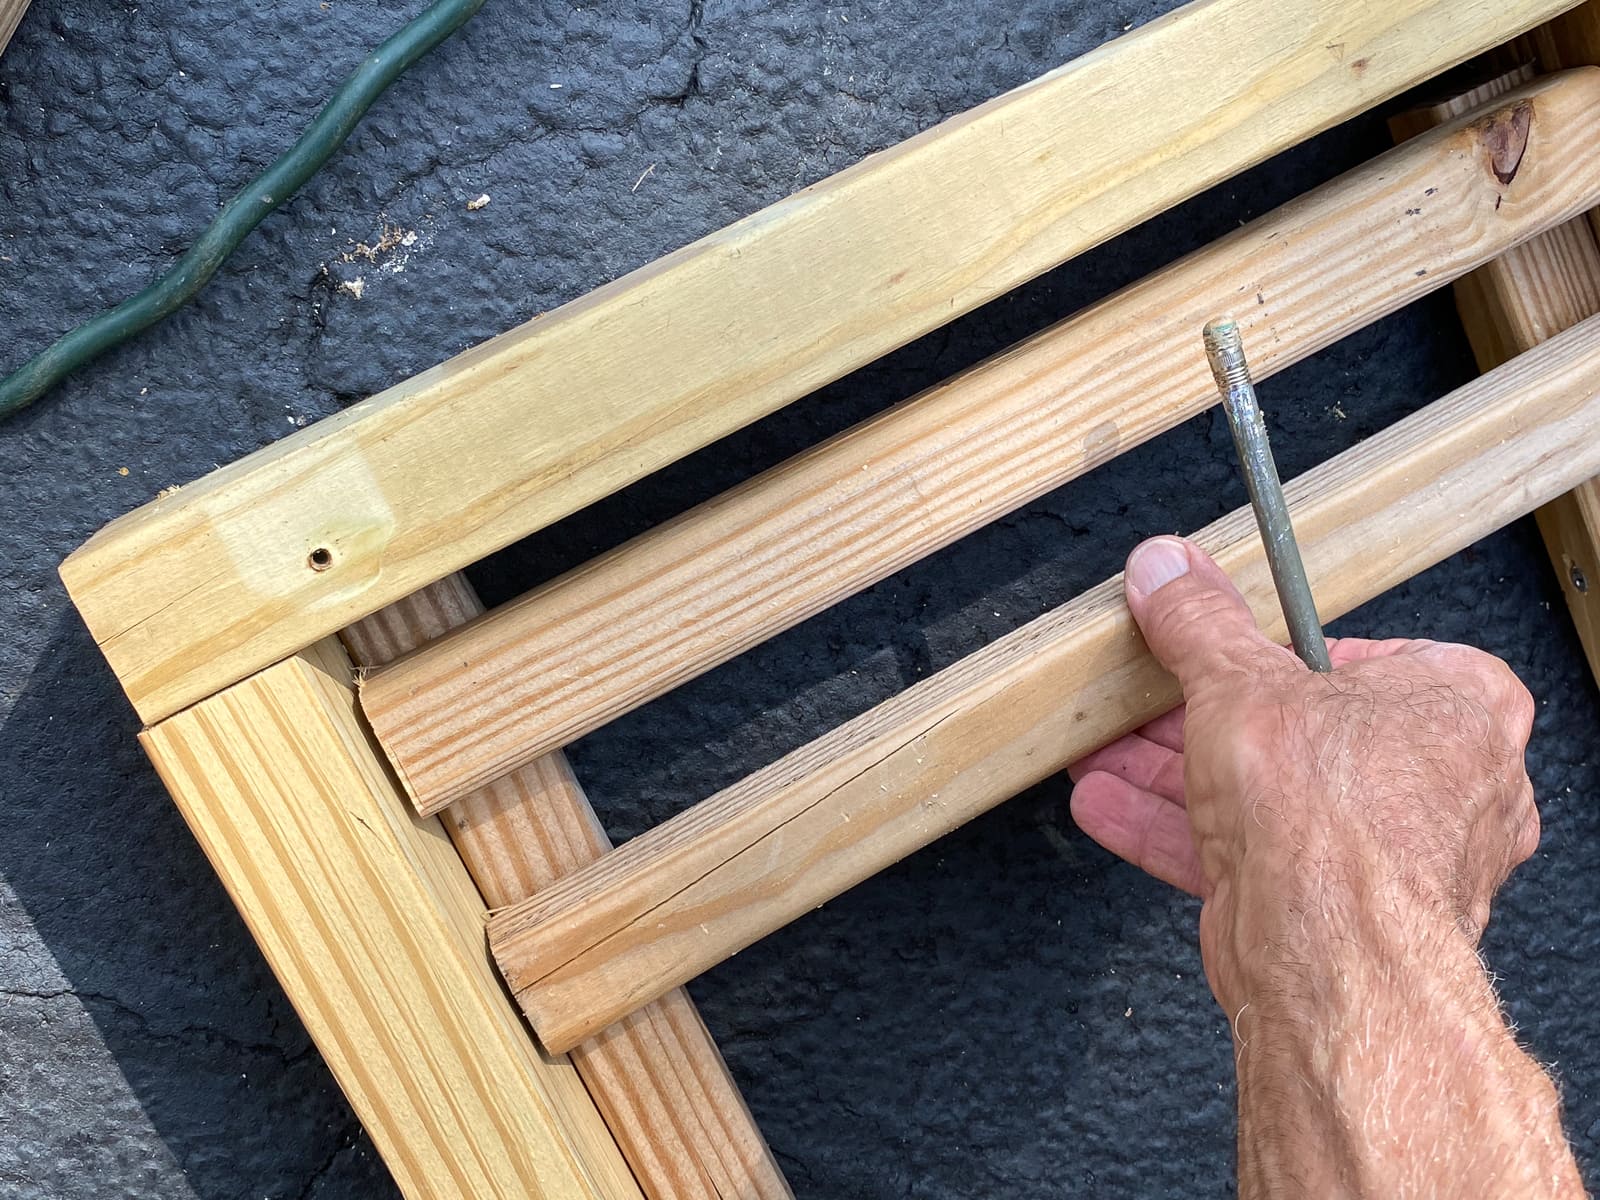
The platforms are now ready to be attached to the frame of the rolling potting bench.
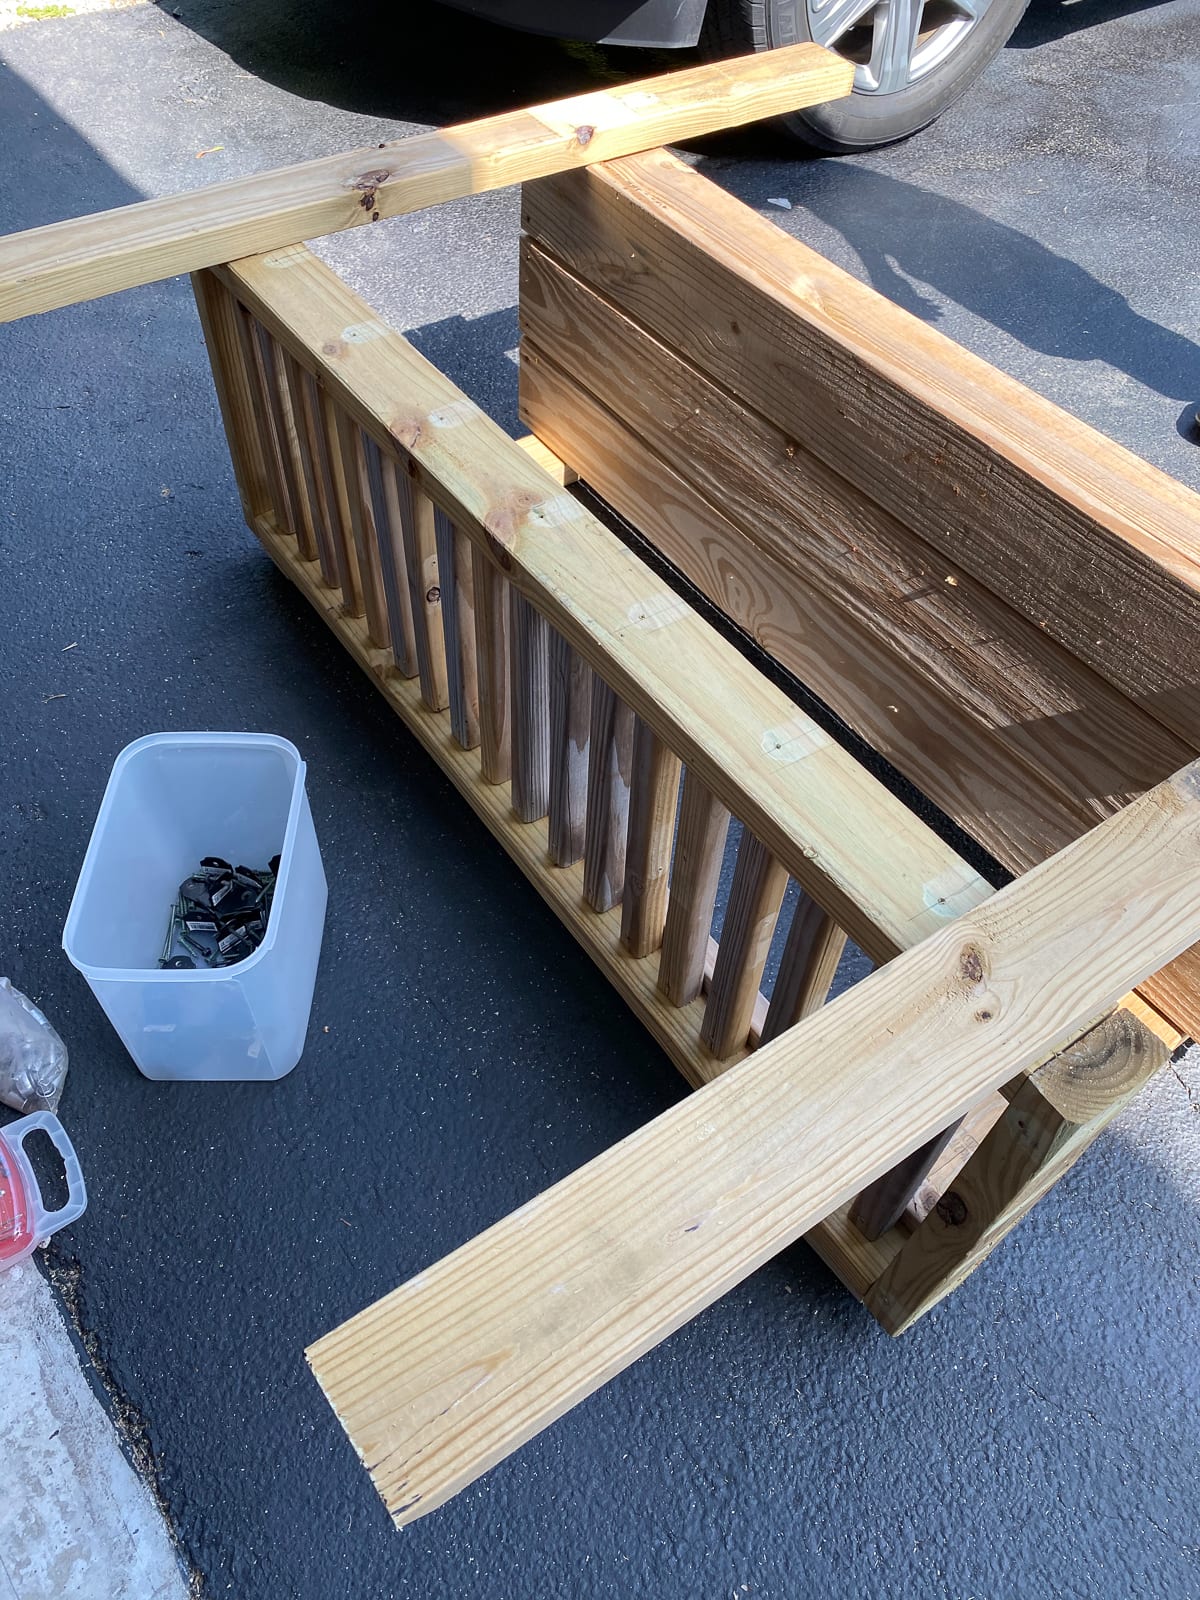
Attaching the legs
Stand the two boxes that you have just built parallel to each other on the ground. The reason for this is so that you can attach the legs.
Place the boxes approximately 16″ apart.
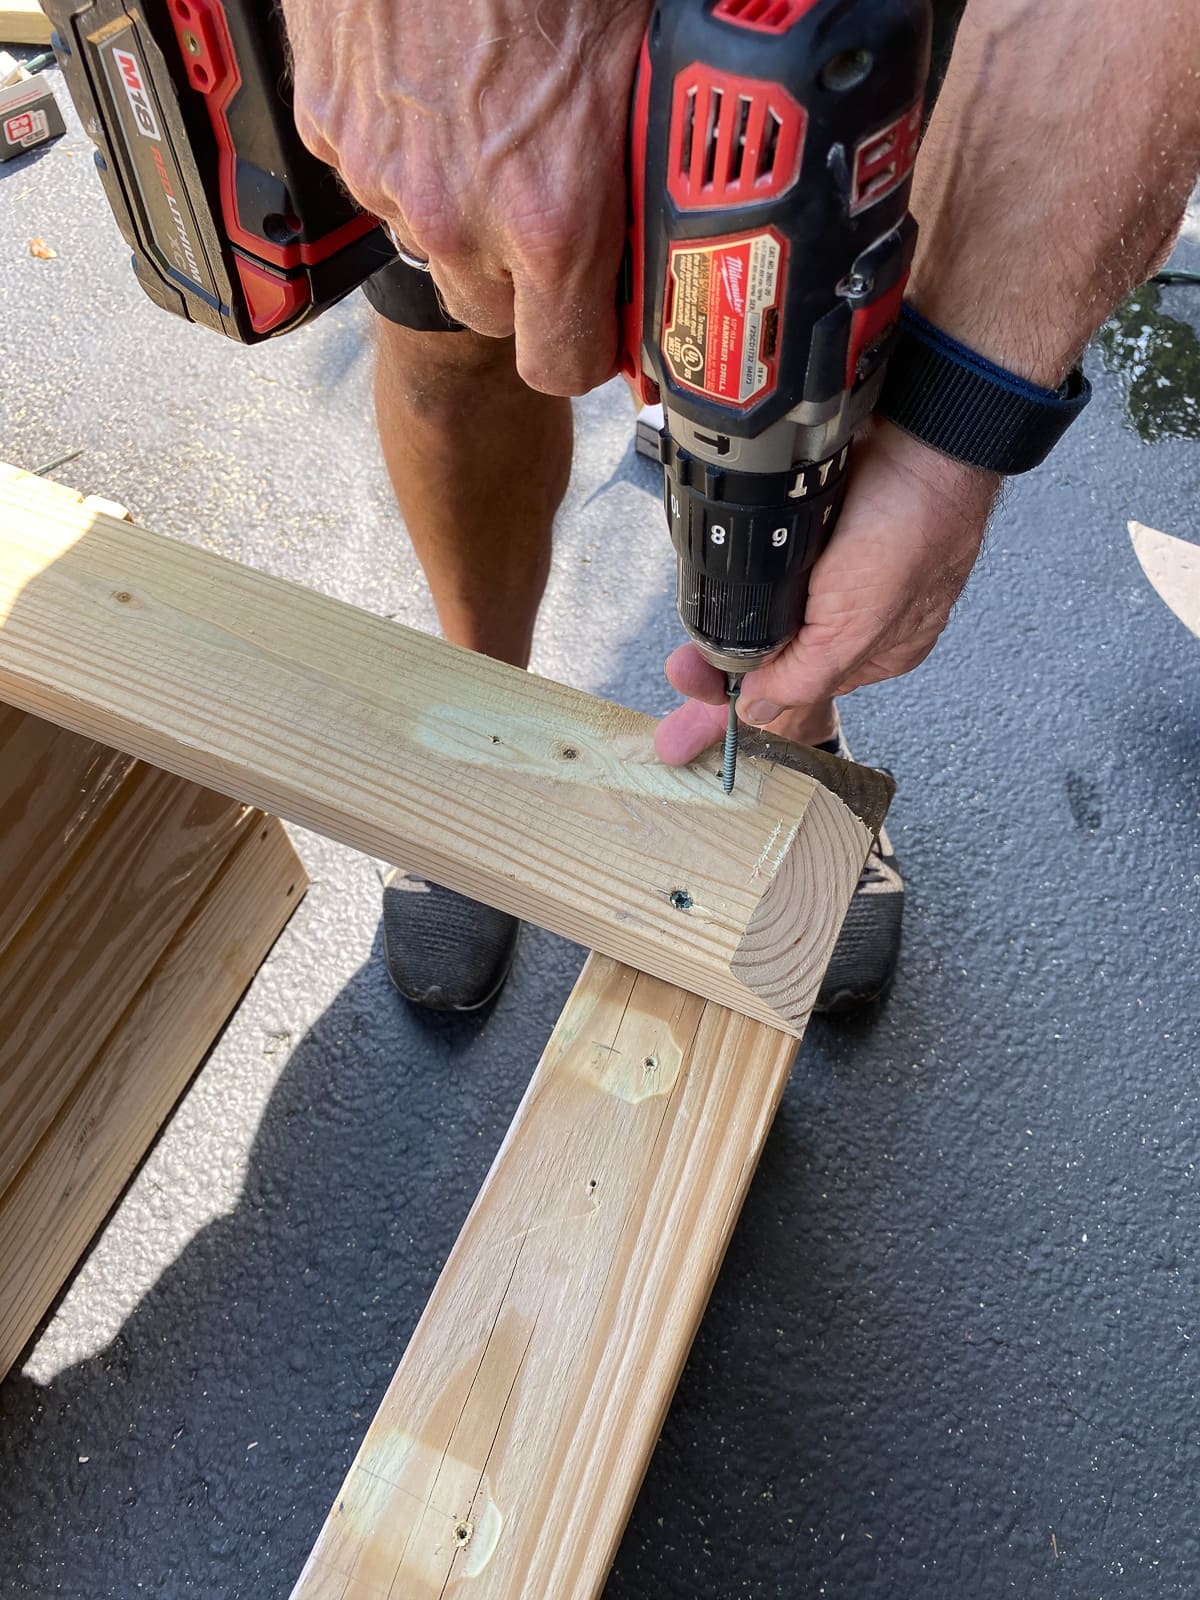
Take the two 37″ supports (legs) and place them so that the top of the 2 x 4 is aligned with the top box. Screw the 2 x 4’s to the platforms with 2 1/2″ screws.
Turn the platforms over and take the 50″ supports and place them on the platforms. Make sure that you match the leg heights on both sides. Screw the 50″ supports to the platforms using 2 1/2″ screws.
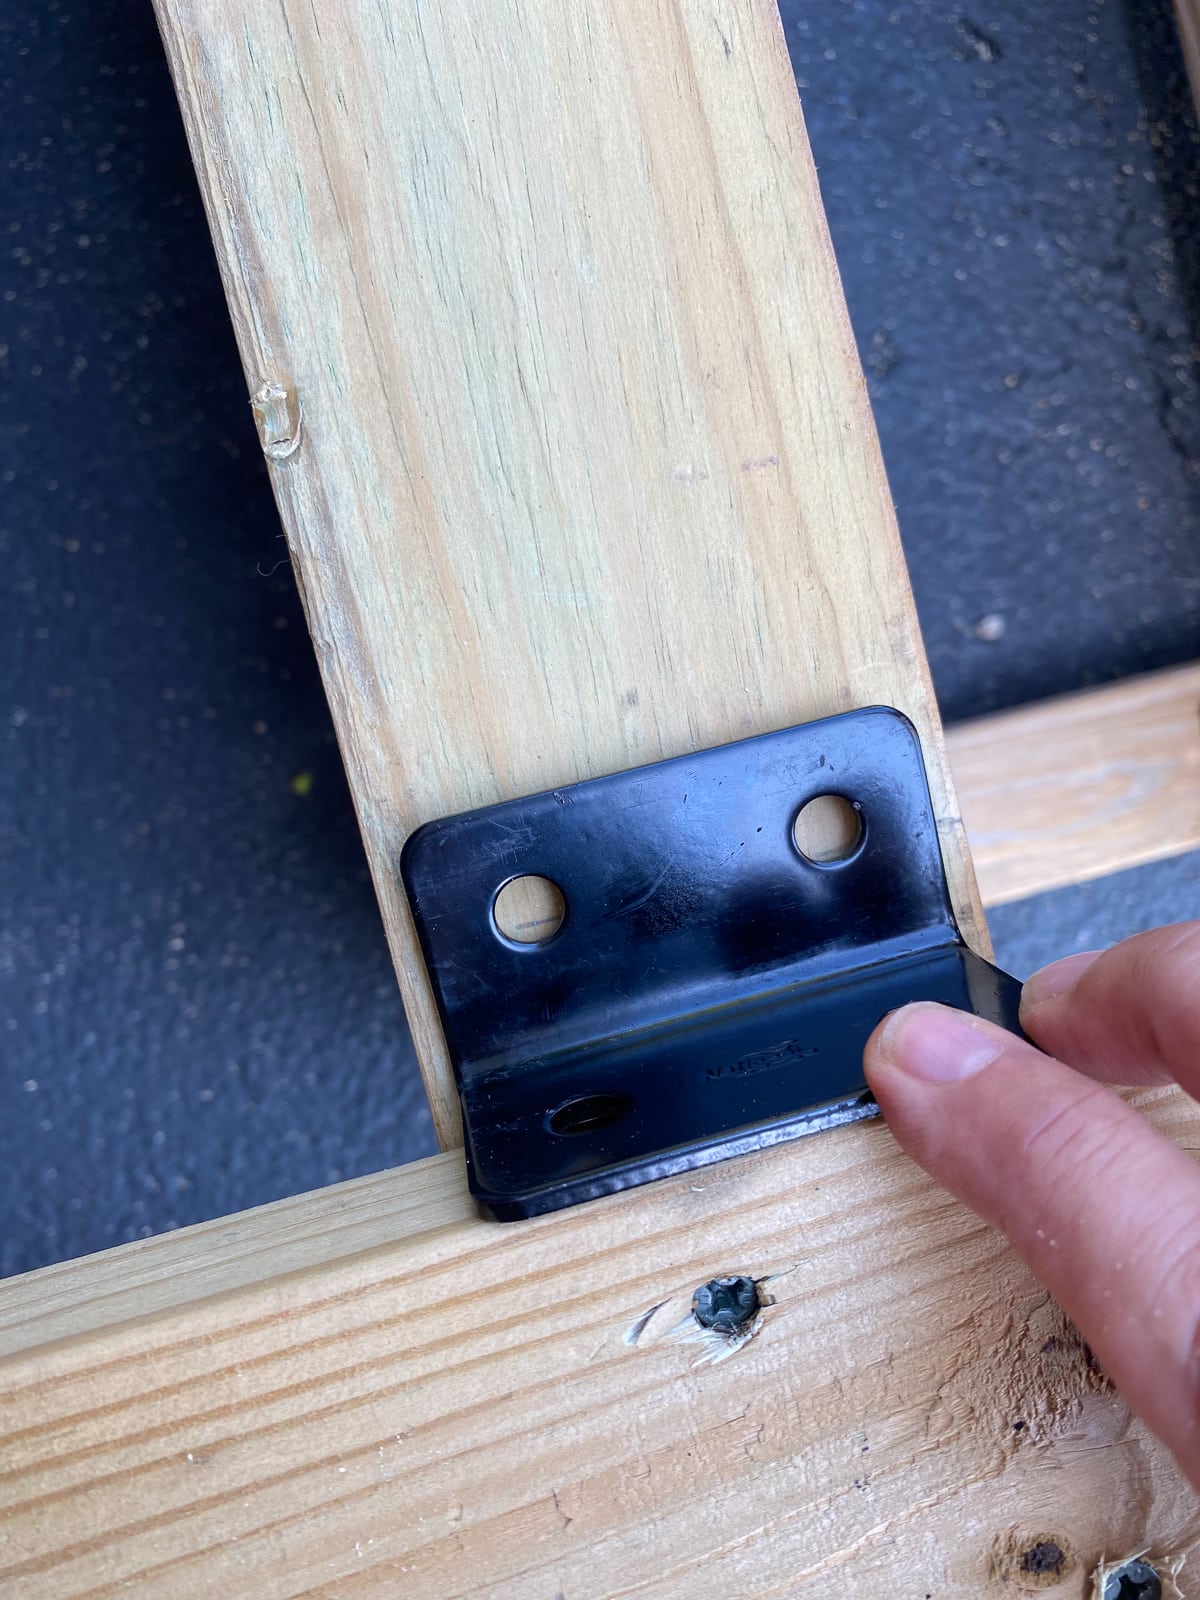
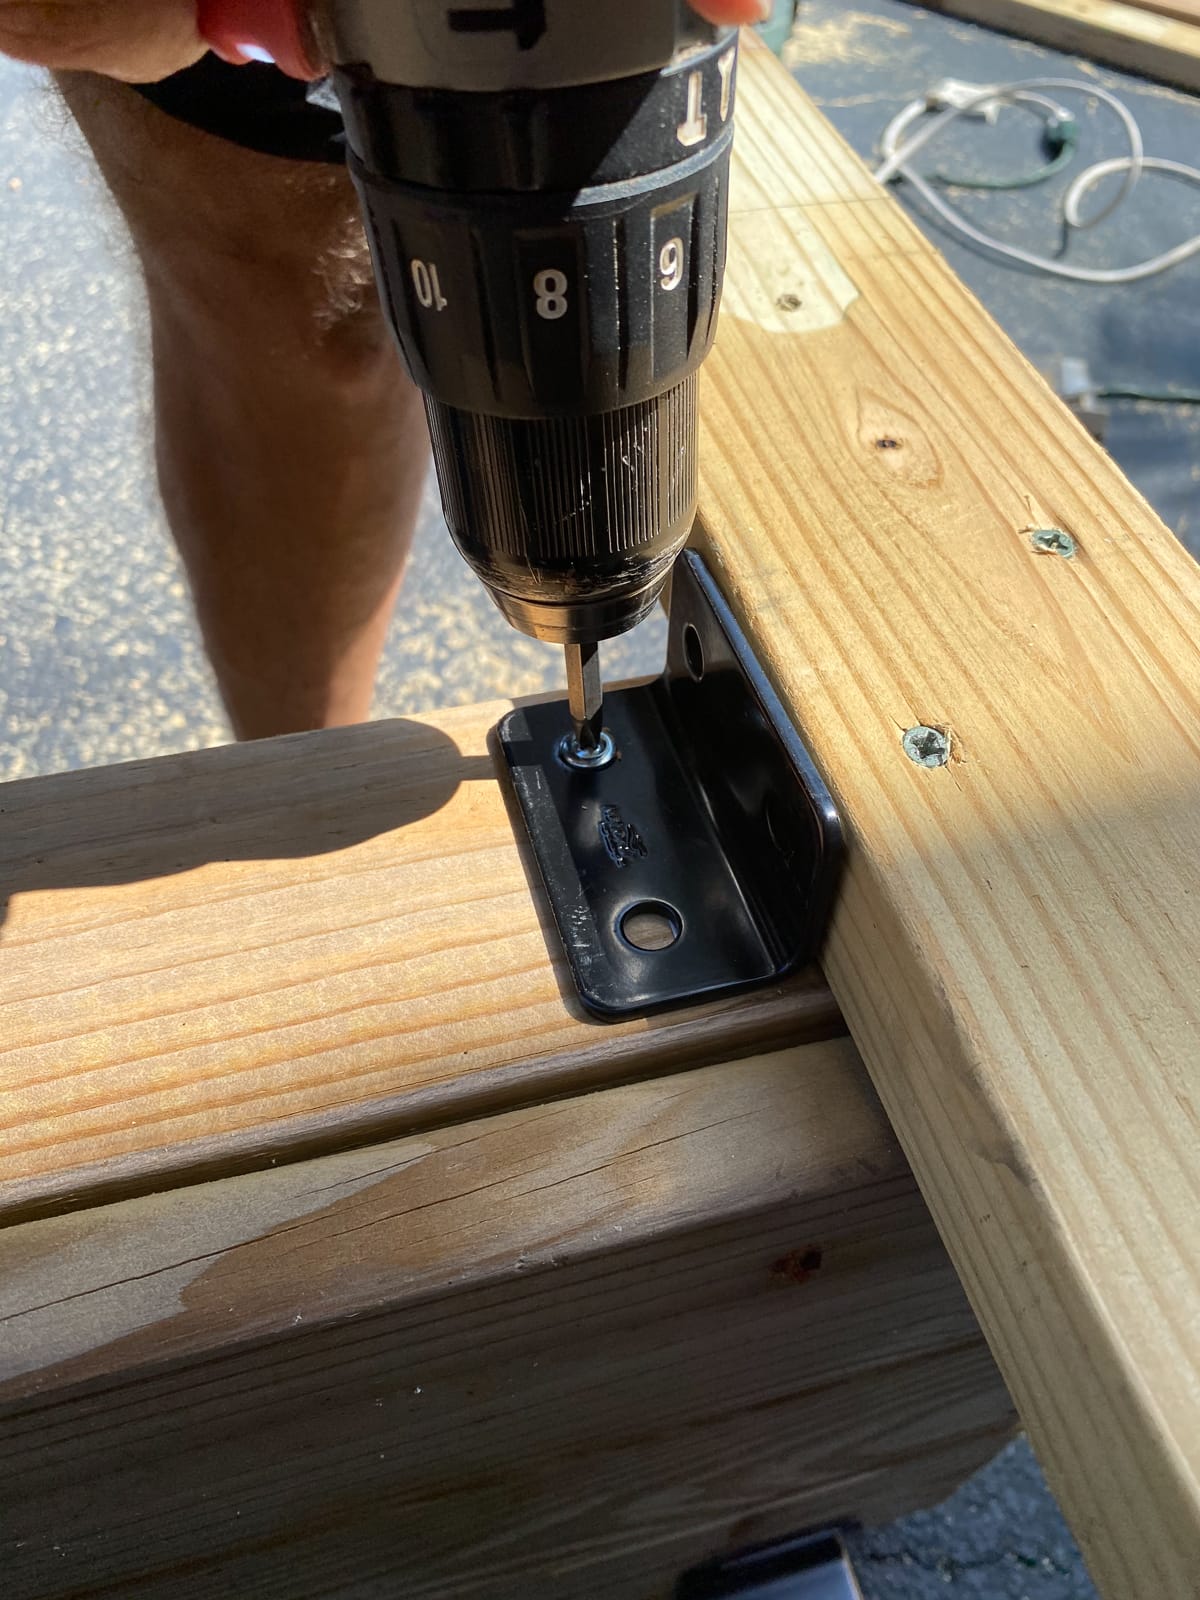
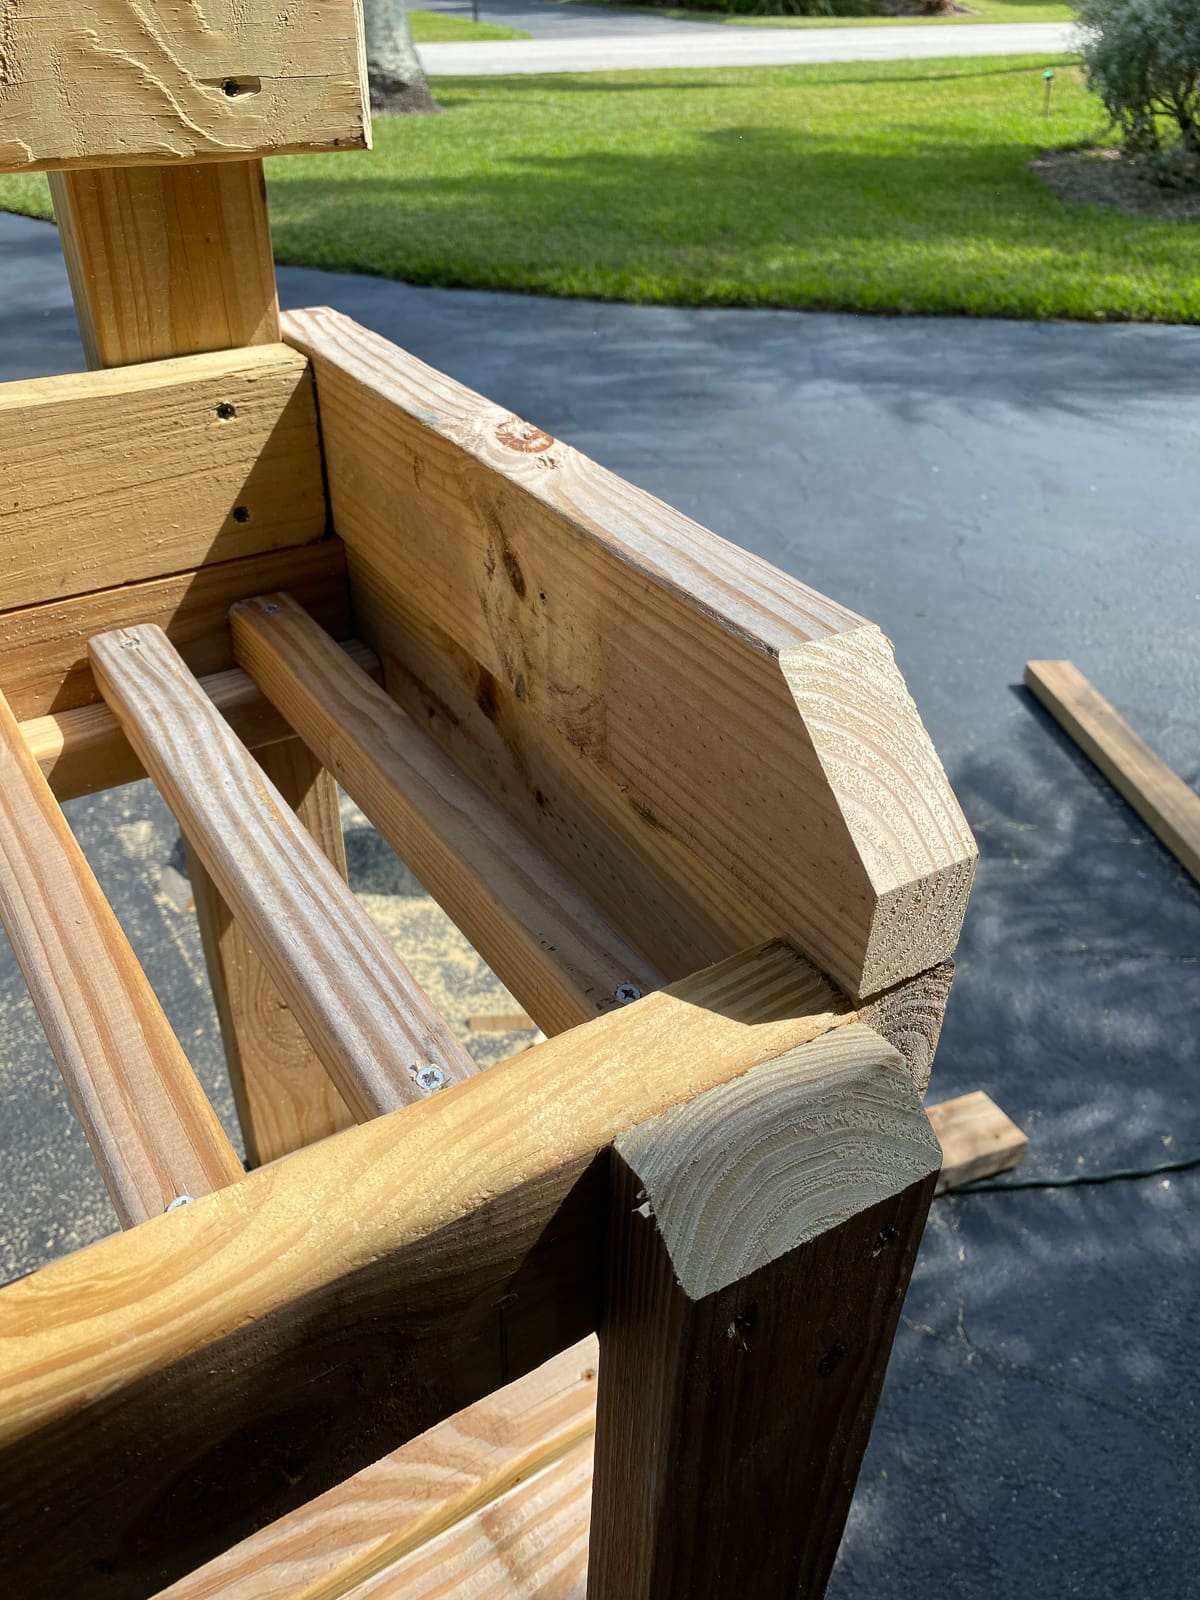
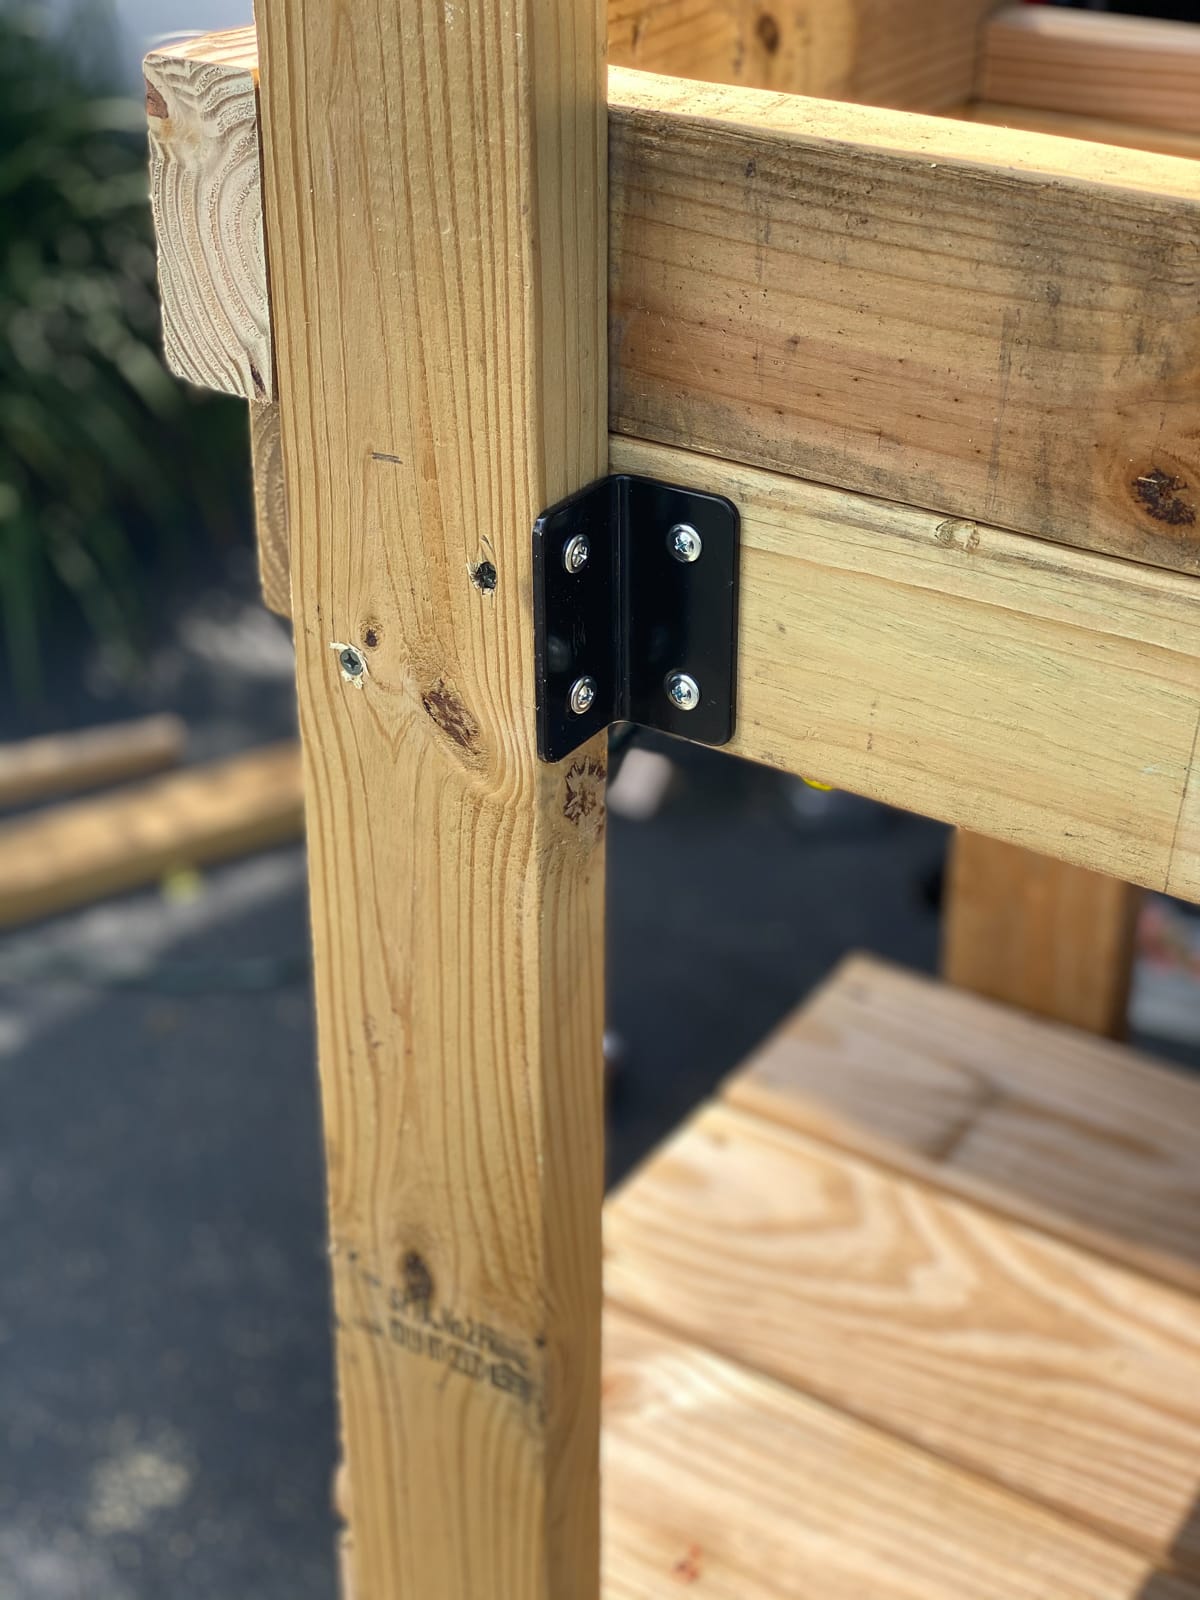
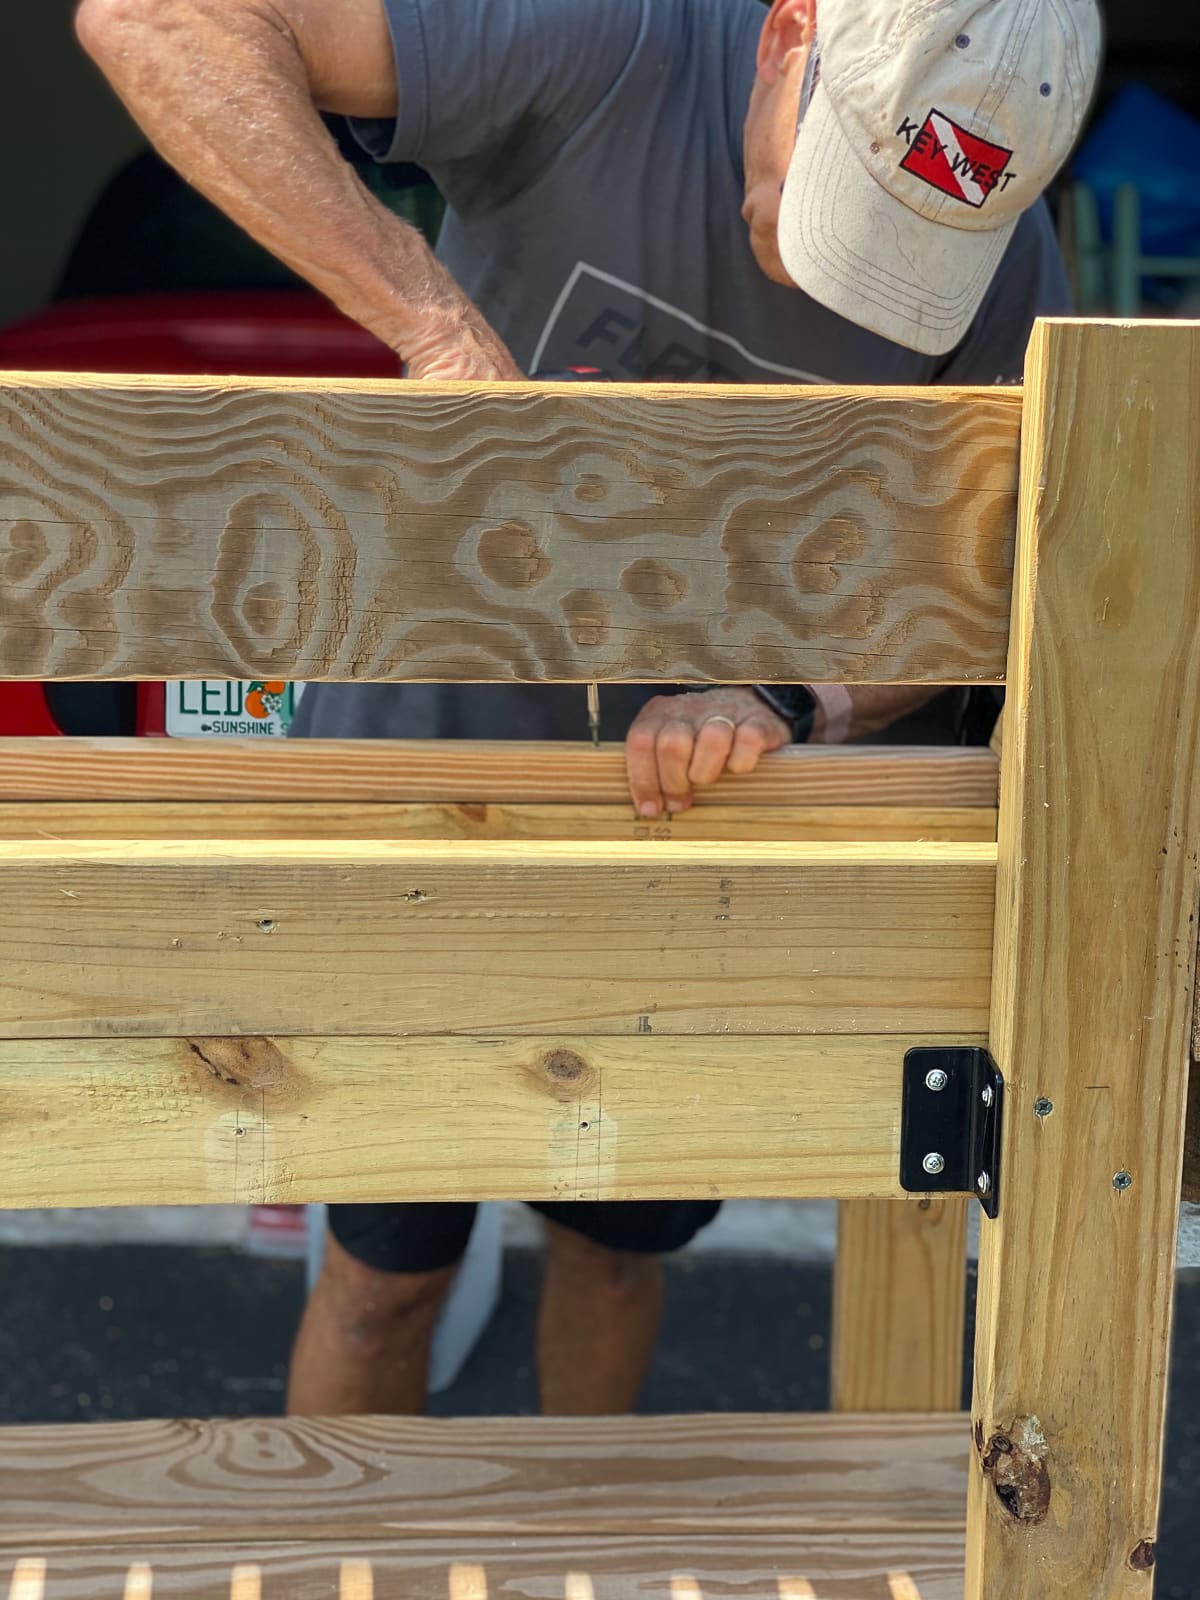
After attaching the legs, we added these all important National Hardware Wide Corner Braces to stabilize the corners. These are recommended by National Hardware to be used for reinforcing 90 degree angles by applying to the inside or outside of the corner.
They help to keep the rolling potting bench from wobbling since this is a heavy structure!

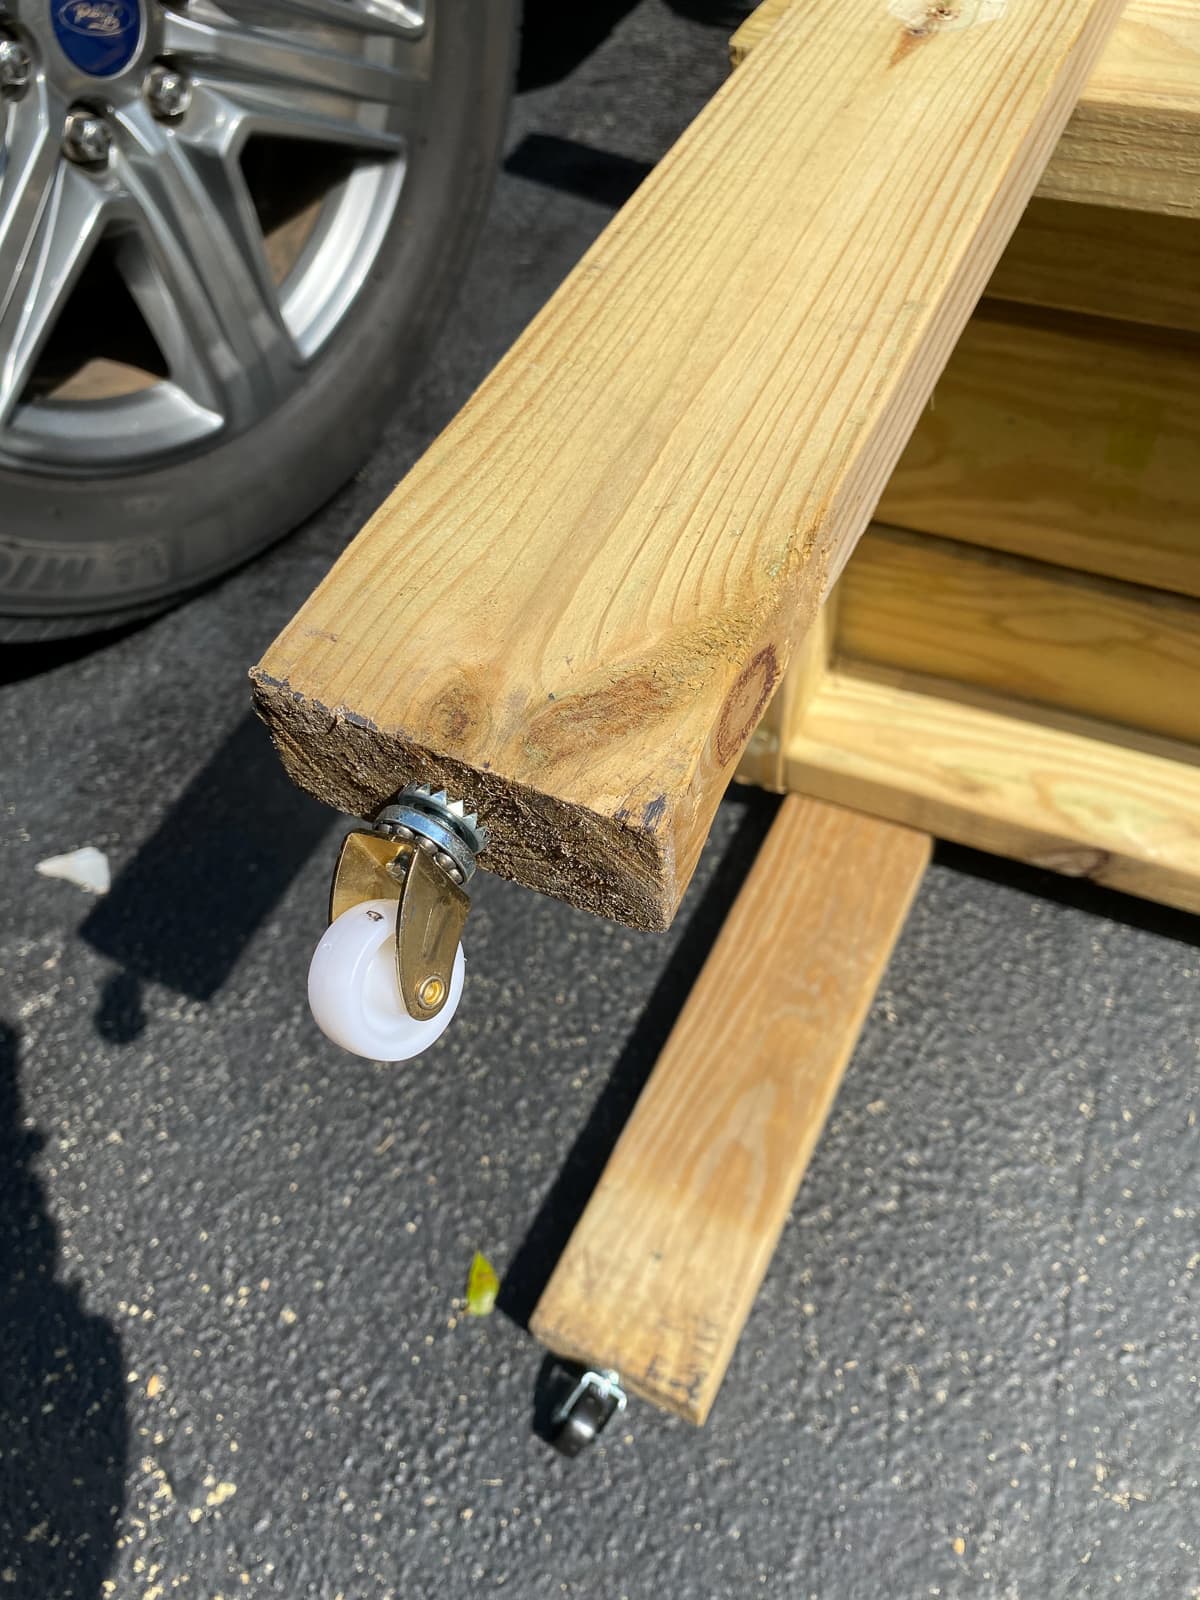
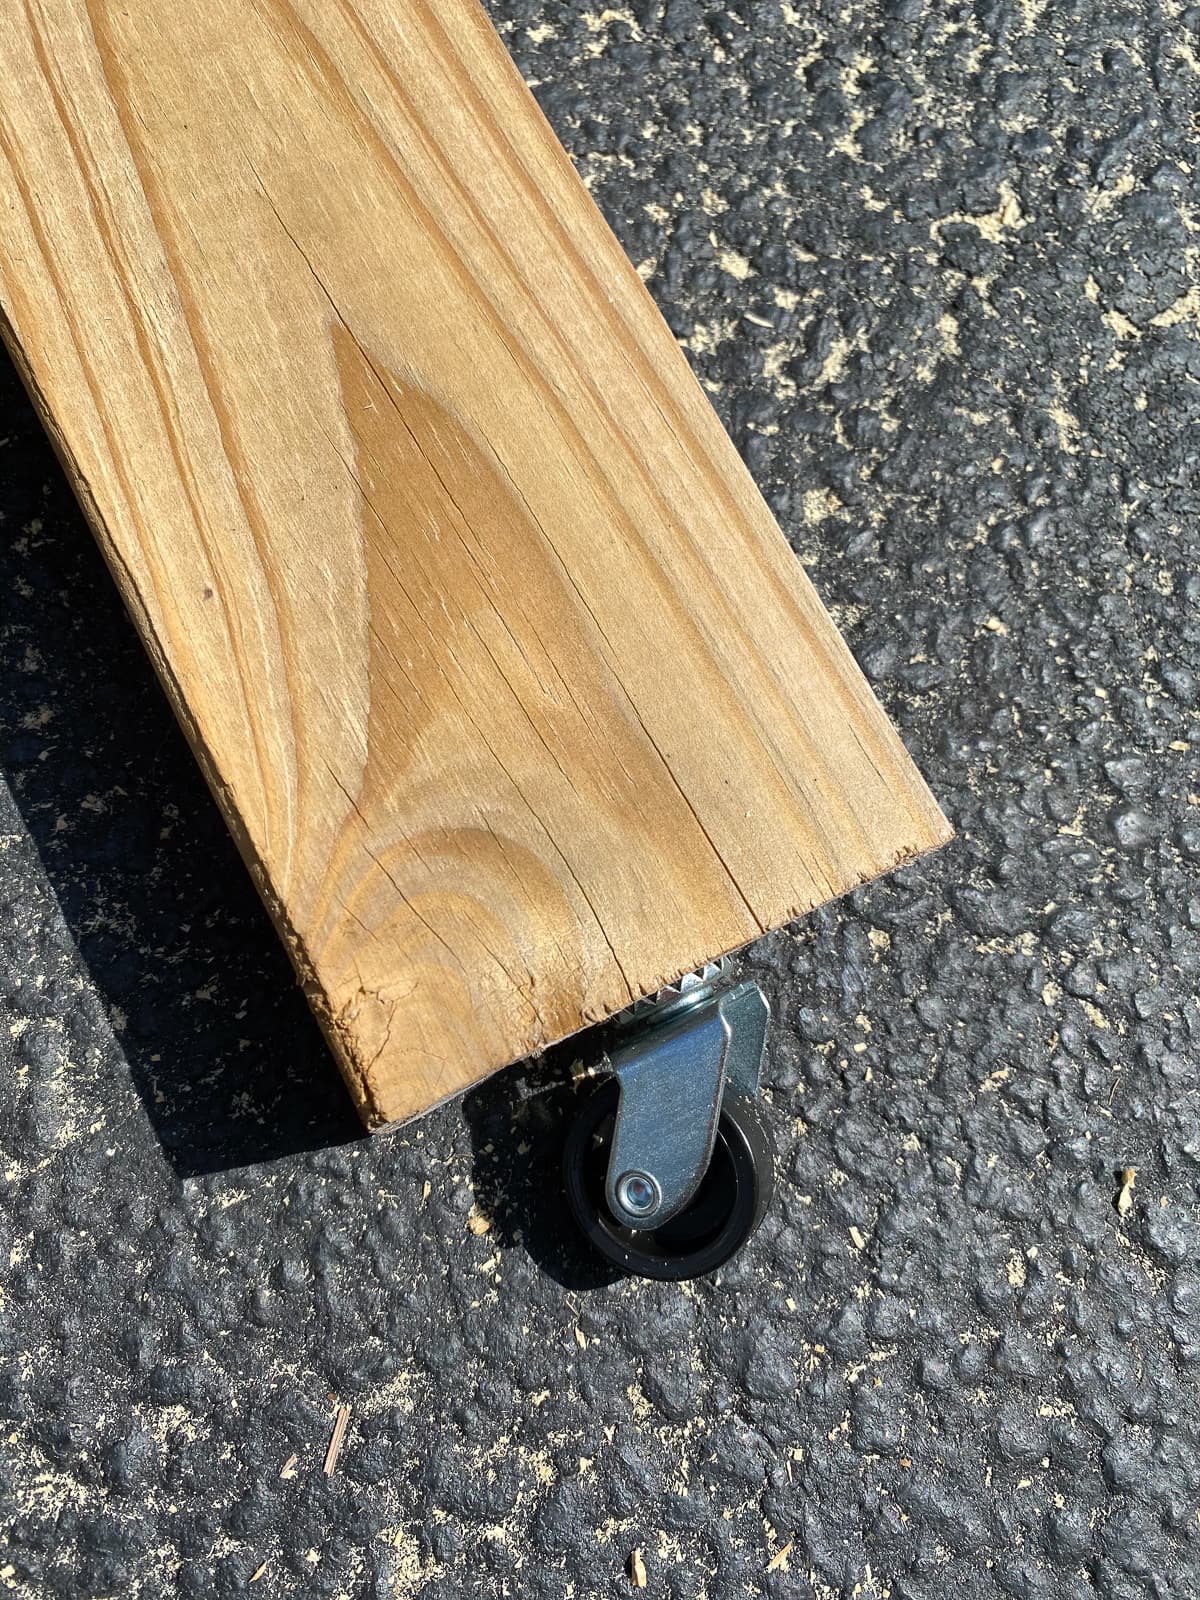
Add casters to the bottom of the legs to make this a true rolling potting bench. Once the casters have been added, stand the unit up. We had spare wheels and without a doubt you can see that they don’t match!
Attaching The Back Support Piece
Now you can attach the back piece to the 50″ uprights.

In addition to the existing structure, 2 x 4’s and 2 x 2’s were added to increase the depth of the upper platform.
We took the rolling potting bench out to a shaded area in the garden that is close the kitchen. My dream was to be able to just run right out there and snip away when herbs were needed for a recipe! I used some plastic planters from the garden section of the home improvement store that had drainage holes. In went my potting soil along with mint, basil, parsley, cilantro and oregano too. Those are the herbs that do well in South Florida, but if you decide to make one of these rolling potting benches check and see what you can grow in your region.
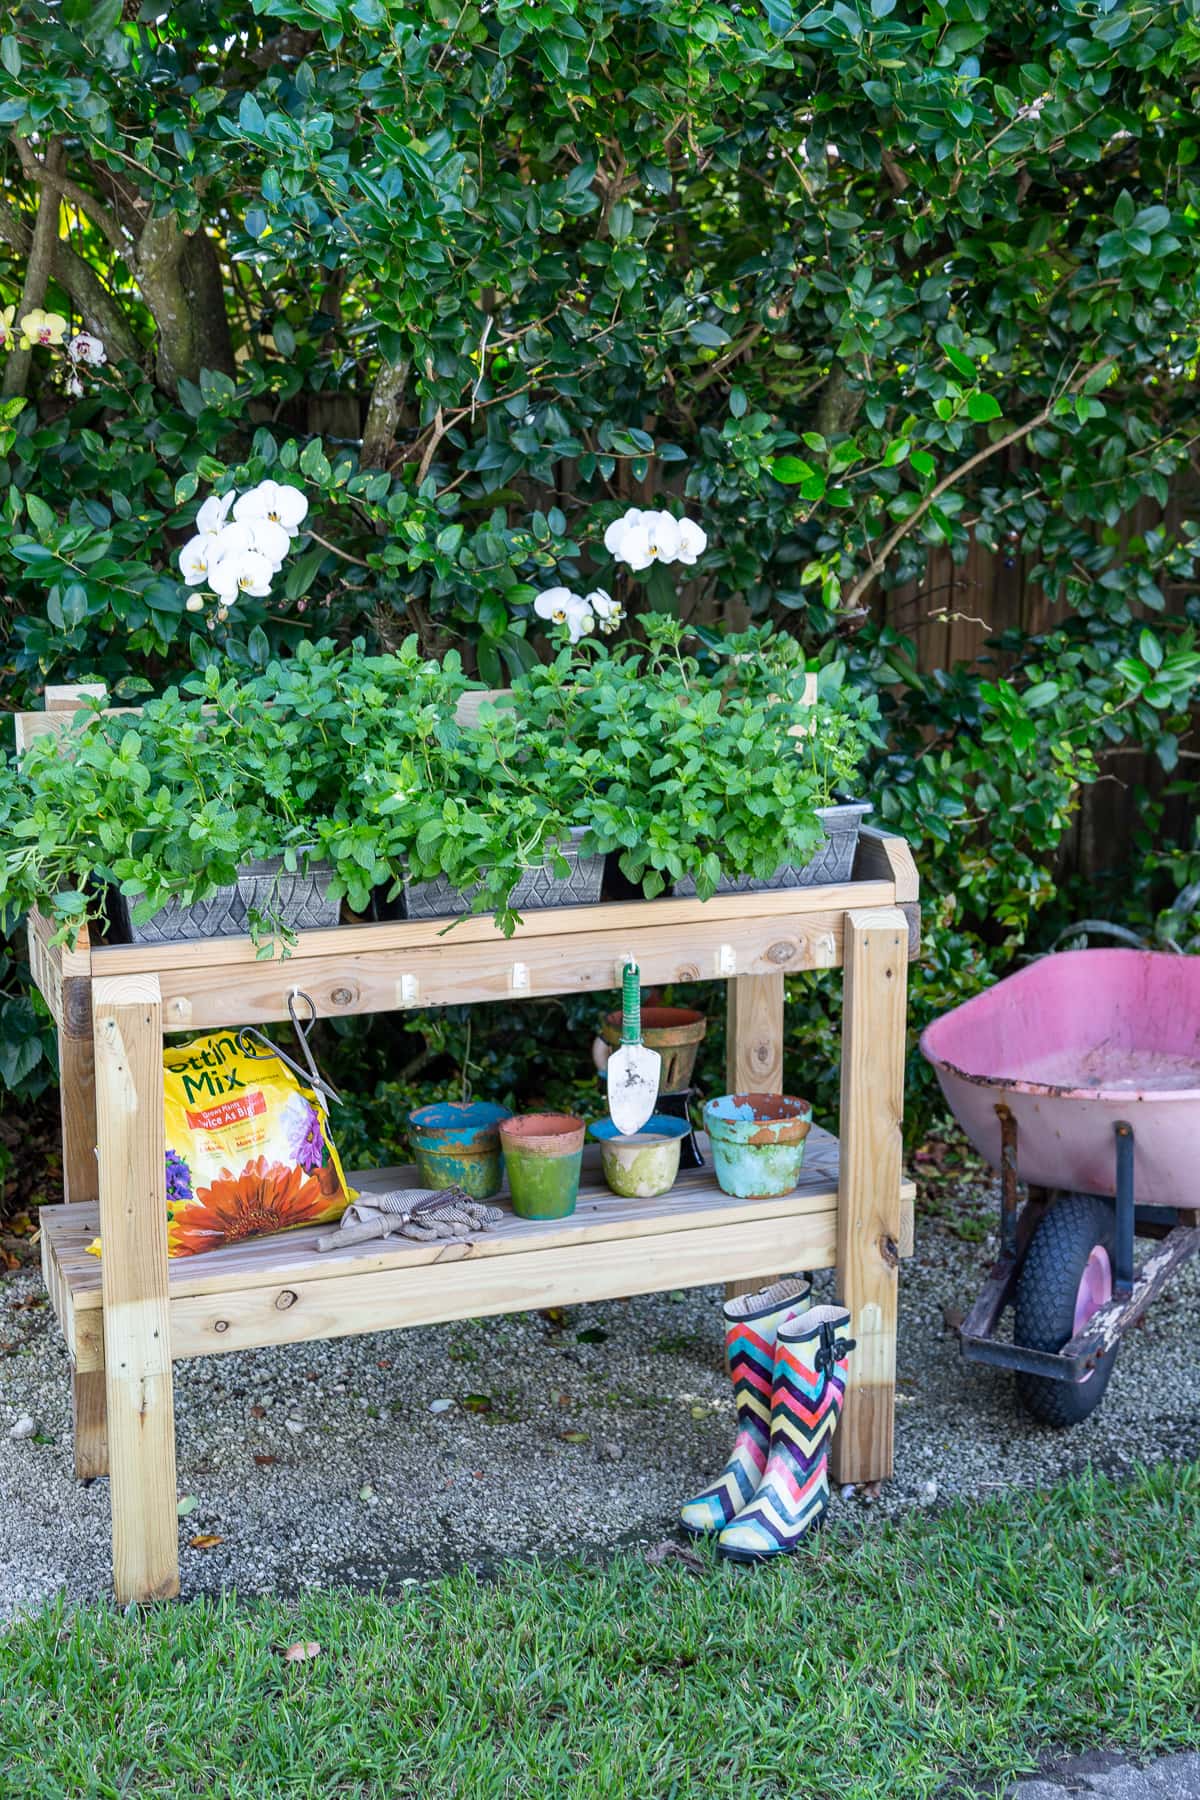

We added a variety of hooks to hang up garden hand tools along with gloves and twine. Just look at all of these yummy herbs!
If you enjoy spending time in the garden, indeed you’ll want to check out these posts as well!
PIN THIS POST FOR INSPIRATION AT ANY TIME!
This such a great idea and you could use it for so many things.
Blessings to you.
Great instructions, I am going to build one of these because I grow herbs every year in pots but at my age having a high, rolling herb stand will work so much better for me. Love the pups in the wheel barrow… the are quite serious about posing aren’t they? Ha Ha!
I received a potting bench as a gift last year but it was so heavy to move. I didn’t even think of putting wheels on the legs. I’m going to do that because it’s on my back porch and I would be able to move it so the plants could get sunshine. I love fresh herbs and cook with them often. Thanks for all of your wonderful ideas.
This is wonderful im so inspired to get outside and work on my garden, thank you!