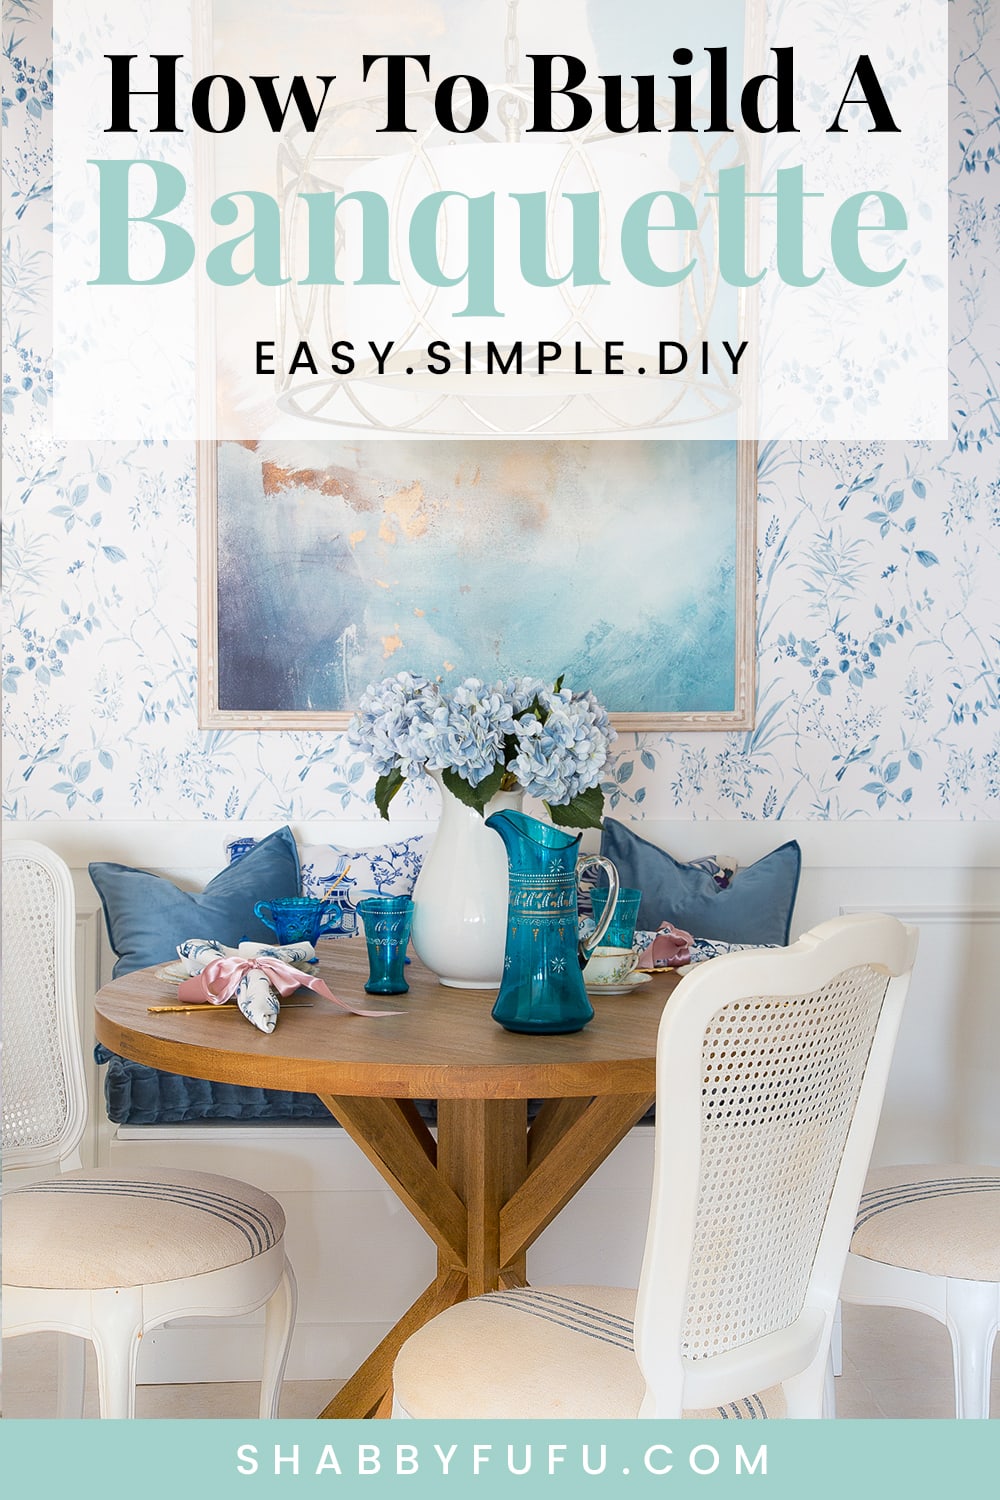
How To Build A Simple Breakfast Room Banquette
This post may contain affiliate links. For more information, please see our disclosure policy.
A simple breakfast room banquette can solve the need for extra seating and storage. In this post you’ll learn an easy way to DIY your own banquette and add beauty and function to your space.
This is a paid post in behalf of Spectrum Brands but the opinions expressed here are my own.
DIY Your Own Beautiful Breakfast Room Banquette!
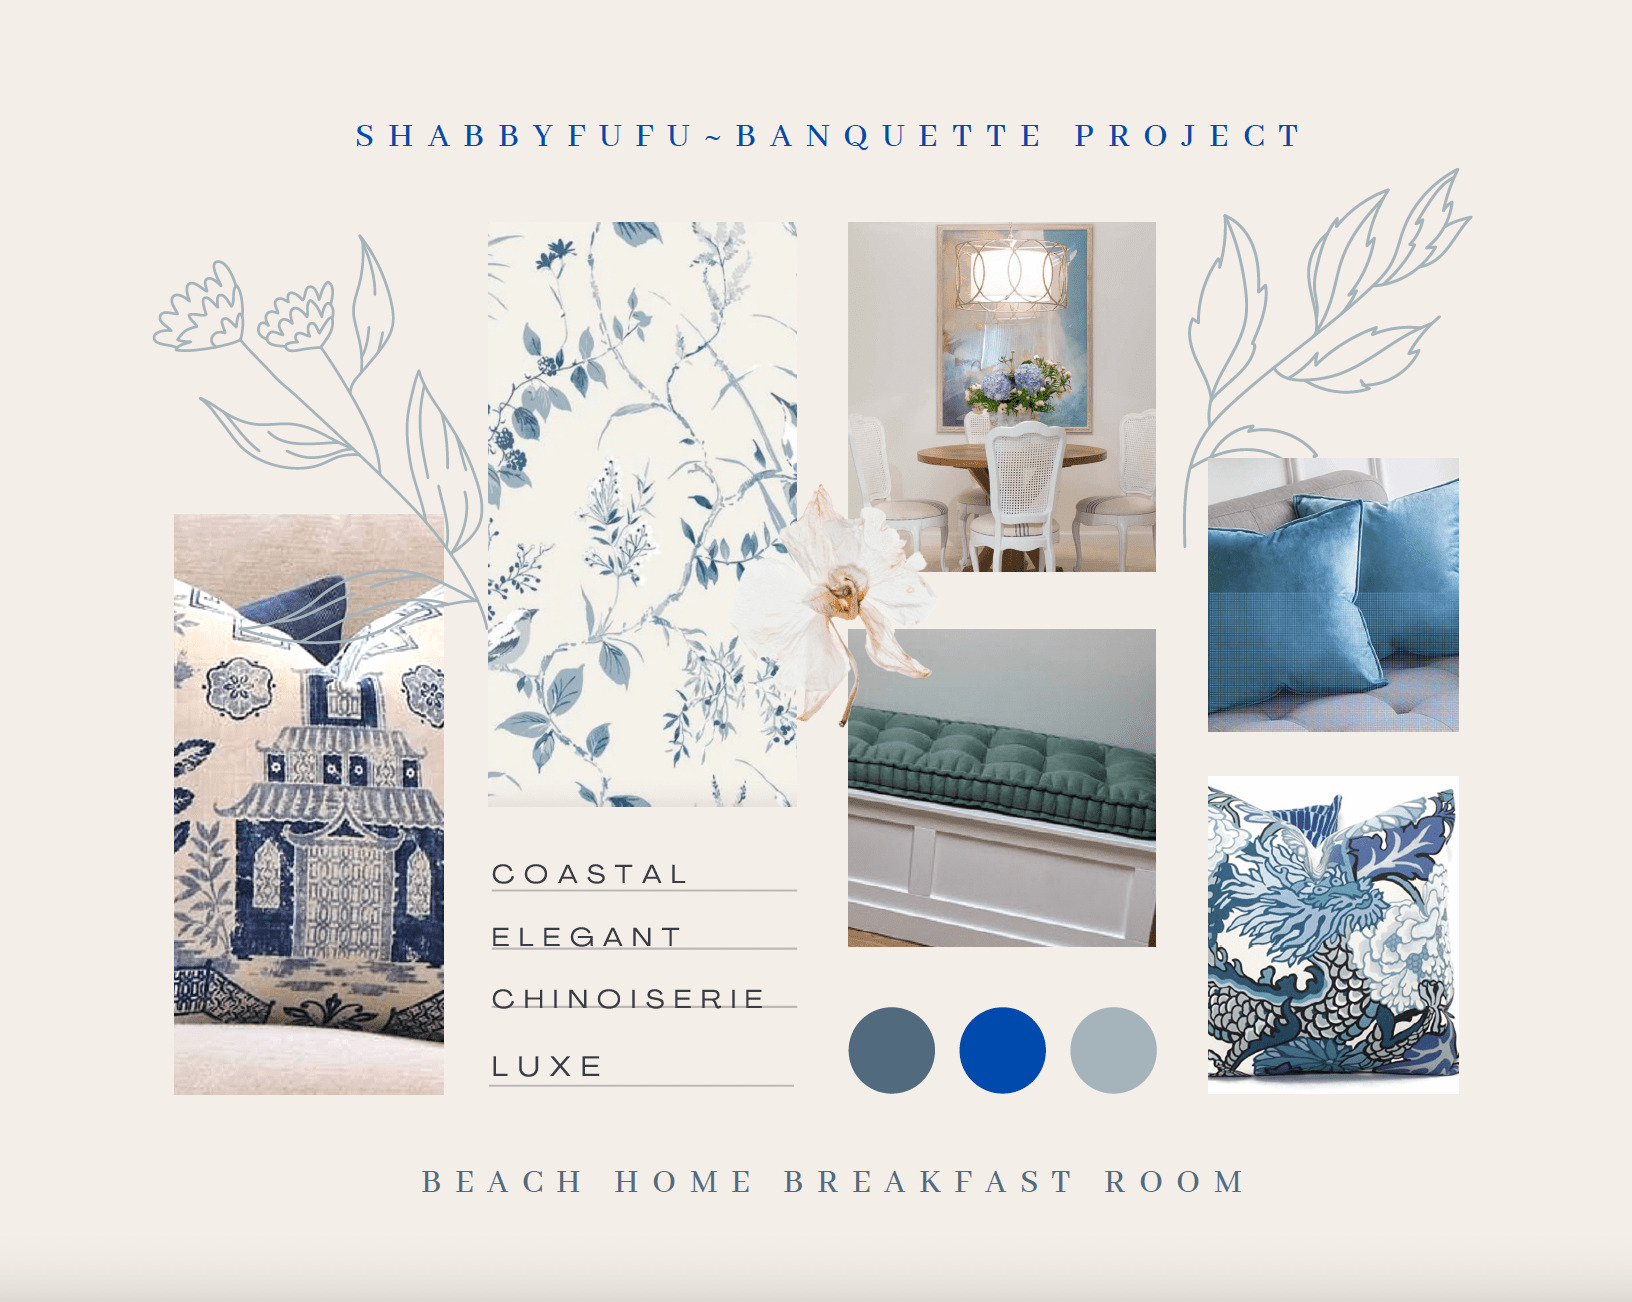
Every good home design idea starts with a need, want and a vision. But ask yourself…is it practical and something that will solve a problem in your home? Only you can determine that, but I highly recommend starting any home project with some easy steps. First, create a vision board or mood board as it’s often called. I have a tutorial for that HERE and this was my mood board for the breakfast room banquette.
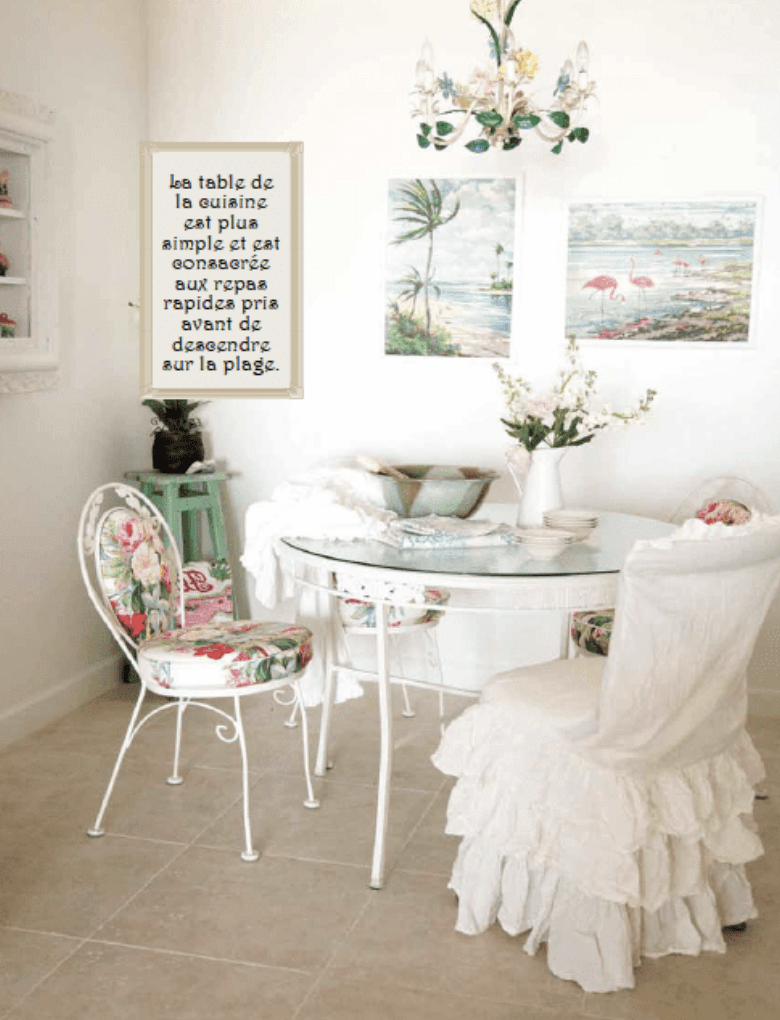
I’ve been thinking about this project for our beach home for several years actually! Our breakfast room is small, but I have always felt that there is wasted space that could be used for much needed storage. The room has had a few iterations over the 17 years that we’ve owned this place. Here’s one from the first decorating of the room and it was published overseas in a magazine back then. Sorry for the blurry old image, but this room has definitely evolved!
The kitchen and most of the rest of the home has been slowly updated over time.

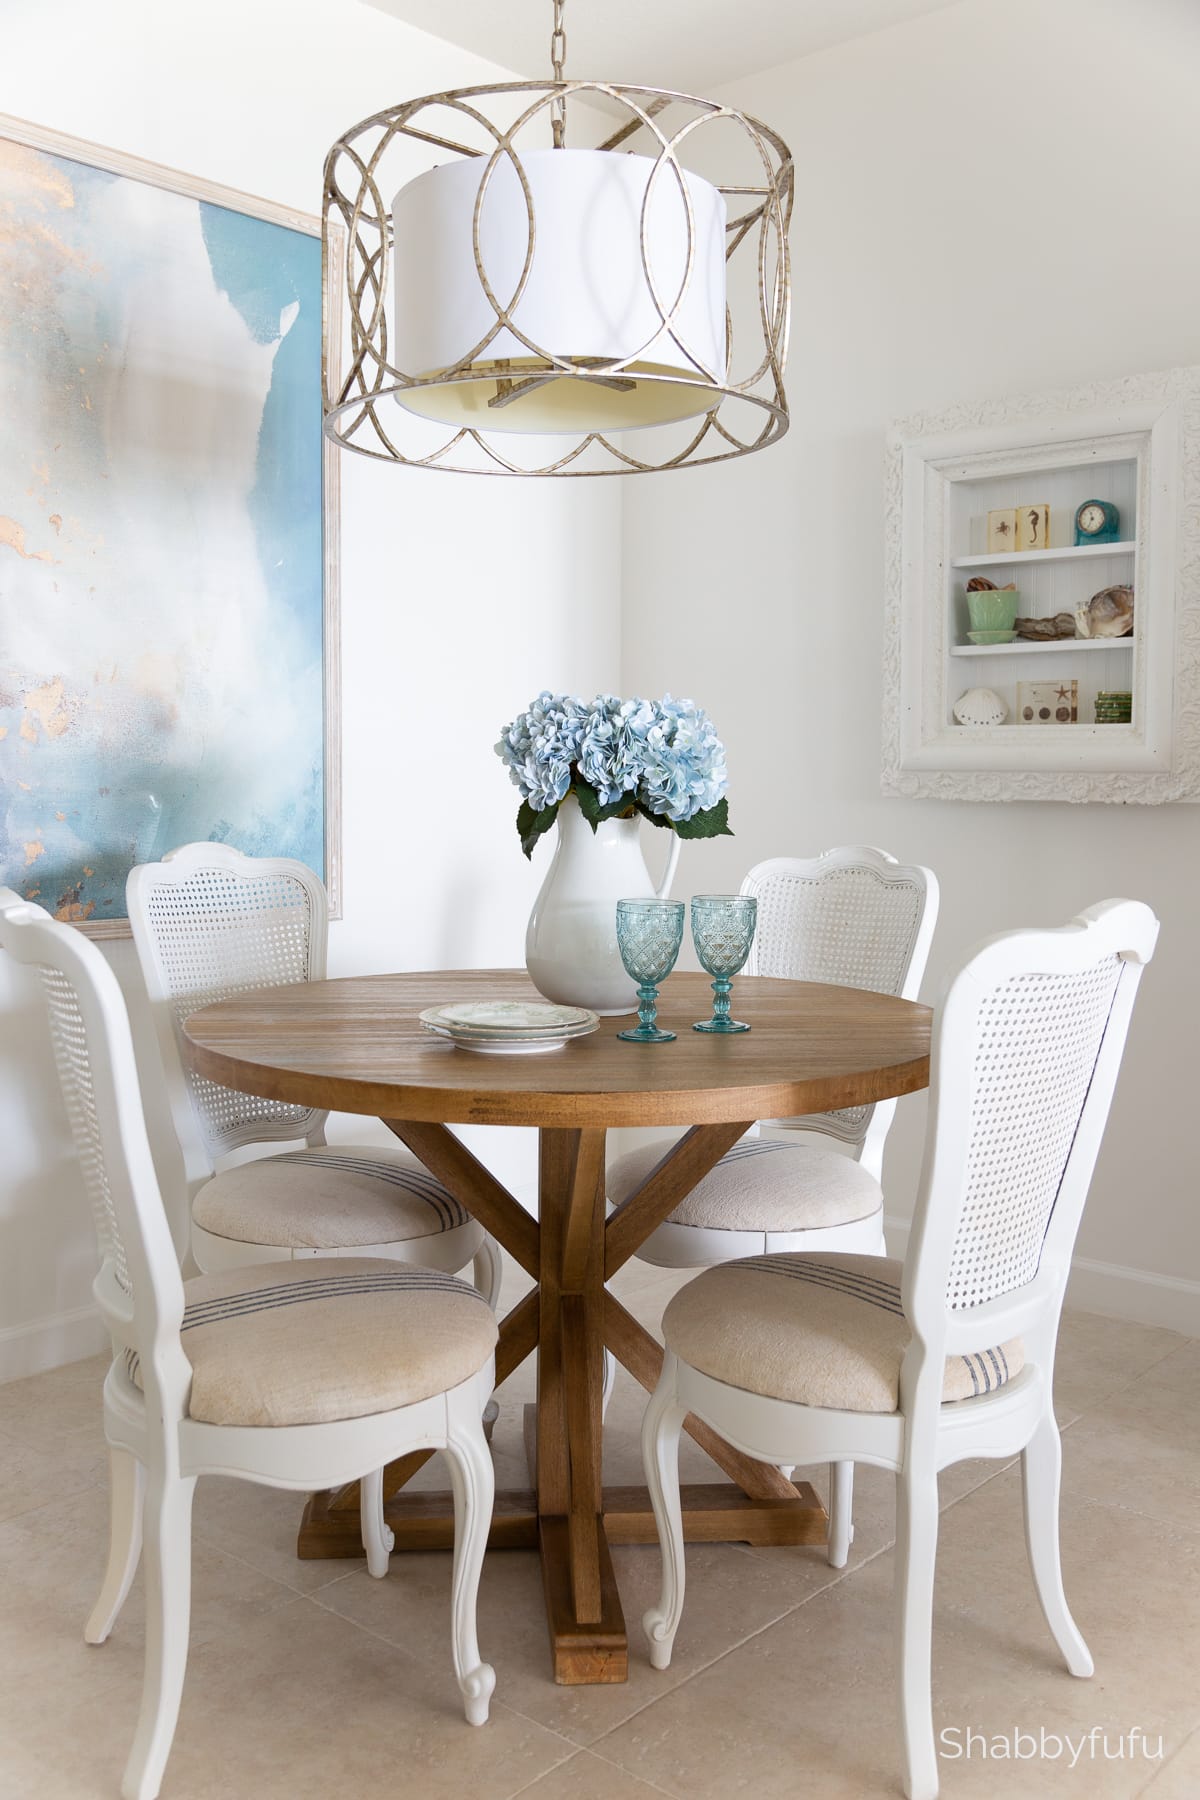
And here is the most recent look, before we built the breakfast room banquette and added simple changes to the wall.
Banquette For Storage!
Banquettes are so good for extra storage, and it’s hidden and tucked away, which I prefer. The only storage that we had in here was the shelf that you see. It backs up to the pantry wall and holds a wine rack and some extra dishes, etc. We clearly needed more storage here, especially for things like beach and travel coolers which we could never find a place for!

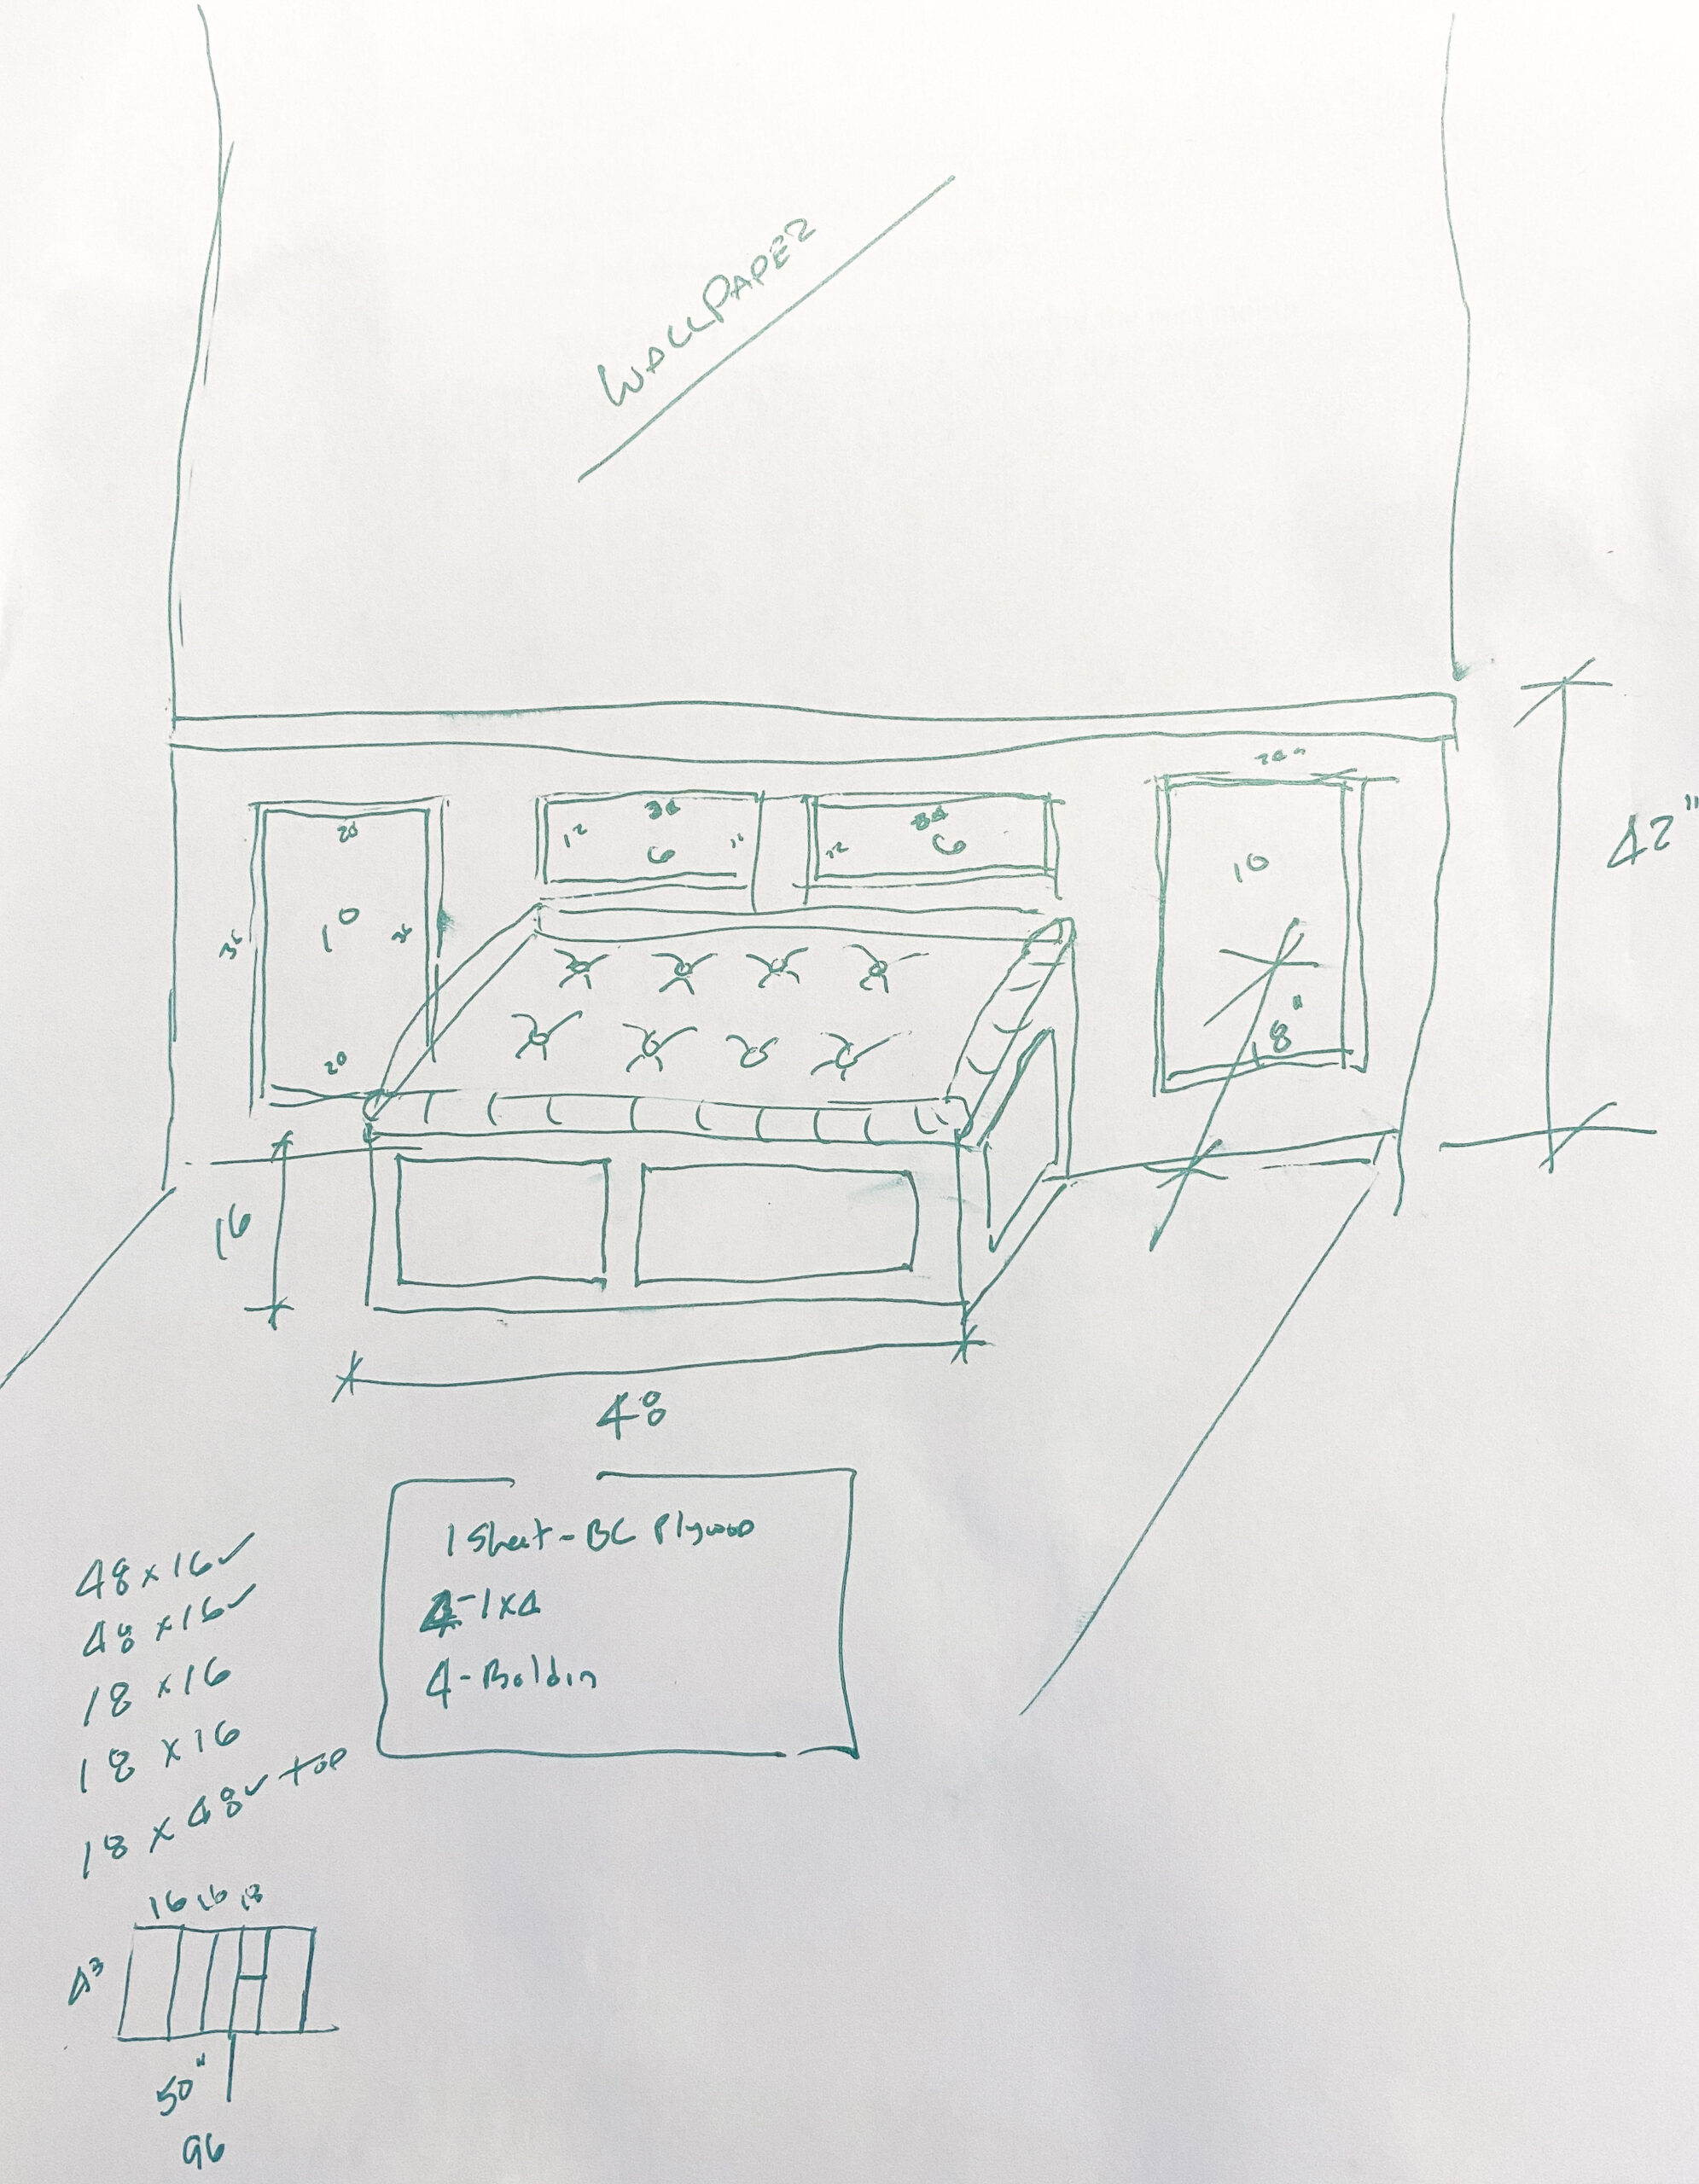
Secondly when you are planning a project it pays to get your measurements and do a sketch. This is nothing fancy, but was so helpful to decide on design and sizing. Props to my husband for this sketching this one and figuring out the materials needed, based on my design idea.
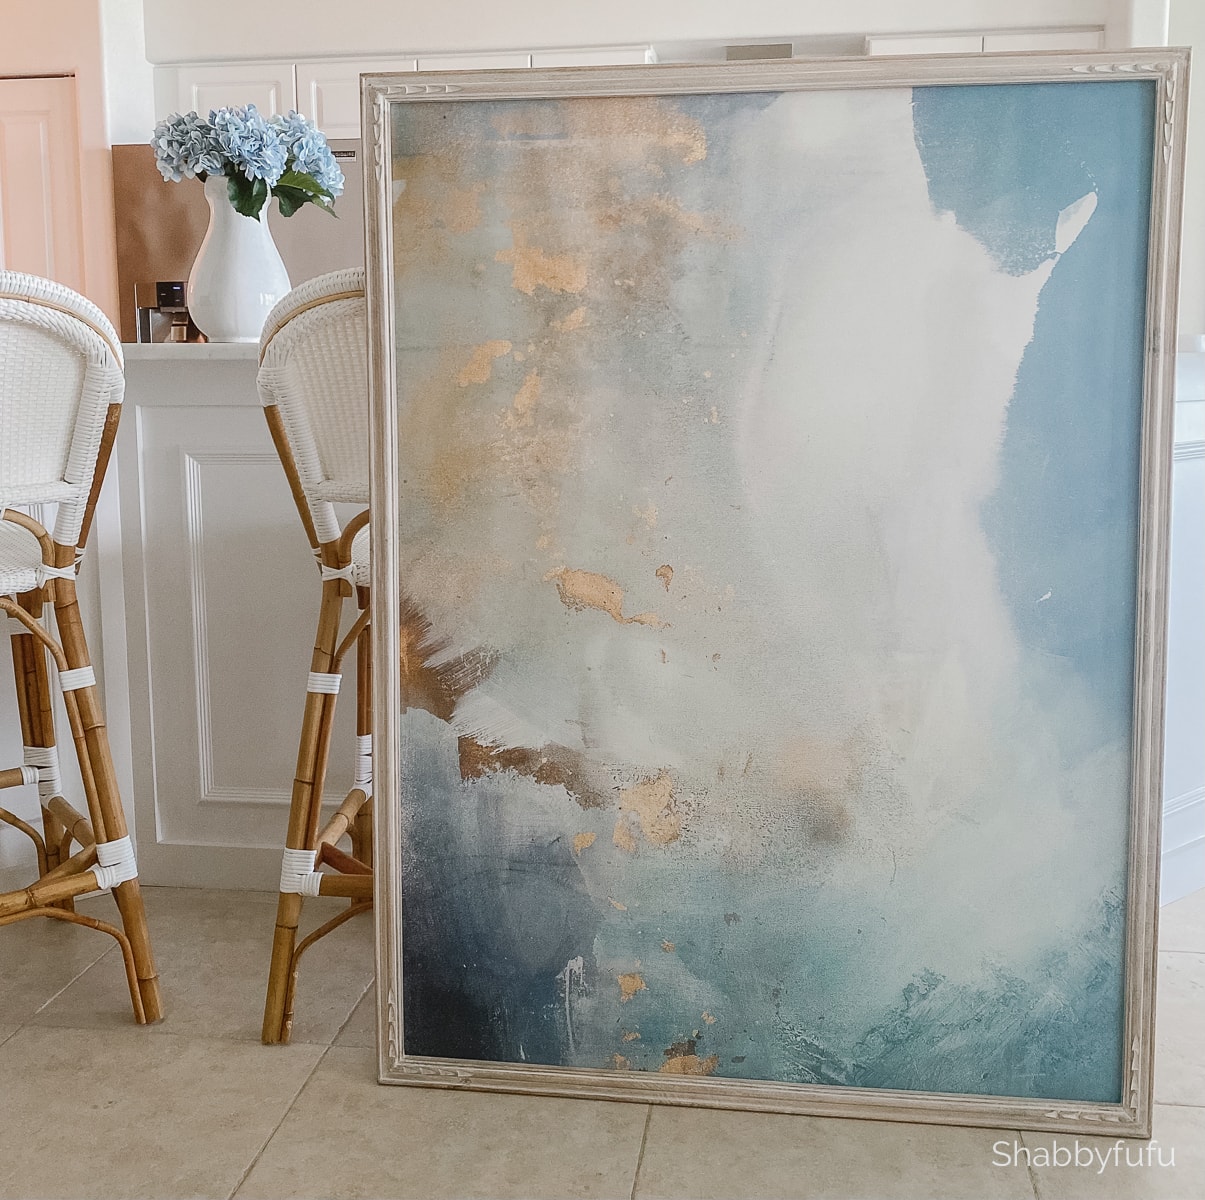
Before we dive into the nitty gritty of the breakfast room banquette DIY, we made some other changes to the room. We removed everything including the furniture and all that was hanging on the walls. This gave us the opportunity to do a deep clean and clean wall scuffs with a Magic Eraser. I had this HUGE piece of art from Minted, and I intended on keeping it, but removed the reflective plexiglass. So much better without the sheen!! This would then be rehung once we finished with the accent wall treatment. Are you ready for that?!!
Creating An Accent Wall
There is no window in this breakfast room. With the open concept it always had the appearance of deep hole at the far end of the kitchen. Almost an afterthought of a room! We have recently made some updates here with wallpaper, both in the powder room and the laundry room. Keeping the flow of this home in mind, I continued with a blue theme and selected this gorgeous botanical pattern! It’s a traditional non-pasted wallpaper (not peel and stick), which was a bit of a challenge getting back to after a long hiatus in the classic papering world.

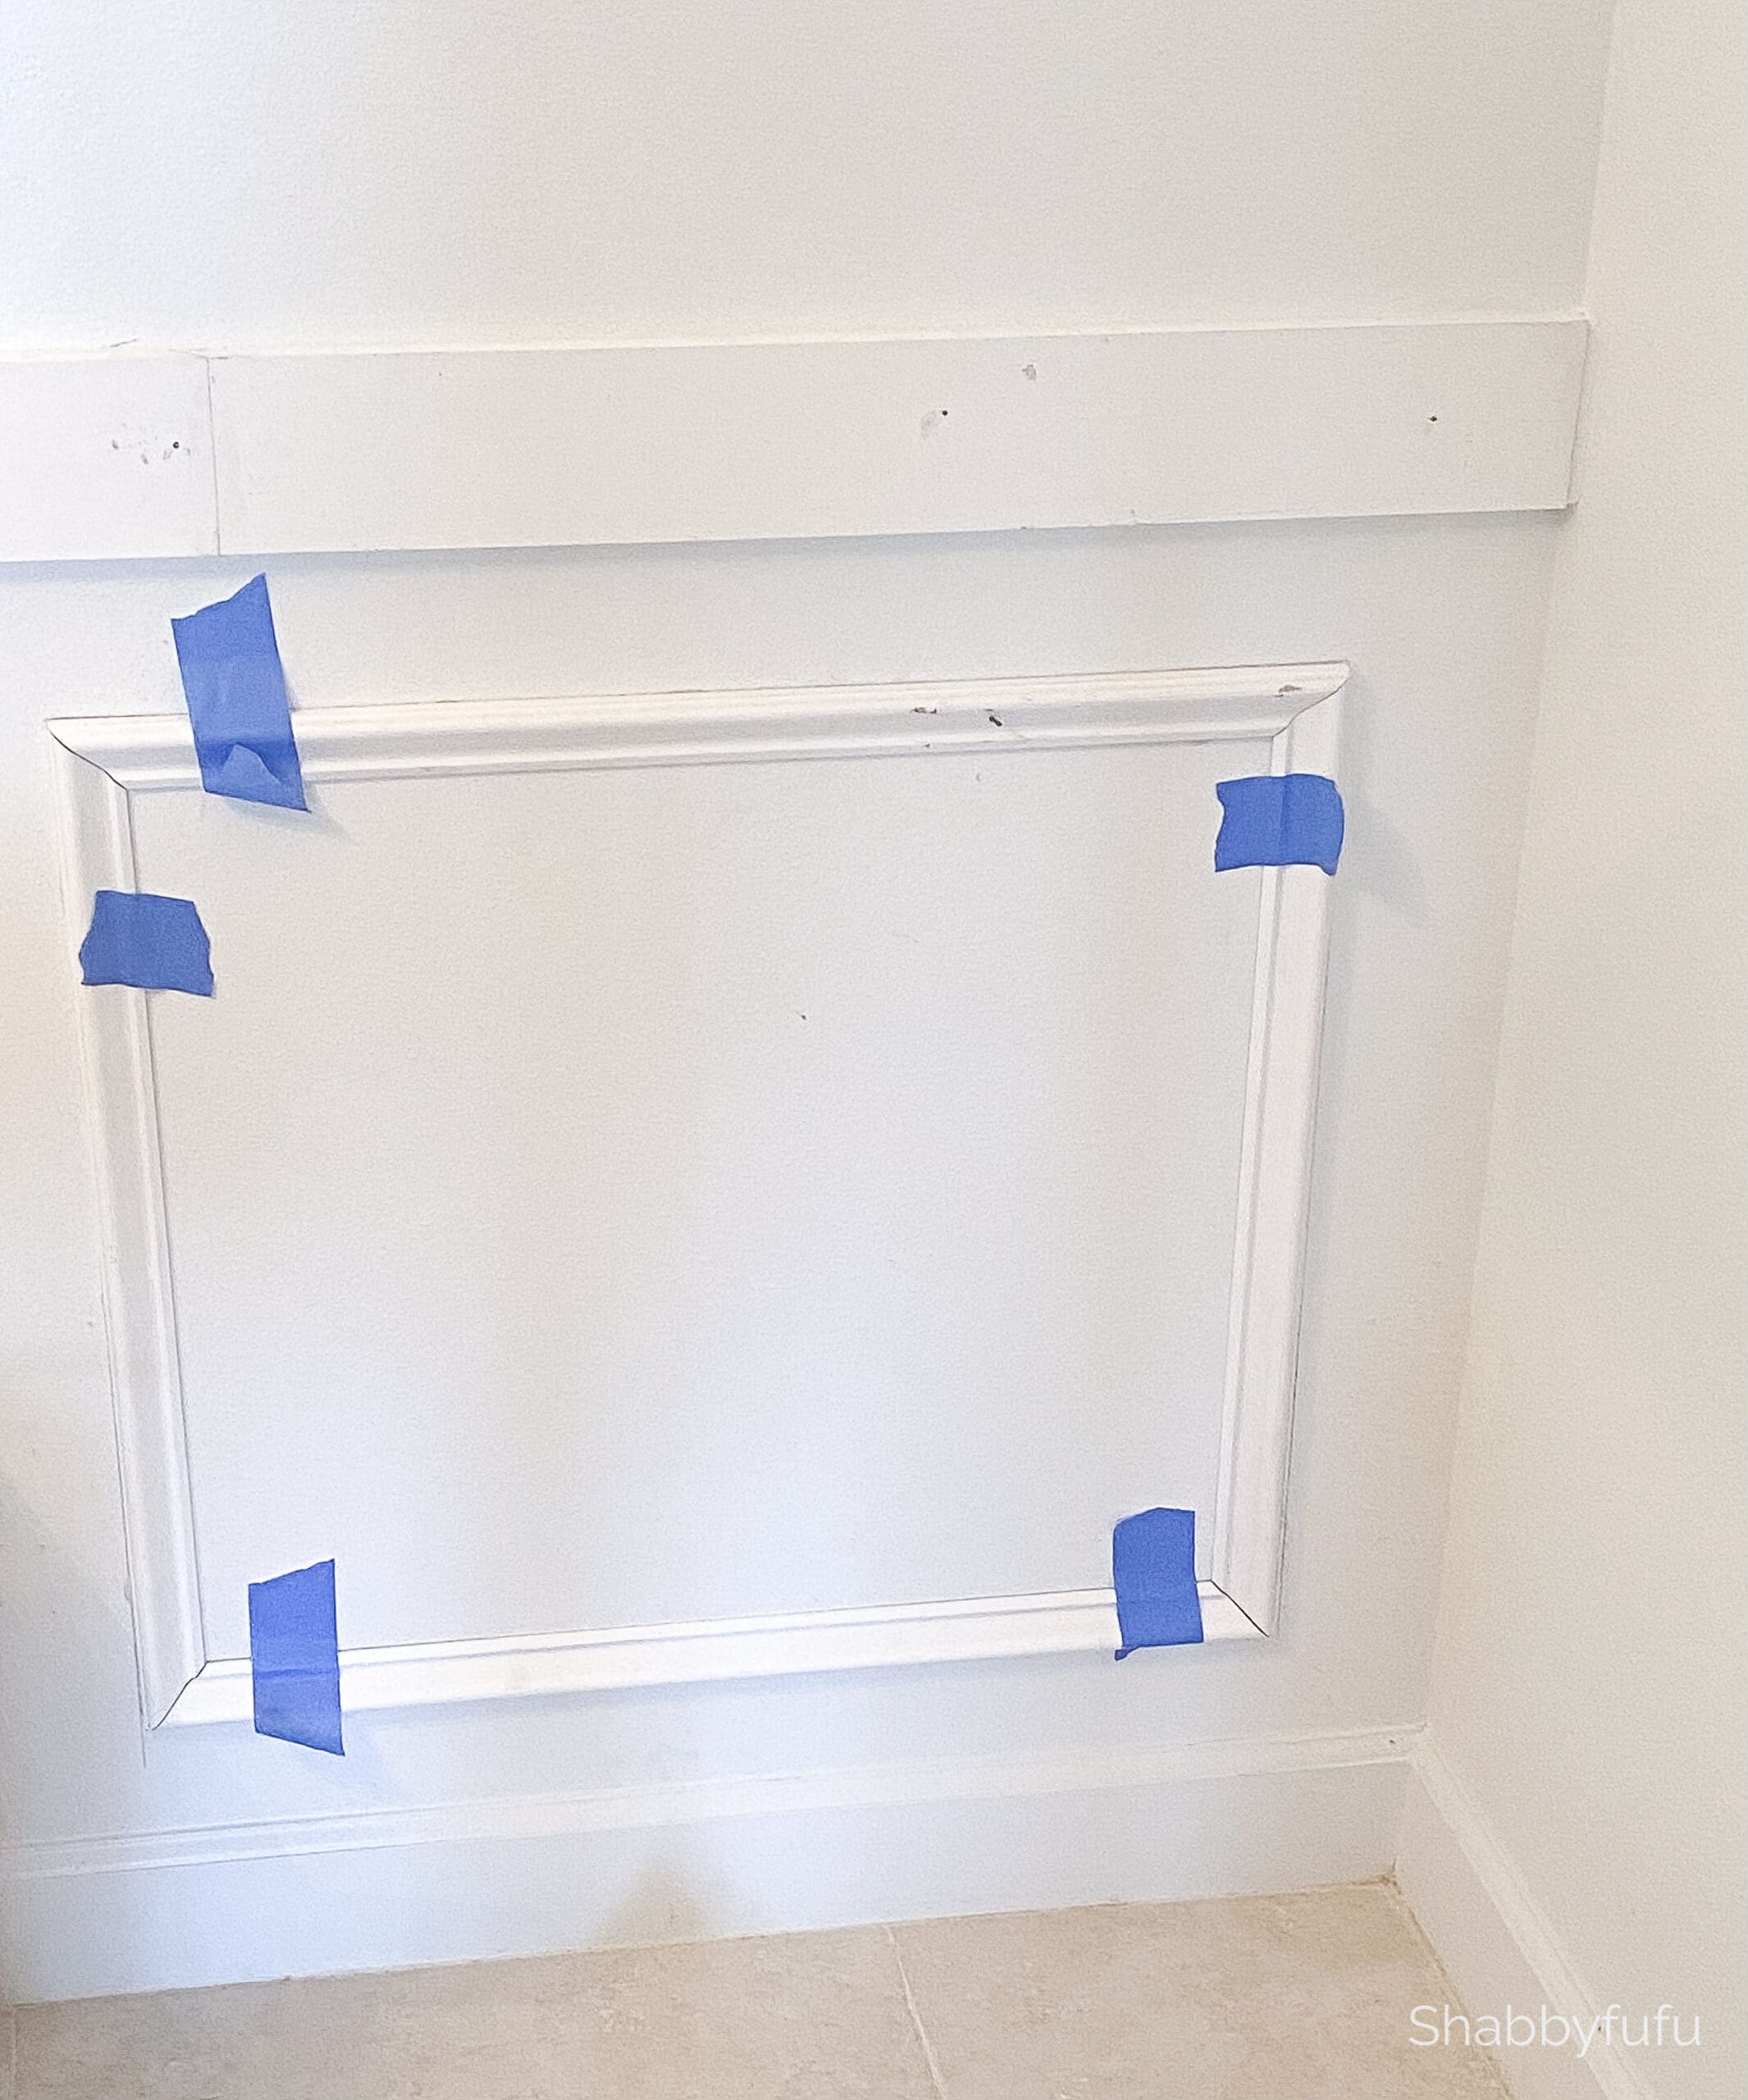
Before we hung the paper we laid out the wall for adding picture molding and a chair rail on the bottom half. I won’t go into how to add these items in this post, but you can see how we did them first.
Laying out the paper on the floor on some plastic sheeting. Matching the pattern and pasting/hanging. This really did not take very long at all!

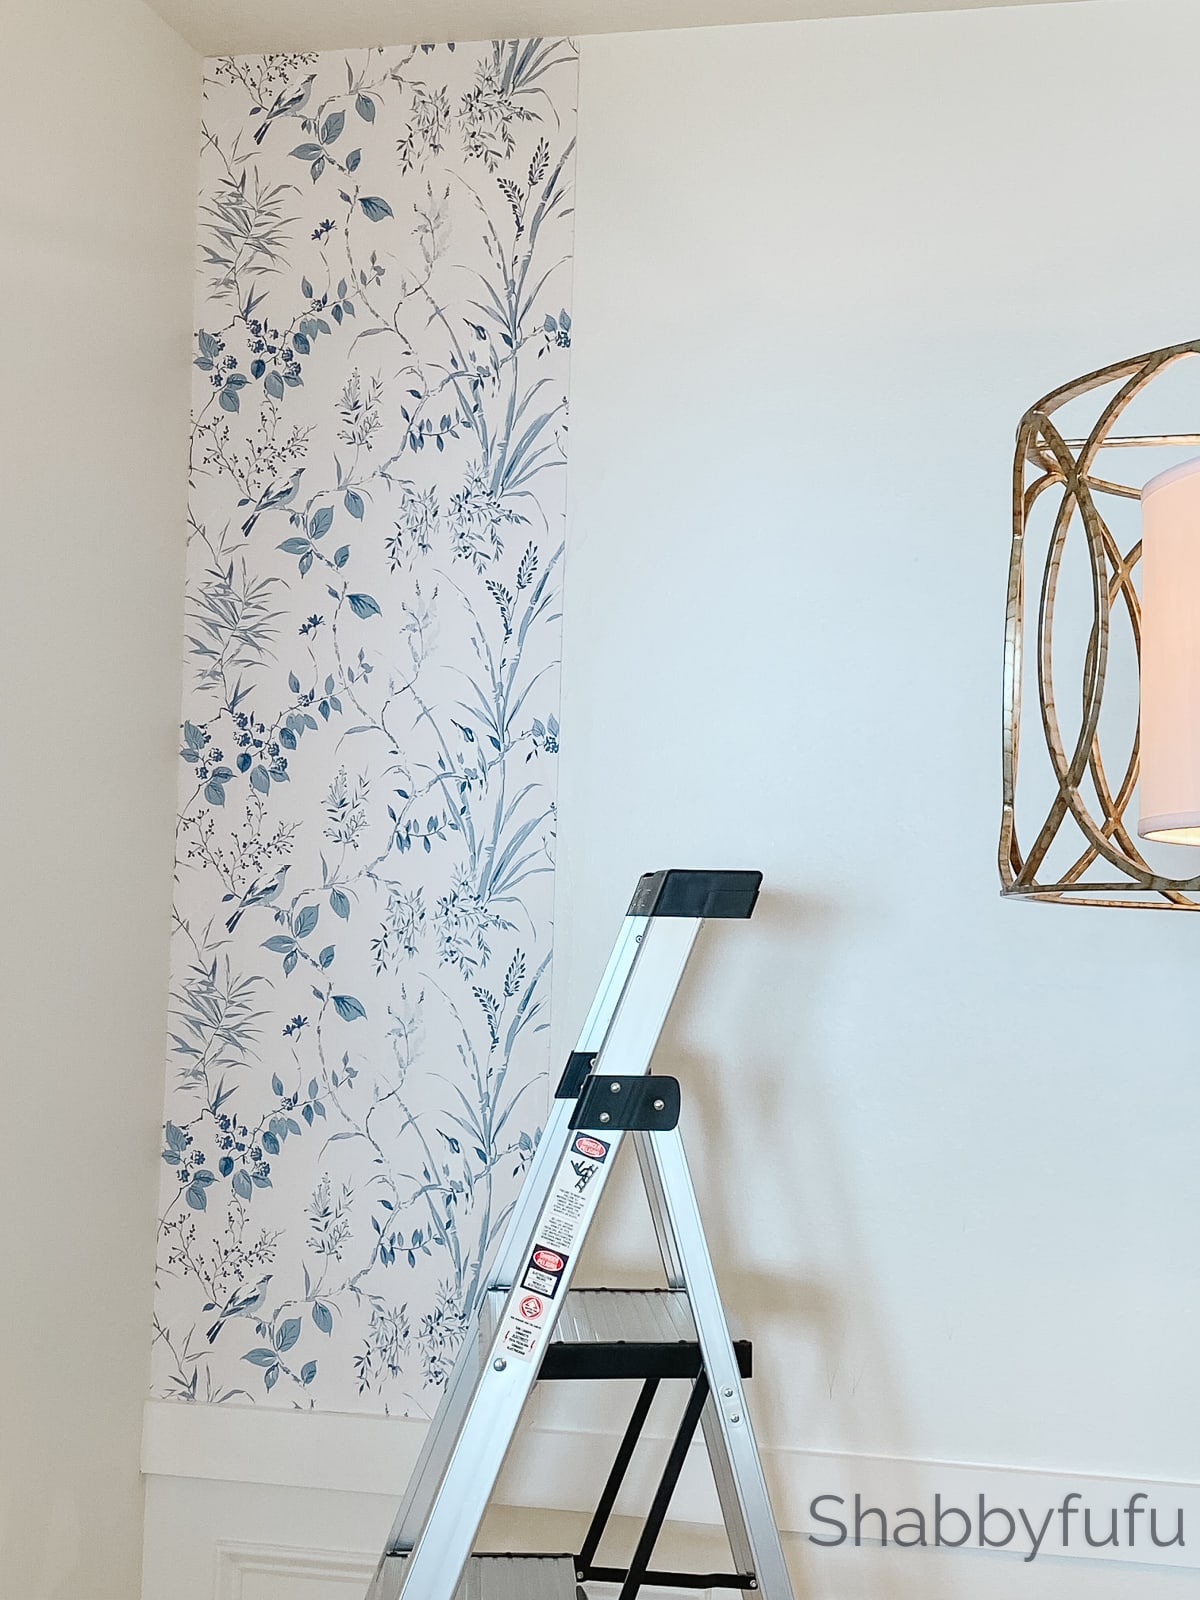
My husband did most of the wallpapering, since he’s so much faster and honestly I would have gotten in the way!

Building The Breakfast Room Banquette
We built the breakfast room banquette in the garage at our Miami house. This is where we have all of our tools and a larger space to work than in our beach home garage. Plus…we try to keep any DIY to a minimum at the beach, because who wants to work when they wake up to a sunrise like this!
Materials List For The Breakfast Room Banquette:
- One 4′ x 8′ sheet of plywood
- Four – eight ft long 1 x 4
- Two National Hardware brass pin hinges
- Ten National Hardware Light Rafter Ties
- Primer
- Paint
Building The Banquette
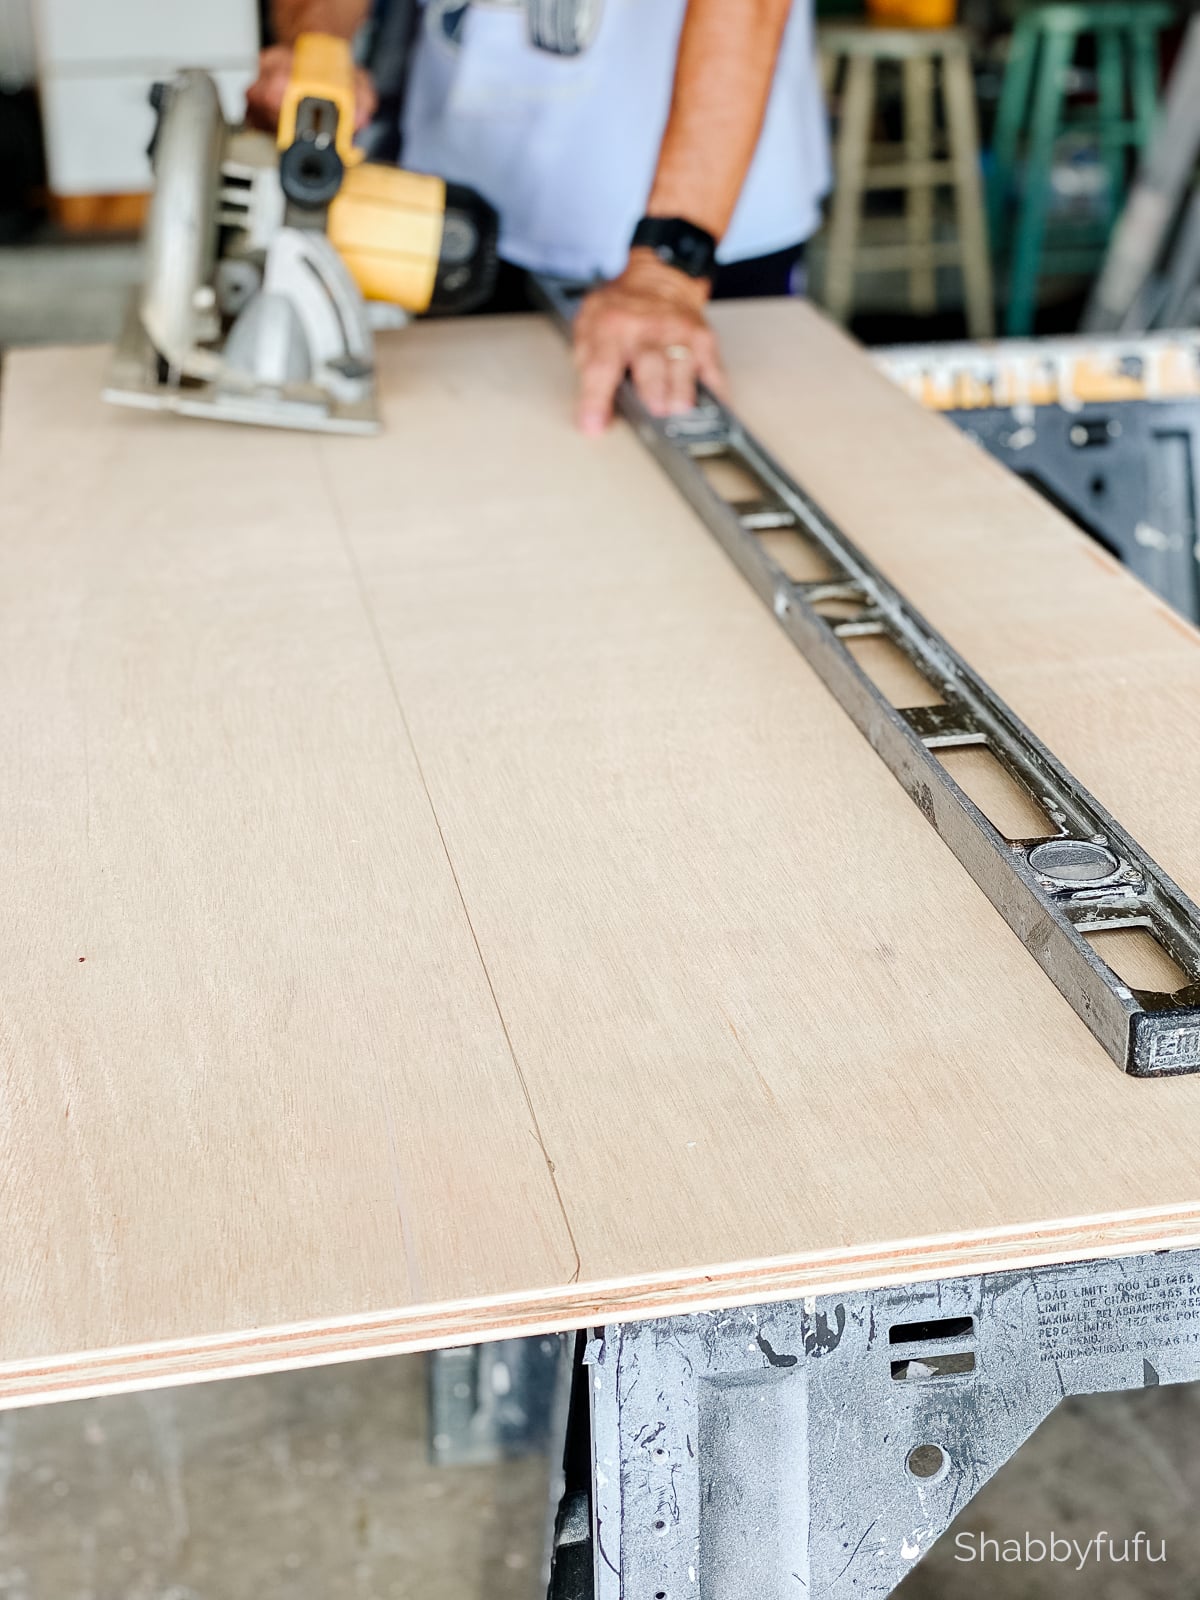
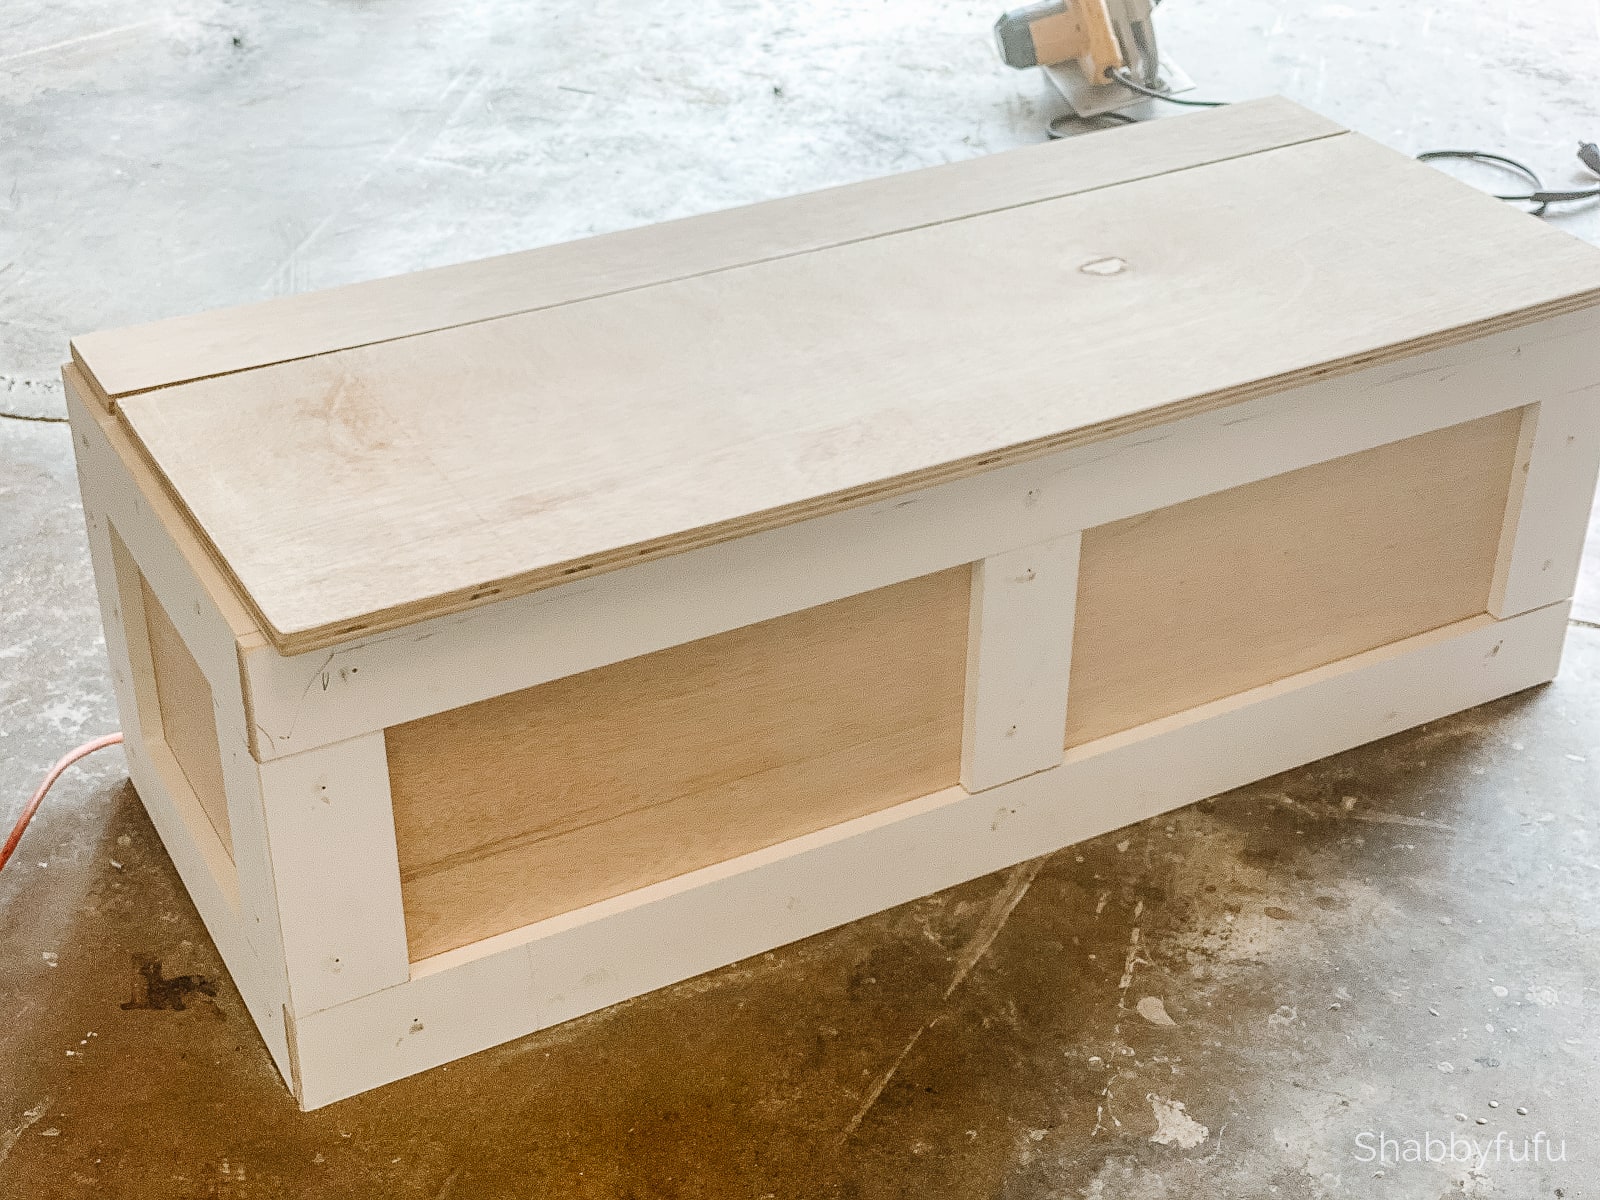
Cut three pieces of the plywood sheet into 16″ by 48″ pieces. Then take one of those 16″ x 48″pieces and then cut two 18″ pieces out of it. You’ll then have two 18″ pieces to build the sides of the box. After cutting, you’ll then have your four pieces to build a box. Two will be 16″ x 48″ and the short sides will be 16″ x 18″.
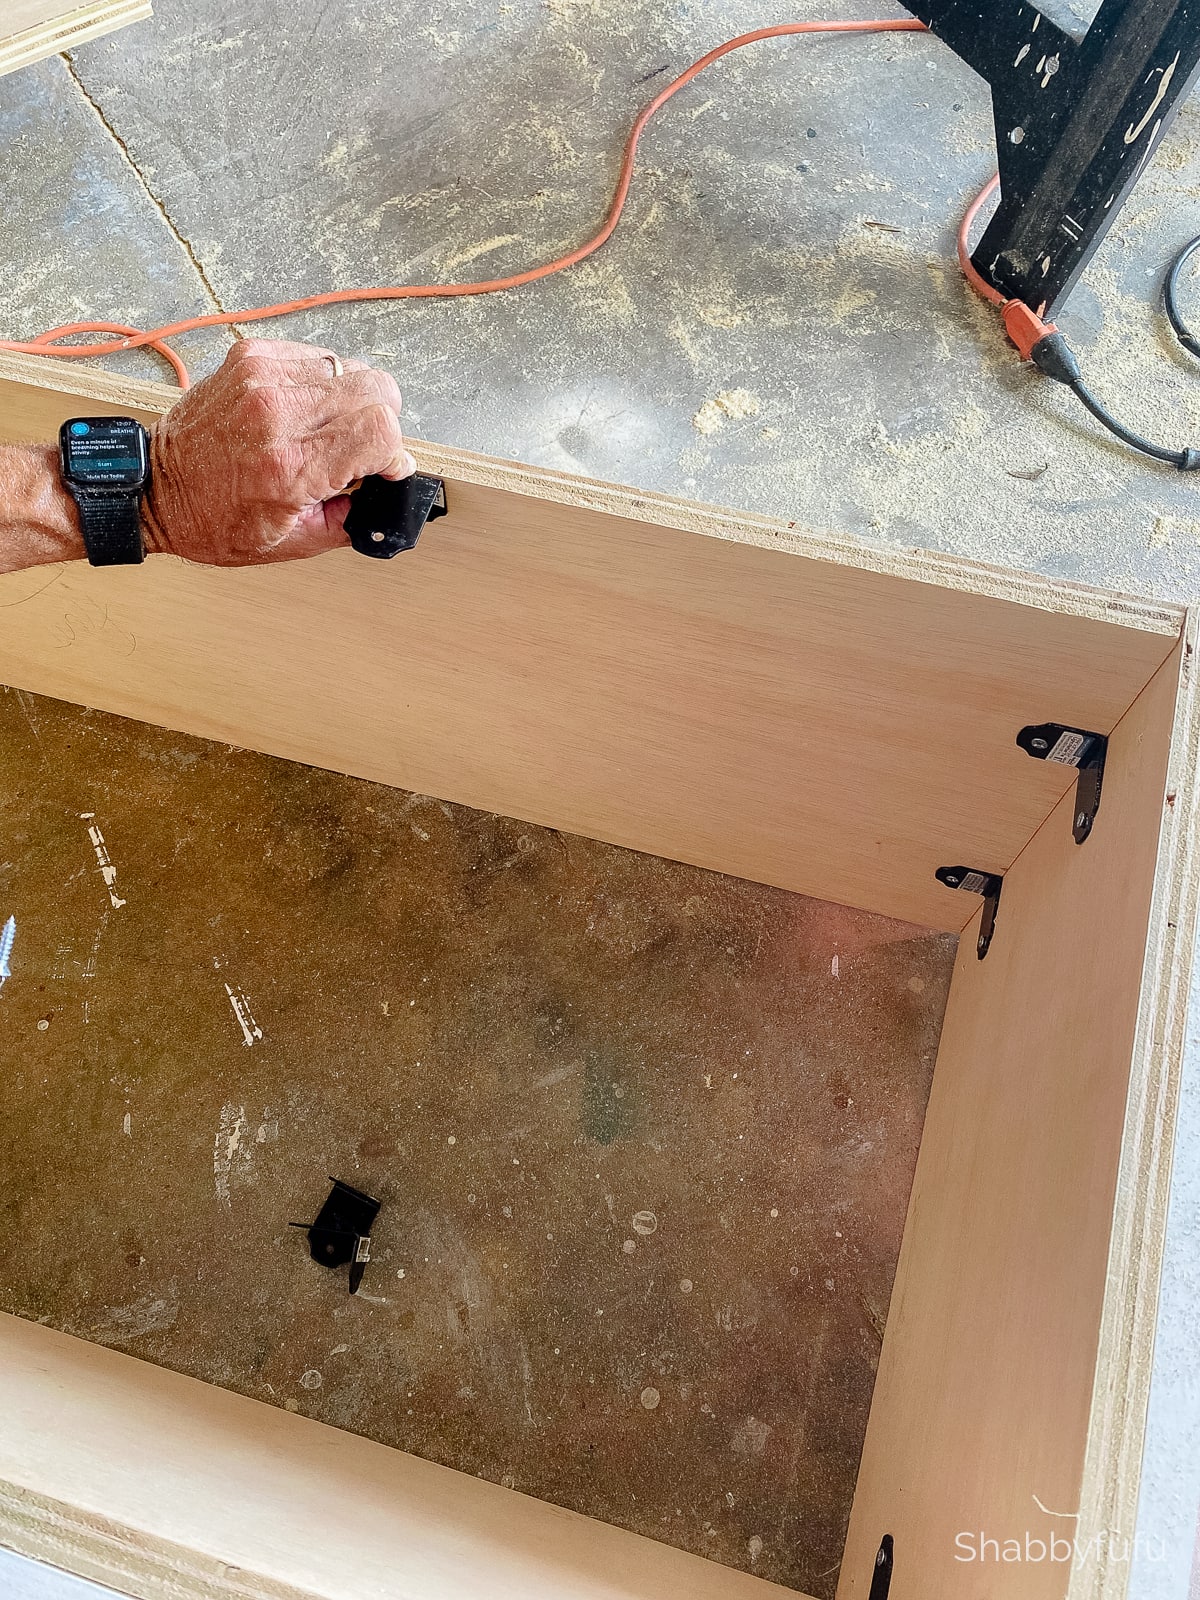
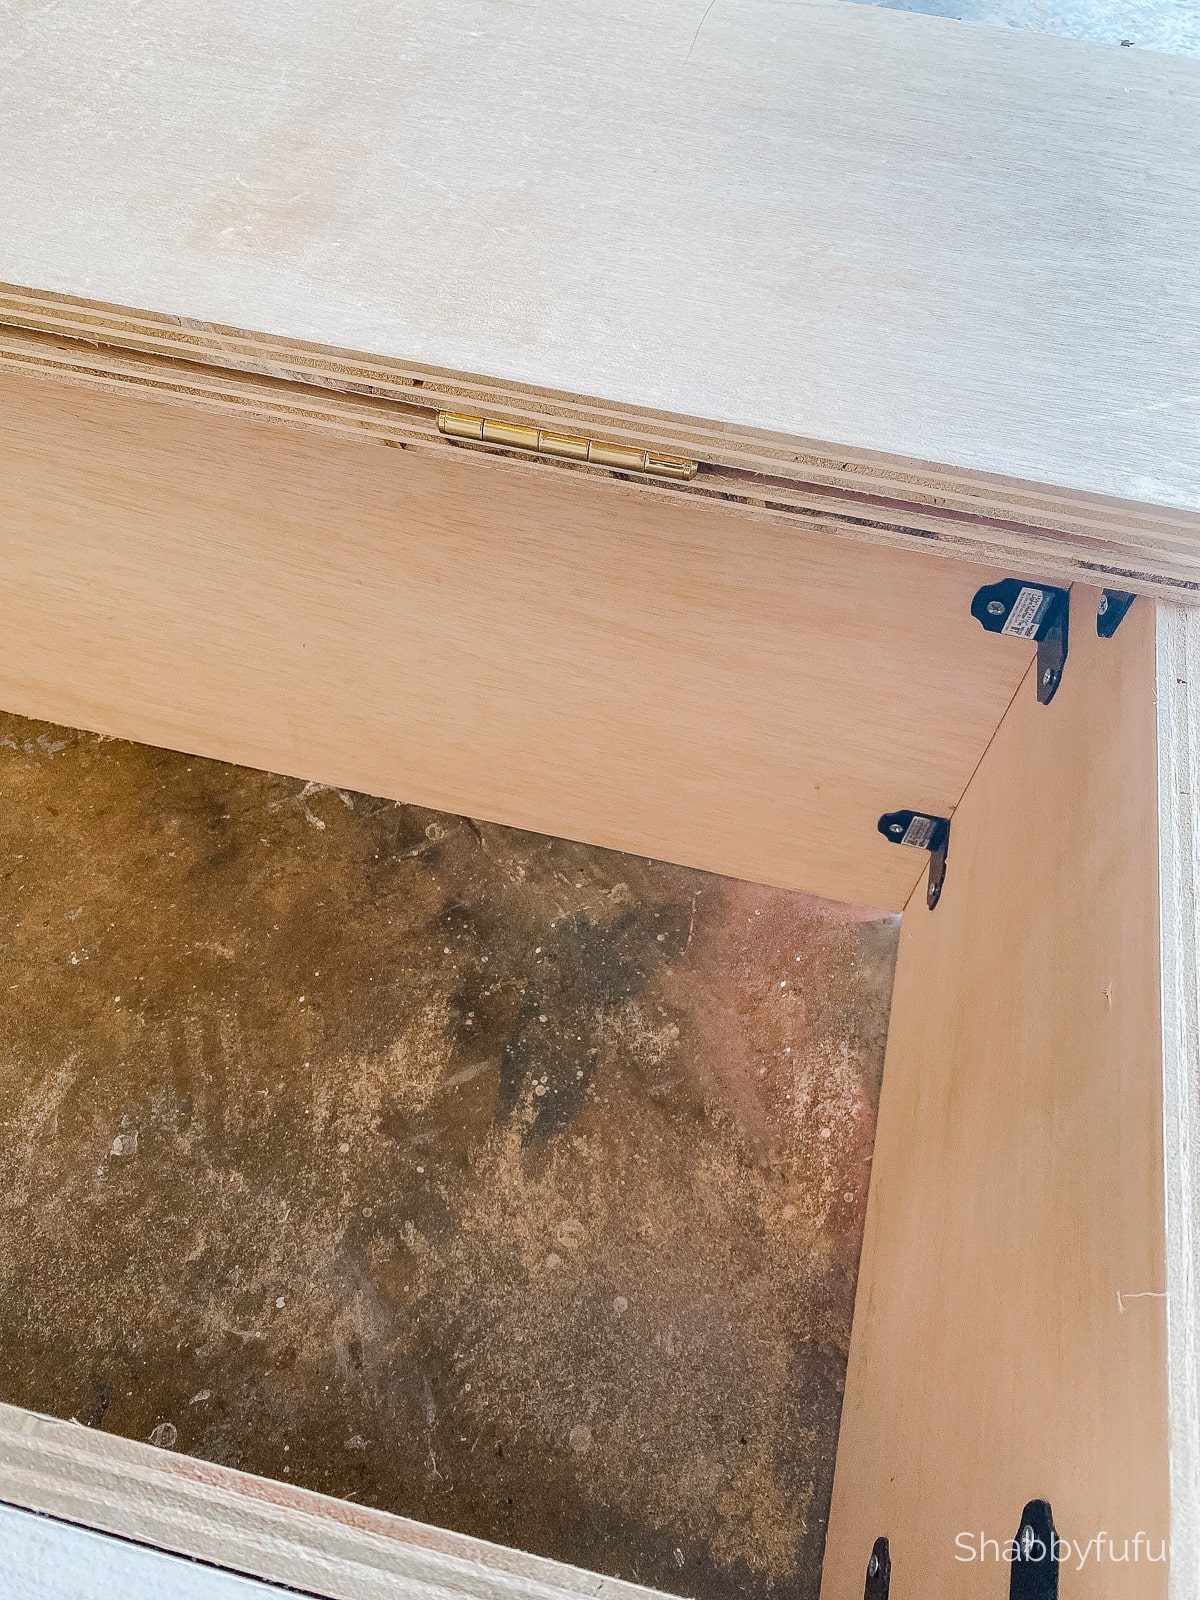
You’ll then attach two National Hardware Light Rafter Ties at each end of the long sides of the box.
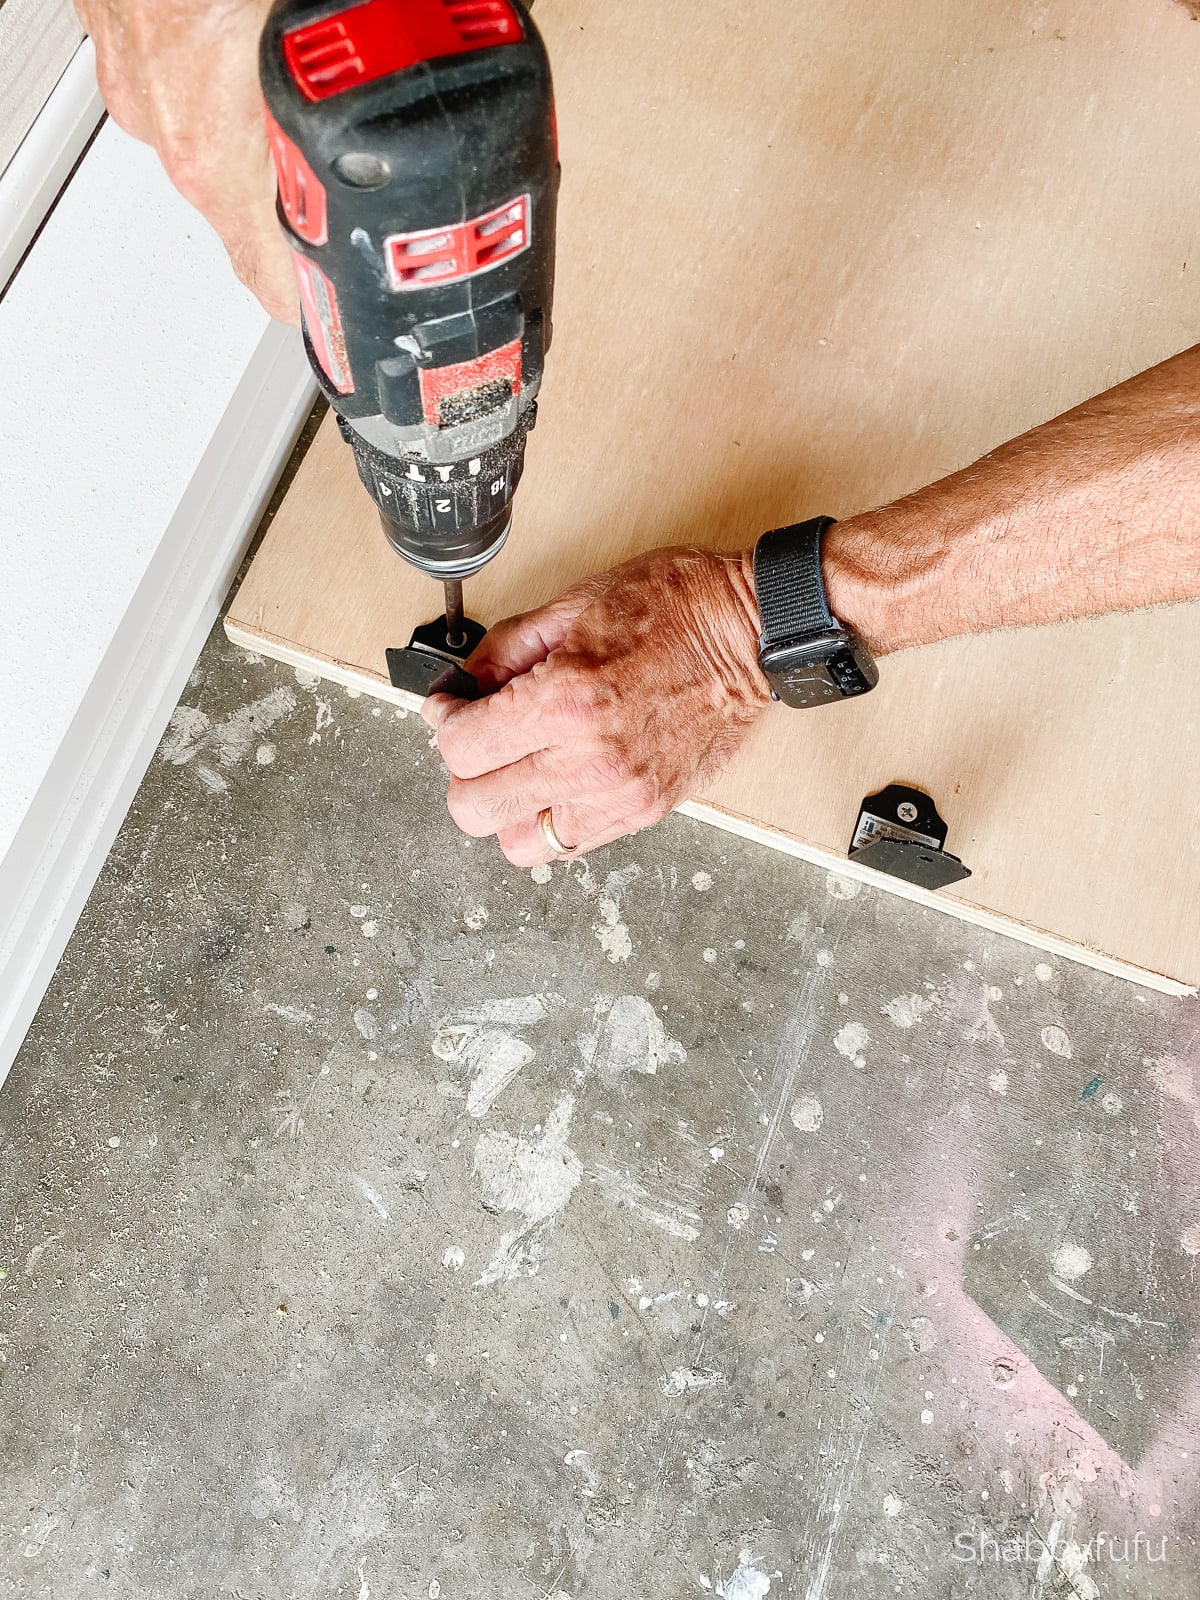
The next step is to screw the rafter ties (also known as angle brackets) to form corners of the box.


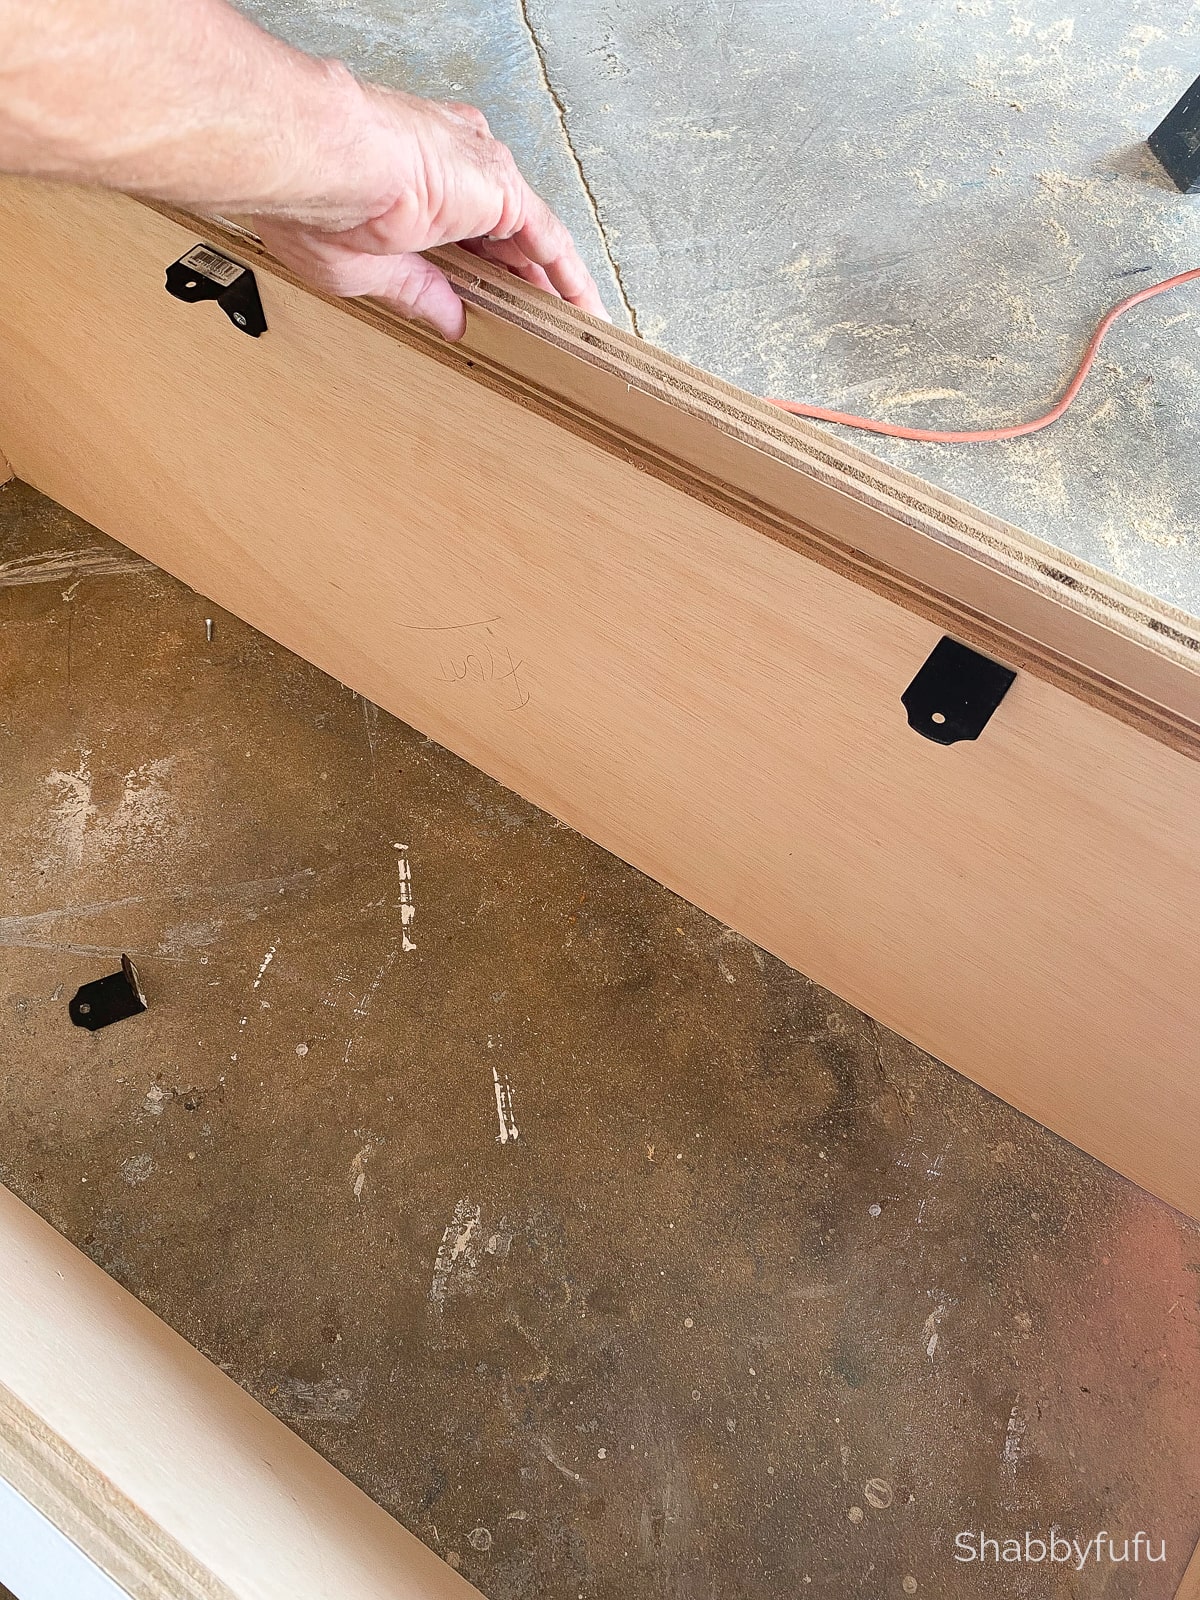
The box is now put together and you’ll then need to create a hinge support for attaching the top piece of plywood.
From the leftover plywood that you’ll have after cutting your four sides pieces, cut a piece 4″ x 48″. This piece will be used to support the hinge bracket on the top.
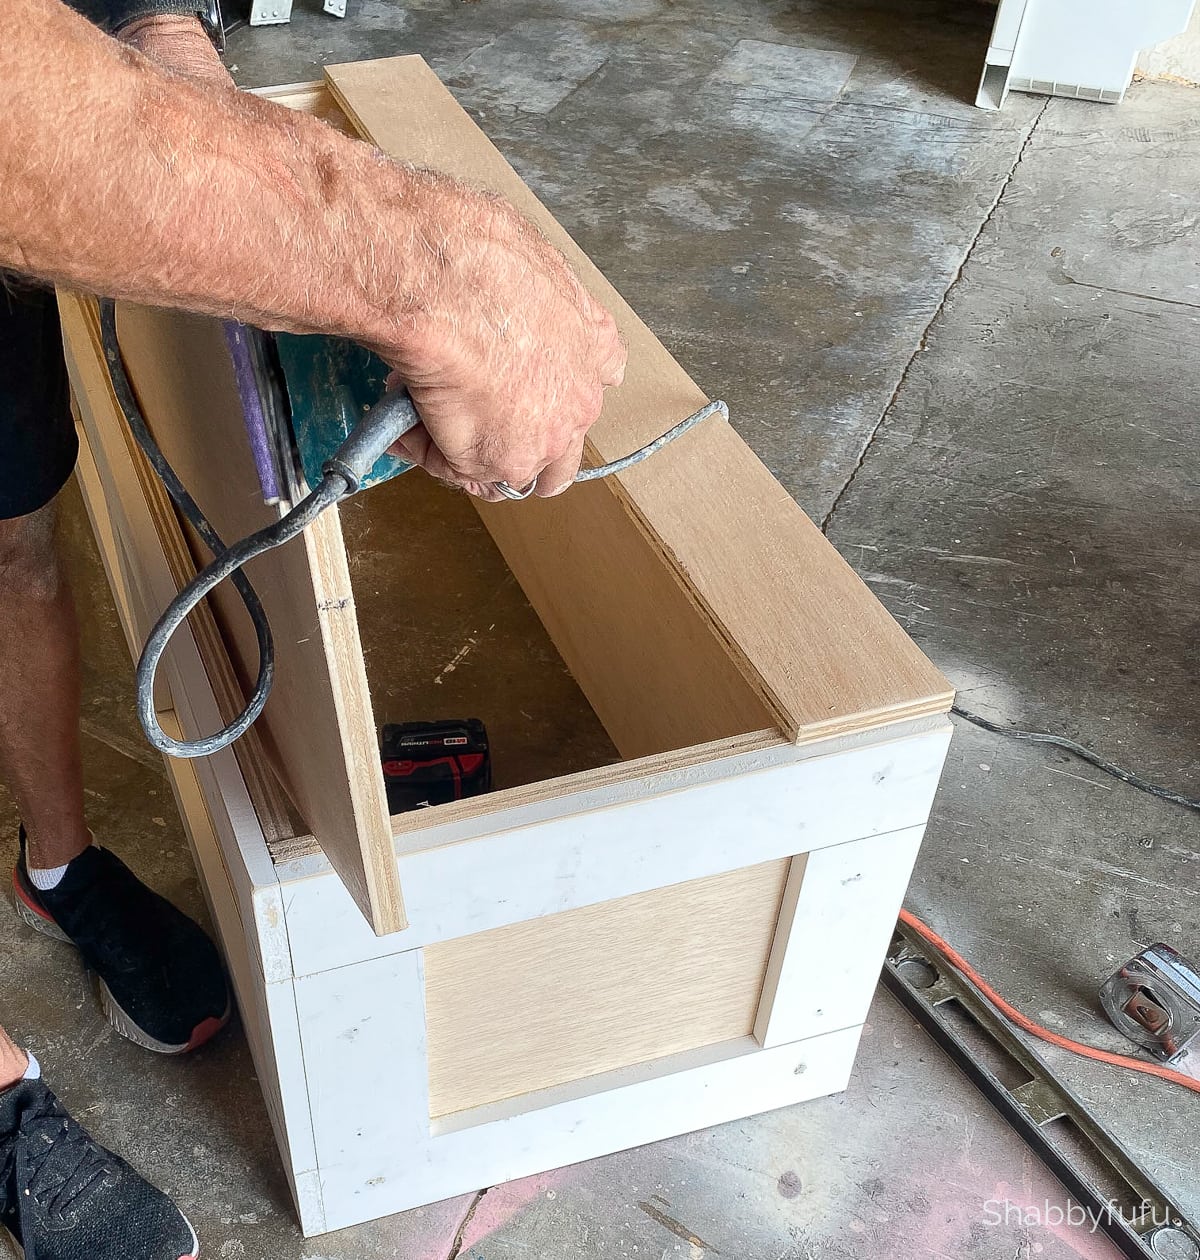
Next you’ll need to cut the piece for the top measuring 14″ x 48″.
We used two of the National Hardware brass pin hinges to attach the top to the box.
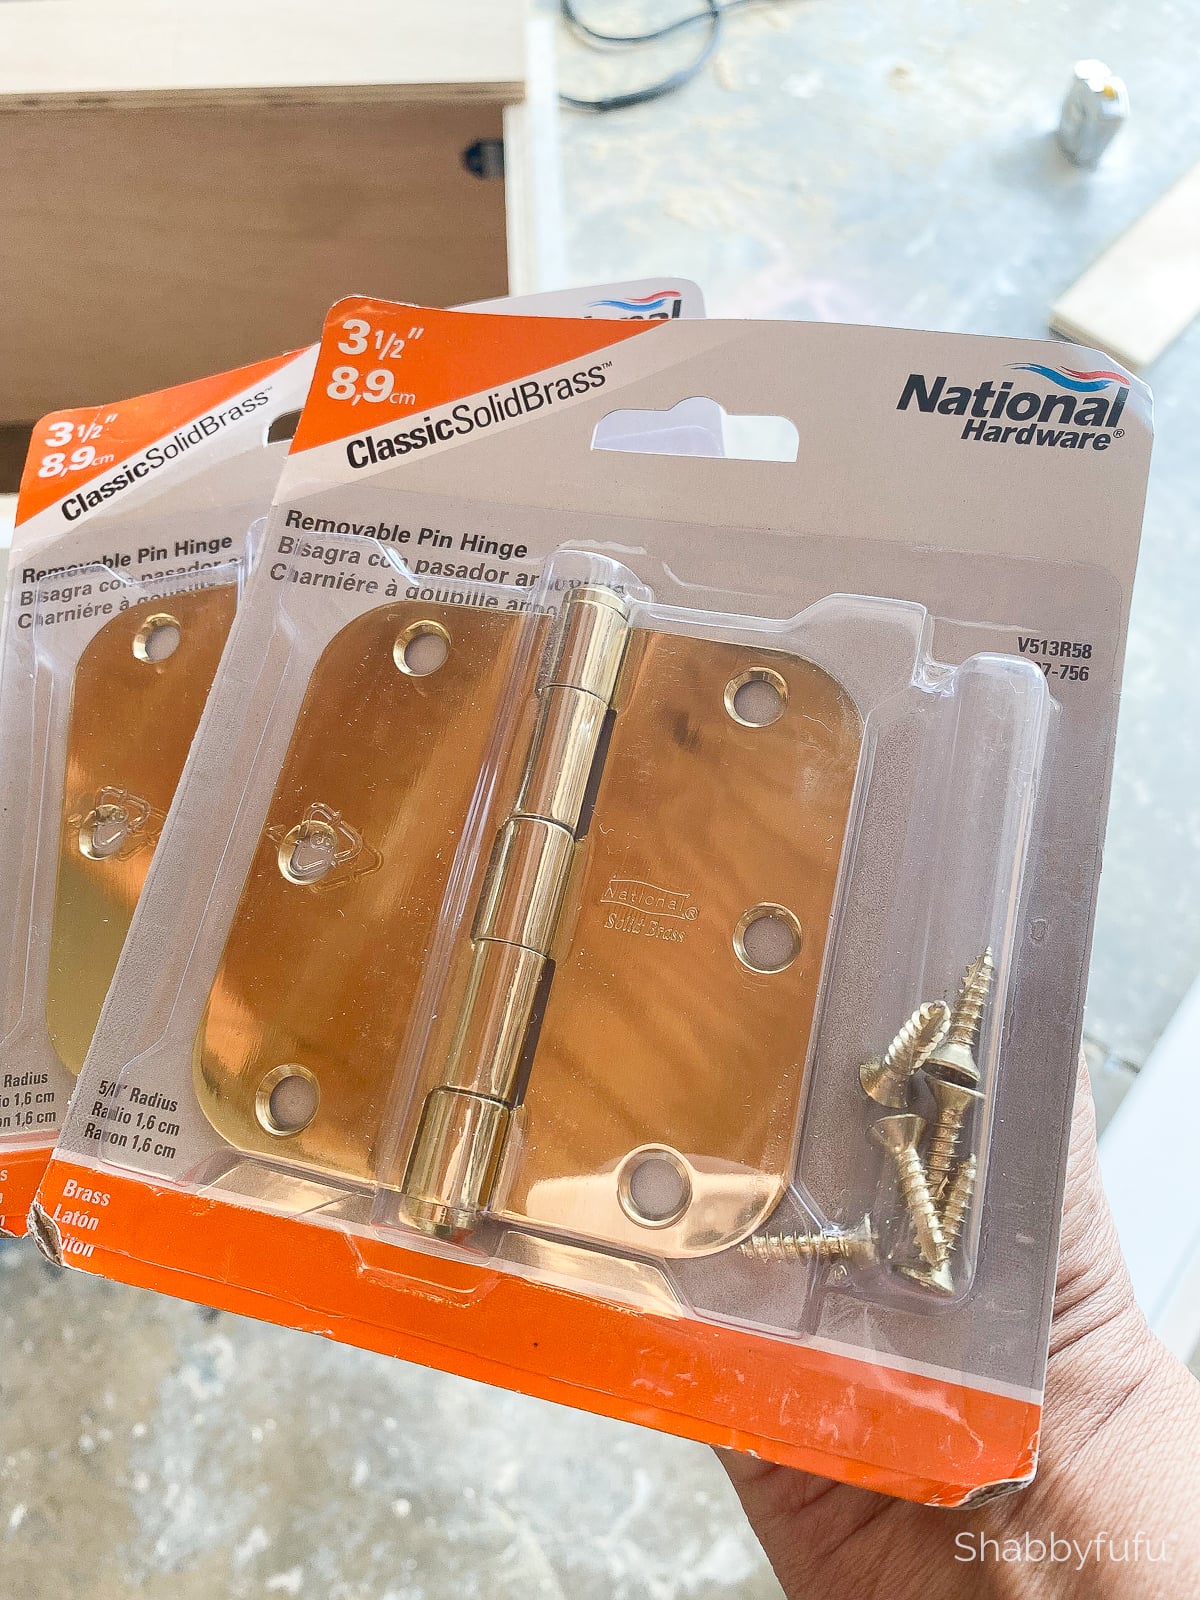
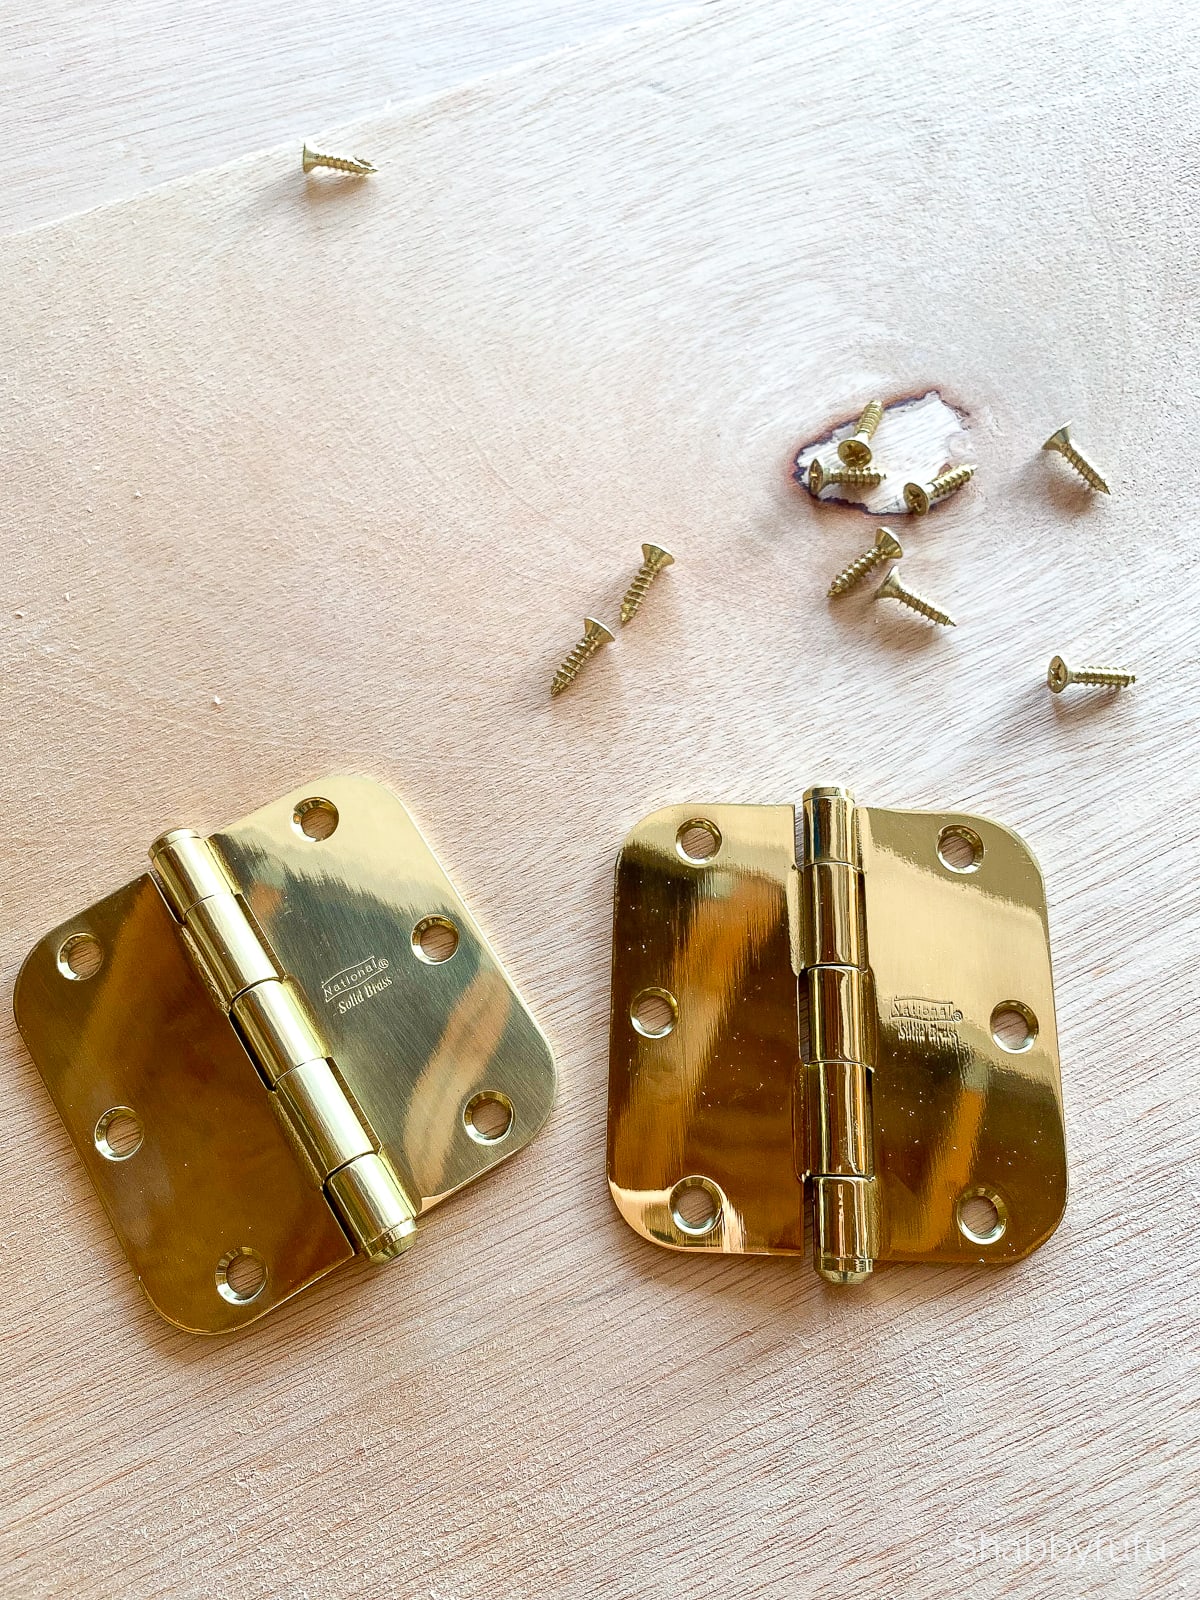
Attach the National Hardware brass pin hinges with the screws provided from the 4″ hinge support plywood to the 14″ top.
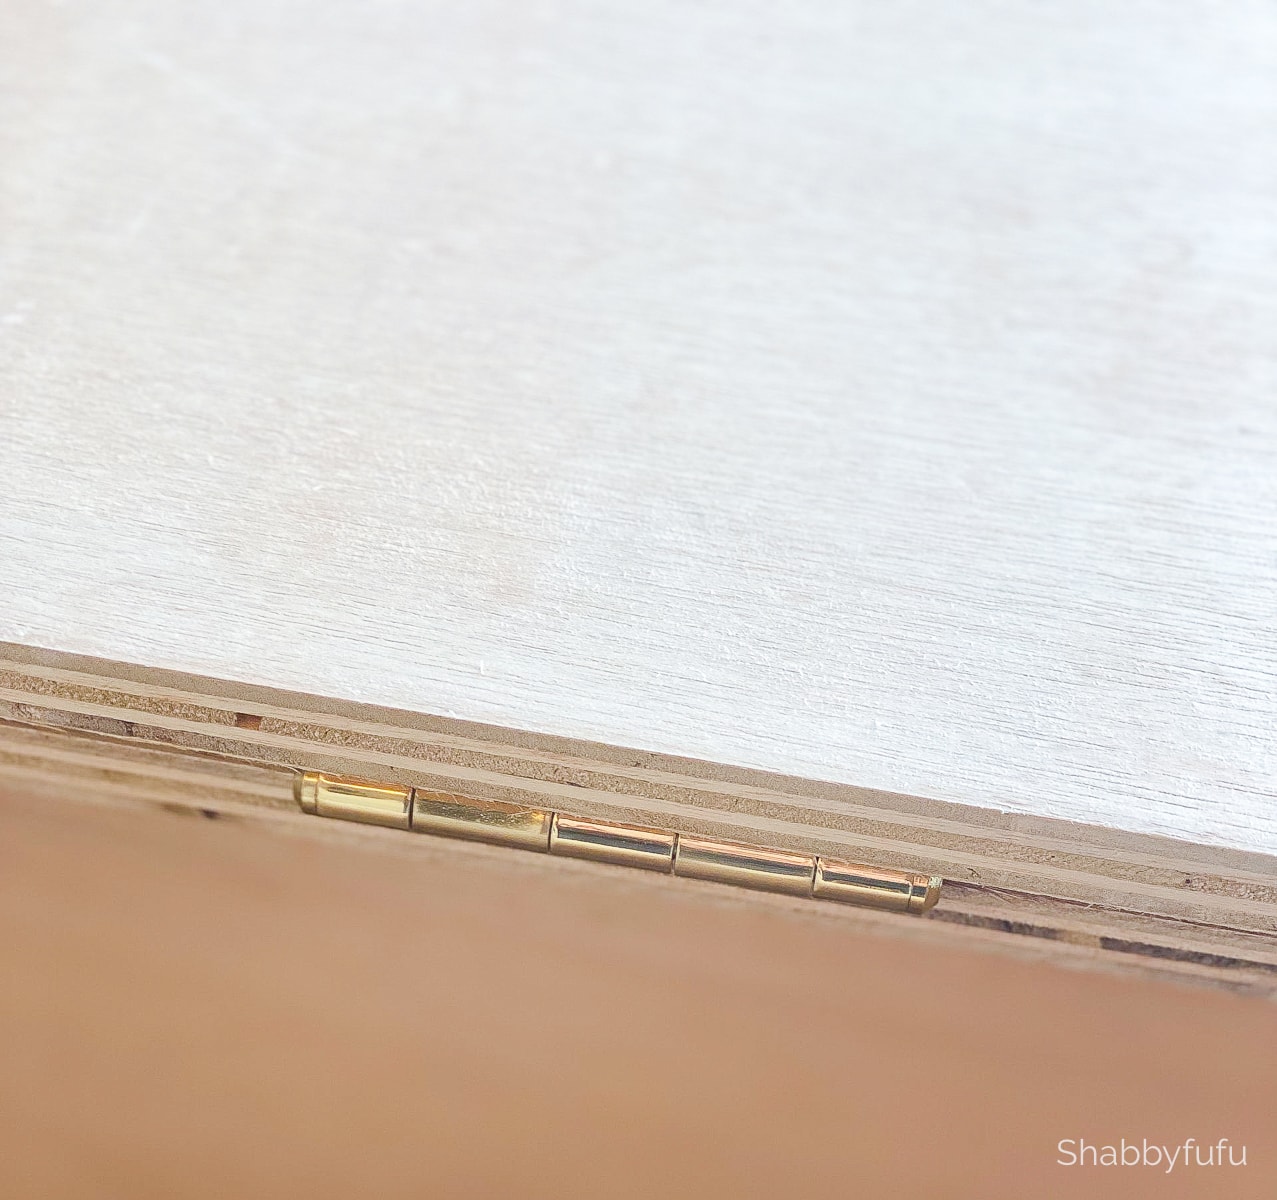
This is one of the two National Hardware hinges that hold the hinged top.
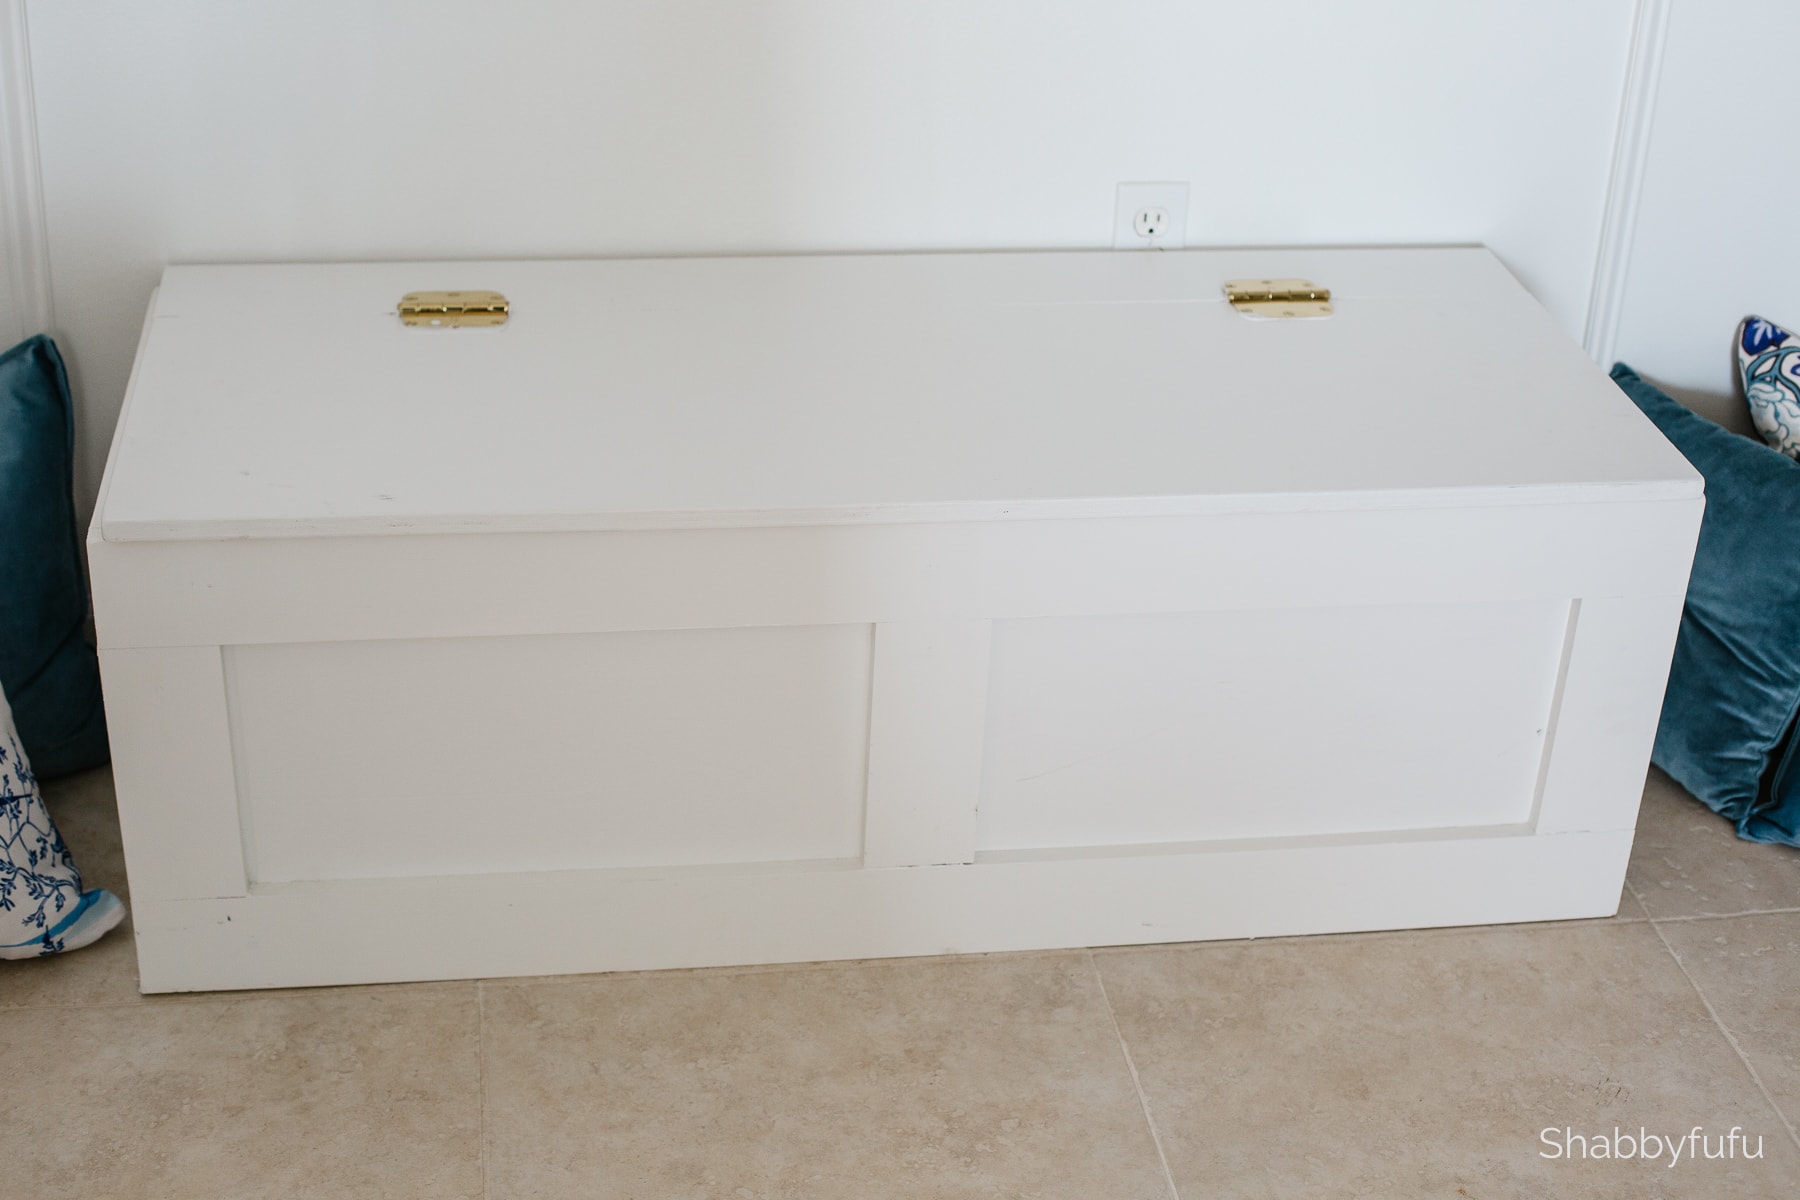
The top is now attached with the two hinges that are attached to the support bracket. This will now allow the top to open and close, similar to a piano bench.
Adding Finishing Touches To A Breakfast Room Banquette
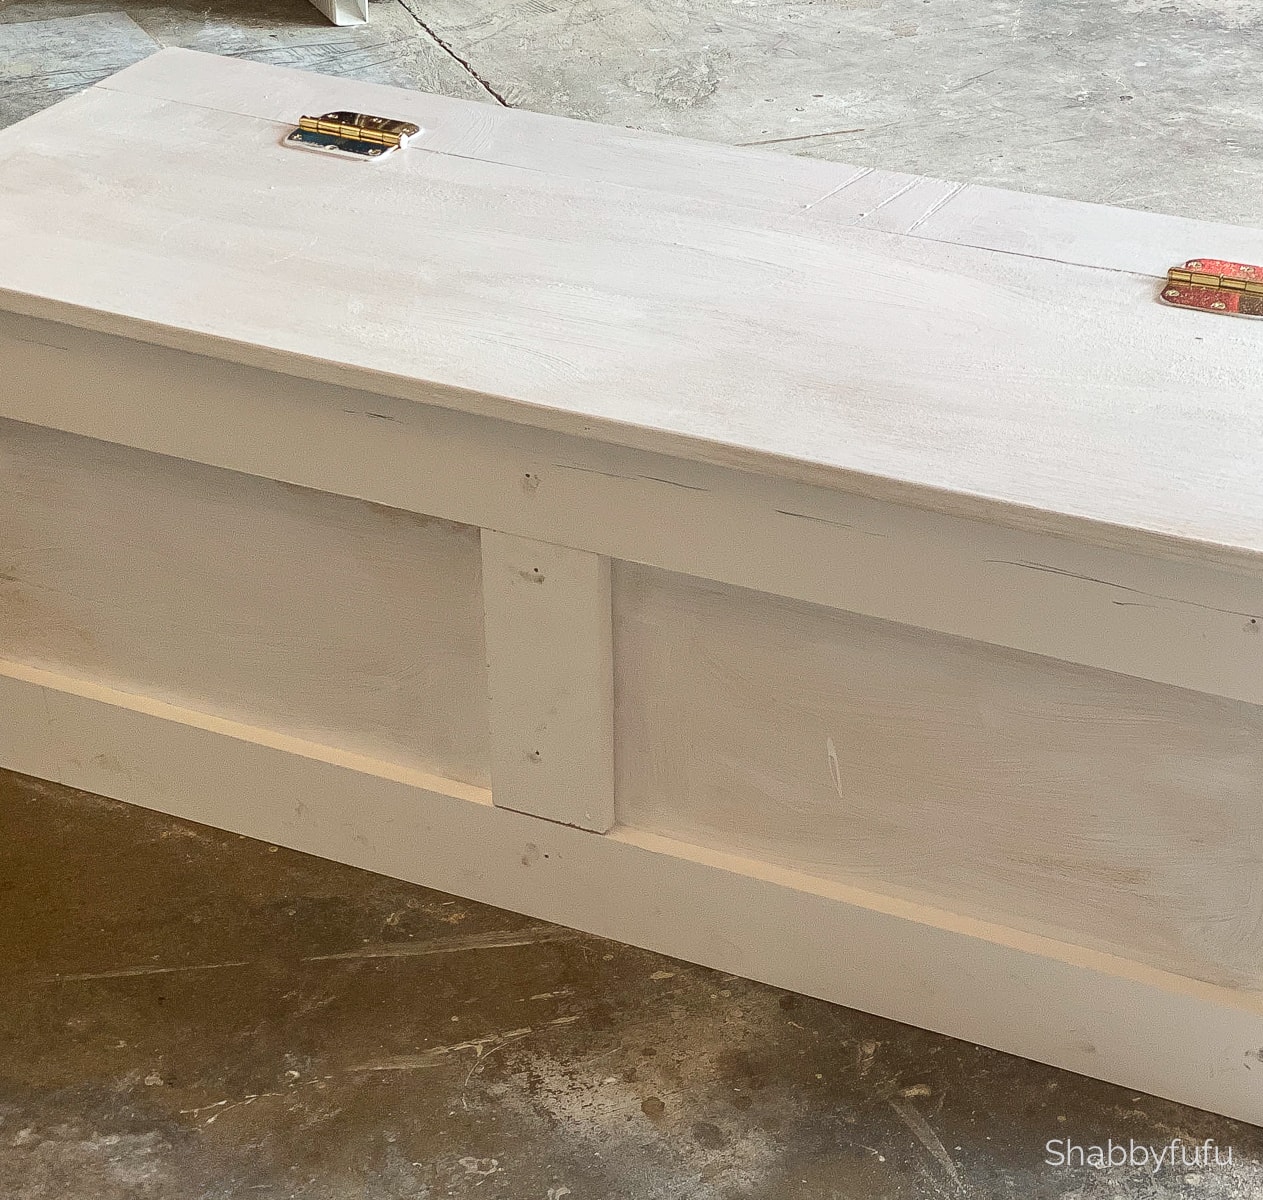
Note that we made the box decorative by attaching 1 x 4 pieces (in material list). This gives it that high end custom look of board and batten finishing. We would highly recommend not skipping this step!
Then prime the box with a water base primer sealer and paint with 2 coats of water base satin trim paint. You’ll want to caulk some of the seams between the prime coat and the final coats to give it a nice finished look.

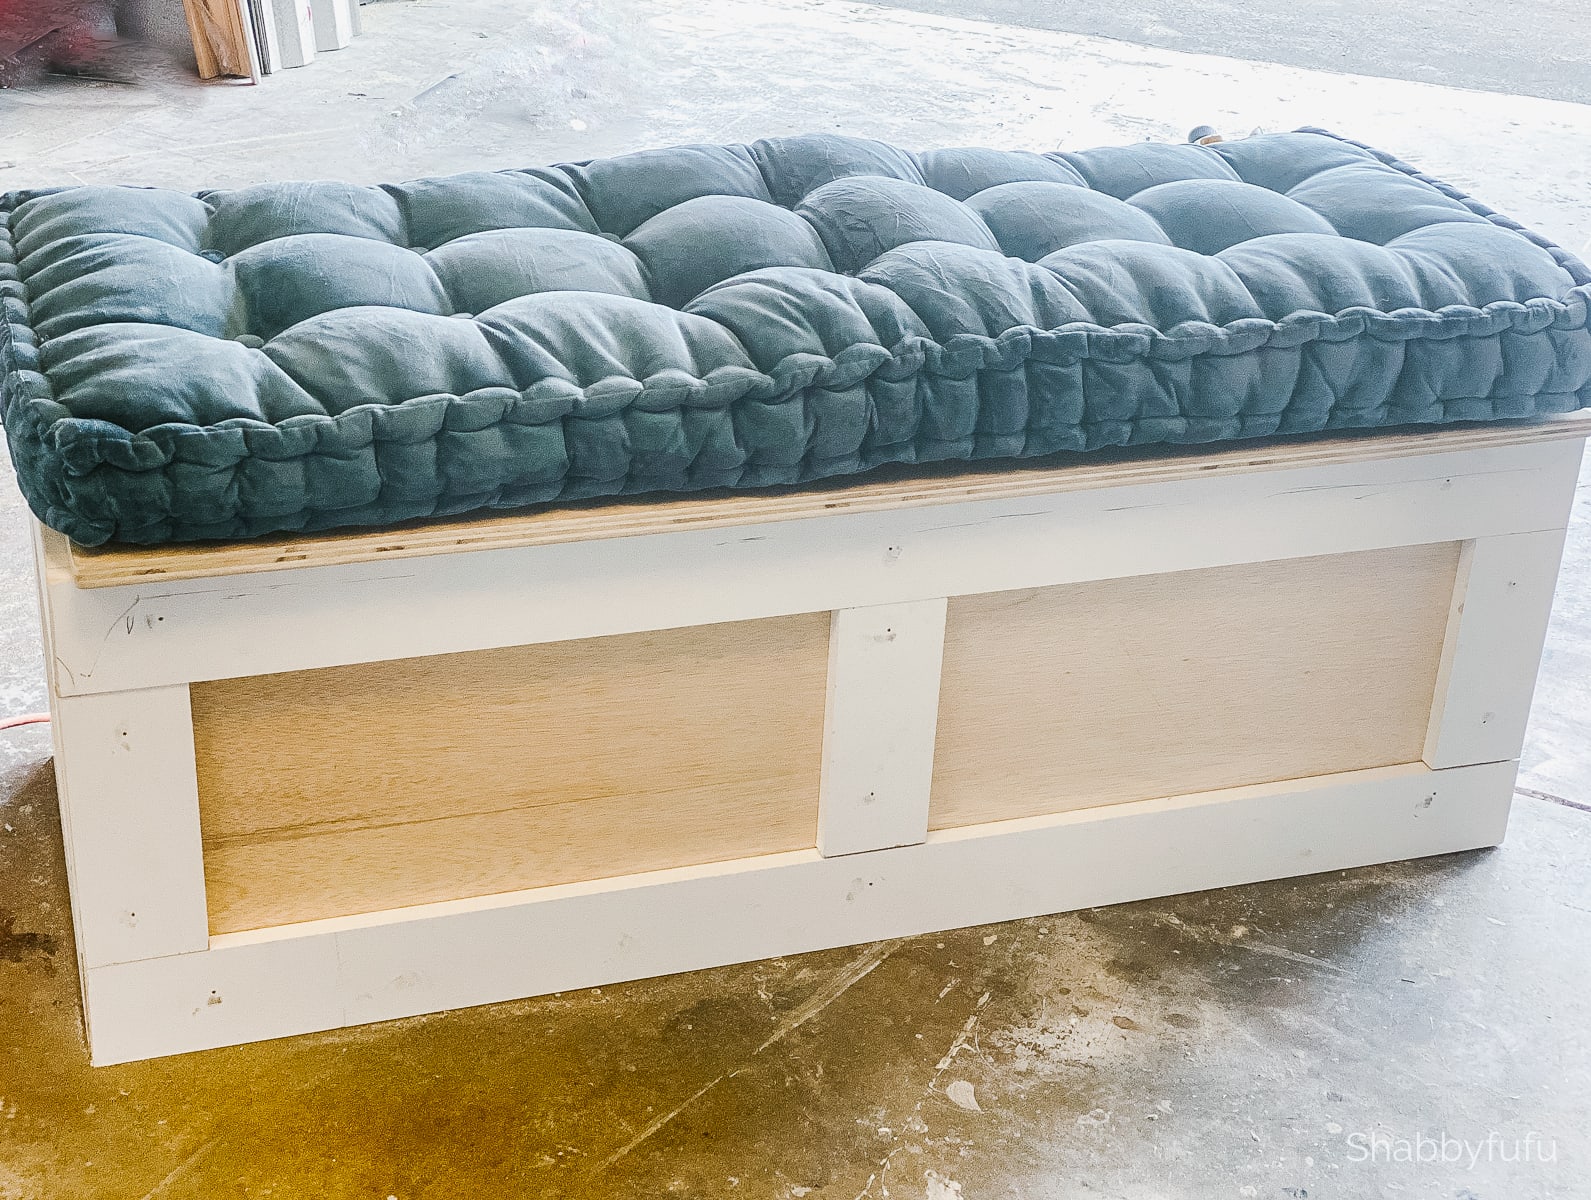
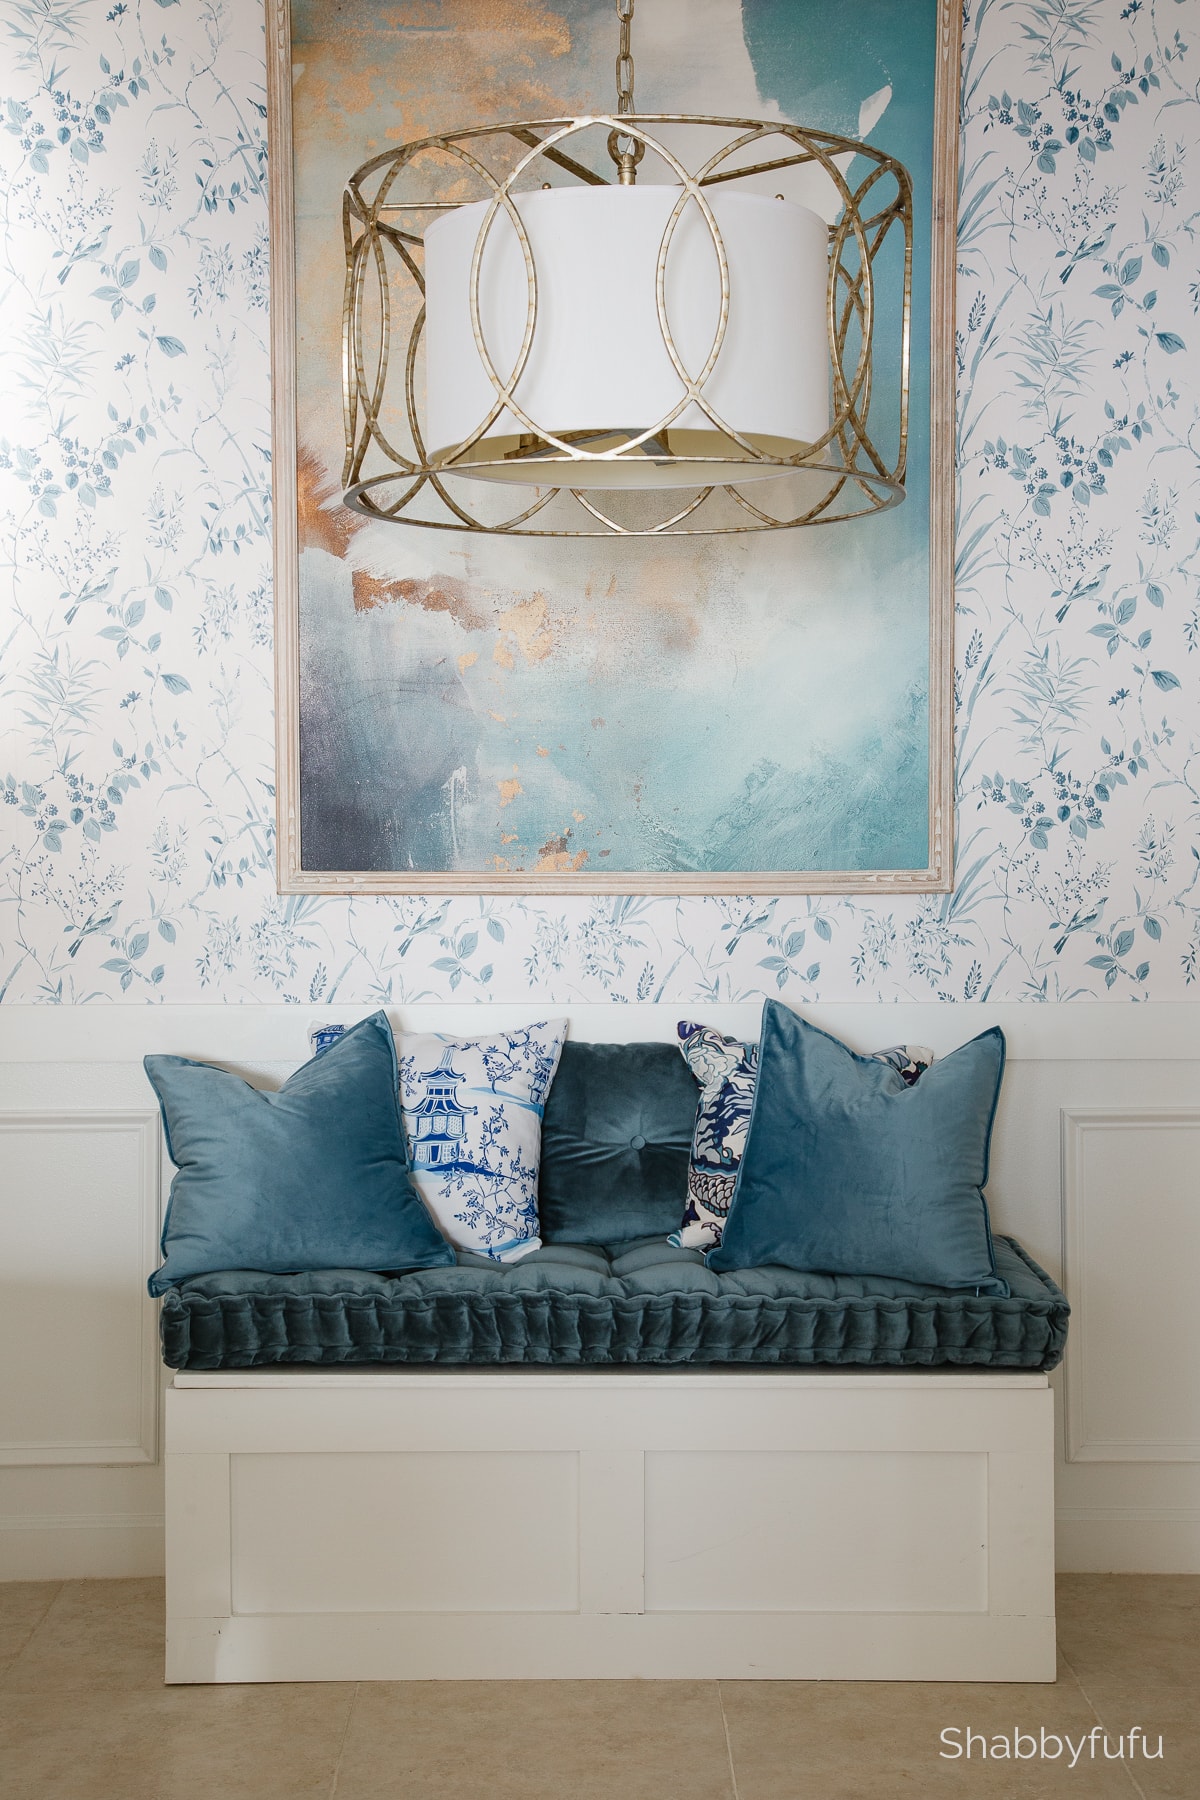
I should mention that I ordered the cushion before we built the breakfast room banquette due to production and shipping lag times. Yes…it fits perfectly and I LOVE it!
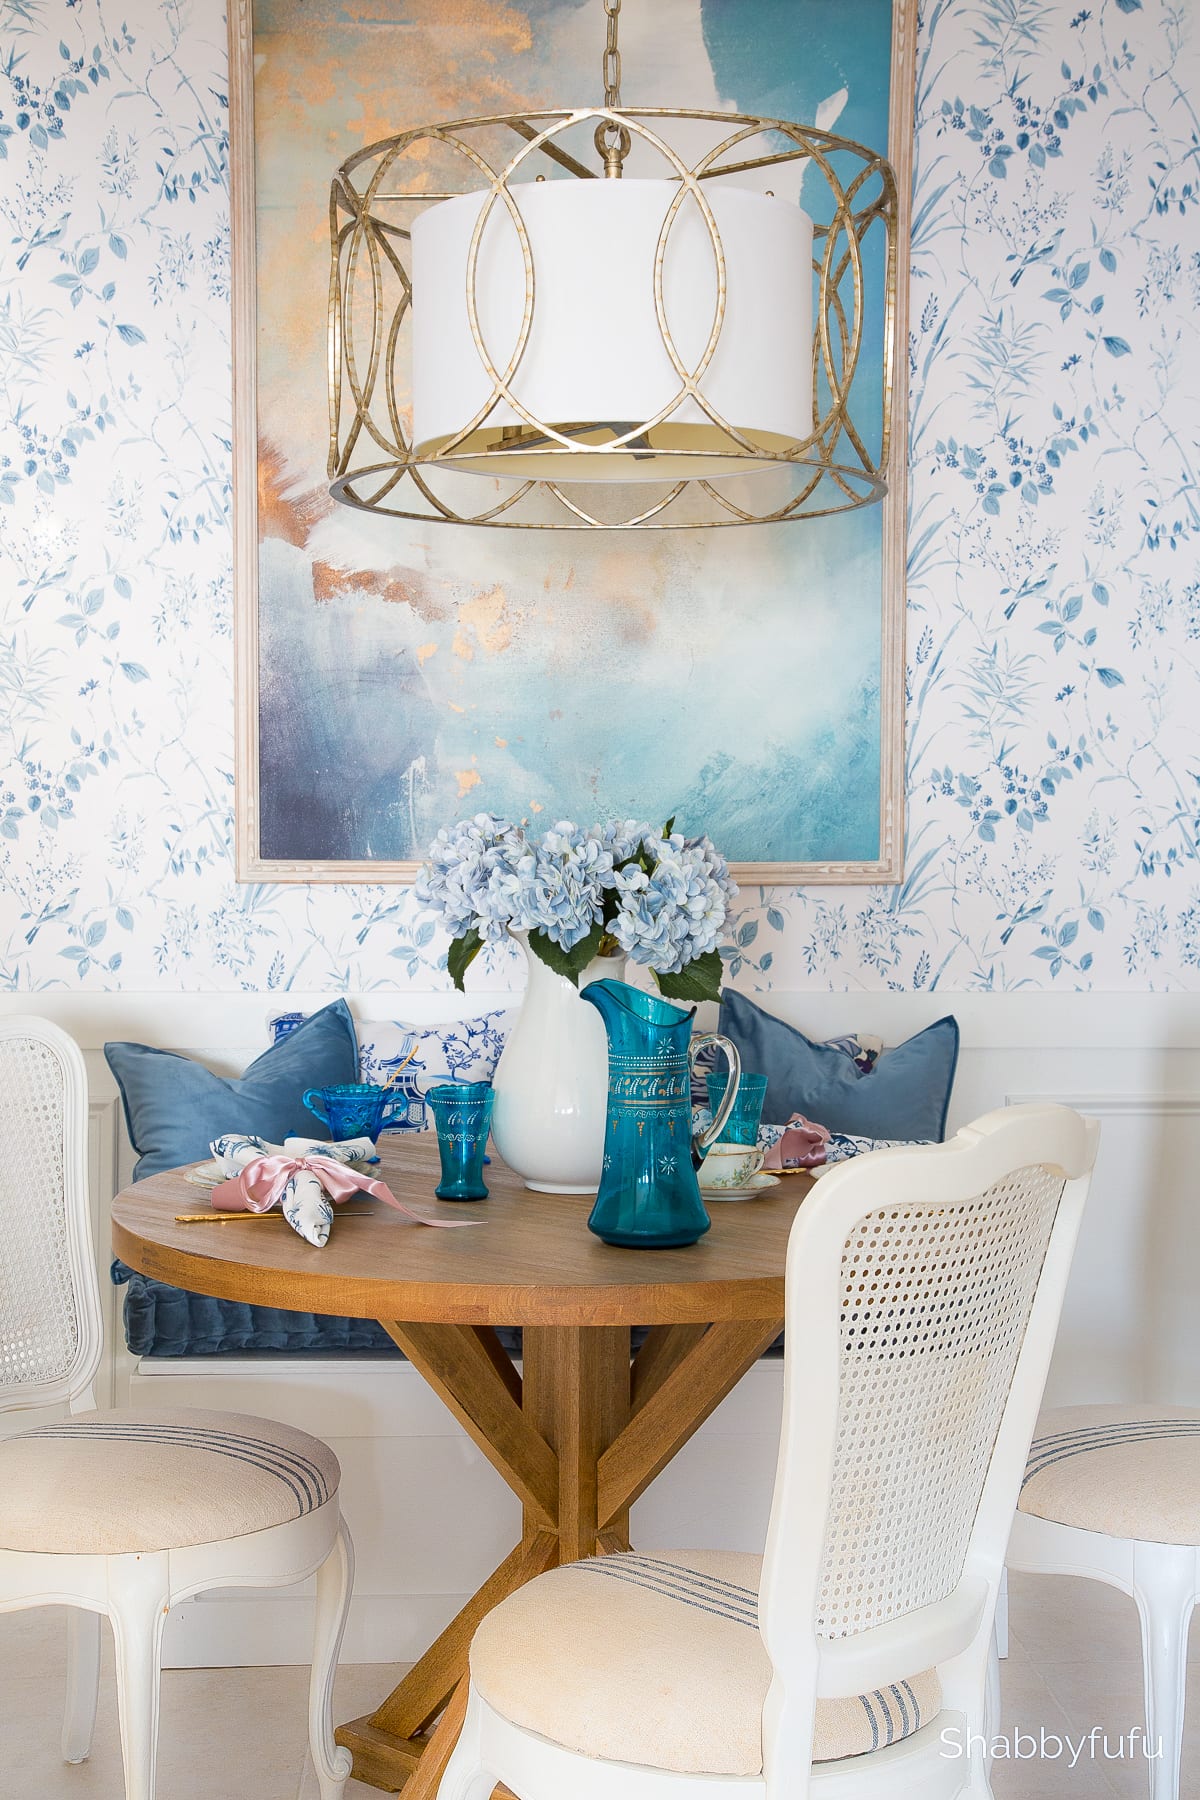
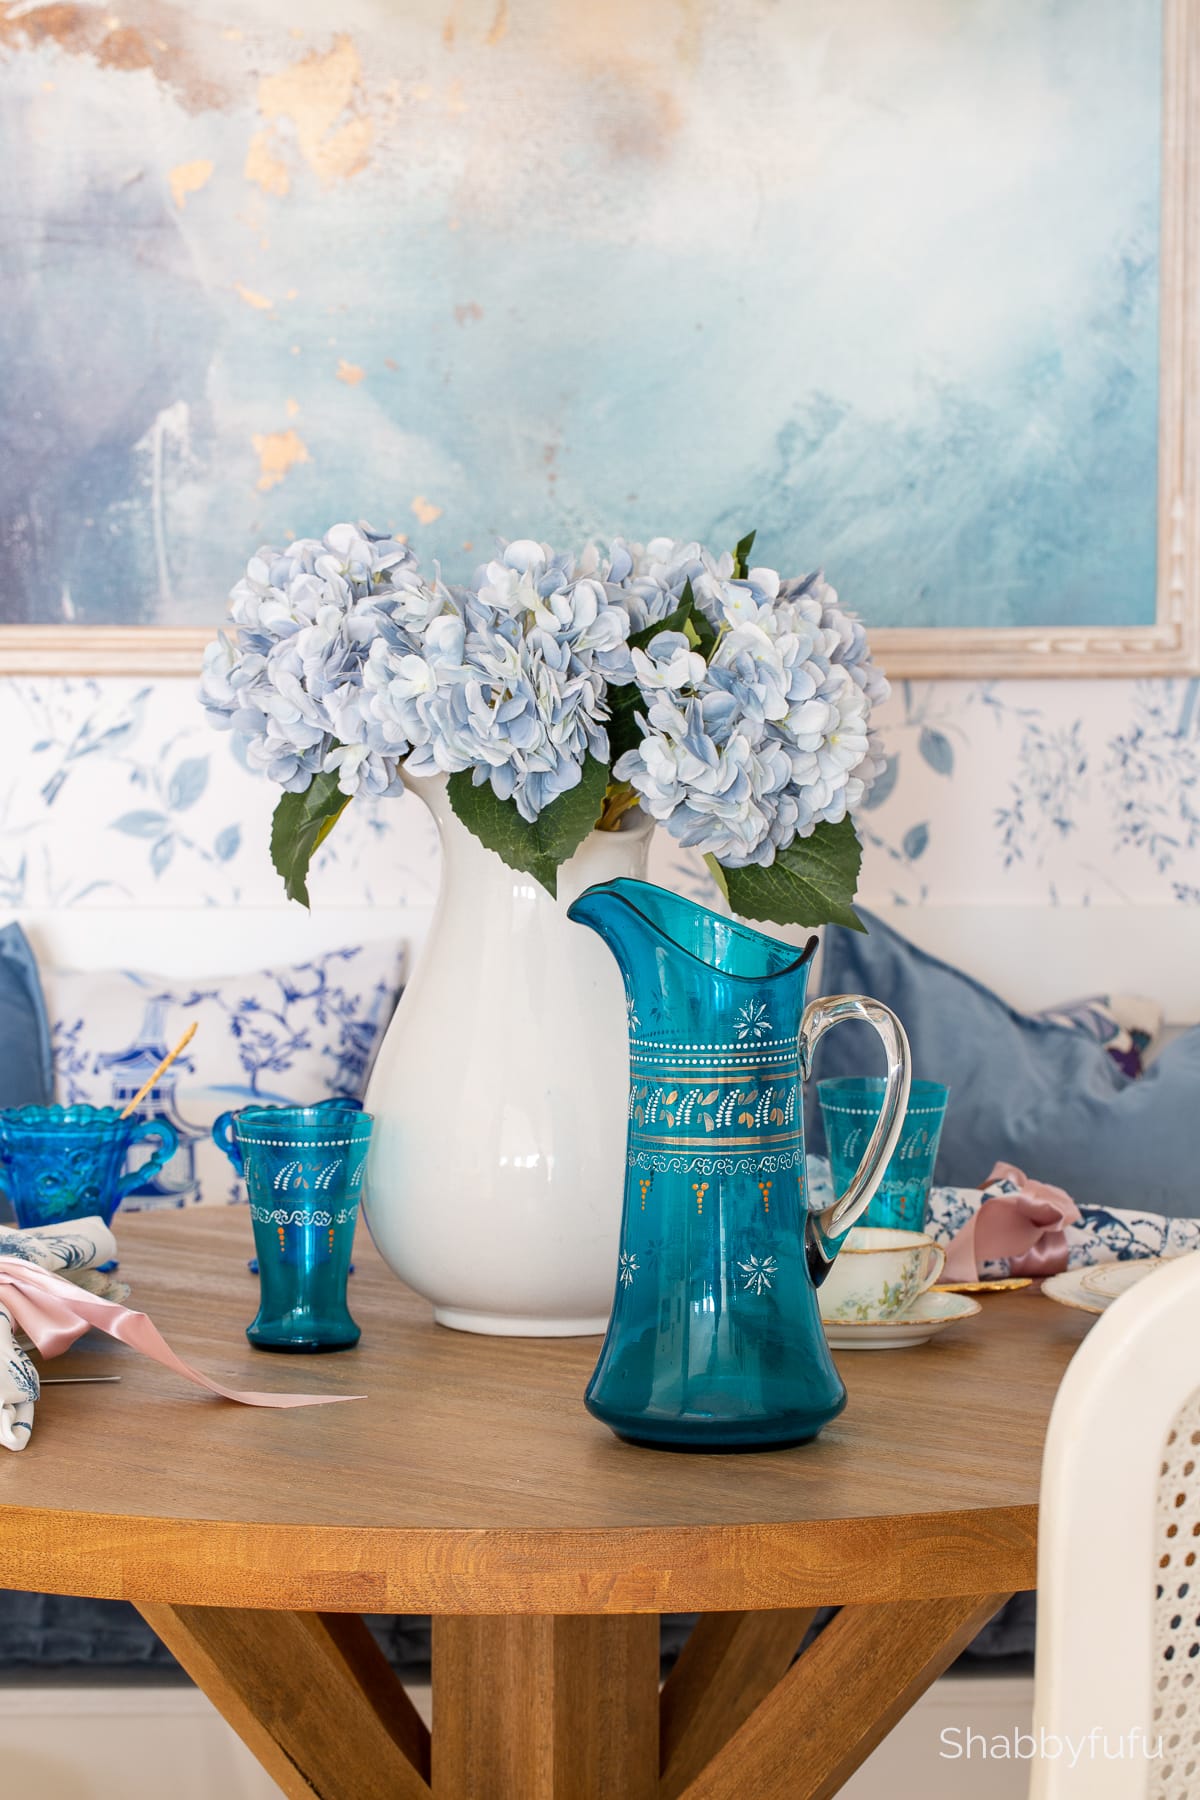
The Completed Breakfast Room With The Banquette
Woo hoo…here we go with a boatload of after shots and I’m really thrilled with the look! At some point if we keep this home we plan on laying LVP flooring over the existing tile. We can’t do rugs since we have 3 geriatric doggies who travel here with us…but overall I’m super happy with the look and function!
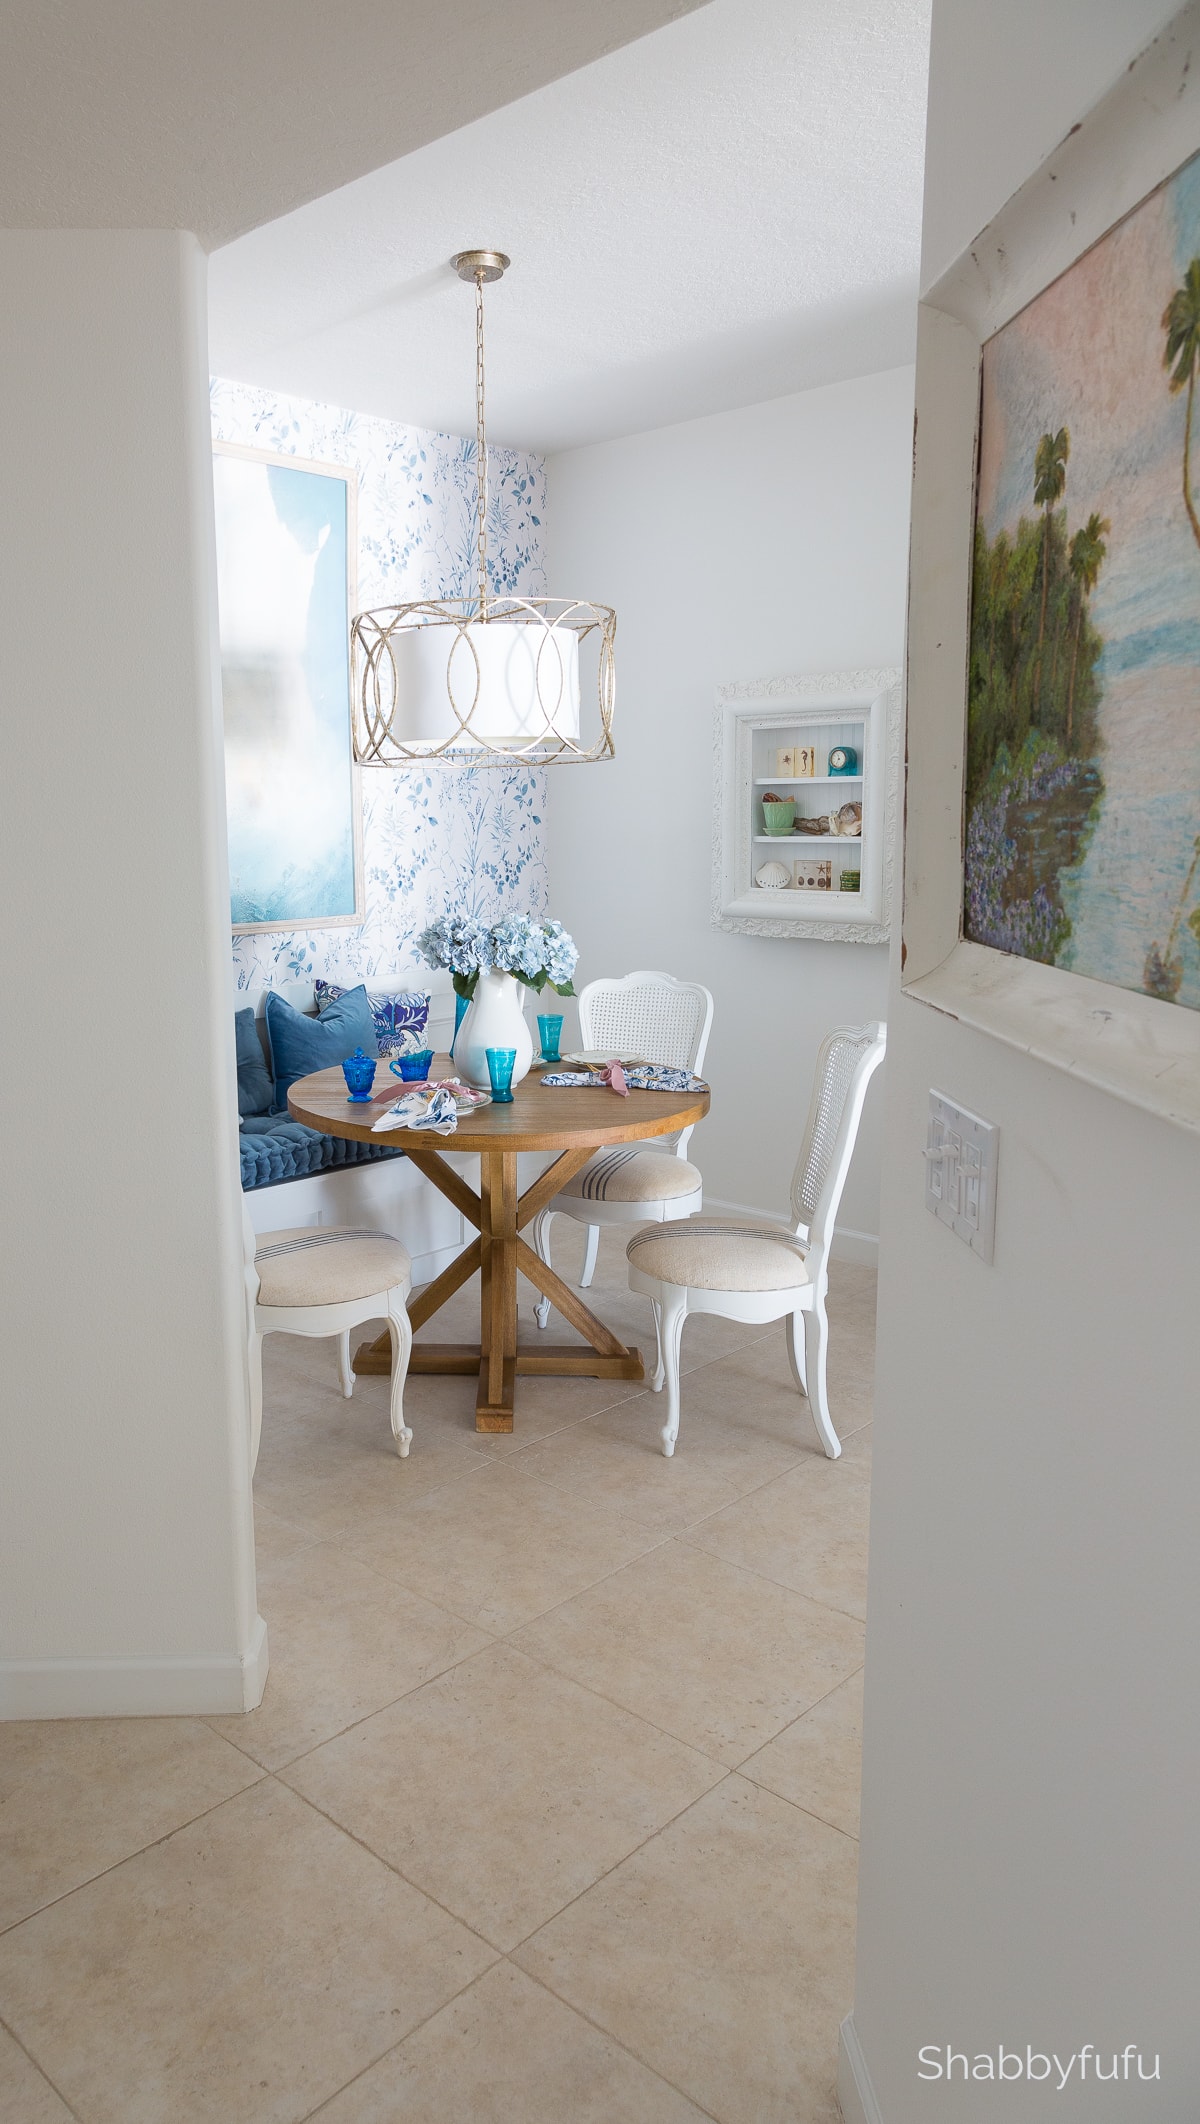
The wallpaper gives the room a real punch and taking the plexiglass off the artwork helps that piece showcase well.

It’s really easy to lift the top when we arrive and want to stash our coolers inside. The National Hardware brass pin hinges work perfectly for this breakfast room banquette!
We didn’t paint the inside of the lid, but certainly one could if they had the time.
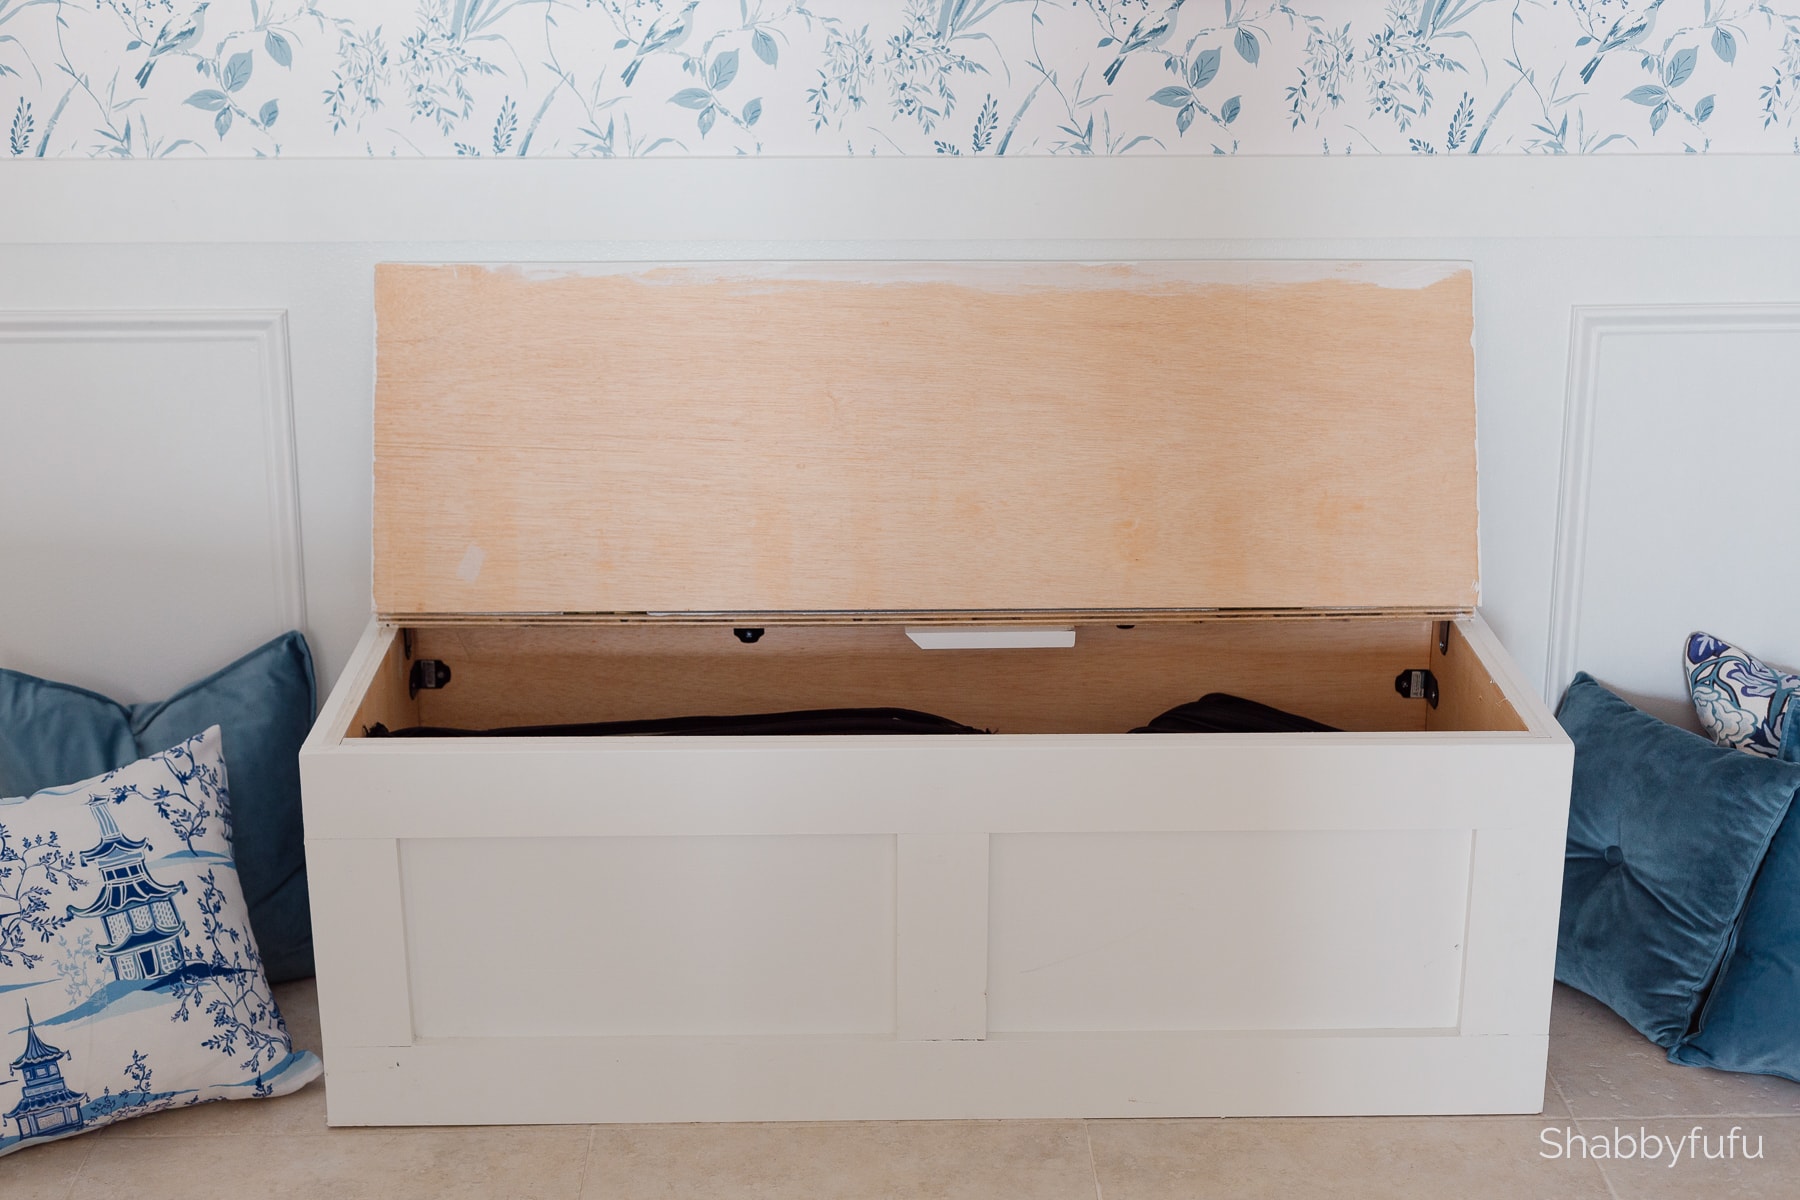
You can see our soft sided coolers inside and a banquette can be used to store any number of items.

Here’s a look at the breakfast room banquette before we put the table and chairs back in place. We made this banquette moveable, should we ever want to use it elsewhere!
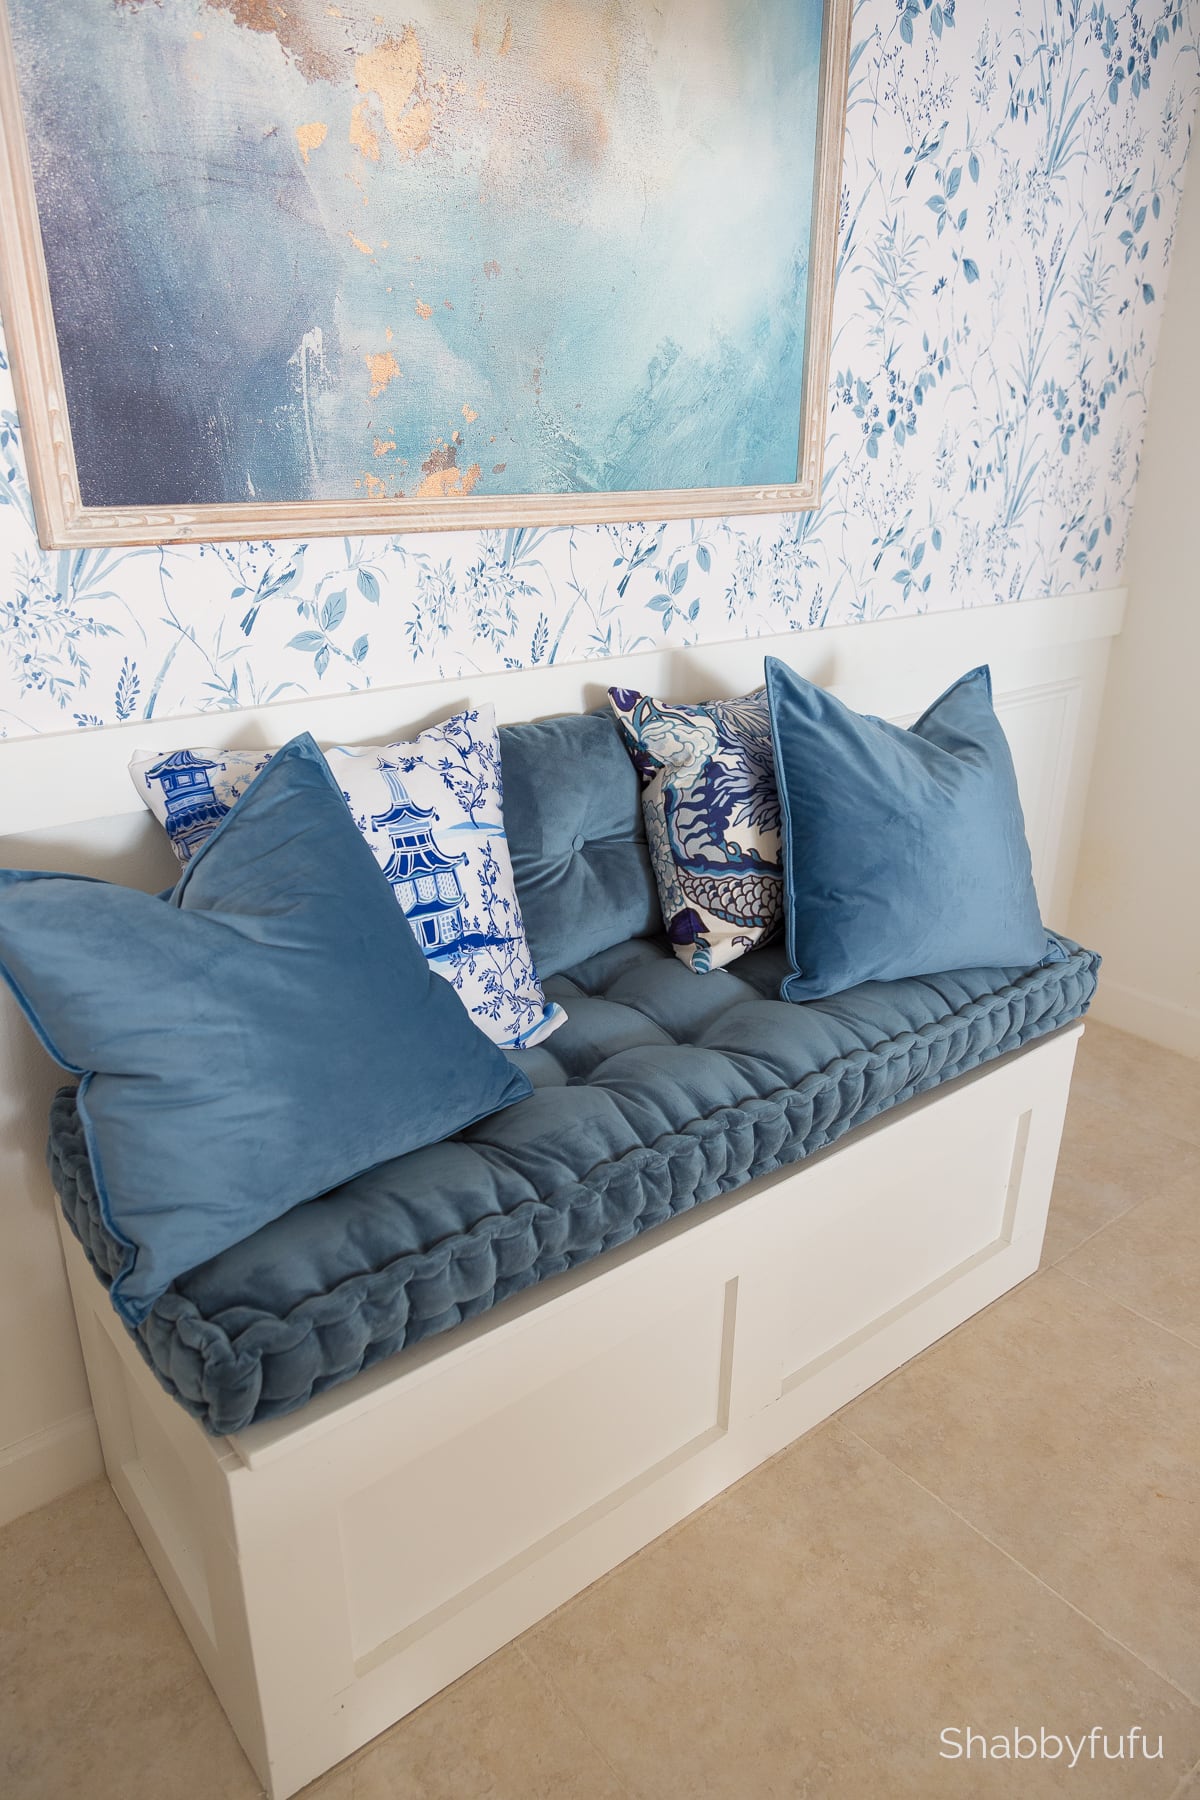
You might ask if this took away from our seating, but it actually added an extra spot! There were four chairs here before and I took one away to use in another space. The banquette was designed to be cozy seating for two!
Adding the breakfast room banquette created a whole new look for this space without changing out the furniture that we had. I call that a real win/win! Thanks for stopping by and let me know if you have any questions!
SOURCES

PIN THIS POST!
What a transformation! It looks gorgeous.
I love the banquette and the directions are easy to follow! I am a seamstress and love to add pillows to any decor to spice it up, add texture, comfort and a pop of color! You can store placemats, table clothes and alternate pillows under to lid to change up the look for various holidays and special occasions!
Warmest Regards,
Dana
What a spiffy upgrade! I’m crazy about your wallpaper choice – and the ‘paneling’ detail is perfect. Your banquet is beautiful storage space! How lucky to have two of you who can actually do/make/create stuff like handmade furniture and professionally hung wallpaper! I won’t even attempt to envision what my own versions of ‘Nailed It’ would look like!
I also like the way you’ve designed it to flow and coordinate with your kitchen, but is just a tad more luxe. Speaking of your kitchen – are those glass subway tiles? They gleam so brilliantly!
And I can’t stop without mentioning that delightful recessed display cabinet in your nook…did you create that or was it always there? It’s such a clever way to create display space without taking up precious air (and head!) space!
Thanks for sharing. I enjoyed reading your tutorial – which I would not even *think* about delving into! LOL
wow! Beautiful! The wallpaper makes it for me. I love the banquette and picture, etc but the paper just seems to really finish the look. Love the transformation!
Absolutely gorgeous!
It is always a pleasure to see you doing your projects. It is much easier to go to a shop and buy whatever you want. Great that you are doing it by yourself, I like it!
And the breakfast area looks really great now.
Thanks Heike! It is much easier to go to a shop for sure, but has more meaning when you make it ☺️
Absolutely gorgeous!! I love it ALL!!!💙
Thank you so much Cindy…it really made such a big difference in brightening up that space!
I wanted a banquette bench built in our dining area but we could not find anyone who could or would build it for us. Strange we thought it was so hard to find someone. It is a box with a hinged lid!? With our low windows it boggled our brains in how to get a lid on it if the window ledge would be in the way…and it seemed to stumble some on the air vent…so needless to say I saved your how-to’s so just maybe we can figure this out on our own.
Looks great Janet! I will put that Etsy seller for the bench cushion as a favorite but sadly it says they no longer have the listing! Anyway I know where to look when we need it. That shade of blue is just so rich looking…love it!!
Lory, this bench was fairly easy to do if you have some skills with power tools. As for the cushion on Etsy, they are all made to order with your specific size and the seller is great! Hope you figure it out…xo
Beautiful transformation! In search of round dining table for a small space. Where did you find your dining table ?
Hi Anne…thank you! That table came from Target several years back and is no longer available unfortunately.