My Kitchen Design Remodel Renovation – 6 Powerful Tips
This post may contain affiliate links. For more information, please see our disclosure policy.
Are you planning a kitchen remodel in the future? I hope that you can use some of the kitchen design ideas & tips in this post to create the kitchen of your dreams!
A Dream Kitchen Design That I Waited Years For
I am just thrilled to have this kitchen design, remodel, renovation finished! I wasn’t really sure how to title this post, since it involves so many aspects when you completely tear out a kitchen and replace it with all things new. It’s been something that I’ve been wishing to do for many years but with raising kids and the expenses that entails we had to wait. Did I get my dream kitchen? Yes! For the size of this house, the space that we had to work with and what we could afford…it is! I still believe in working within the constrains of what a budget allows and utilizing carefully planning. This is going to be part one, as I have so much to share. Scroll down as I’ve edited this post to include this link to my completed kitchen reveal!
Table of Contents
While our old kitchen looked pretty good, it’s functionality was quite tired. Our home here in South Florida was built in 1962 and we’ve owned it since 1990 (33 years). As a young family when we purchased it, my husband and I knew that this would be our “forever home” to raise our family in. Here we are all of these years later with grown kids and we are still living in this house!
At the moment we have no plans to move, but one never knows. Regardless, remodeling a kitchen to bring it up to date pays off by increasing its value and I want to have some time to enjoy it…should we decide to sell down the road.
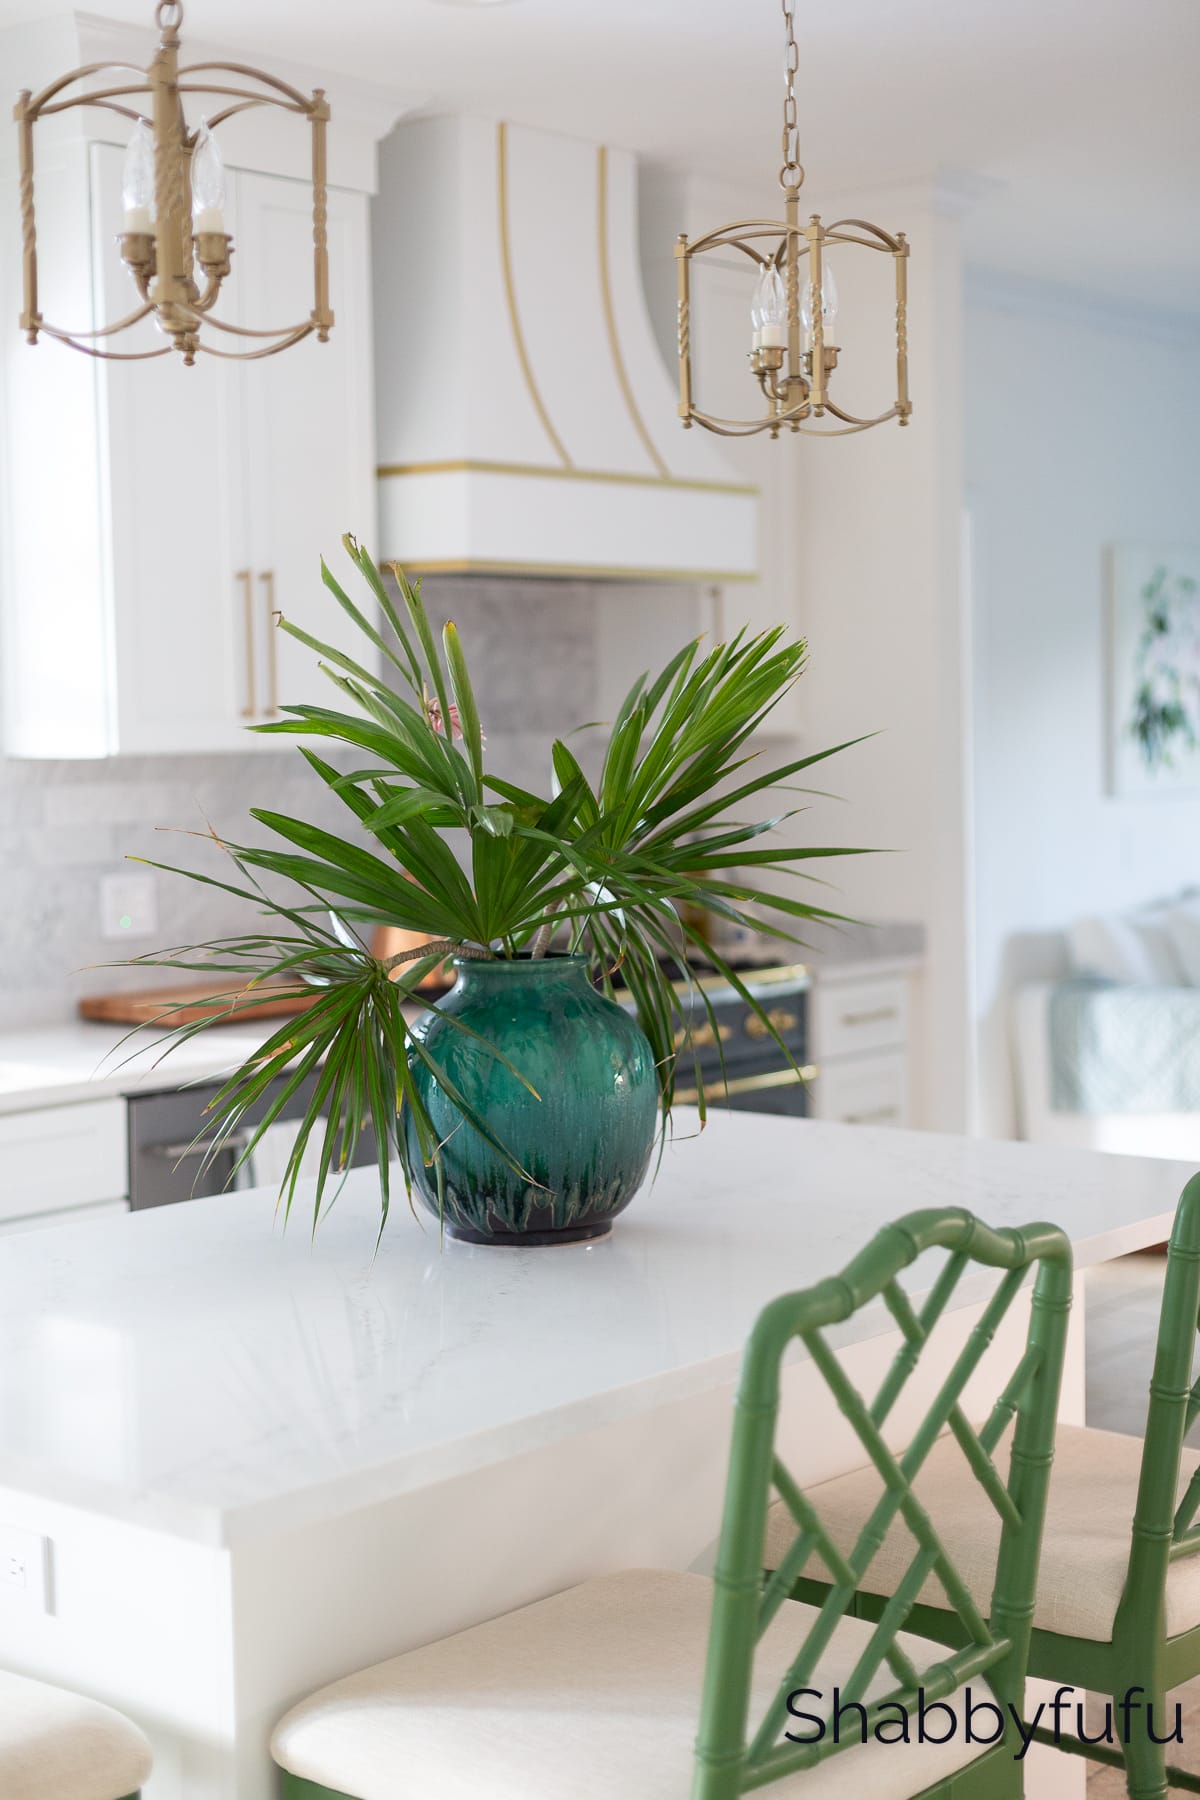
The kitchen has always been white and I say pish-posh to those who state that white kitchens will go out of style! While other looks will trend over the years, white kitchens will stand the test of time and are easy to add color and warmth to with accessories and simple changes.

The boxes of our original kitchen cabinets were made to last. When we first moved in we scrubbed and scrubbed the sold wood box shelves because the previous owners were heavy smokers. Yuck! We had new cathedral style doors (popular at the time) made by a local carpenter. At one point down the line we borrowed space from our large living room and enlarged the kitchen to accommodate an island. I wish that I had photos of the prior work done, but it was a long time ago. The counters had several iterations of countertop material over the years, from the original laminate to granite and more. In these before images the countertops are quartz and we loved them the best of all choices made! You can read about the quartz we used in this post and this one, and we used this same quartz selection in our new kitchen build out as well.
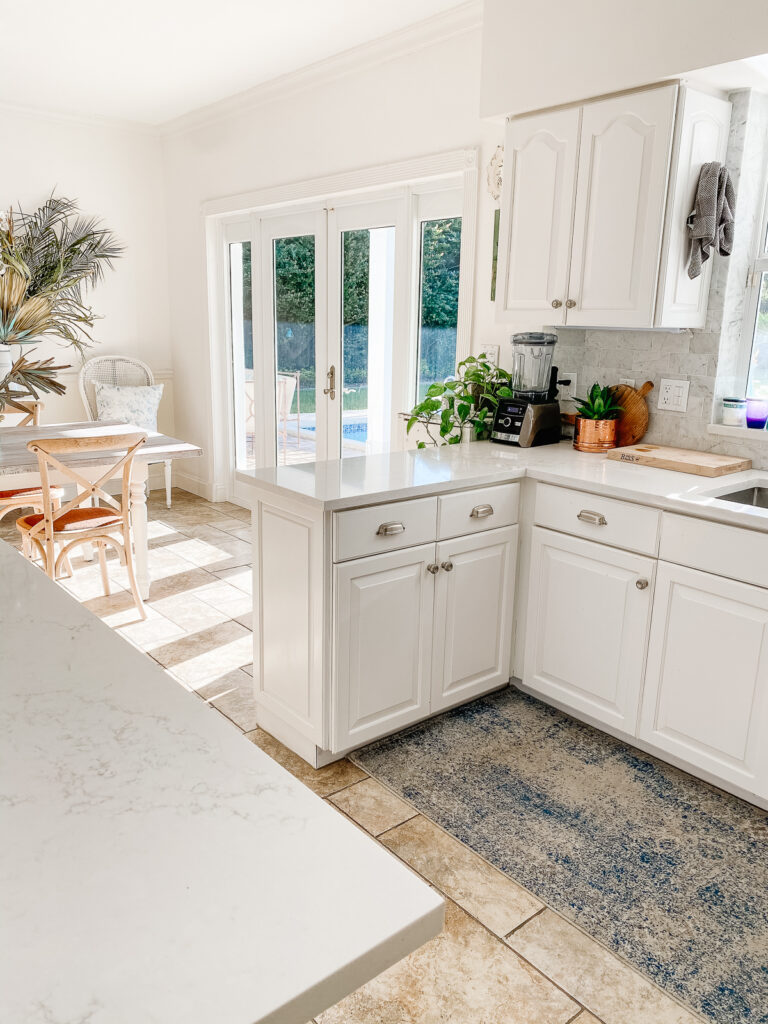
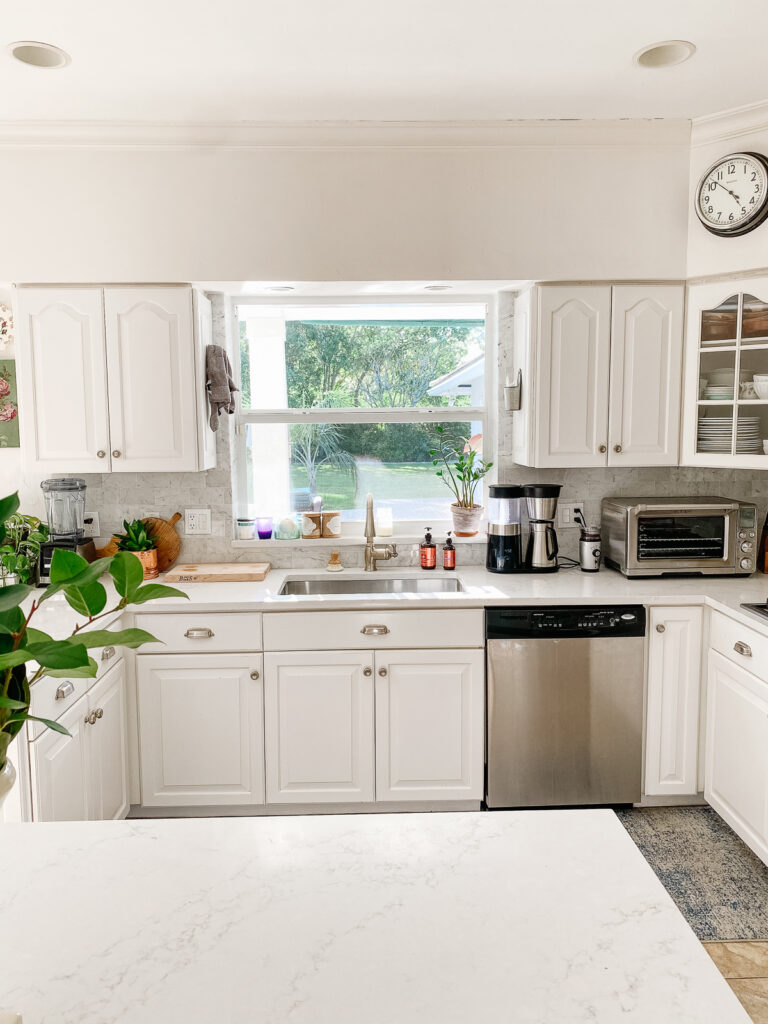
Let’s look at some before photos and some tips that we’ve learned along the way.
Tips for planning your successful kitchen renovation
- Decide on your budget when planning your kitchen remodel.
- Think about the room’s existing layout and any changes that you’d like to make.
- Will you hire professional help and are you willing to wait? I will say that a kitchen renovation isn’t practical for most do it yourself homeowners. It can take months to complete the work and will likely involve a general contractor, electricians, plumbers and possibly a design professional.
- Style choices should be made well in advance of demolition. Decide on a look that you are going for. Do you prefer a modern sleek kitchen, or a more traditional style? What color will your cabinets be? Go online to places like Houzz, search on Pinterest for kitchen styles and save what you love in a board that you create. Take a stroll around Instagram and put in hash tags such as #kitchendesign and #kitchenrenovation . Visit local kitchen showrooms or get in touch with a recommended kitchen designer.
- Create a wish list and a must have list. Find out what’s available in appliances, etc. and choose backup options.
- Consider storage, food prep, cooking needs and all of the day to day practical things that a kitchen needs to serve. Work zones will be essential for each task you will do in the room.
Plans For Our Kitchen Renovation
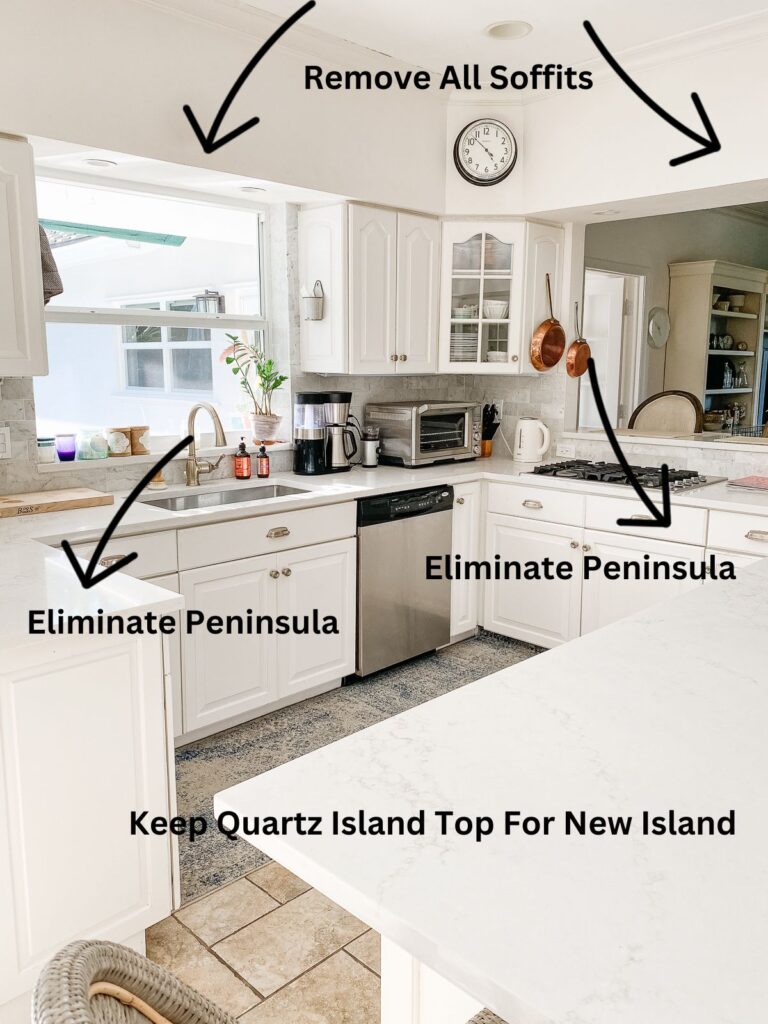
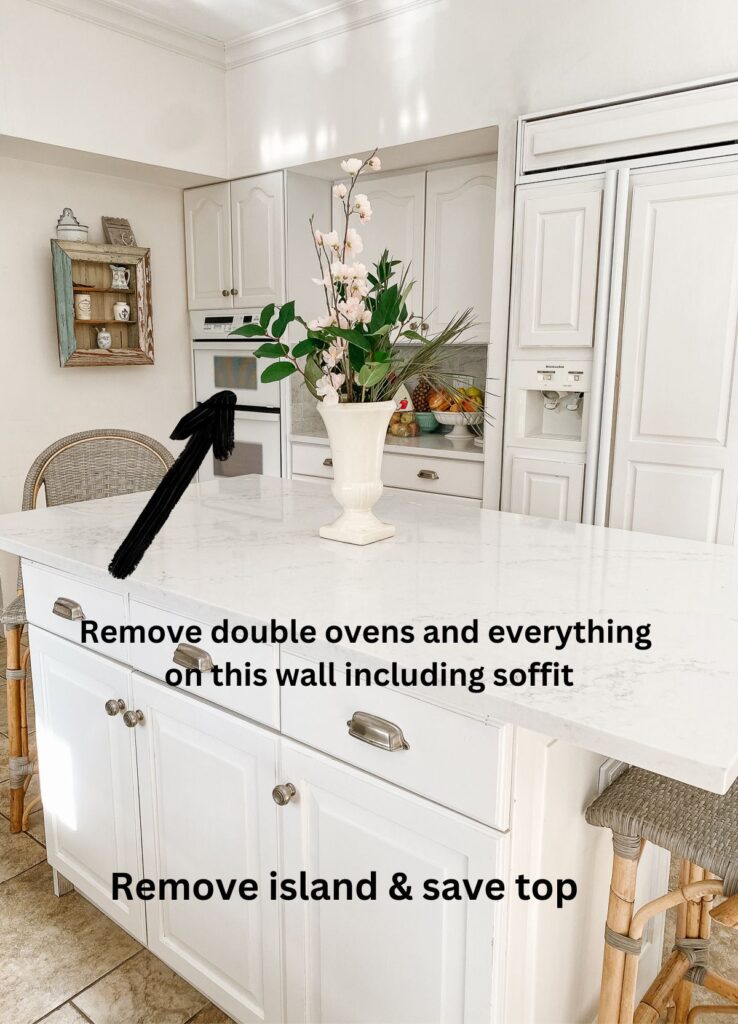
As you can see, there were two peninsulas in the old kitchen, which we decided were not needed in the new kitchen layout. Also, the soffit has been eliminated and it was probably my biggest pet peeve since day one in this house! What wasted space and I finally won the war about that with my general contractor husband! You’ll see how it really opened up the kitchen to the family room with a seamless traffic flow.
We did a total gut of the old kitchen but saved some things to help keep our cost down. The flooring has been kept and we only needed to replace it in a few areas. While I would have loved to install wood floors, it’s not practical in our area with the humidity factor. The cabinets had damage and wear inside so couldn’t be saved. We removed the crown molding and reused it in the new kitchen. I donated the dishwasher to one of our workers, sold the Serena & Lily counter stools on Facebook Marketplace and kept the old fridge until our new Sub Zero arrives this summer.
Kitchen Designer Plans
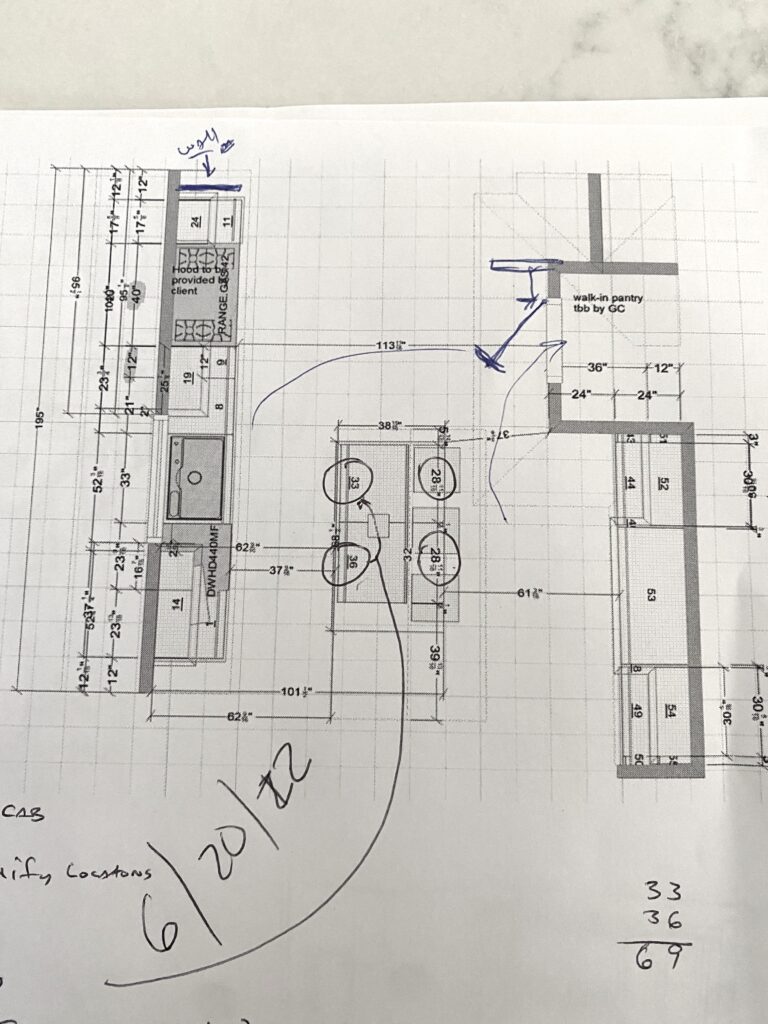
Once we knew what we wanted, we worked with a kitchen designer at the cabinetry company to help us plan out the space and order the correct cabinets. We used Eleet Cabinetry and worked with Christine who provided us with our plans. My husband served as the general contractor and I must say that I was impressed with how smoothly everything went under his reign! Below are the plans and if you can envision, we moved the cooking area to the left side and built out a small pantry on the right side of the room. Since the peninsulas were both removed, we had room to move the island closer to the left side and have a good traffic flow in front of the pantry.
We went through several drafts before we got it down to exactly what would work in the available space.

Always check, double check and triple check your measurements before placing the cabinet order! We found several small mistakes on our plans and also made a few changes. As I mentioned, my husband is a general contractor with many years of experience and I can’t imagine things would have turned out as good as they did without his expertise!
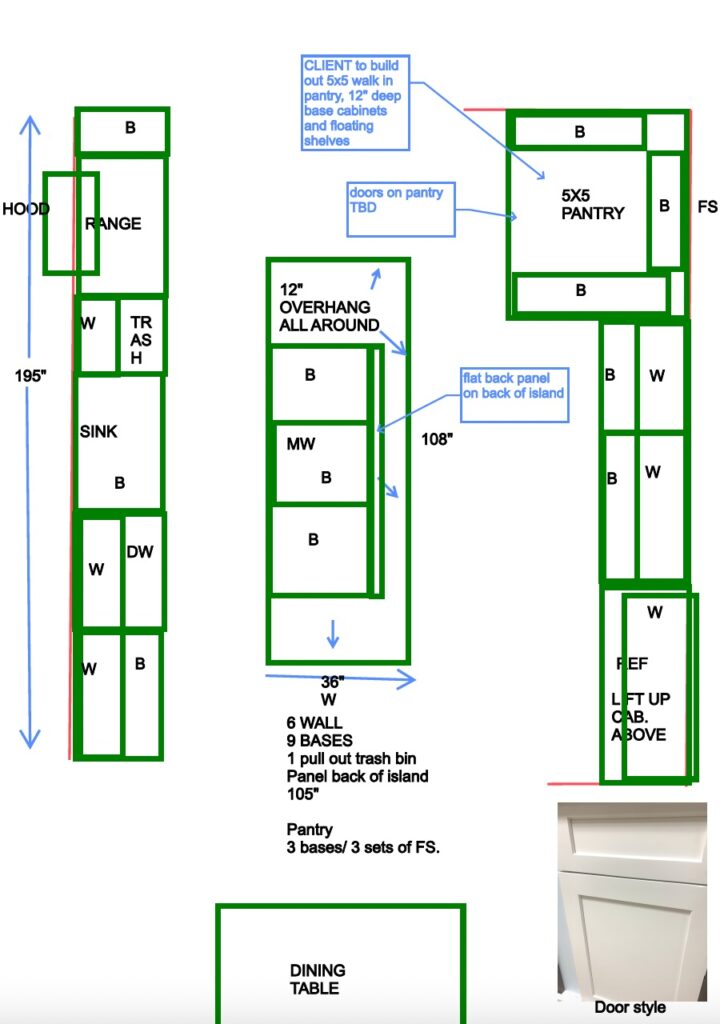
With the soffits gone we were able to take the cabinets all the way to the ceiling, which was a non-negotiable on my wish list! Another plus is that all of the lowers are drawers and not doors, so it’s much more user friendly for storage and easier on my back!

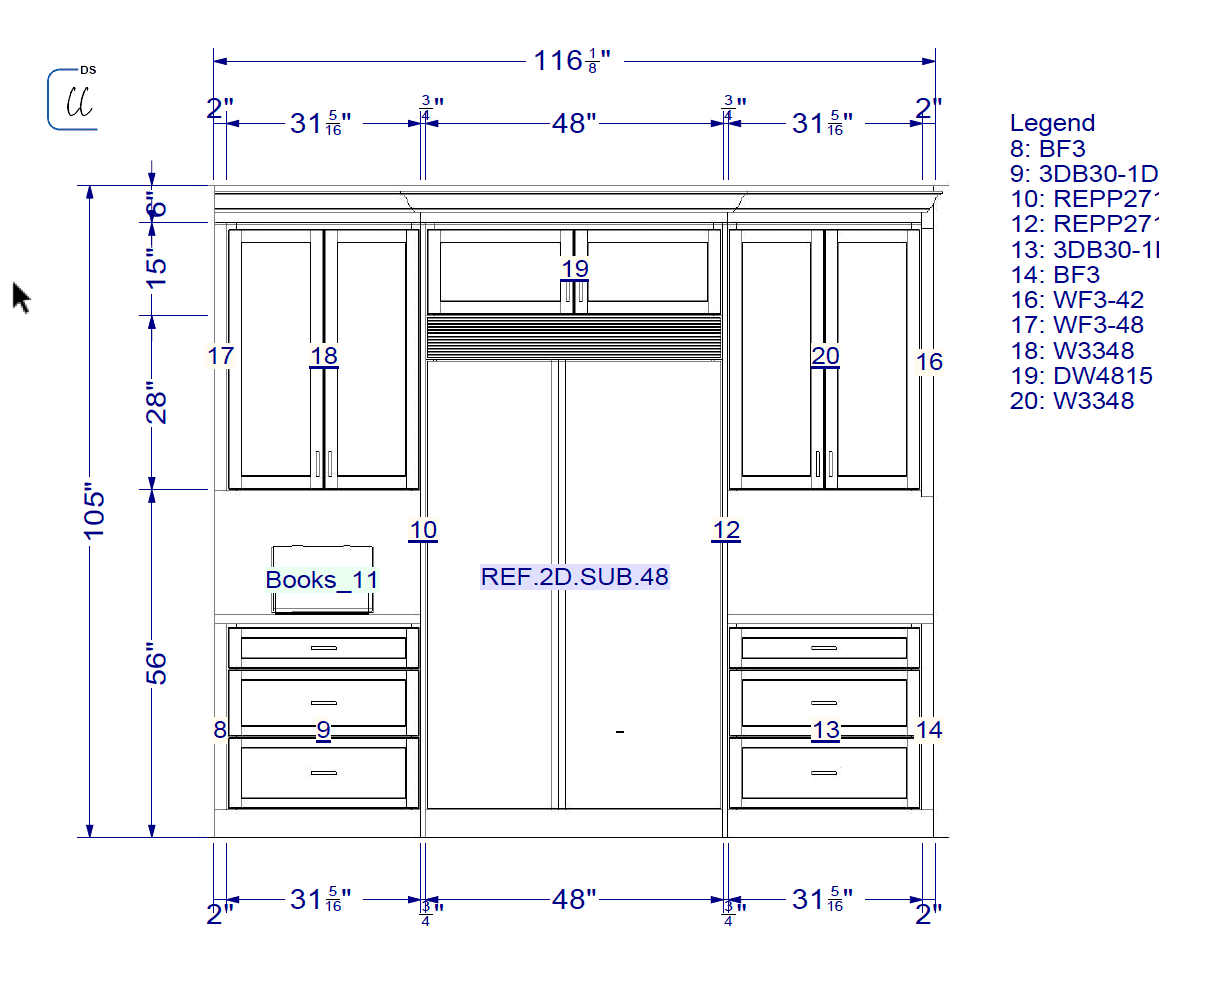
The opposite side of the kitchen follows a similar layout as before, but the fridge will be larger. I opted for no glass cabinets because I wanted a clean look.
Create A Design Mood Board & Select Appliances
I mentioned the design mood board that I created before, and wanted to share it with you again. If you don’t know how to design one of these, I wrote this post on creating a moodboard that is simple to do!
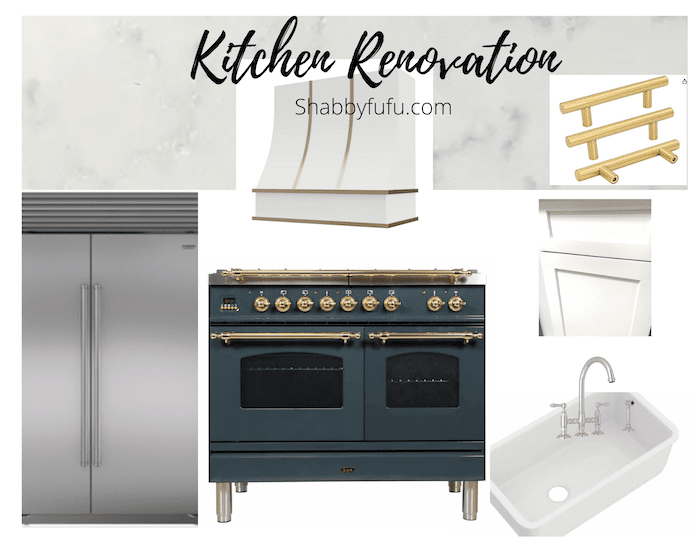
At the same time we were designing the plans we went to our local Ferguson showroom to pick out appliances. I knew what I wanted in advance and what our budget would allow and I was determined to stick with it and ignore the priciest eye candy! Sticking to my mood board was super helpful so that I could show the saleswoman and see what was available.
While I love the look of the La Cornue CornuFé 110 Range, it would have taken me over budget. Find this one here for more info. However, I knew that with the all white kitchen I wanted some color and that the new oven (range) would be in some shade of blue. The oven and the hood fan would be my focal points of this kitchen remodel renovation. The jewels of the room, if you will!

What I Chose – Sources
The Range – ILVE 40″ Inch Freestanding Dual Fuel Range in Blue Grey with Brass Trim (UPDN100FDMPGULP) (sponsor discount)
The Hood Fan – Hoodsly Curved With Brass Strapping Hood Fan in White (sponsored)
Refrigerator/Freezer – SubZero 48″ Classic Side-by-Side Refrigerator/Freezer with Internal Dispenser
Dishwasher – Asko Stainless Steel
Sink – Allia Fireclay Single Bowl 32″ Undermount Sink
Countertops – HanStone Montauk Quartz
Bridge Faucet – Rohl San Julio 1.5 GPM Bridge Kitchen Faucet & Sprayer in Polished Nickel
Water Filter – Home Master Under Sink Reverse Osmosis Water Filter System
Water Filter Faucet – Rohl Polished Nickel Water Filter Faucet
Cabinet Pulls – Emtek Jasper Satin Brass
There will be some other pieces that I’ll reference the sources to in the full reveal, as it wouldn’t make sense now.
The Kitchen Demolition & Construction Process
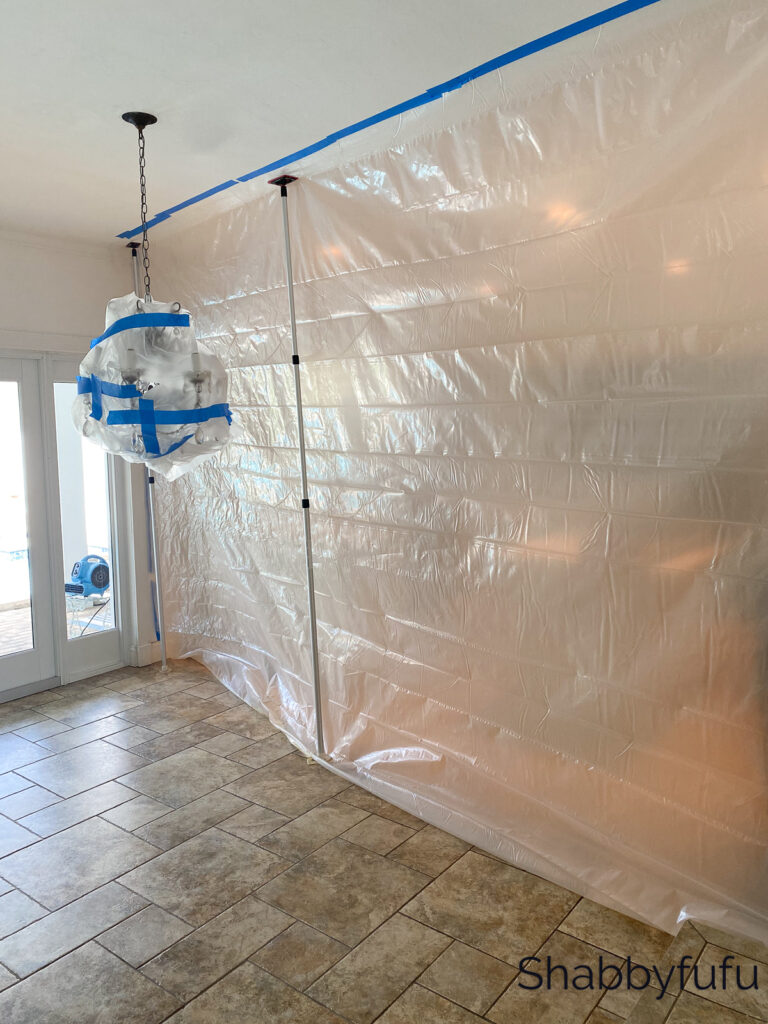
Kitchen demolition is a messy, messy job! My husband had a couple of guys from the crew here for two full days to take everything out.

Prior to the kitchen demolition he put up two plastic zip walls to keep the dust from spreading all over the house. One of the walls had a zipper and one did not (recommend the zippered kind). If you are going to do any sort of demolition in your home, I highly recommend having these temporary zip walls put up and save yourself a headache! We wrapped the dining area chandelier in plastic and removed everything else from the area. With the blue tape wrap, not a single person hit their head over the 4 months of work!
Blue painters tape is great! We marked off where cabinets & appliances would go to be certain of measurements and for the various trades working here.
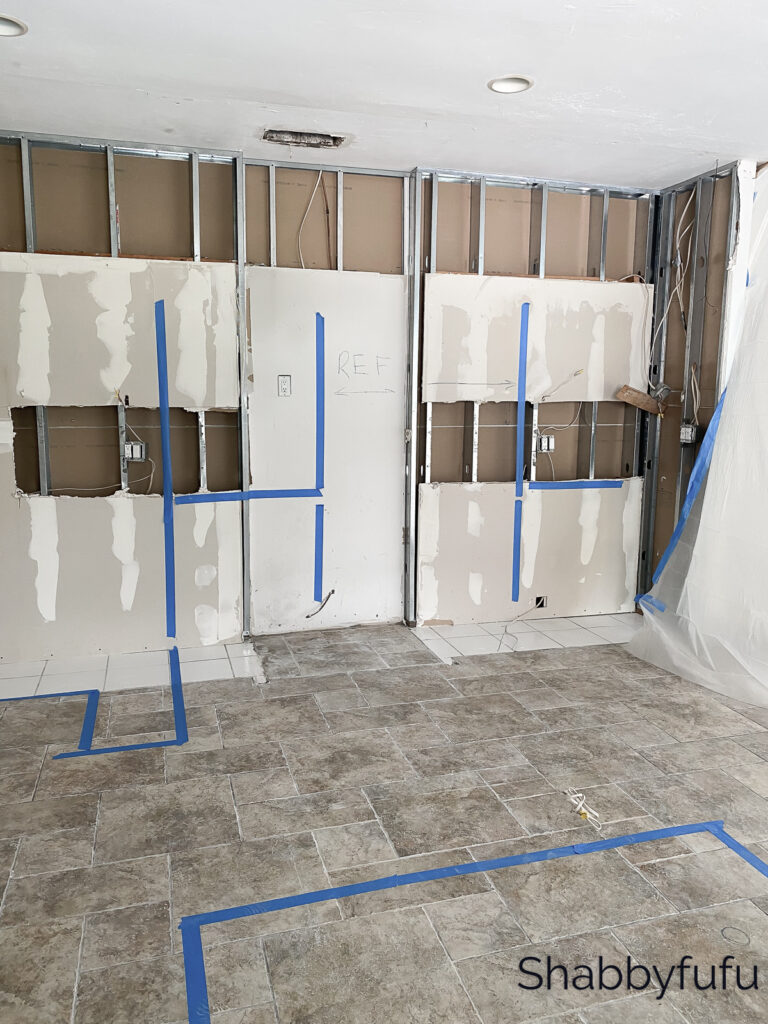
General Order Of How To Proceed
- Determine where the electrical outlets, wiring and lighting and plumbing needs to be updated or changed.
- Repair and replace any necessary drywall.
- Paint the walls and ceiling.
- Repair (or replace) flooring.
- Install cabinets.
- Install countertops.
- Sinks and faucet installation.
- Install backsplash.
- Installation of the appliances and hood fan come last.
- Clean up!
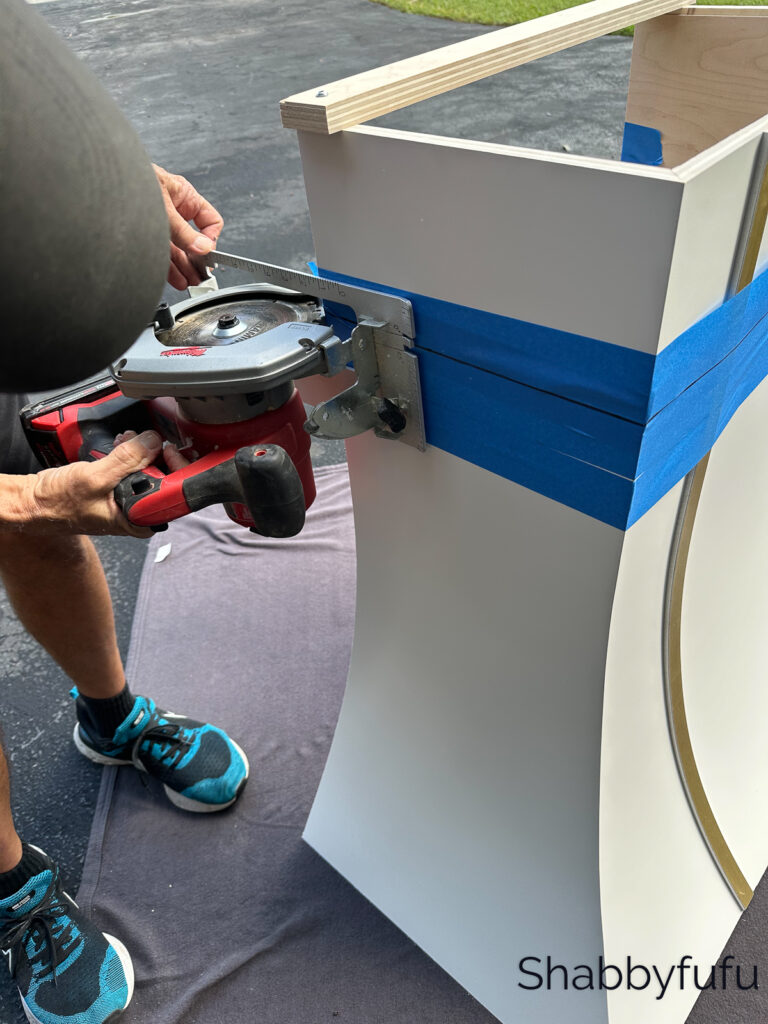
Installation Of The Hood Fan

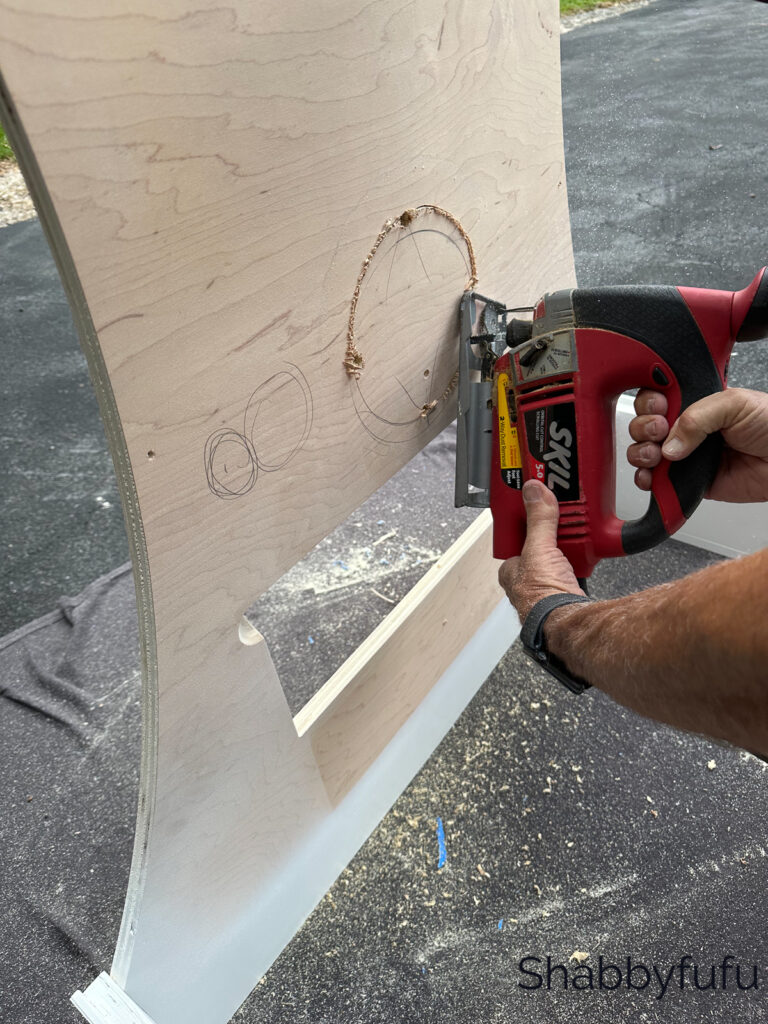
In this post I’m including a brief part about the installation of the hood fan in collaboration with Hoodsly. They are so kind and easy to work with and in our opinion have the nicest selection of wood hood fans covers that we’ve seen! A big bonus is that Hoodsly hood fan covers are wood and made here in the US. We weren’t sure of how tall we would need our hood fan since we ordered it pre-construction, but being crafted of wood it was easy to trim. We utilized the videos on the Hoodsly website that you’ll find helpful as well. I loved the tip about using blue tape (yes, blue tape again!) to prevent the wood from splintering when cutting with a saw. If you’re interested in ordering a Hoodsly Wood Fan Cover, use my code Shabbyfufu10 for 10% off on the Hoodsly Website.


Next my husband cut the back for the ductwork that would vent out onto the patio. The small circles would be cut with a hole saw for the electrical work to be connected.
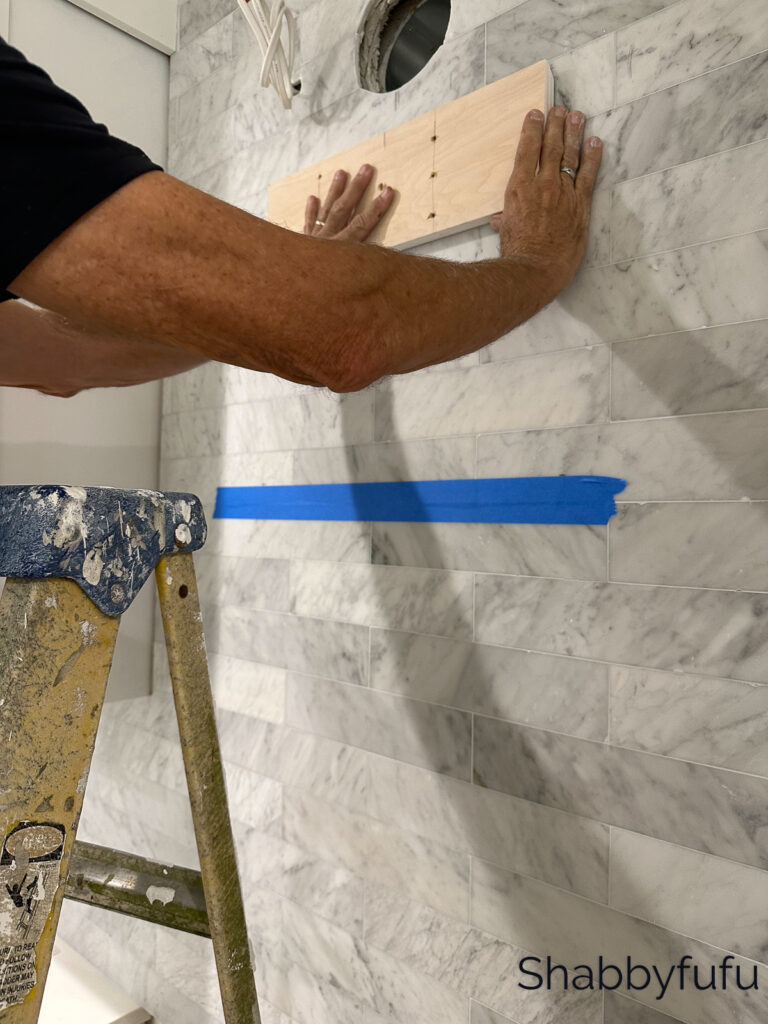
We tiled our backsplash with white Carrara marble (more on that in my next post!). A bracket was installed to hold the fan and hood in place.
The next step was to pull the electrical wiring through to the power source behind the wall.

Then we put the back piece of wood for the hood fan cover up over the plywood bracket that we installed and installed the base of the cover.

We then added the ductwork and ran it out to the patio, where we had cut out a place for the venting to the outside. An outlet was added by the electrician and the actual hood fan was placed securely on the base.
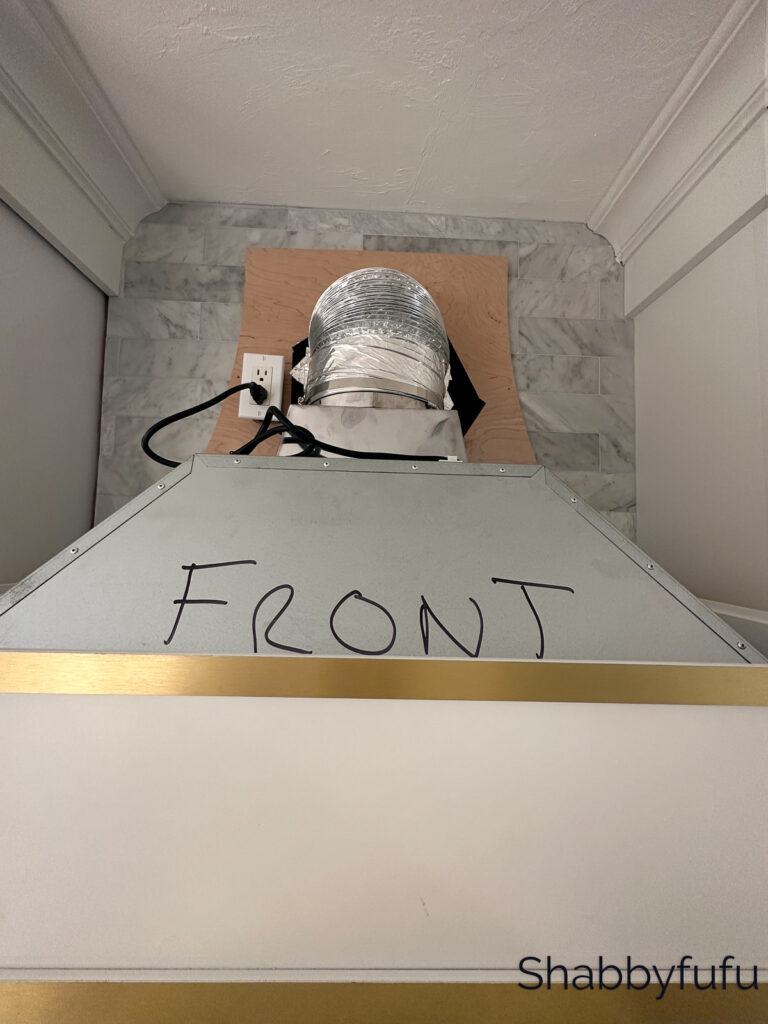
The final step was to place the Hoodsly Hood Fan over the vented area that you see above. Ready to cook and vent!
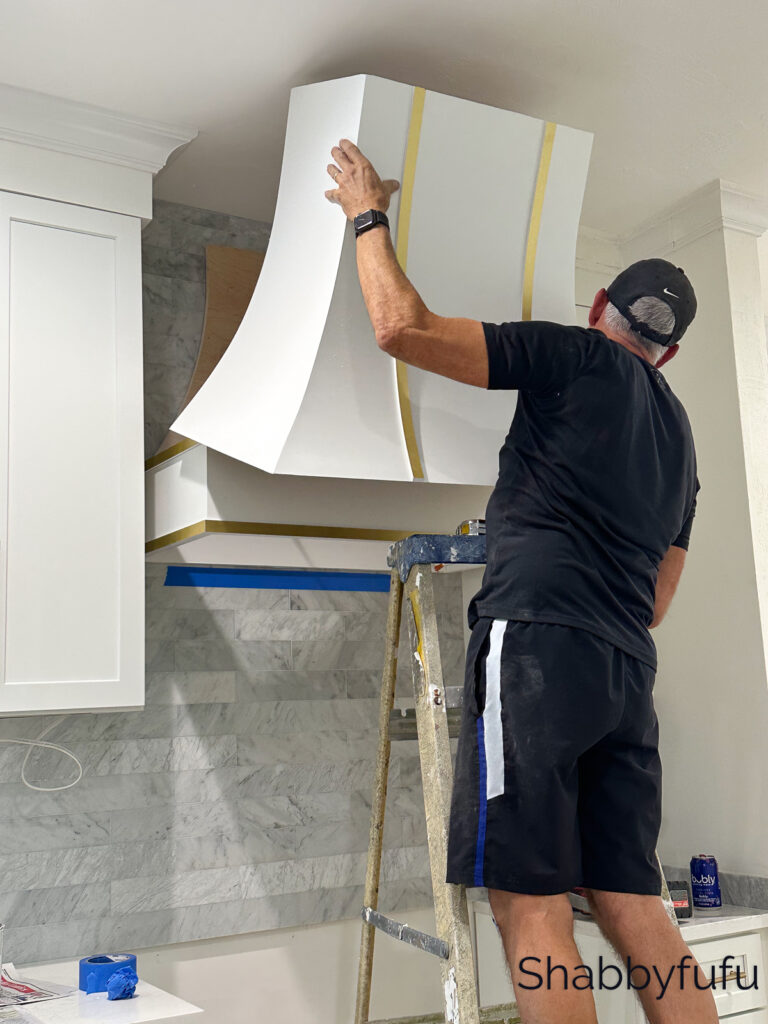
Note that it was easier to install the hood fan before the stove was in place! You can get to the wall easier and there is less chance of damage to the range. There “she” sits waiting patiently and I’ll take you along in my next post for the finished kitchen and more!

I hope that you enjoyed this post and if you have any questions feel free to leave a comment or email me!
Janet, you didn’t have ductwork running through the soffits in the kitchen initially? We do, so would have to those raised into the attic if we eliminate the soffit (which I would love to do!).
Hi Lorrie! Thankfully our ductwork was up in the attic so we didn’t have that issue. Watch for the reveal on Friday!
Wow! Can’t wait to see the finished room!
Thanks Kay and I’ll be posting that this Friday!
I know this is going to be fabulous. Can’t wait to see the end results. Woo Hoo I bet you are over the moon with having a brand new beautiful kitchen.
Hugs. Kris
Kris, I’m so thrilled and it’s all the better having waited for this kitchen for such a long time! Will be posting the reveal on Friday xo
Can’t wait to see the finished product! We renovated a circa 80’s kitchen with same soffit wasted space! What an amazing transformation when we took the cabinets up to the ceilings….also installed a very similar dual fuel range by Verona! Our hood was handmade by our contractor in the identical style to your new hood …I originally wanted copper, but cost was too much, so they improvised and painted it…..10years later it STILL looks like copper….even fooled a decorator that came in to assist with staging!!
Sounds like we have similar taste Jill and I’ll bet your kitchen and stove are stunning! I’ll be posting the reveal on Friday, so do come back and see
What a beautiful kitchen. You have helped me so much in design and decorating and FlyLady helps me keep my home clean. Thank you!
One question on your beautiful dreamy kitchen. What edge detail did you choose for your countertops?
Thanks for sharing all the details with us !
Jean, it’s called an eased edge and I guess I’ll be adding that to the reveal post for Friday!
Amazing details and pictures! I don’t care either what people say about white cabinets. I love them! We redid our kitchen 8 years ago and I did a creamy white with just a bit of warm glaze. Our very large peninsula is cherry underneath but a matte black with the corners rubbed where the cherry is exposed. Love it all.
Your tips are great and I cannot wait to see the finished product. We are hoping to downsize this year and I am already missing my beautiful kitchen. Hope to be able to repeat a similar look to what I have😊
Thanks so much June and your kitchen sounds lovely! I have a photo in this post of our beach home kitchen that has a similar look but it’s much smaller. White kitchens rule!
This is an amazing kitchen and love all your very intelligent choices. I love having drawers in all the lowers…I have one that I use just for my baking supplies and measuring cups etc. I like being able to lift the sealed lid and scoop directly into my flours and sugars etc. My baking ingredients are all together. Your stove will be spectacular! Looking forward to your next update.
Thanks Christine for stopping by! I’m really enjoying the drawers and have a few empty that I need to decide what to do with! Great idea for baking items that I might use over here! Come back on Friday for the full tour
Your range and hood vent are amazing! I love them.
Renae, thank you so much!
….that range…swoon-worthy
Stacey, it’s really the jewel of this kitchen and I’m thrilled to have it!
Janet, Great post!! I love all of your selections and really enjoy seeing the details of the remodeling process. It will be gorgeous!!! Looking forward to the big reveal :).
Thanks so much Vicki and I did post the reveal as well! Here you go: https://shabbyfufu.com/luxury-kitchen-design-reveal-complete-renovation/
Loved these tips! The blend of practical advice and design inspiration makes planning a kitchen remodel so much easier.”